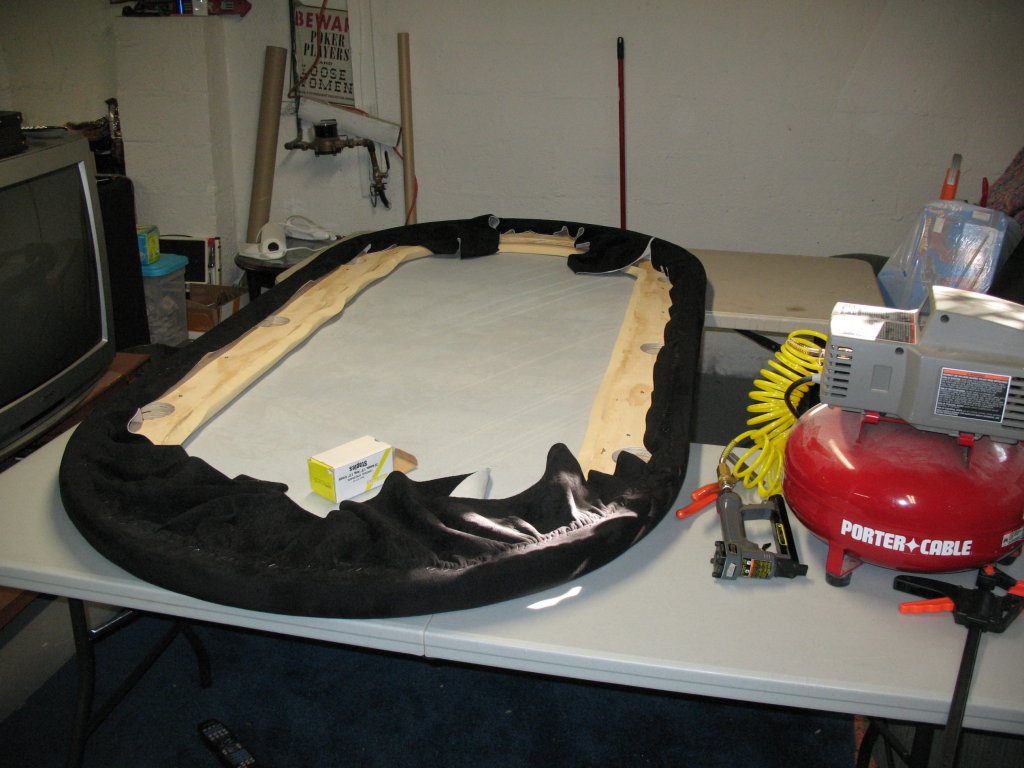
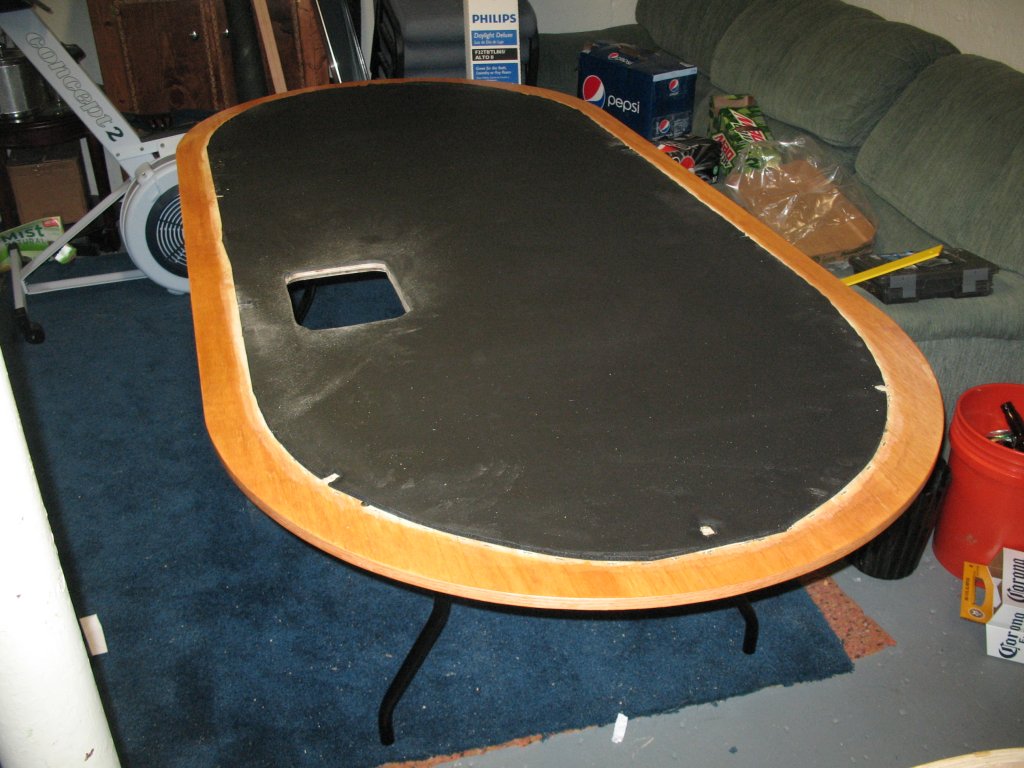
I've had numerous build questions over the years about the main table in my poker room. There's a build thread on an older table forum, but most of the photos were originally uploaded to photobucket and are either no longer available, blurry or watermarked, and the forum itself is not very active anymore and rank with ads. I did that build thread in real time over the course of about 3 months and changed directions a few times, so it's a bit of a mess lol - it is still available here. I had some rare free time this weekend, so I figured I'd take a little stroll down memory lane and try to recreate the build here on PCF. I built this table 10 years, so please forgive the not-so-great quality photos.
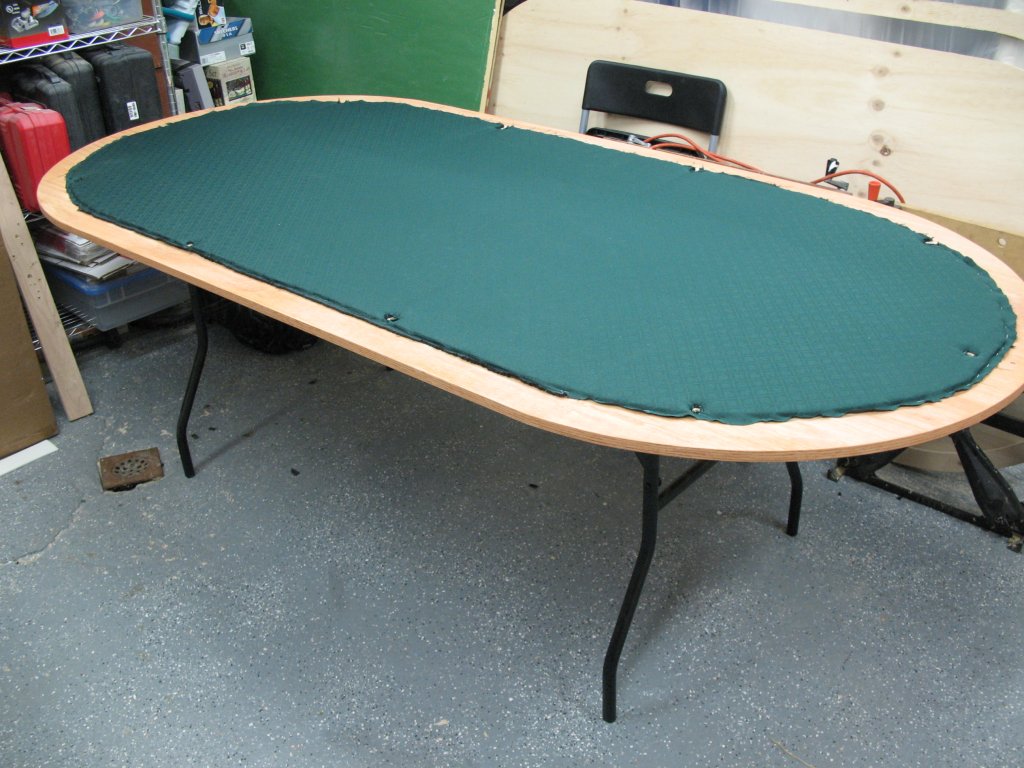
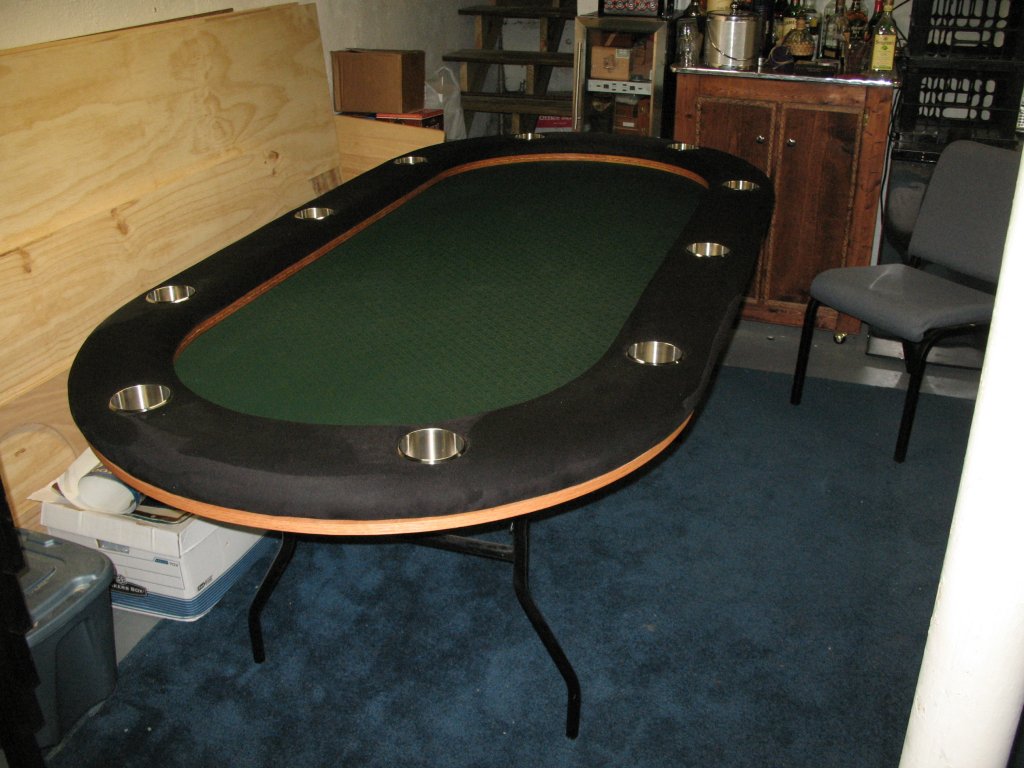
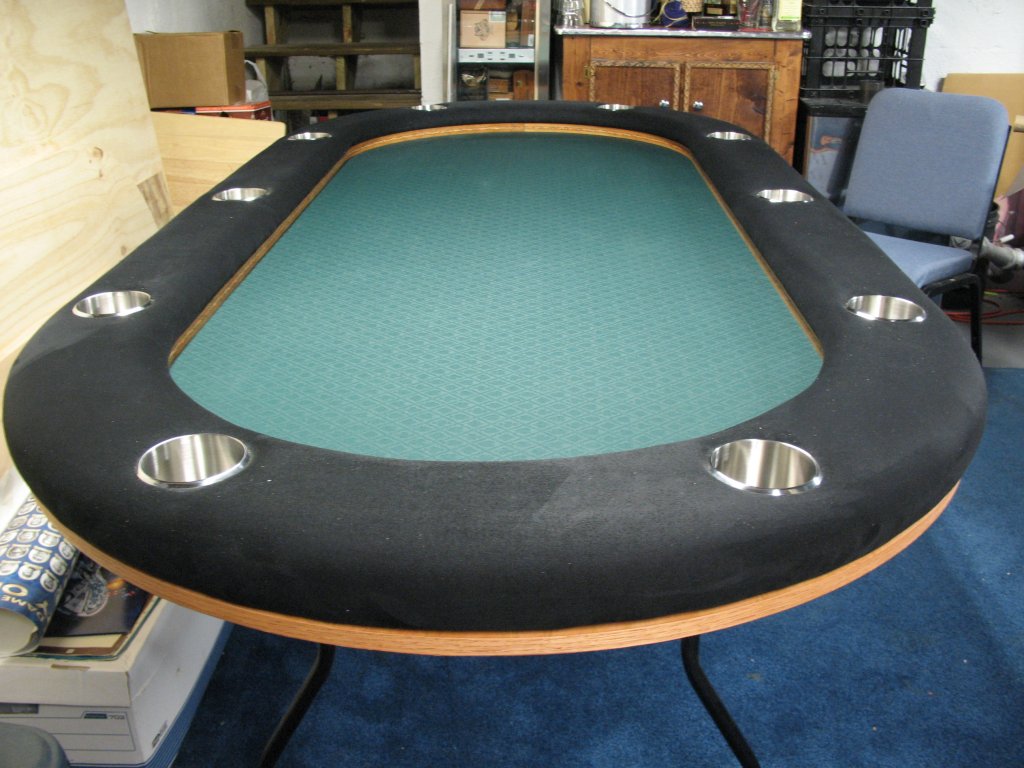
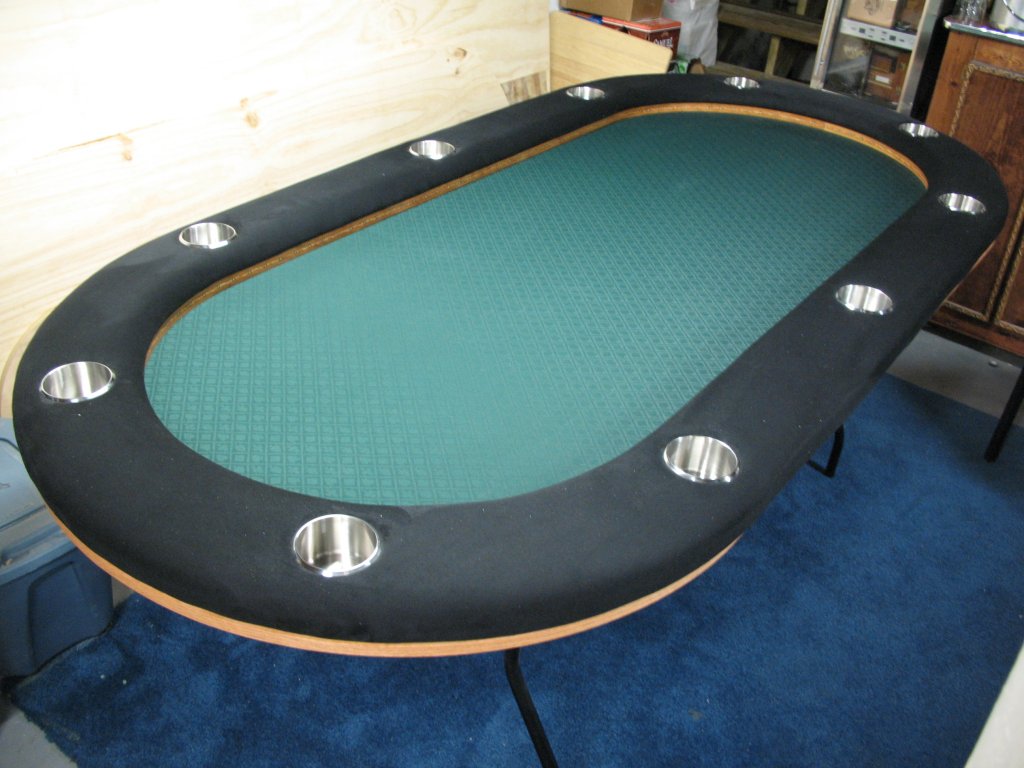
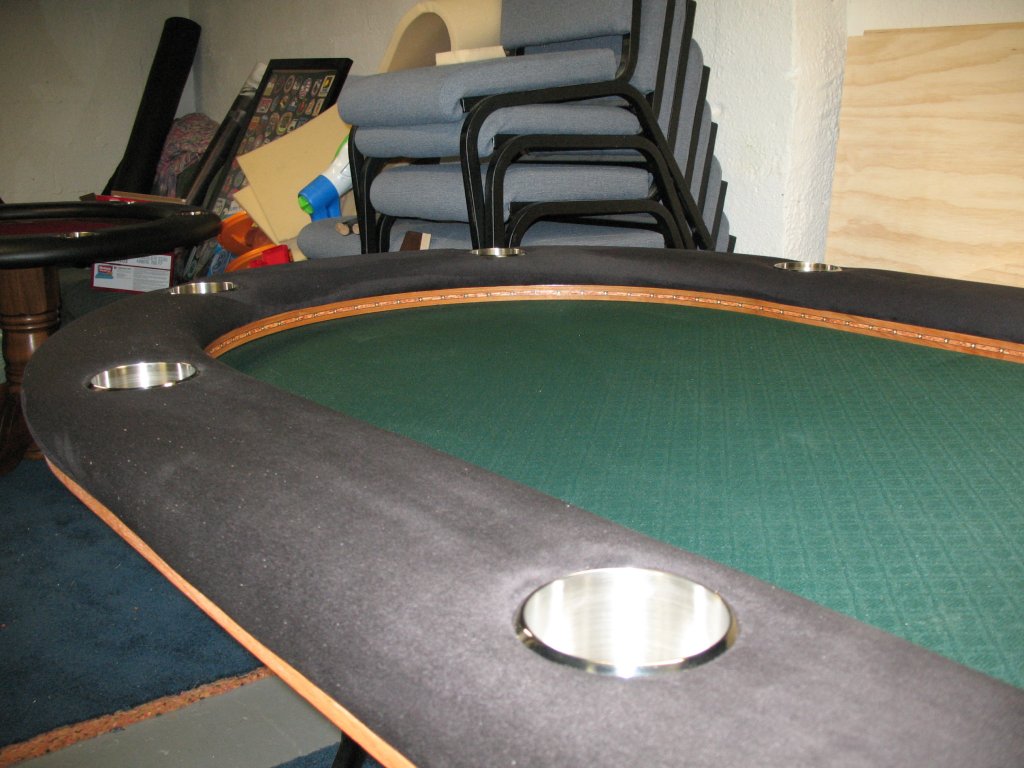
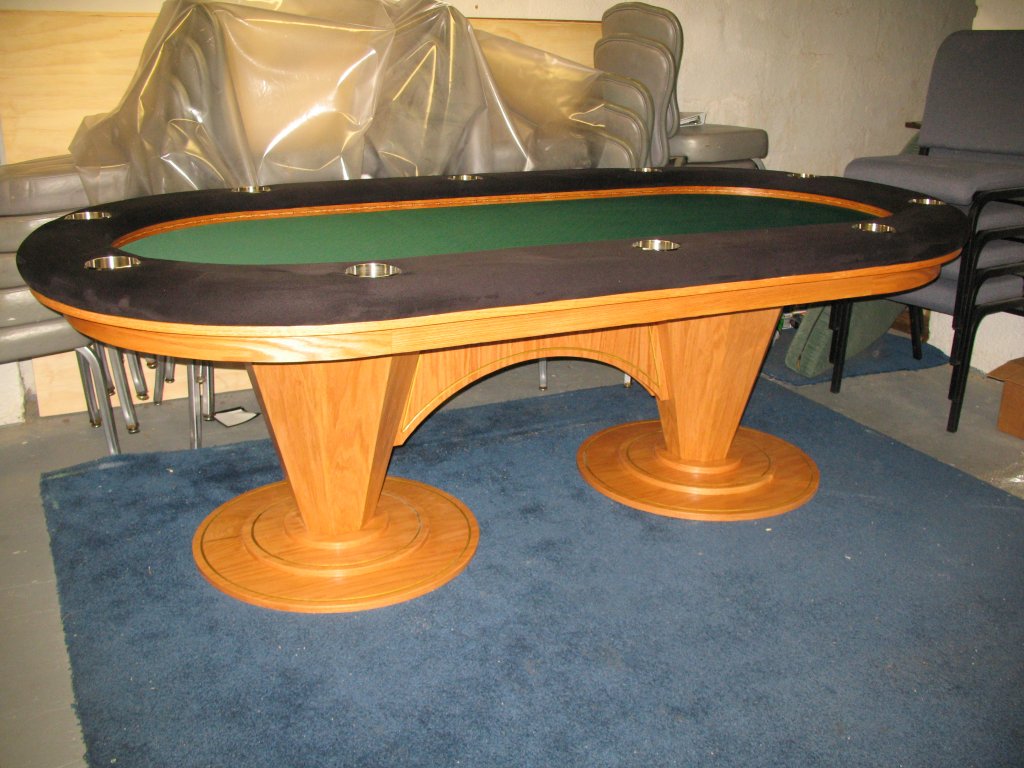
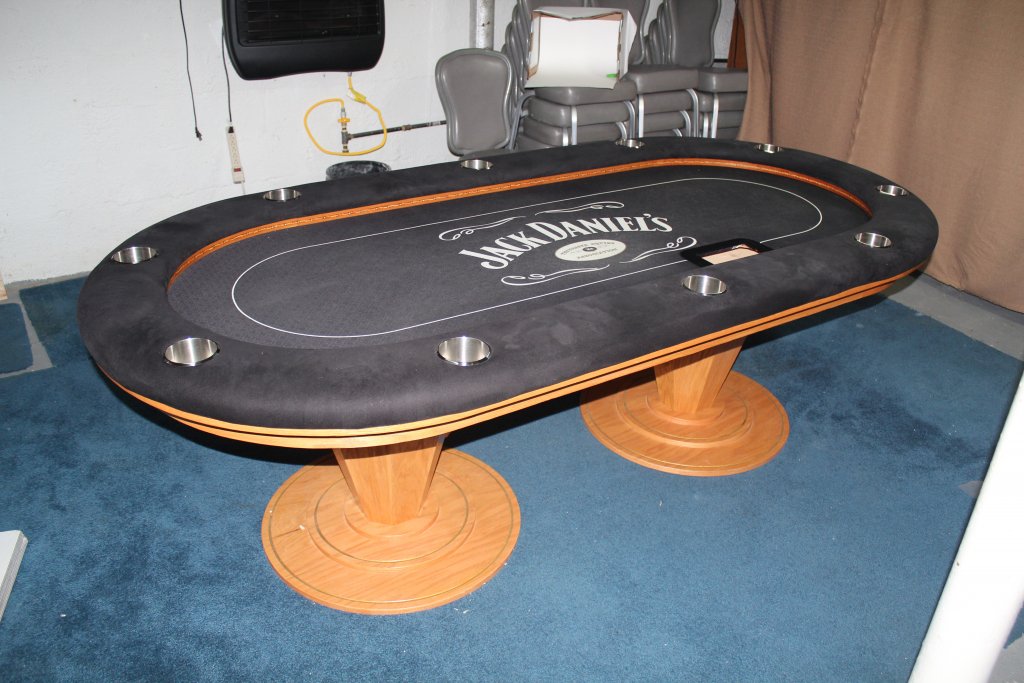
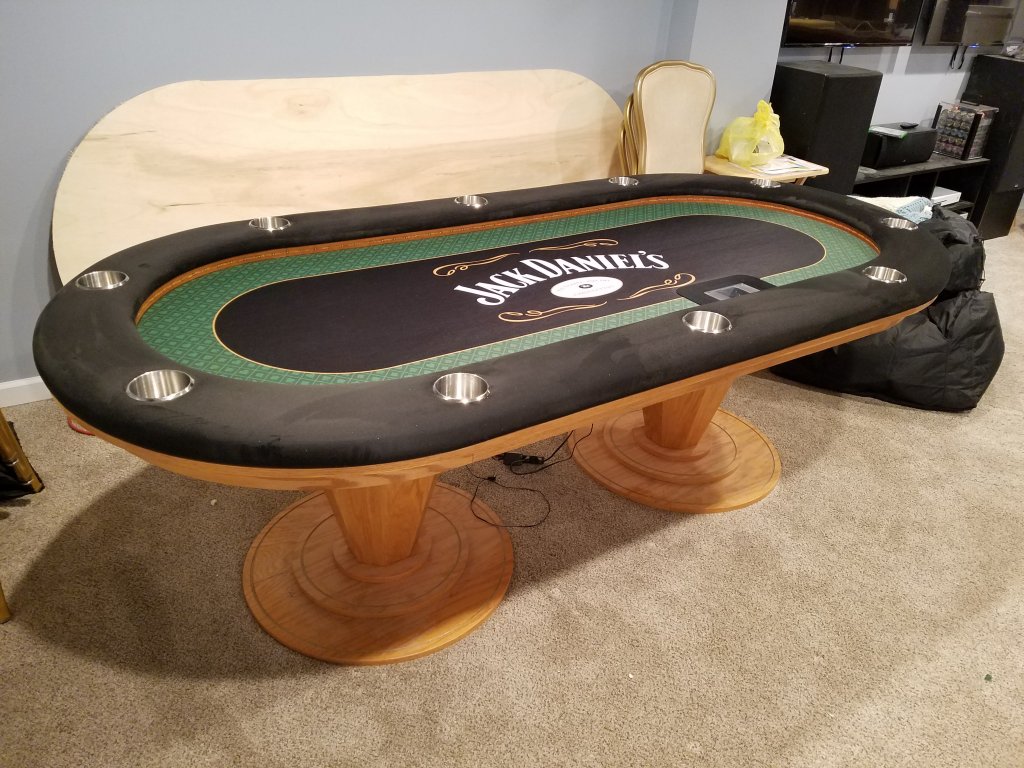
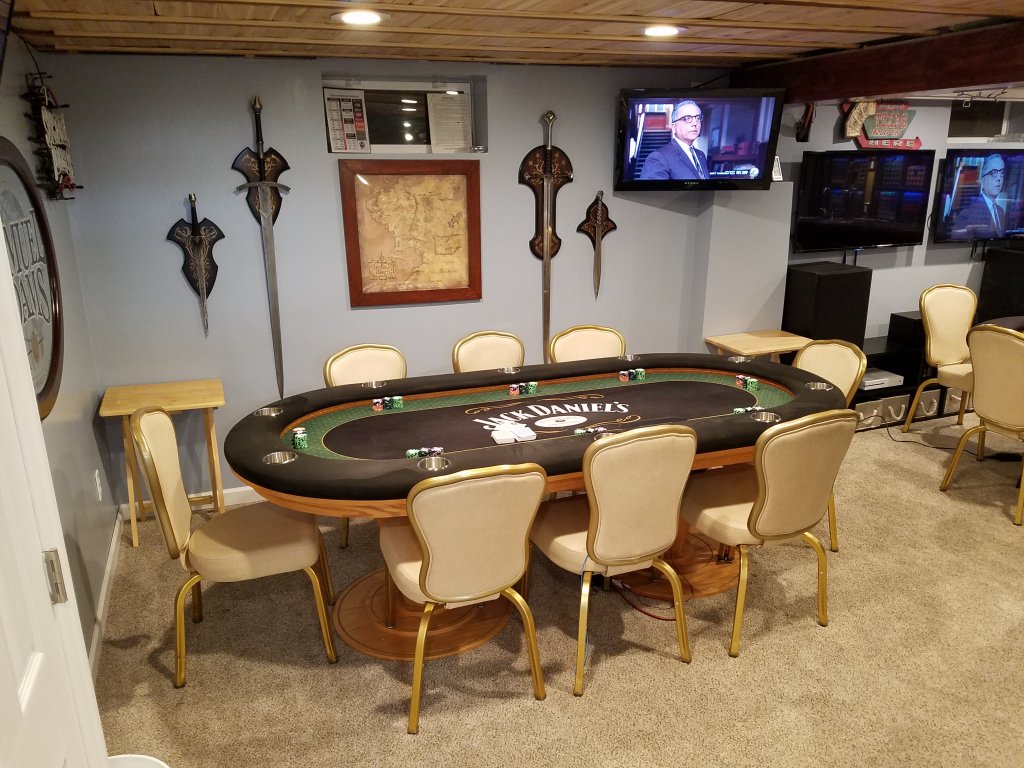
Here's what the table looks like today:
Time to turn back the clock to 2010........
This table build started somewhat on a whim. I had a potential table customer stop by to check out my work and chat about the details for his upcoming build, and he ended up making me an offer on my personal table. Well, in true degenerate fashion, he first tried to talk me into doing a $1000 flip for the table, but I declined on that one. I had the itch to build myself a new table, so I took him up on the offer, sold that one and started on the new build the next weekend.
Here are the table specs:
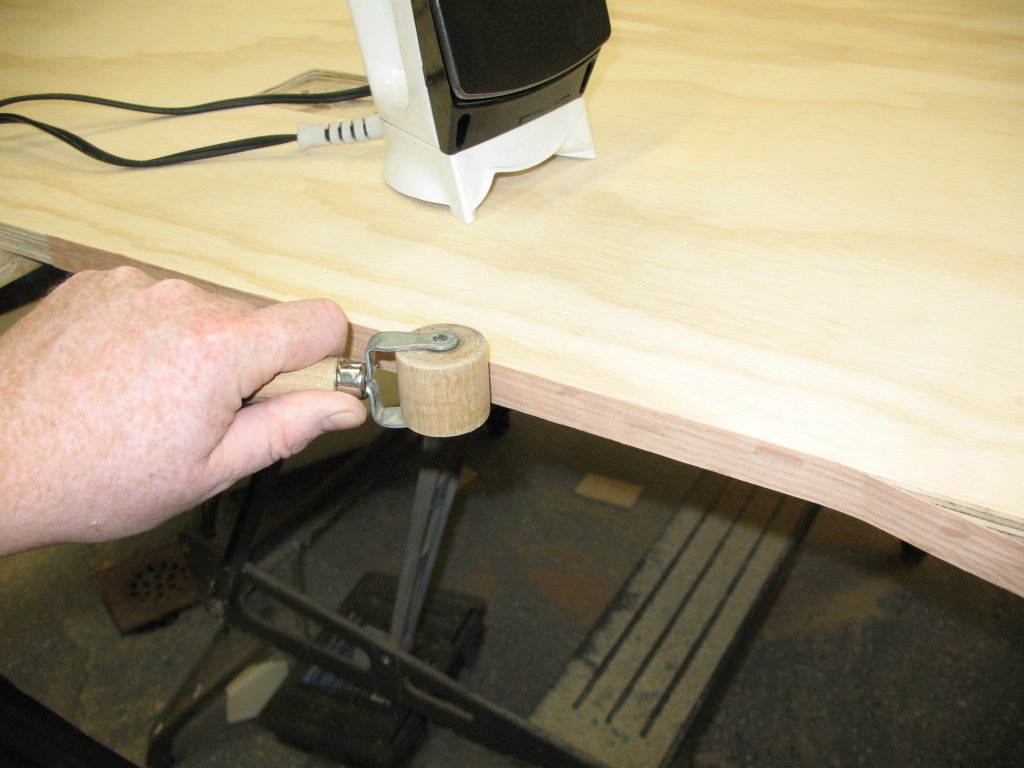
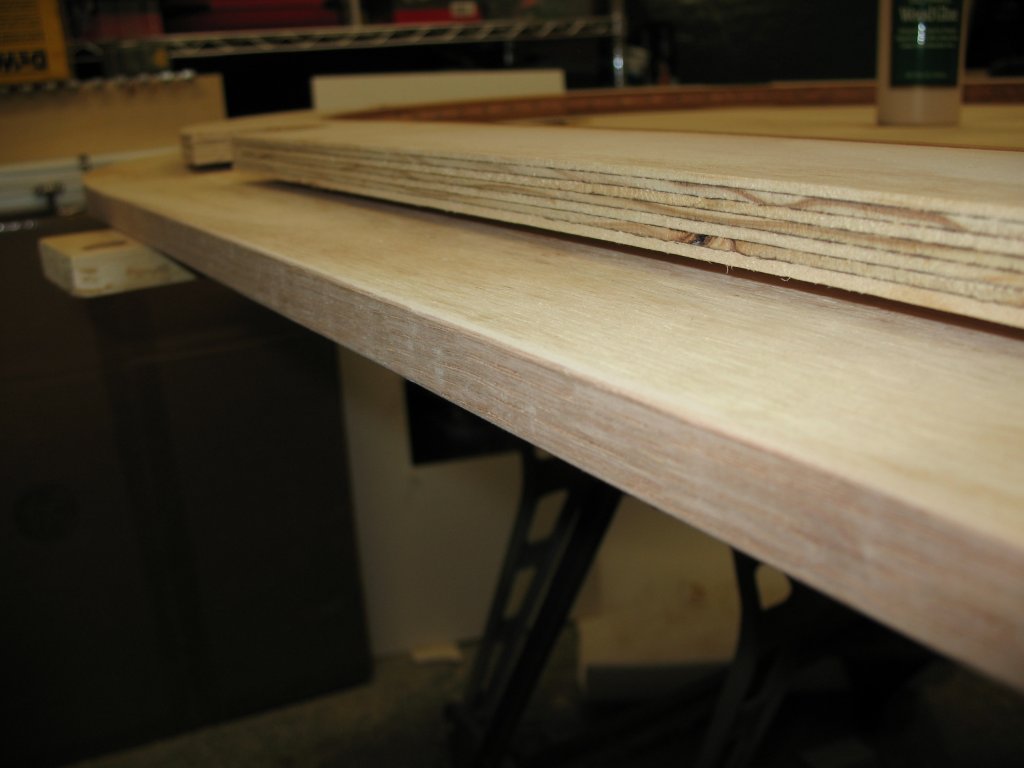
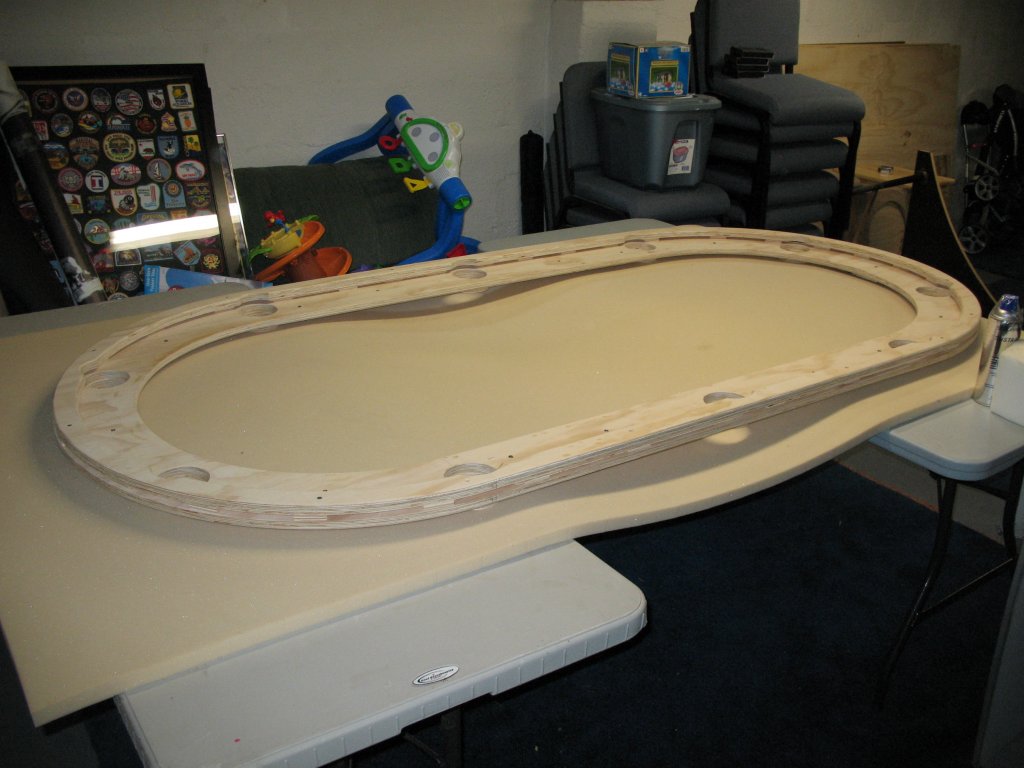
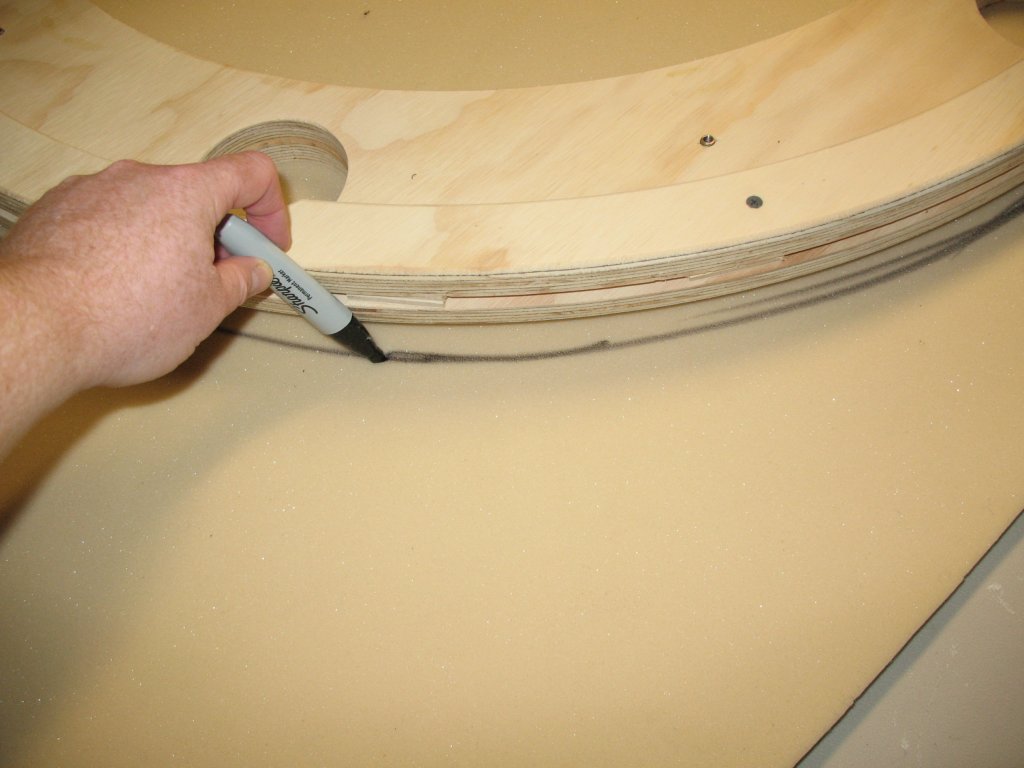
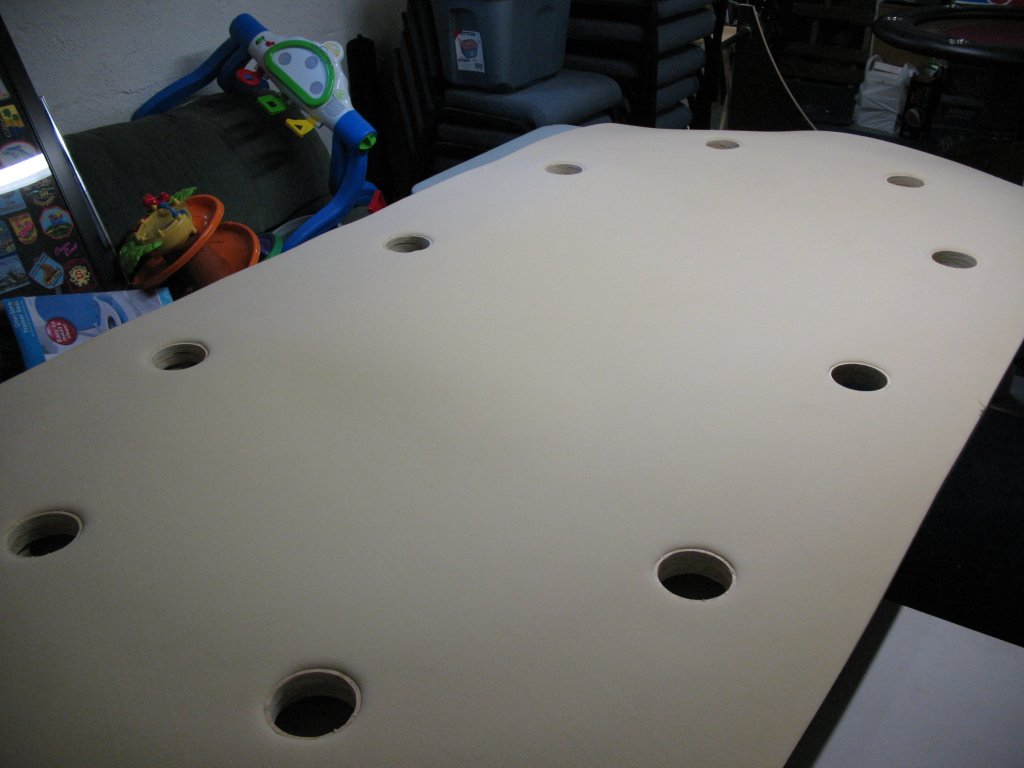
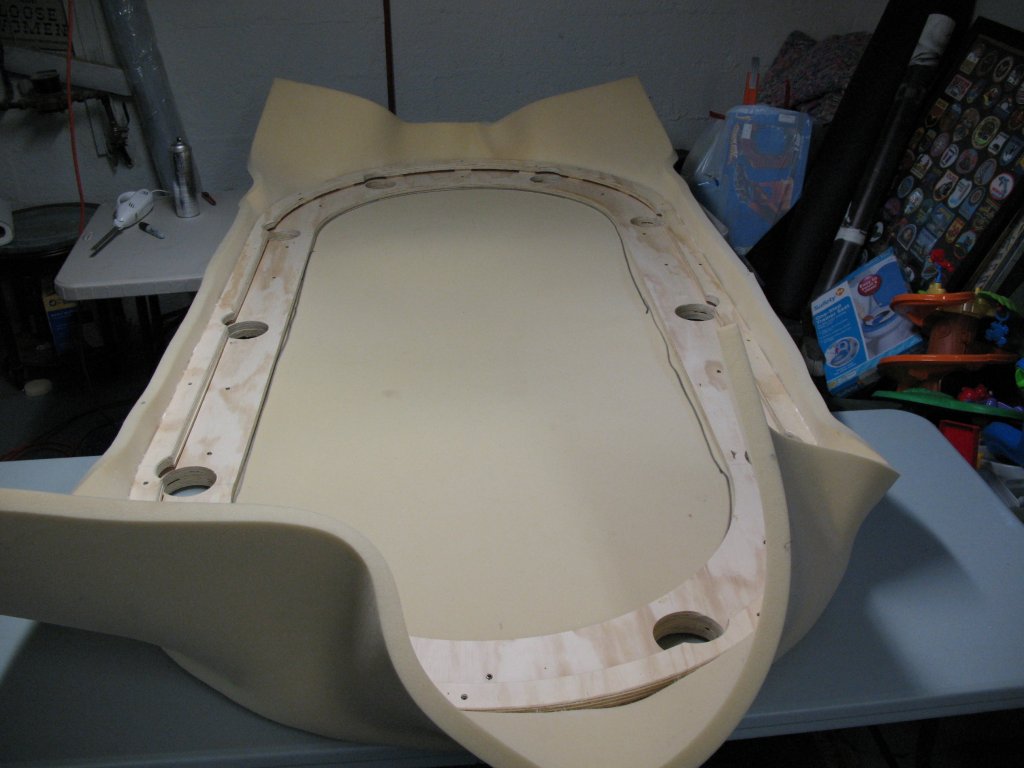
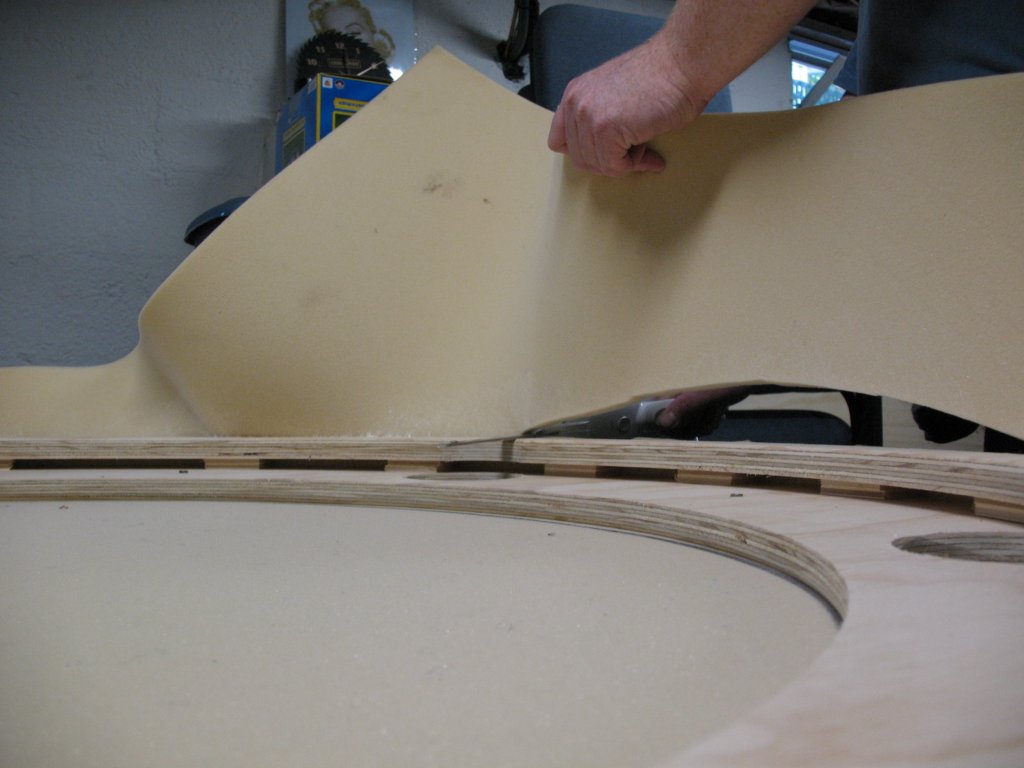
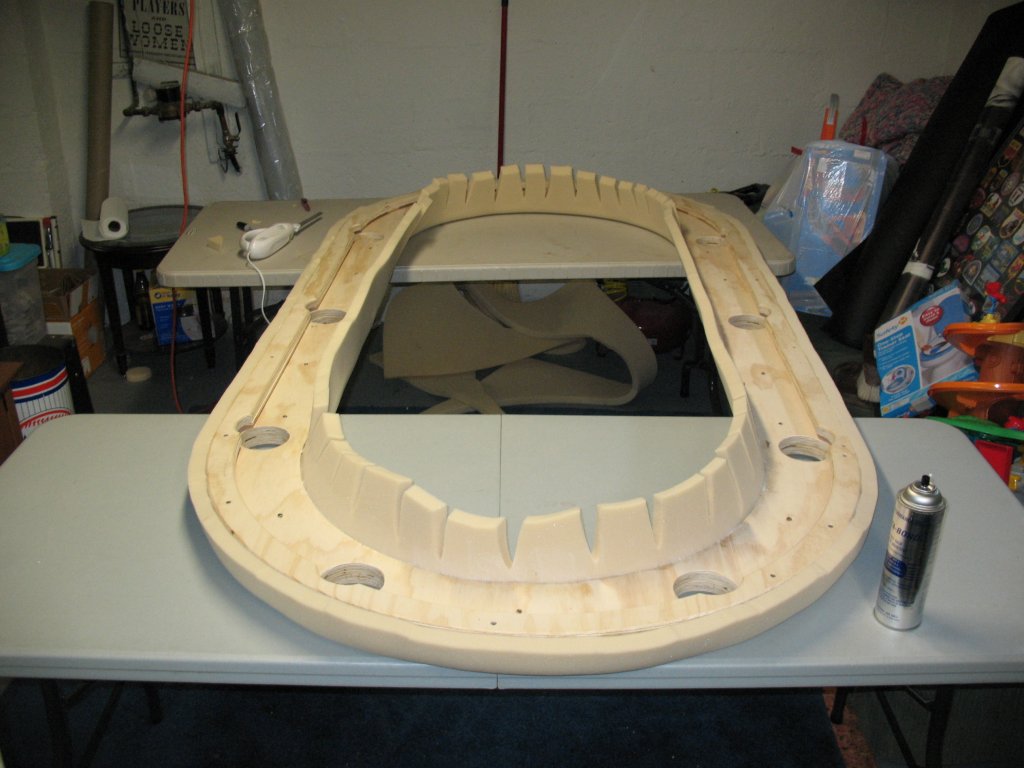
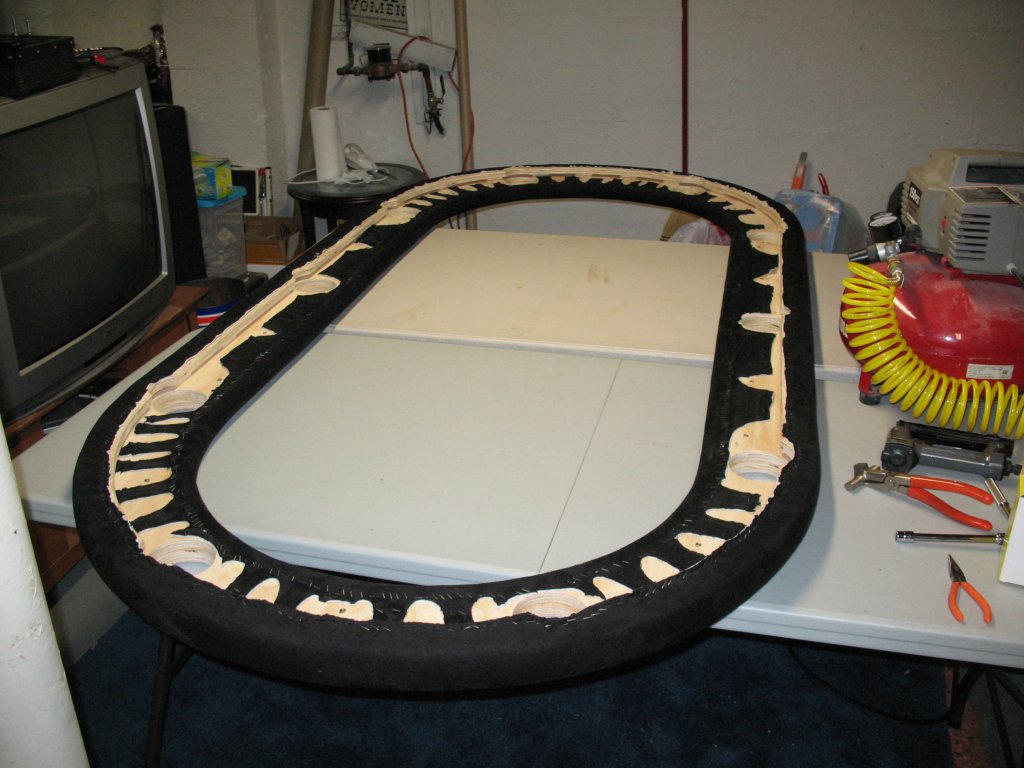
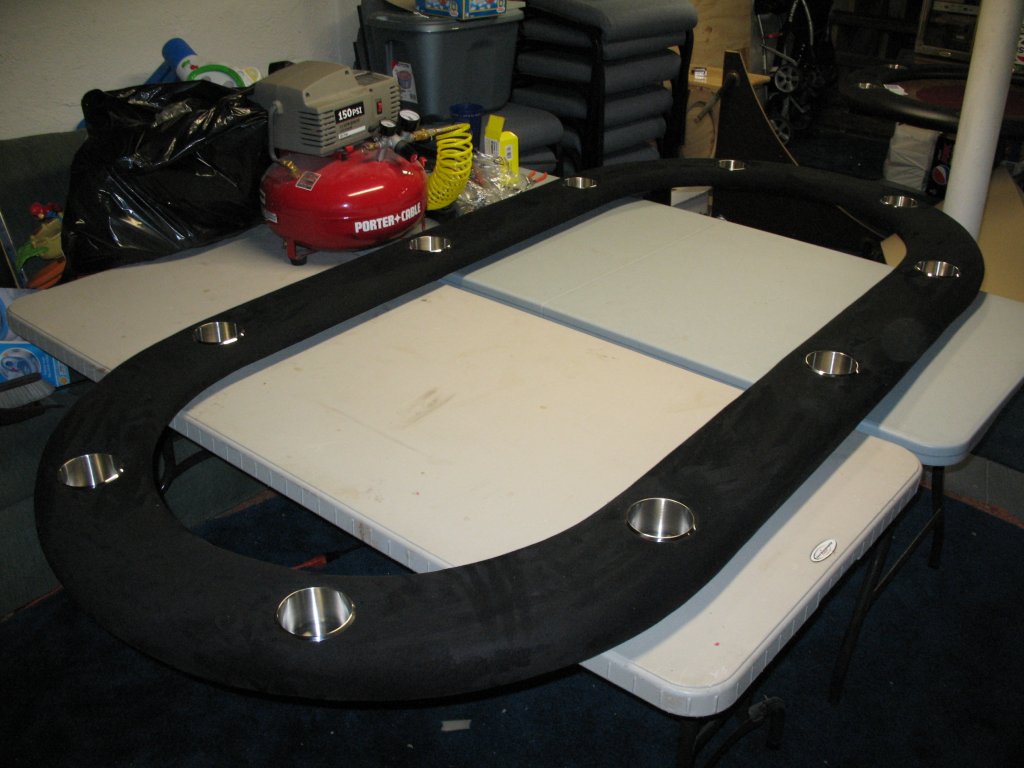
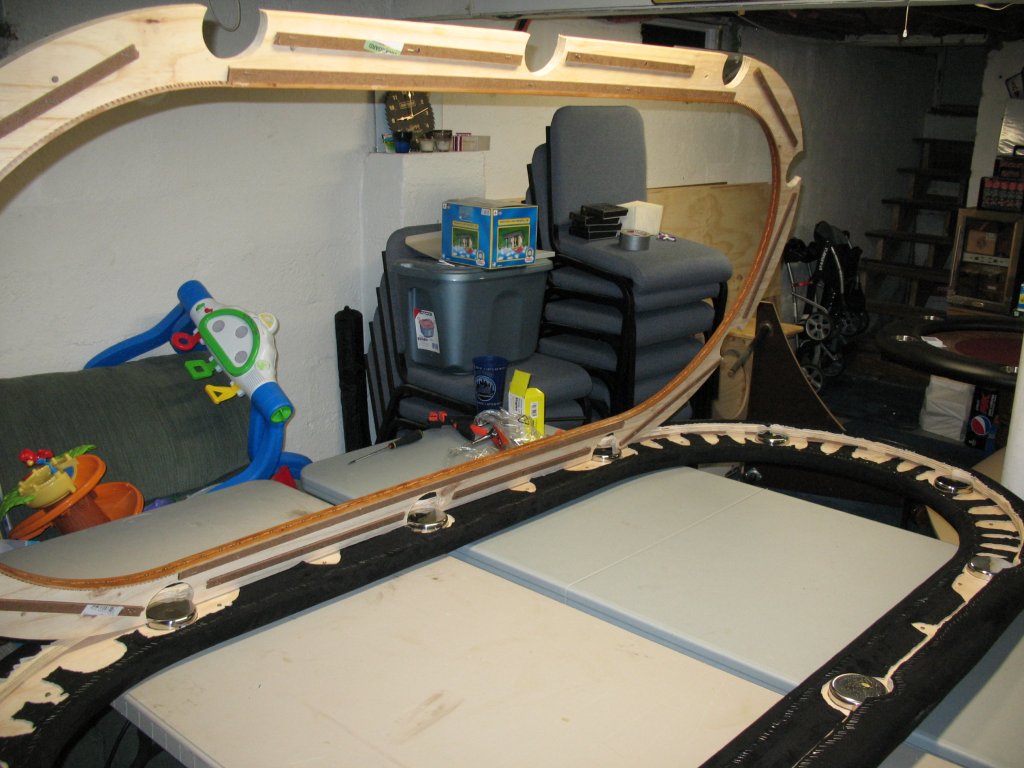
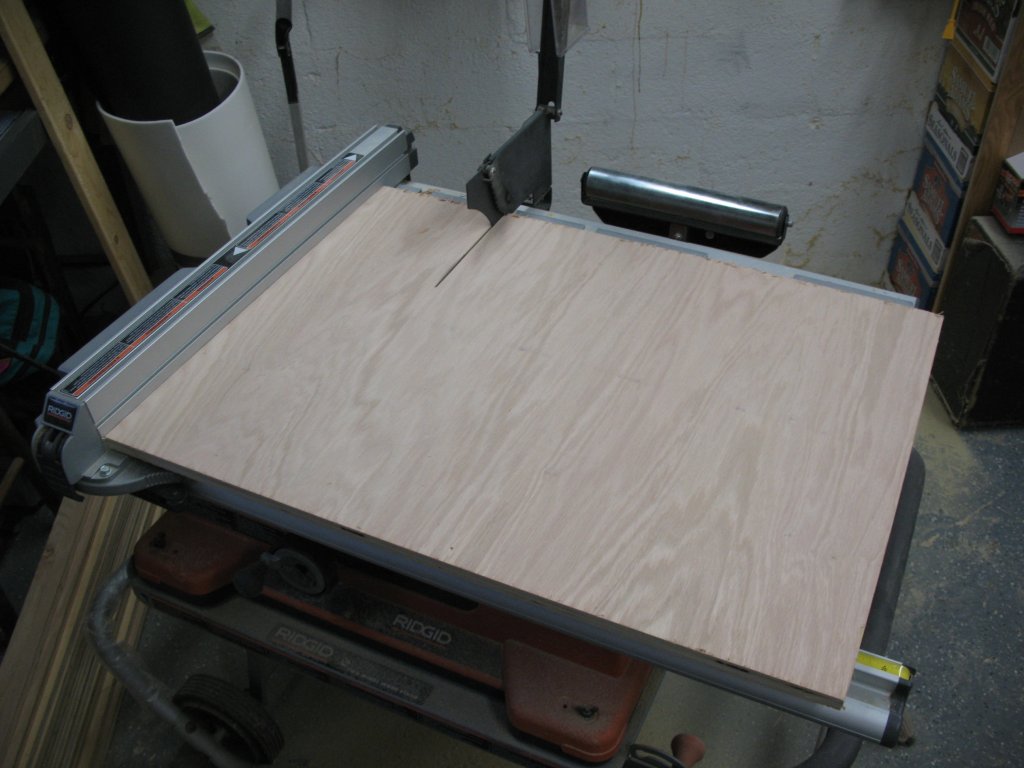
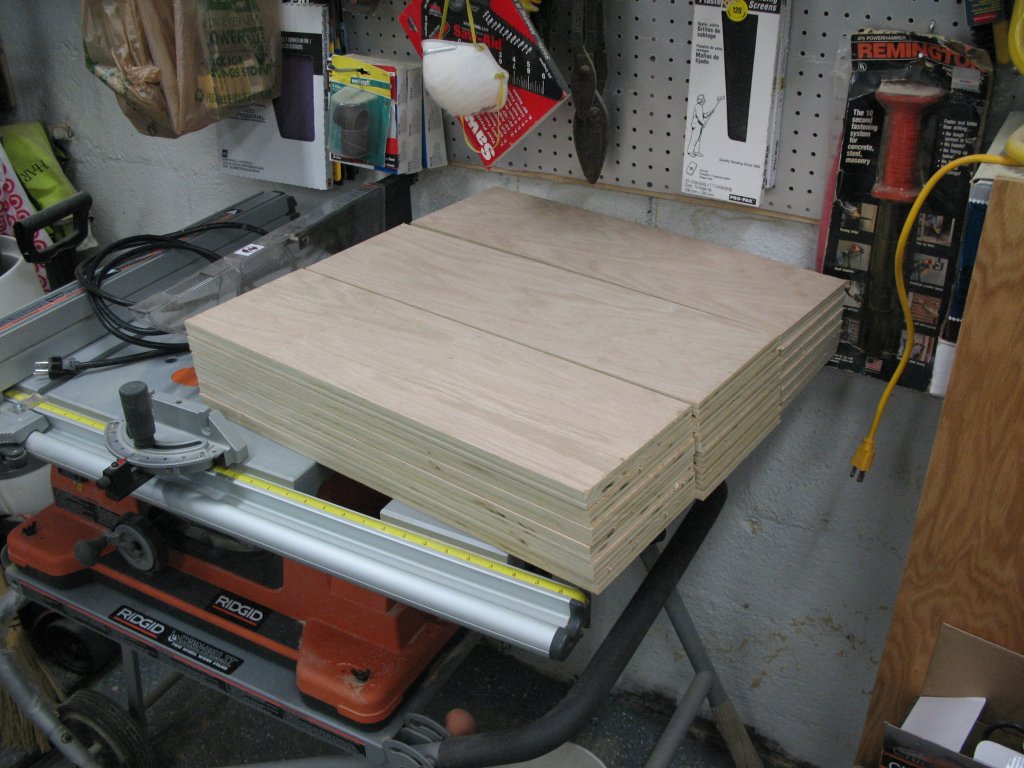
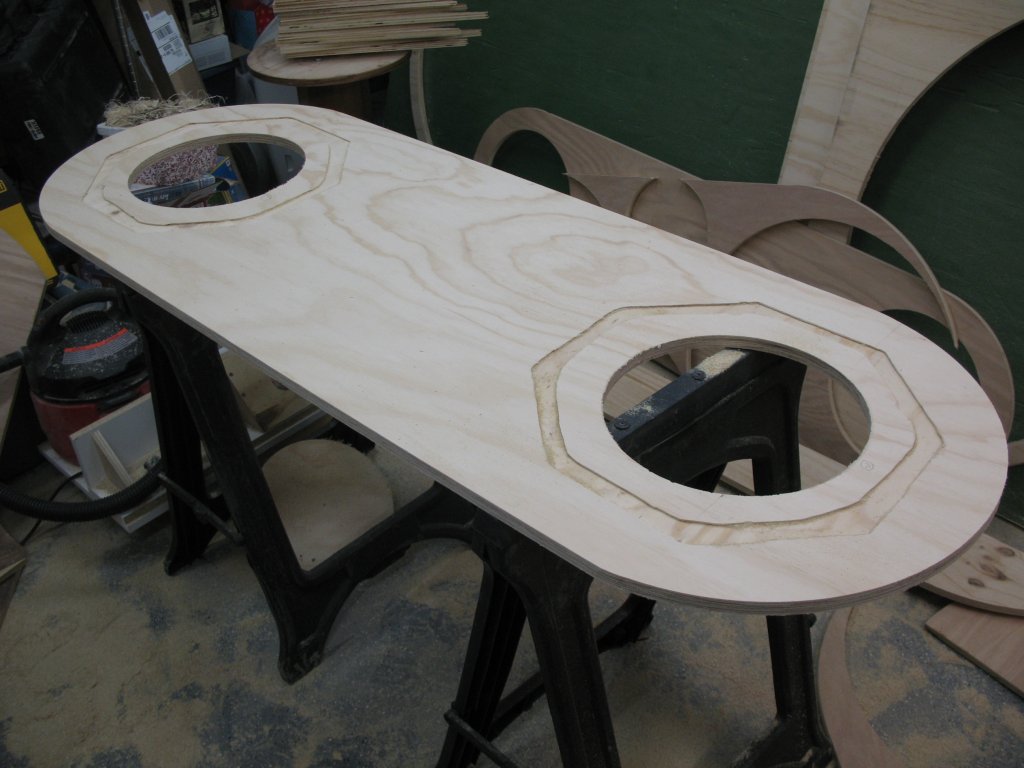
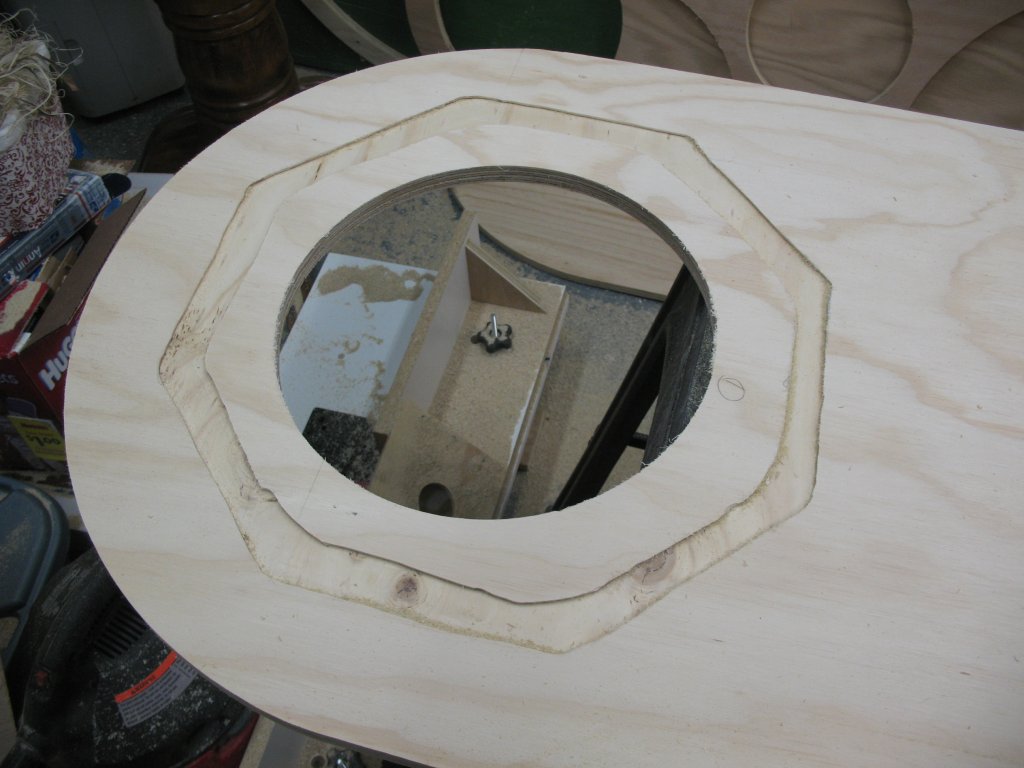
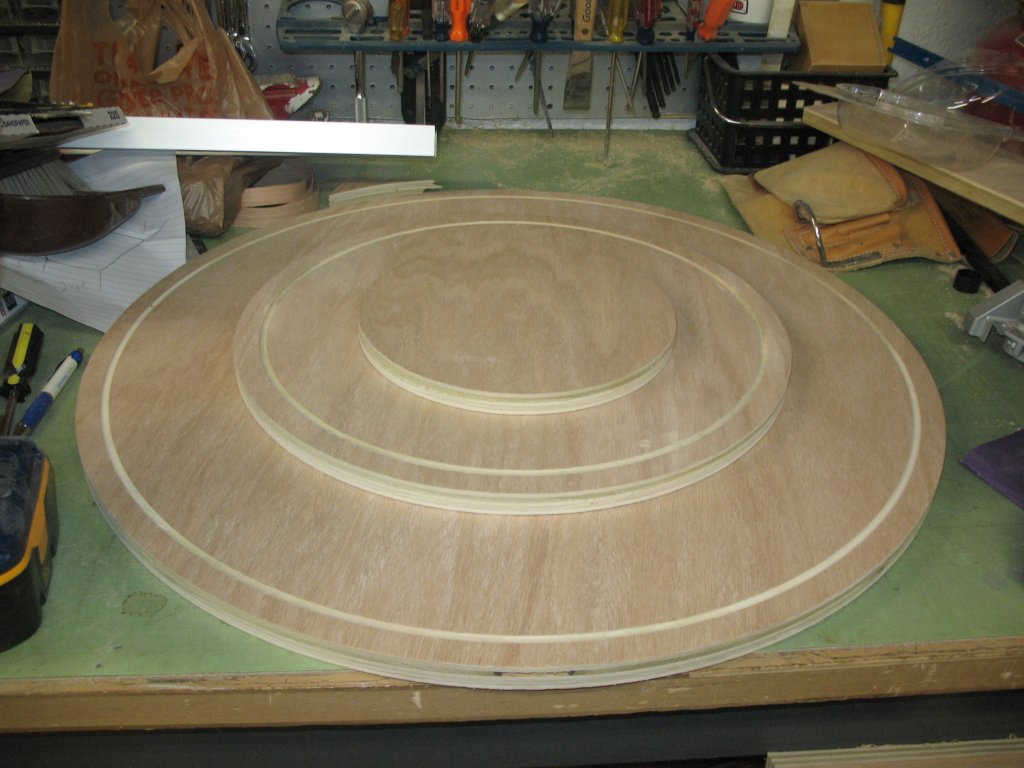
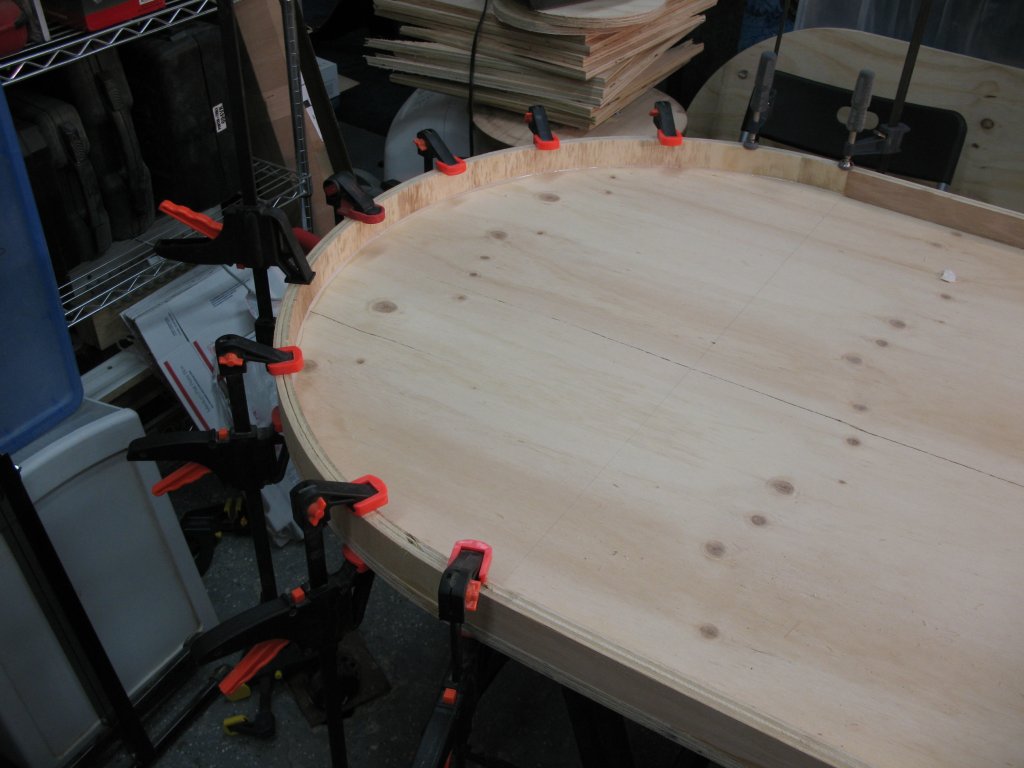
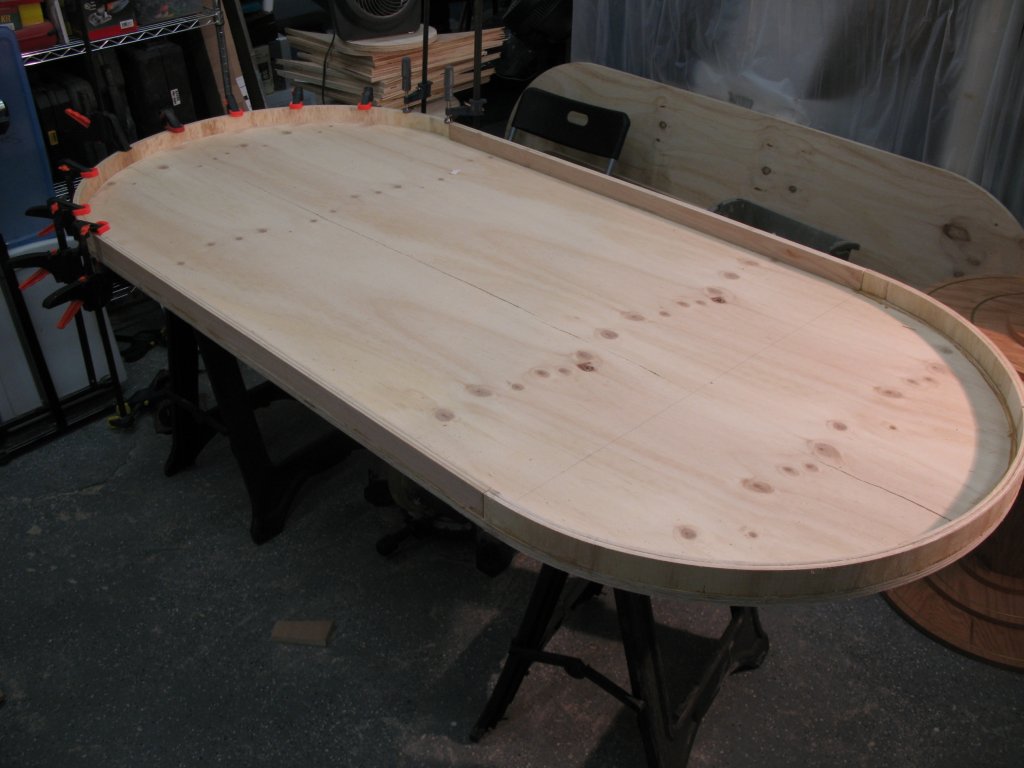
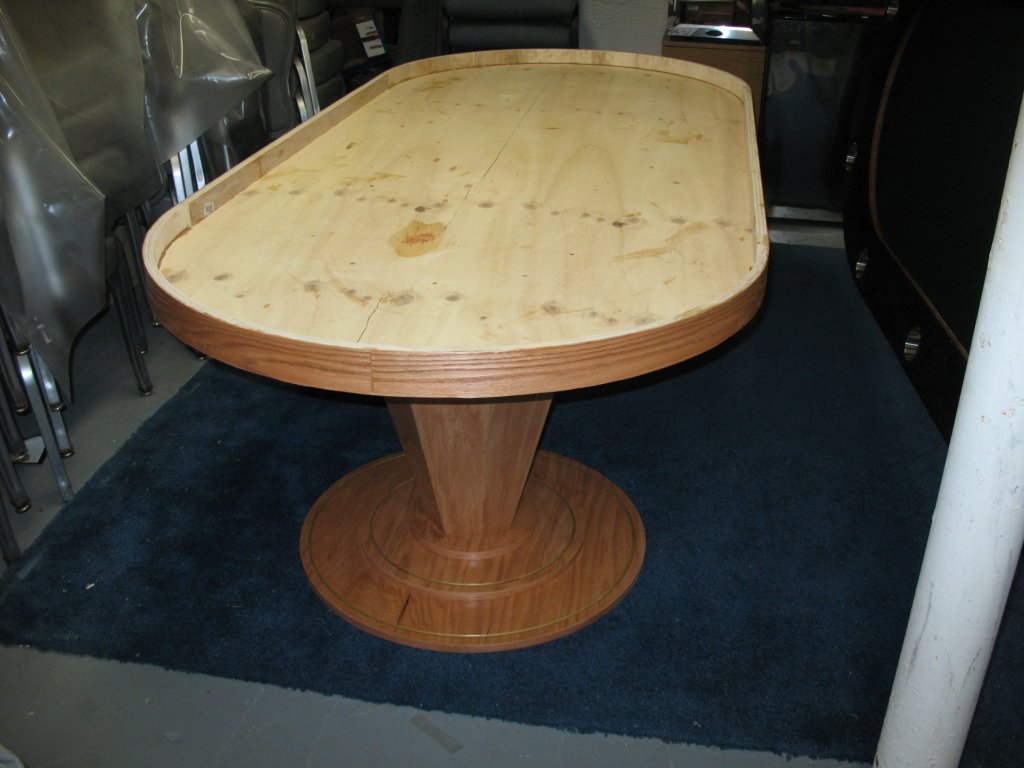
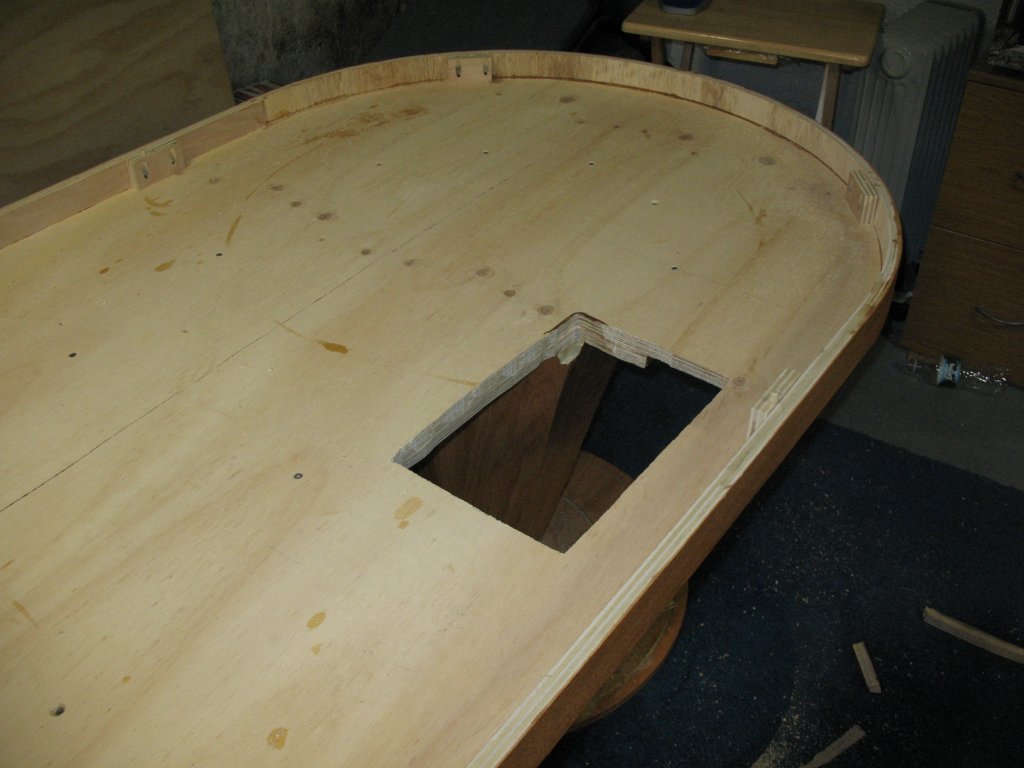
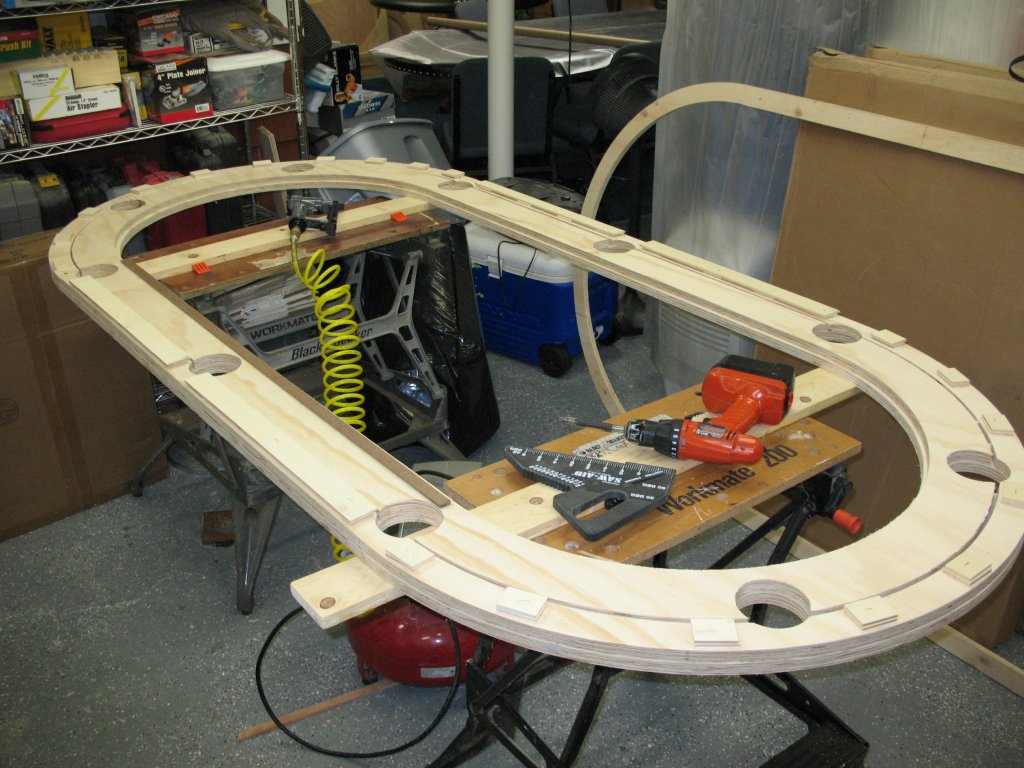
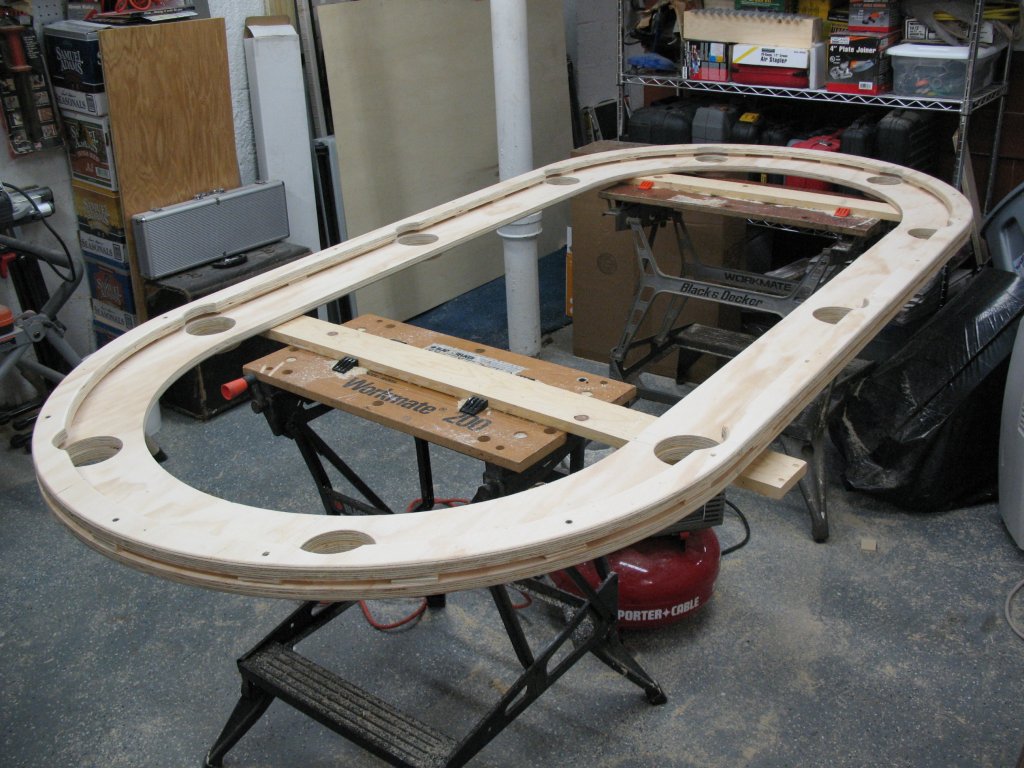
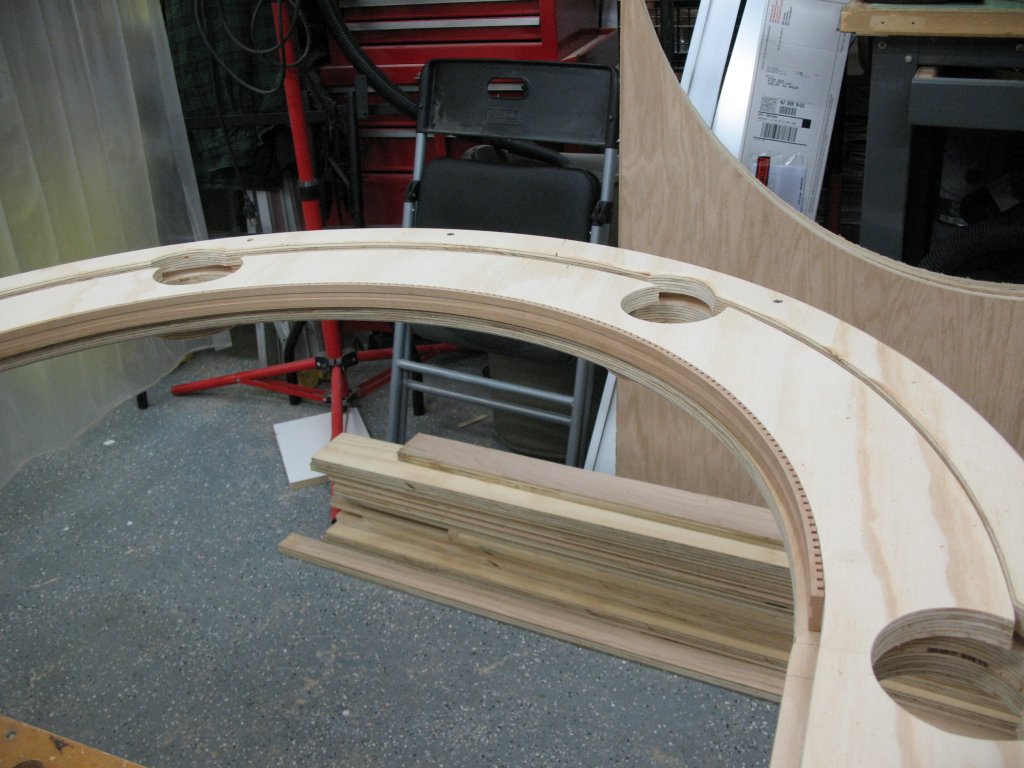
I typically do all my main cuts out on the back deck to save on sawdust cleanup in the shop. I started by cutting off 4" from both the length & width of three 3/4" sheets of oak ply (base sheet, rail sheet and riser sheet) with a circular saw to get the table from 96x48 to 92x44. If you don't own a 8' long straight edge, the factory cut edge of these cutoffs can double as nice straight edge for routering your inner straight rail cuts.
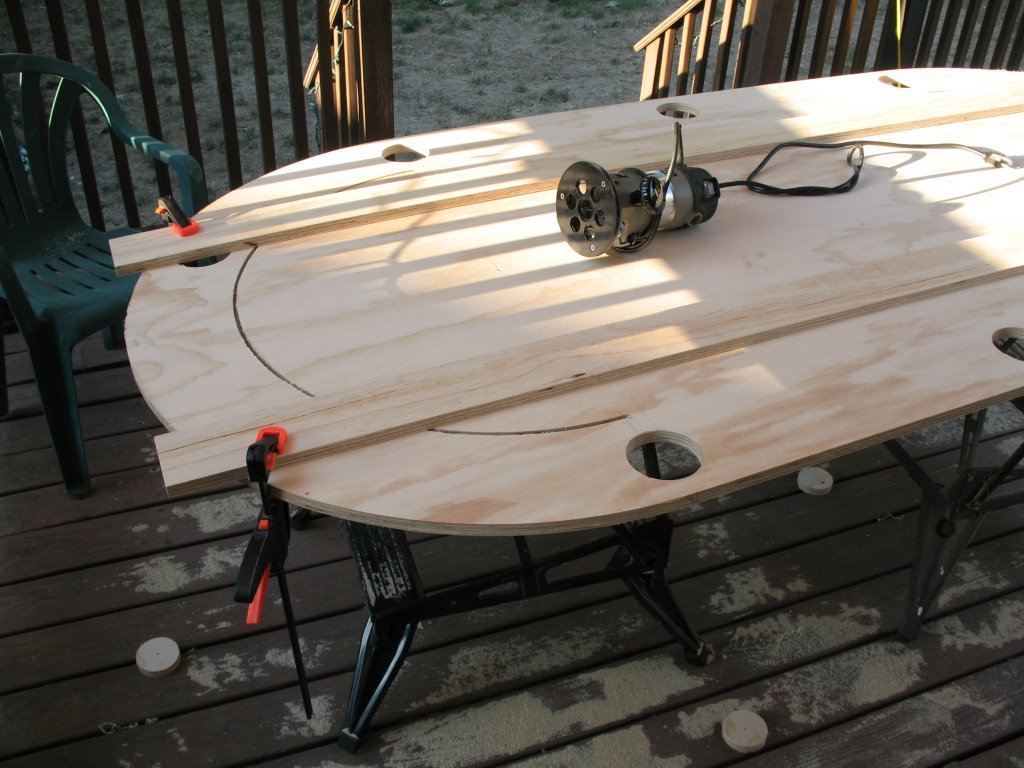
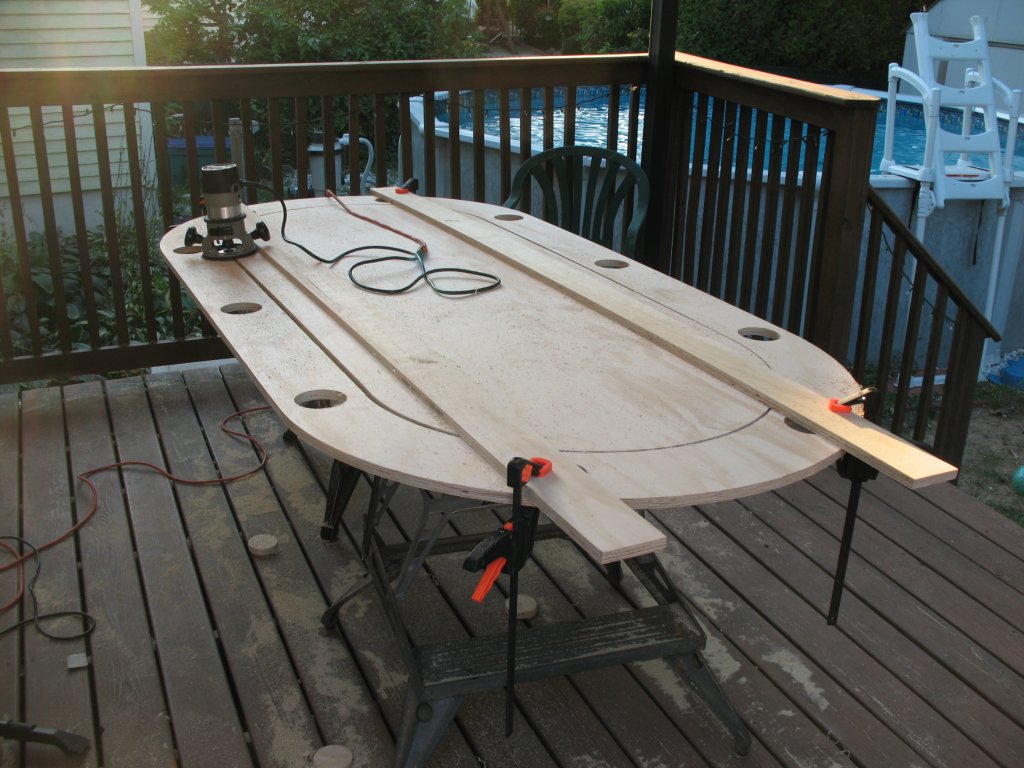
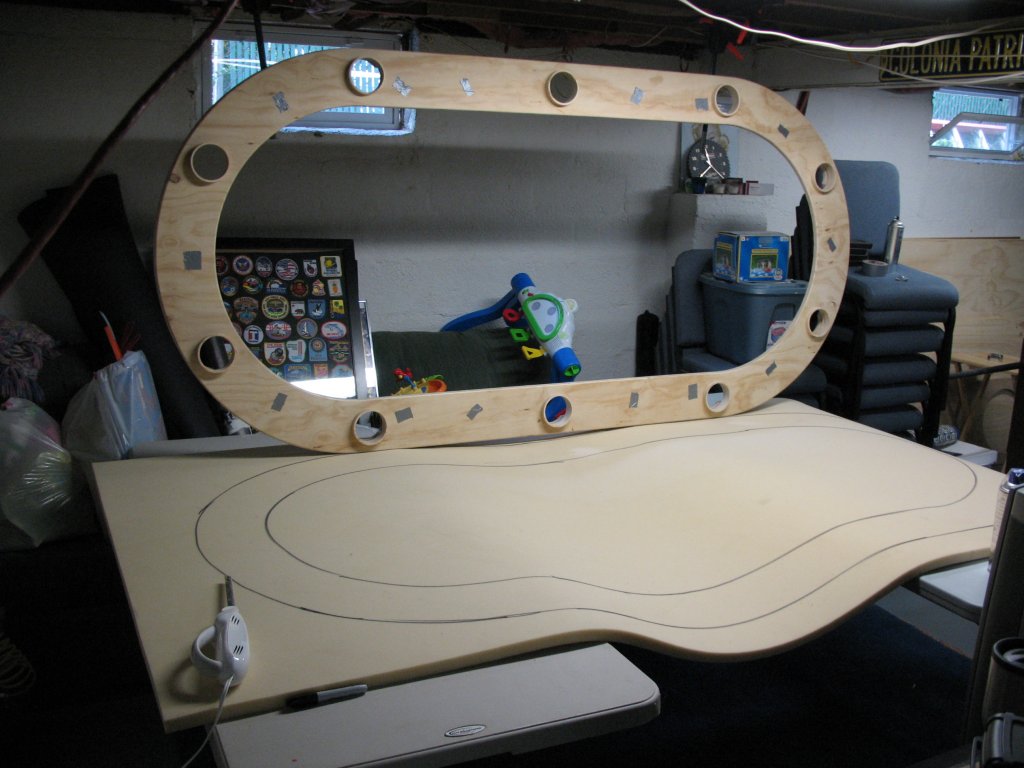
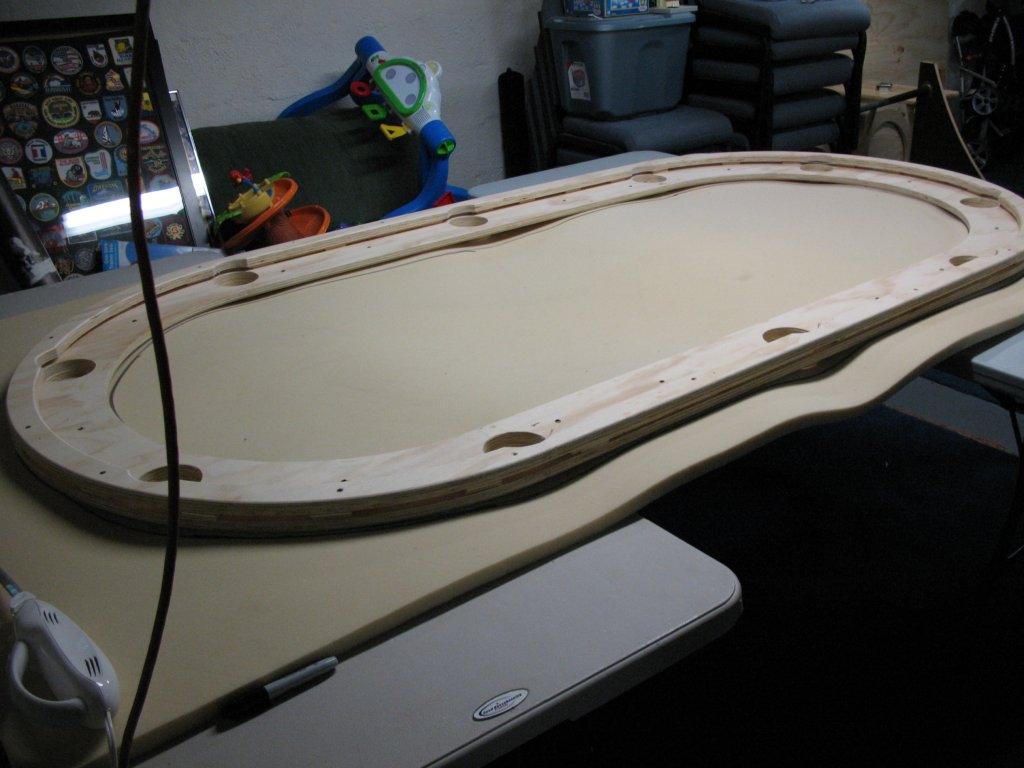
The rest of the first day included routering the outer arcs, measuring out and cutting the cup holder holes in the rail & riser sheets, and cutting the inner arcs and straightaways in the rail & riser sheets.
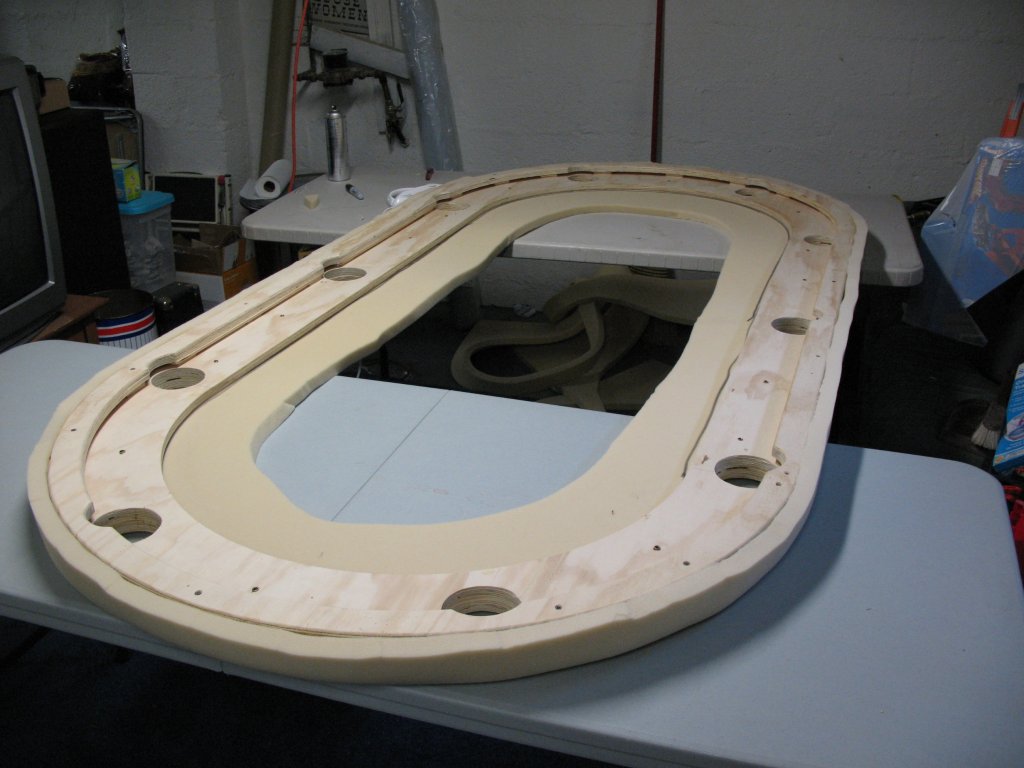
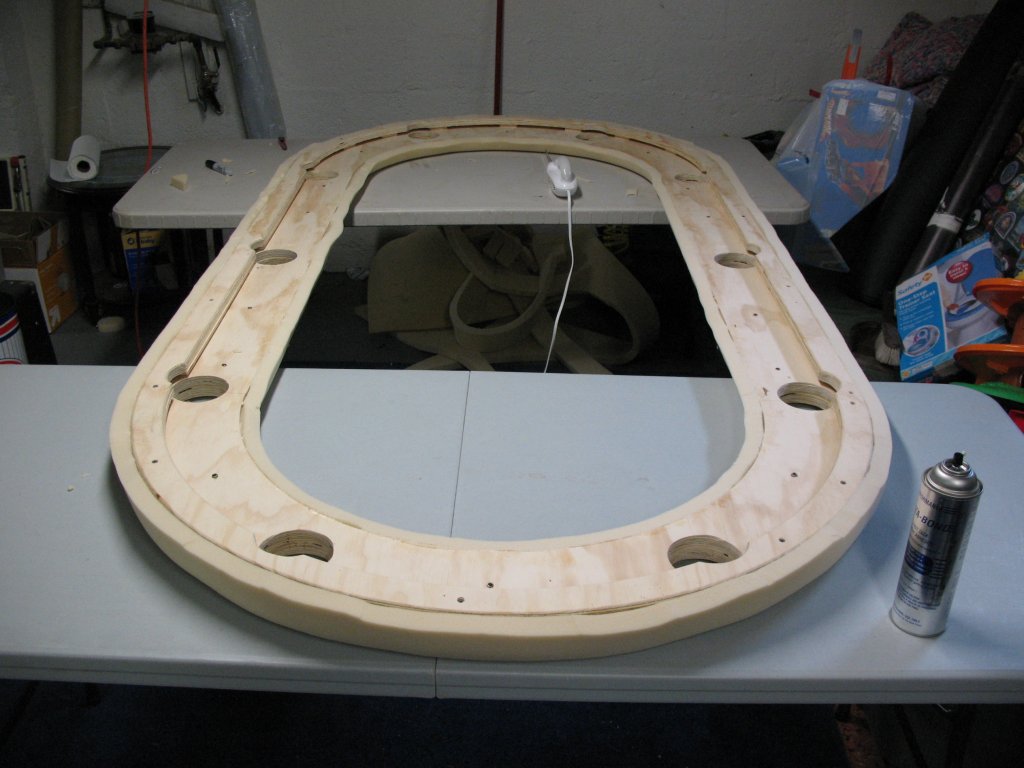
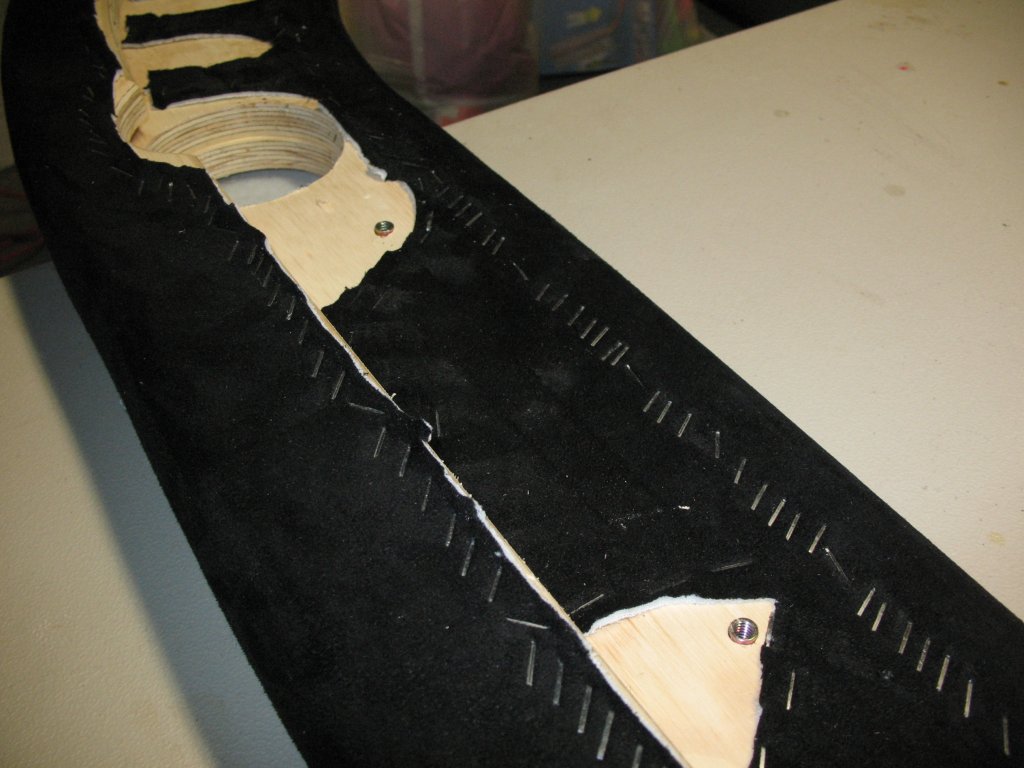
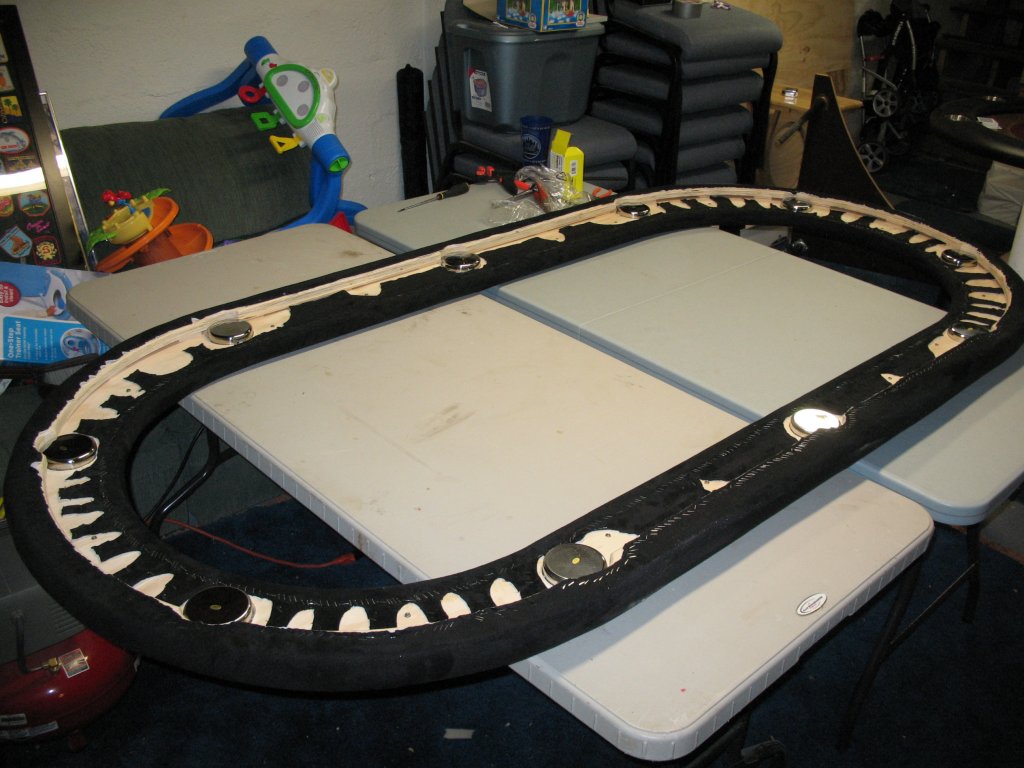
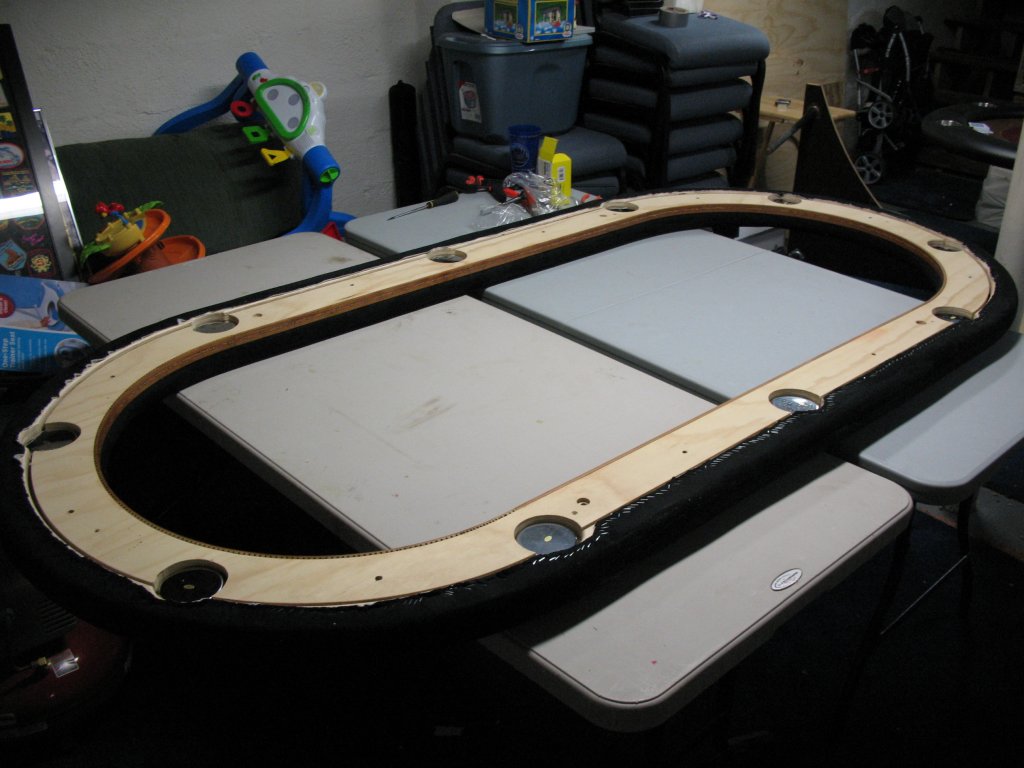
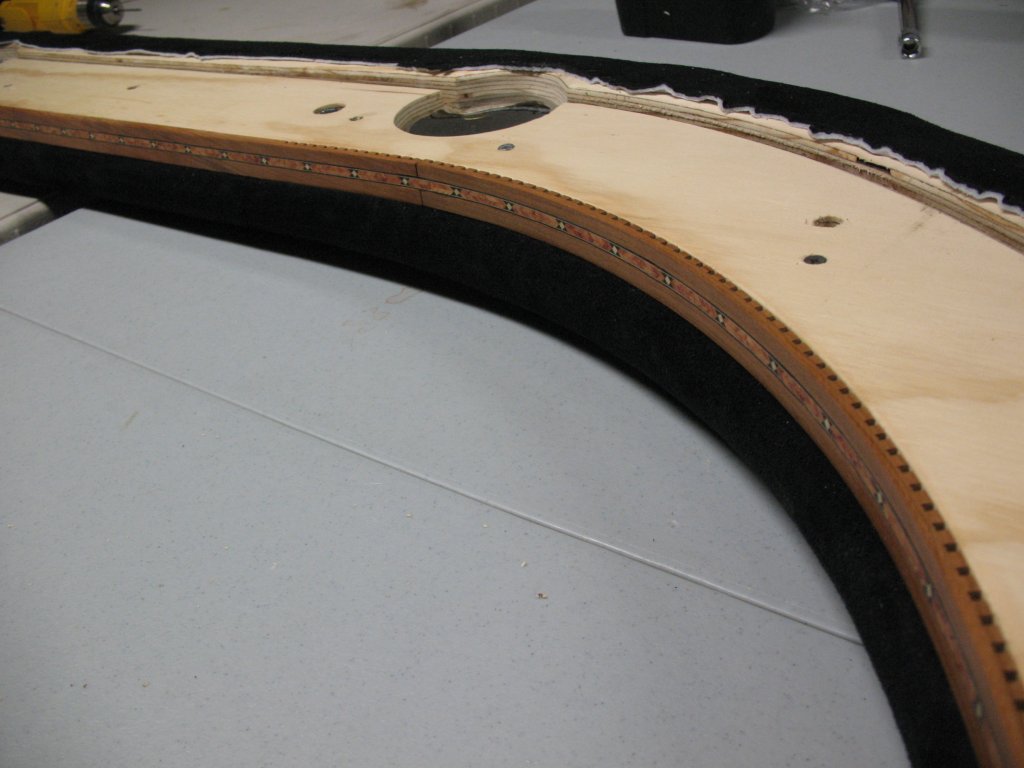
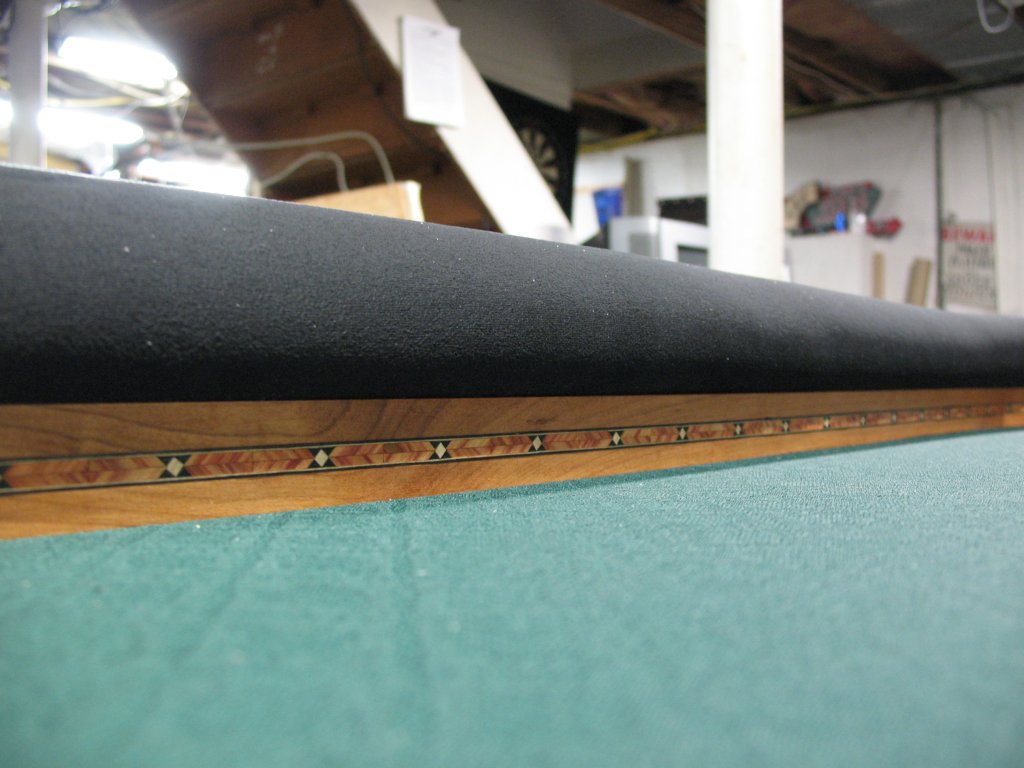
Once all the main sheets were cut out, next up was assembling the rail. For the riser on this table, I went with solid pieces of cherry, inlaid with a decorative wood inlay. The cherry riser pieces were ~7/8" tall and 1/4" wide, so I had to get creative with spacers. Here's a picture of the table section at the rail:
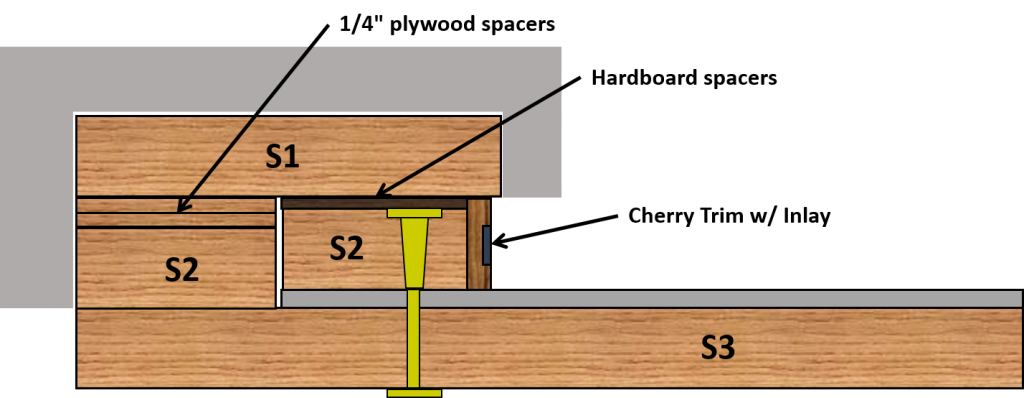
And an exploded via showing how the pieces separate:
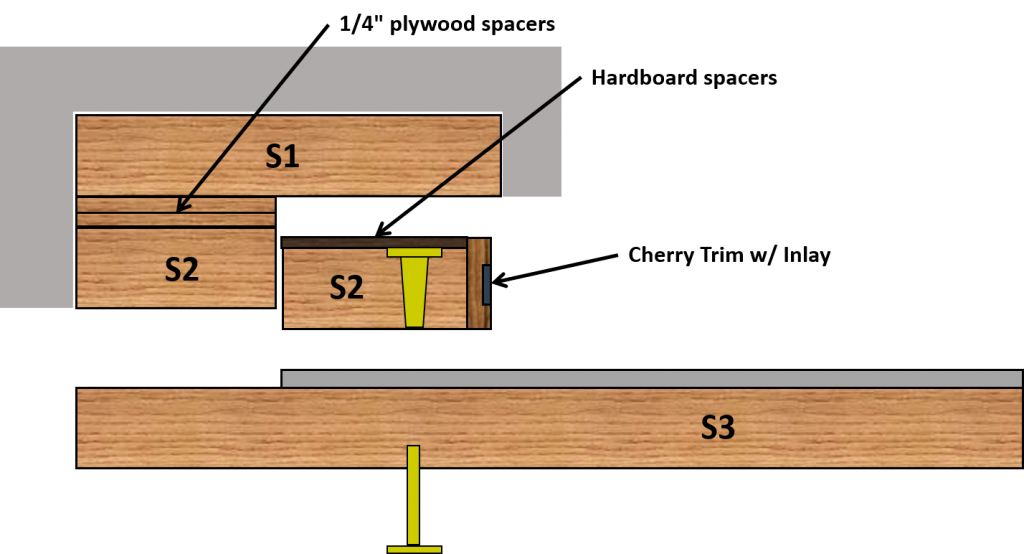
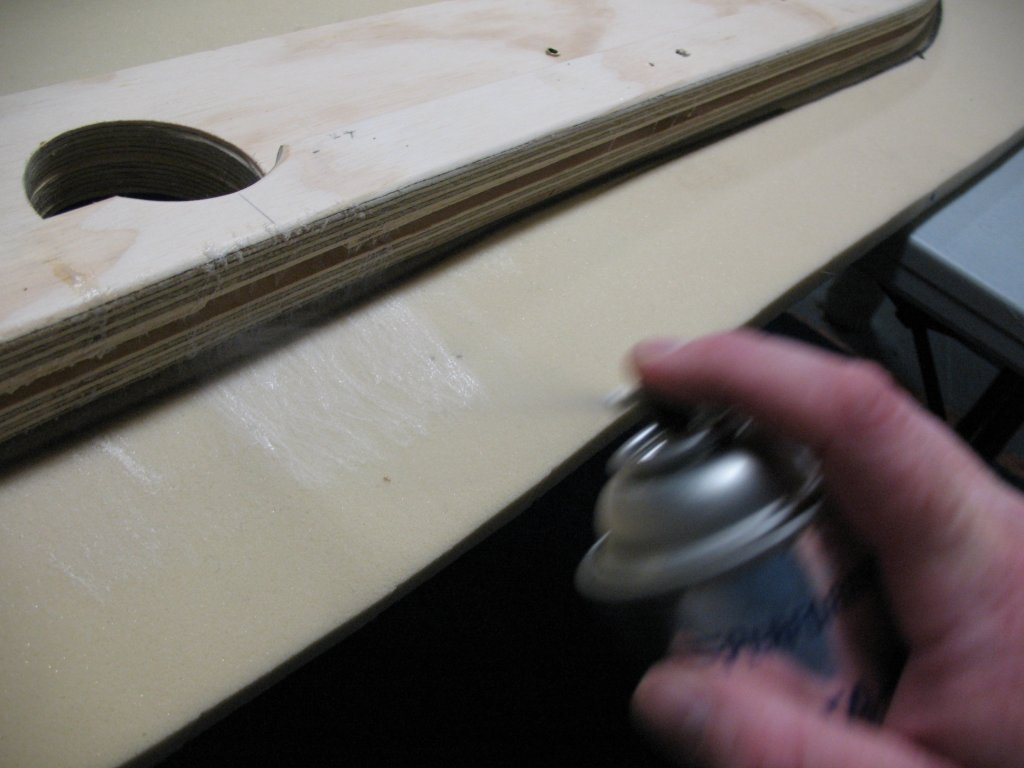
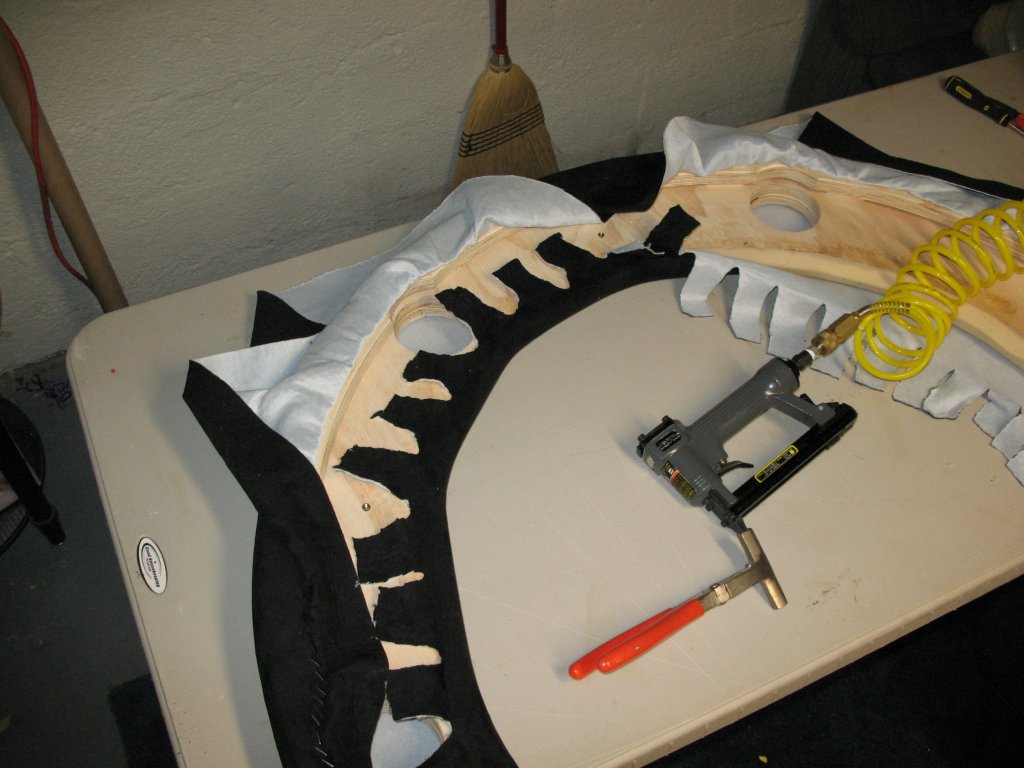
With this style of construction, you have to make sure rail section at the outside of the rail (lip area) is about 1/4" taller than inner rail (exposed riser), to account for the 1/4" playing surface foam. If the lip area is too tall, the riser won't contact the playing surface snugly, and cards may sneak under the rail. If the lip is too short, you may have a little gap between between the rail and the outer edge, depending on the foam you use for the playing surface. HD foam will compress enough where it's not an issue, but you'll get that gap with firmer closed cells foams like volara and ensolite (which is what I used here). I used 1/4" (7/32" actual) plywood spacers for the main rail piece, and 3/16" hardboard spacers for the riser insert to get both sides to equal out:
Height at the riser area:
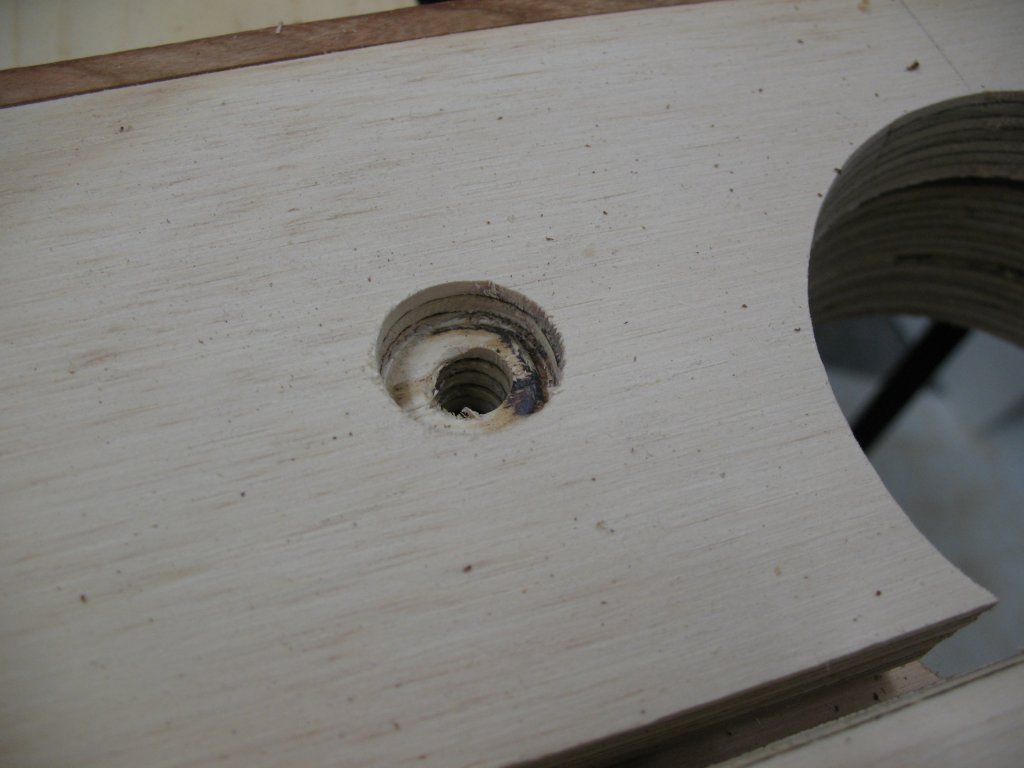
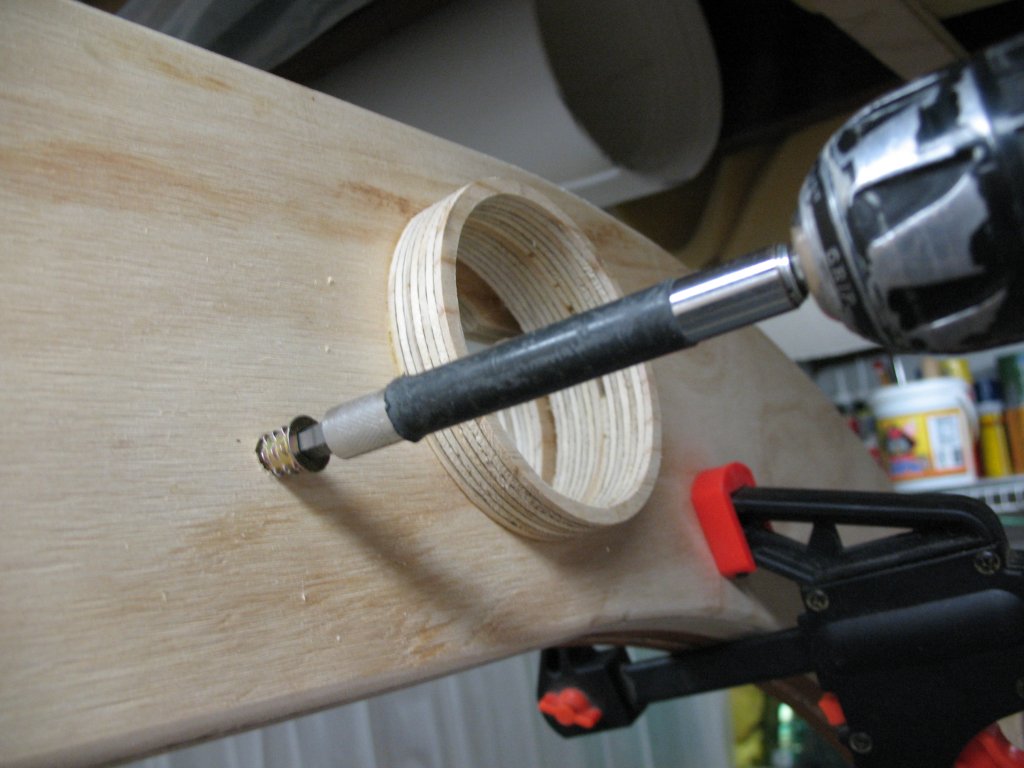
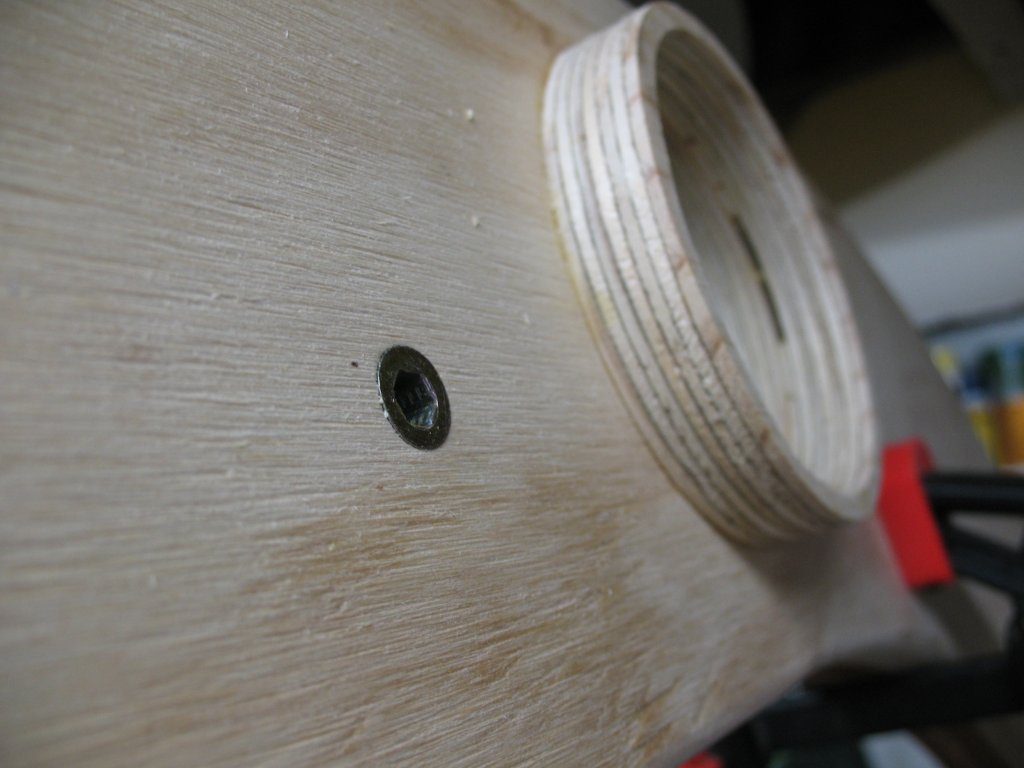
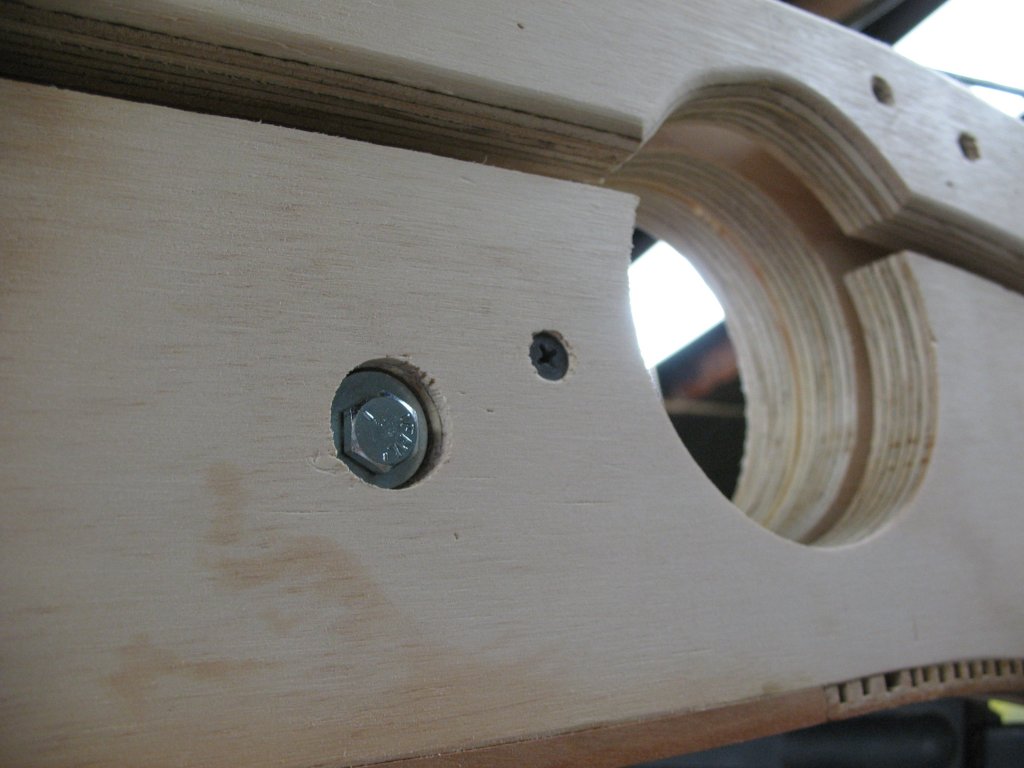
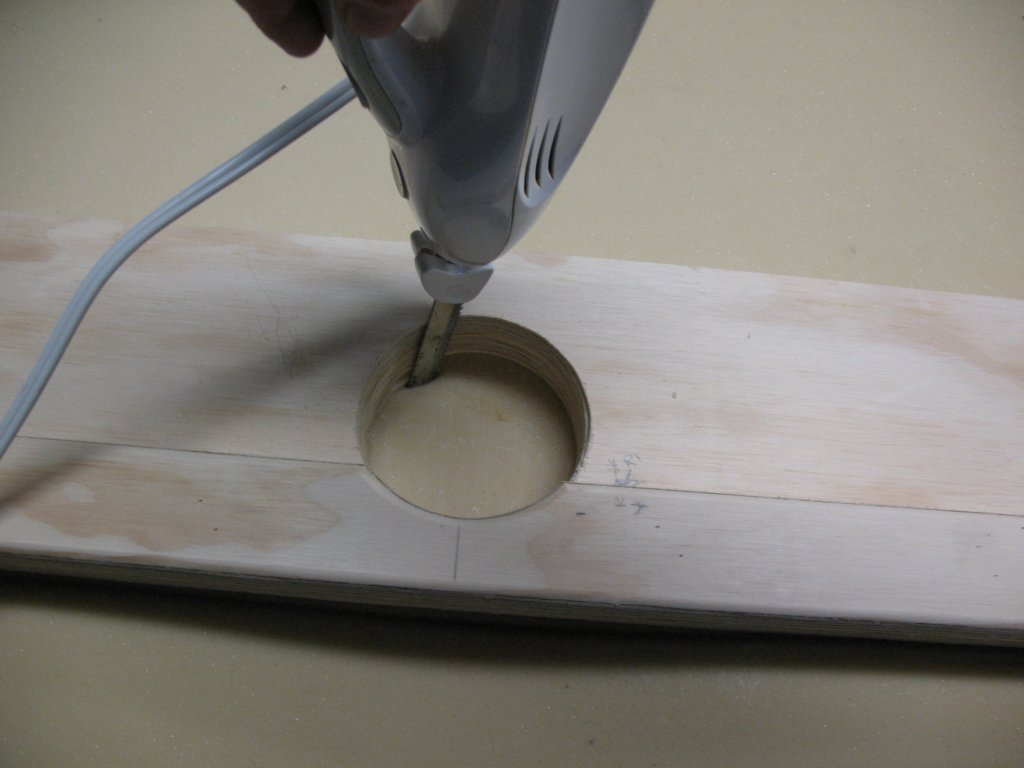
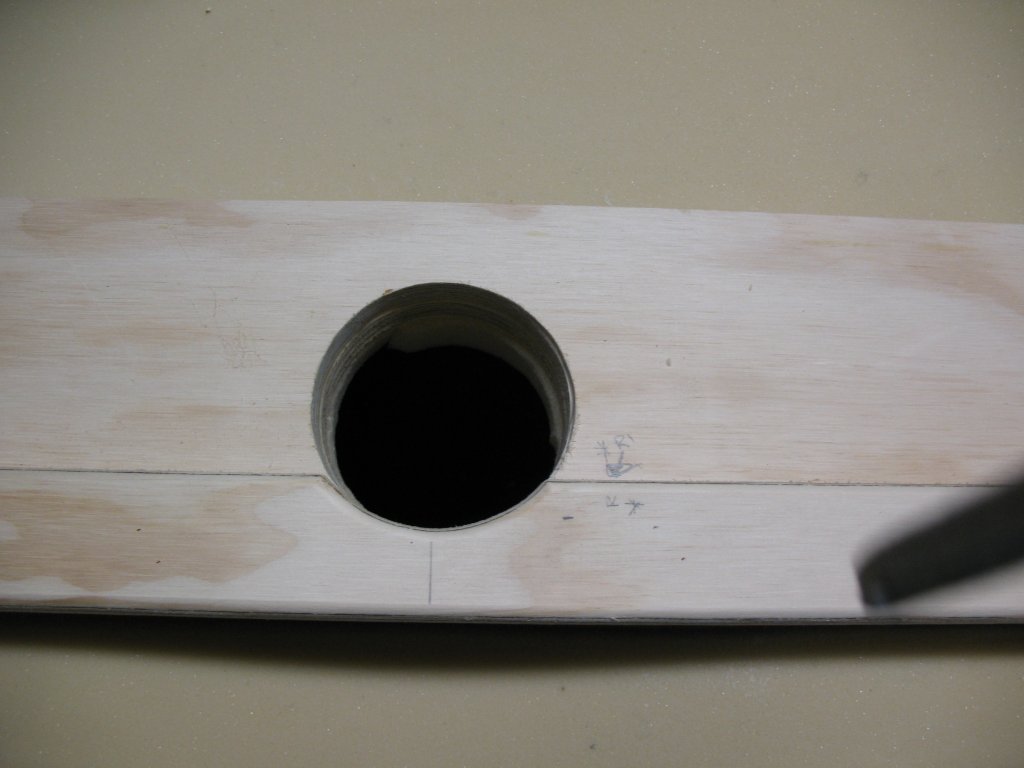
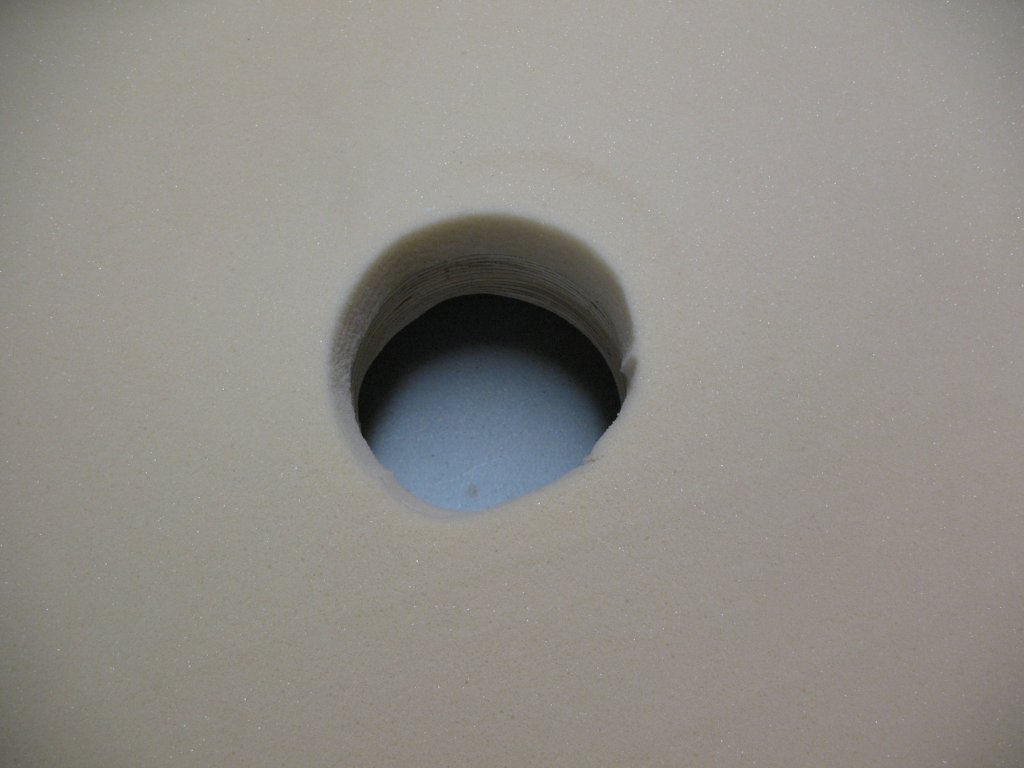
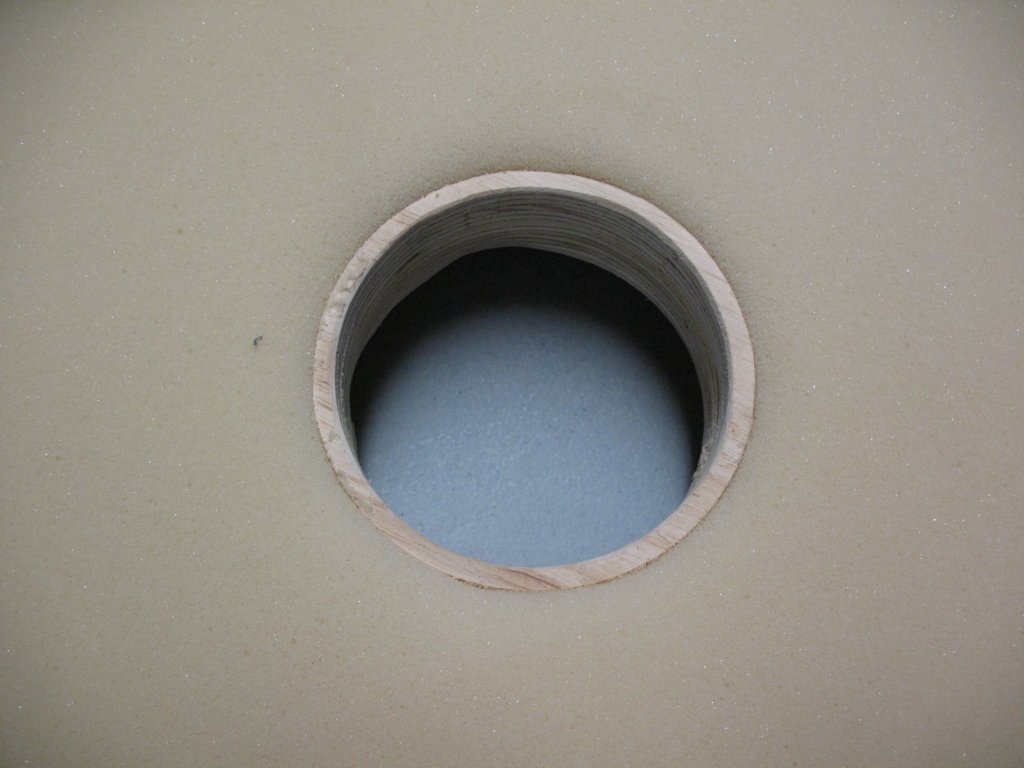
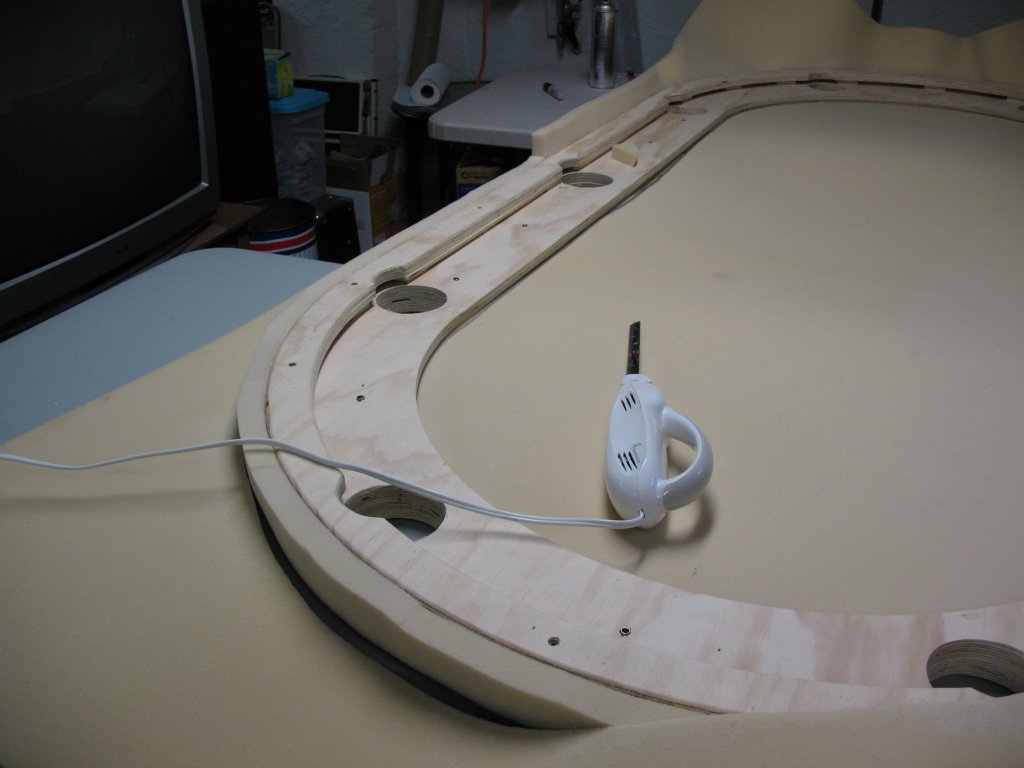
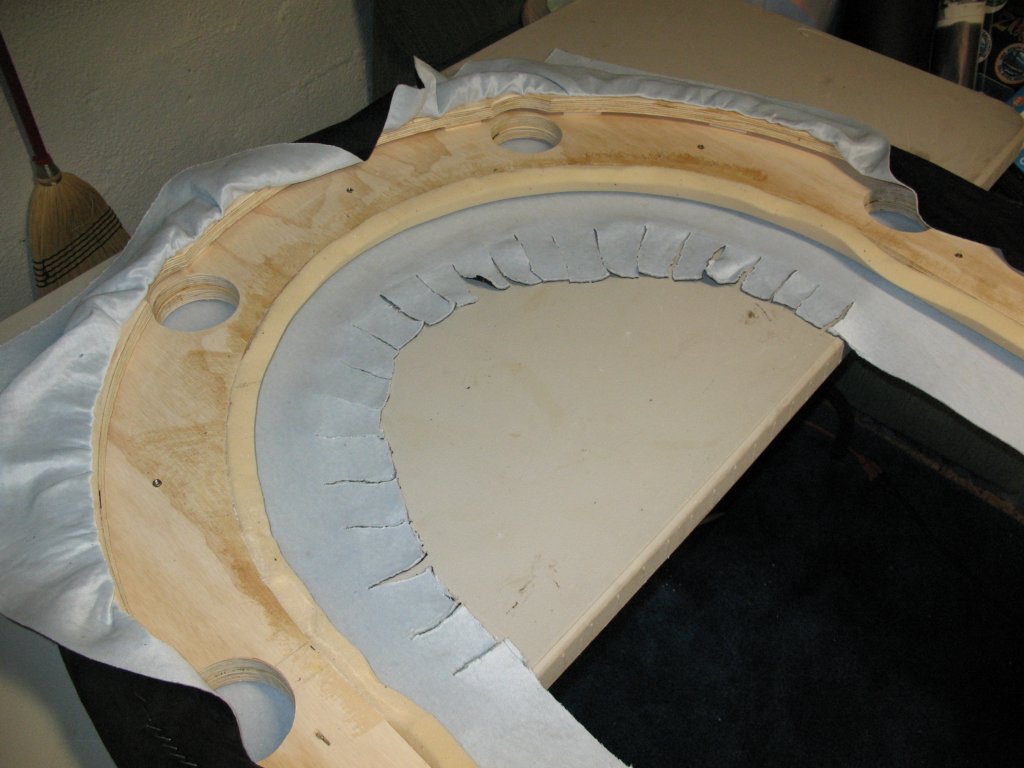
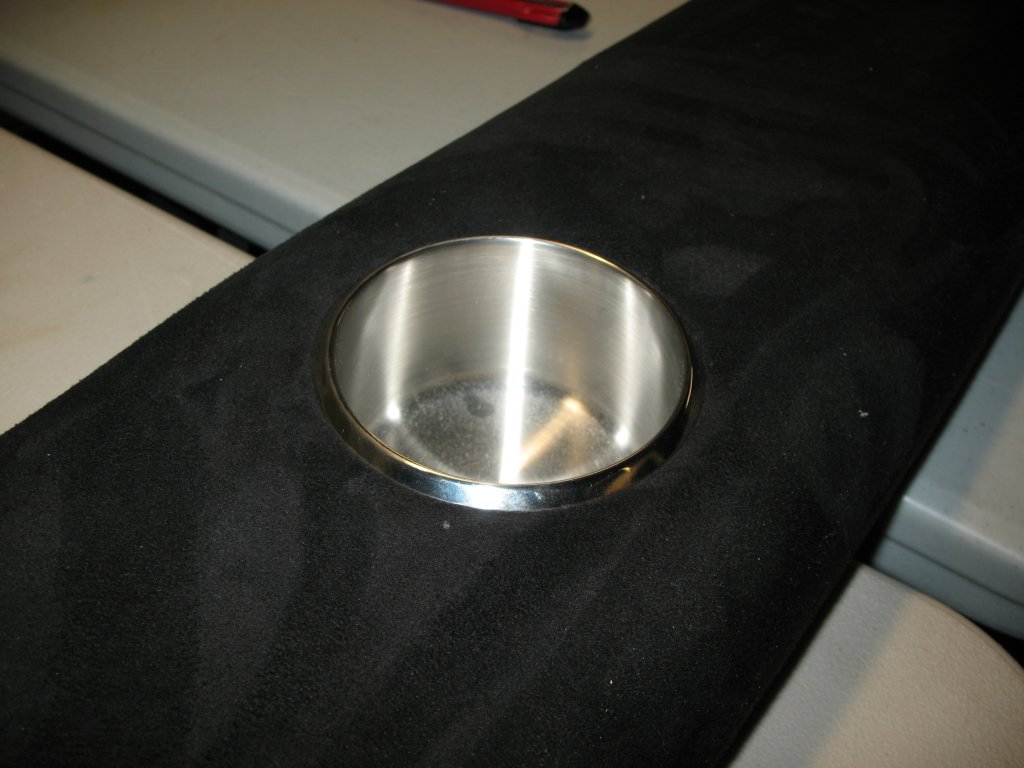
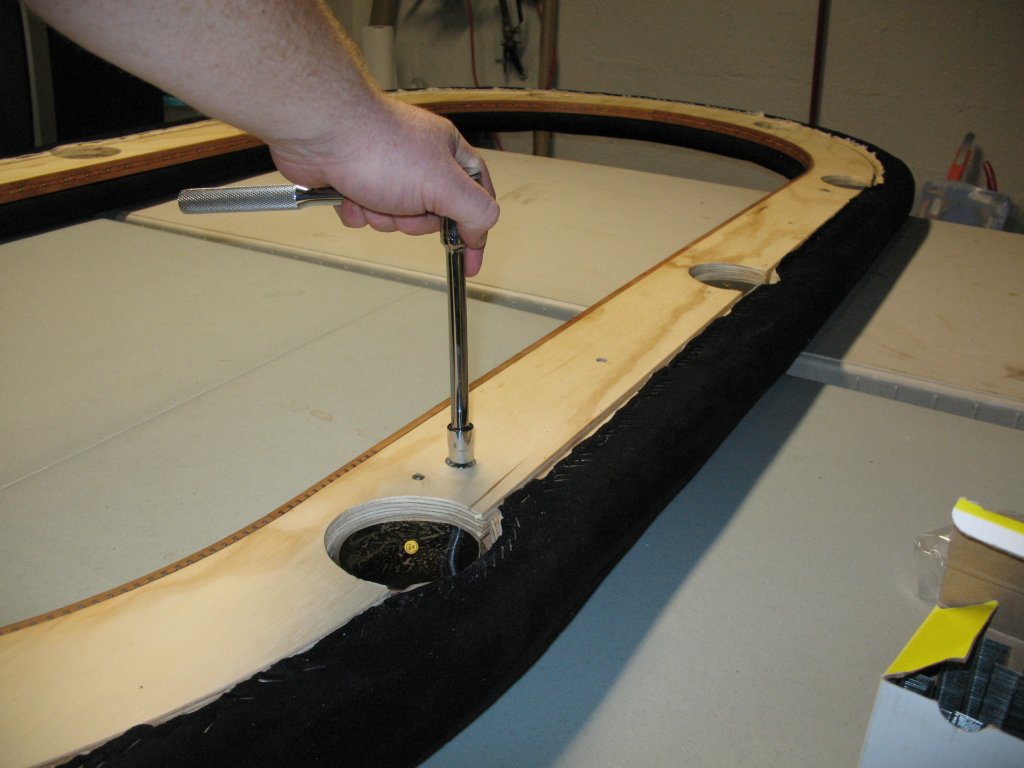
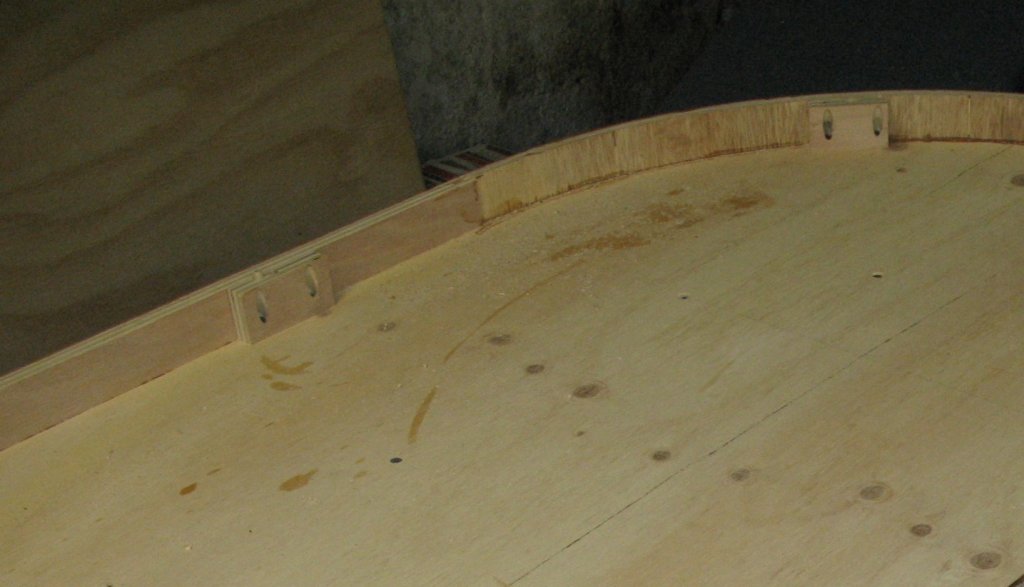
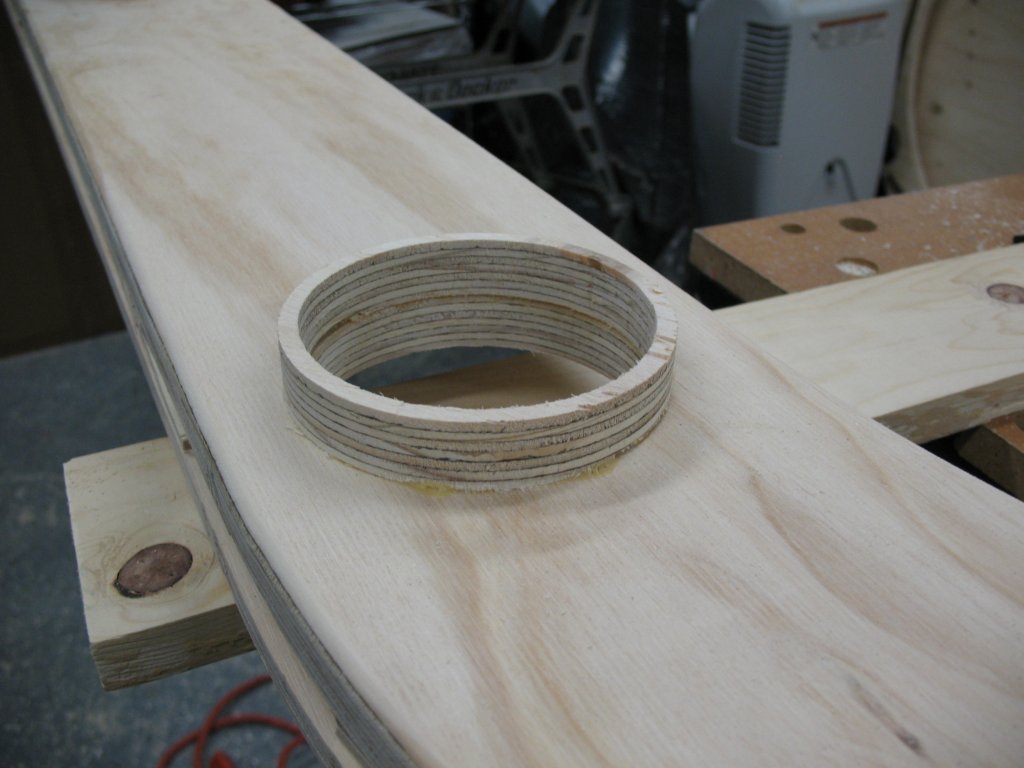
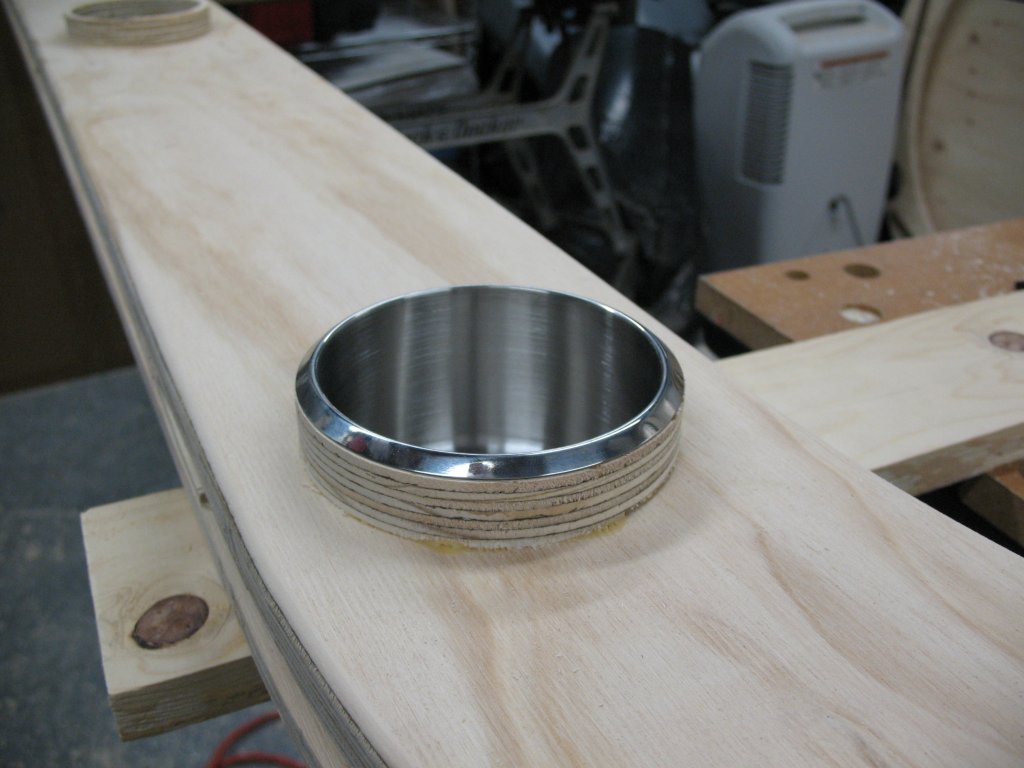
Next up are the cup holder rings, which are glued to the top of the rail. The rings are 3/16" thick and routered from the scrap cutoff corners of 3/4" plywood. These help to give the cups a solid base and prevent them from squishing down too far in the rail padding:
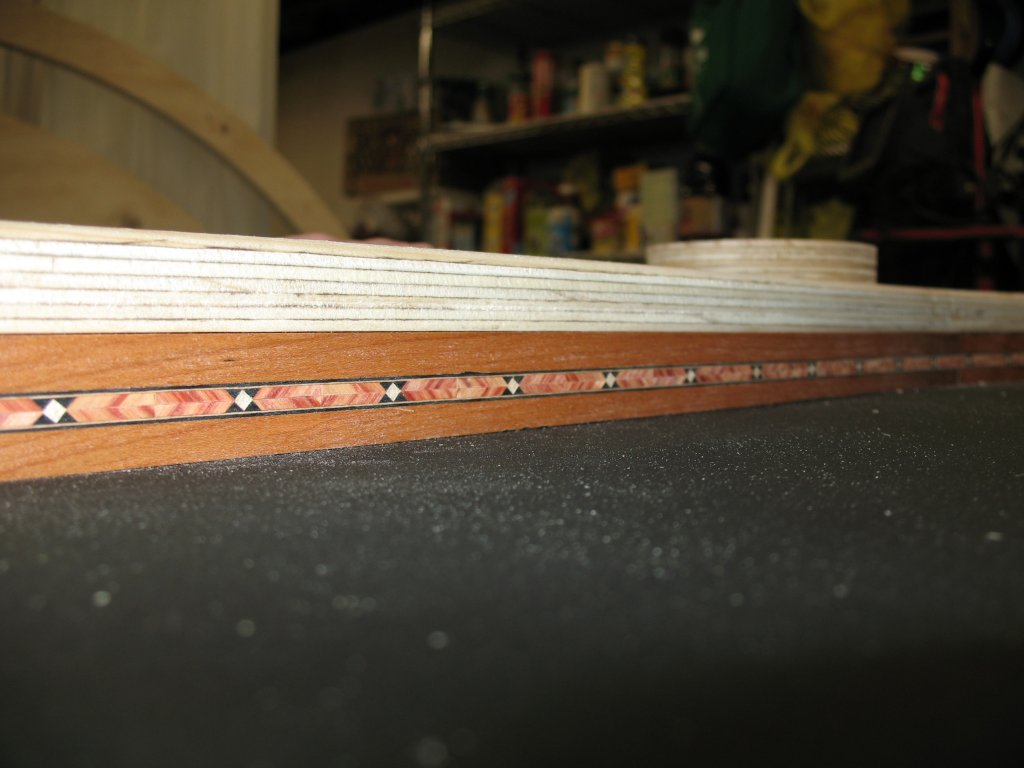
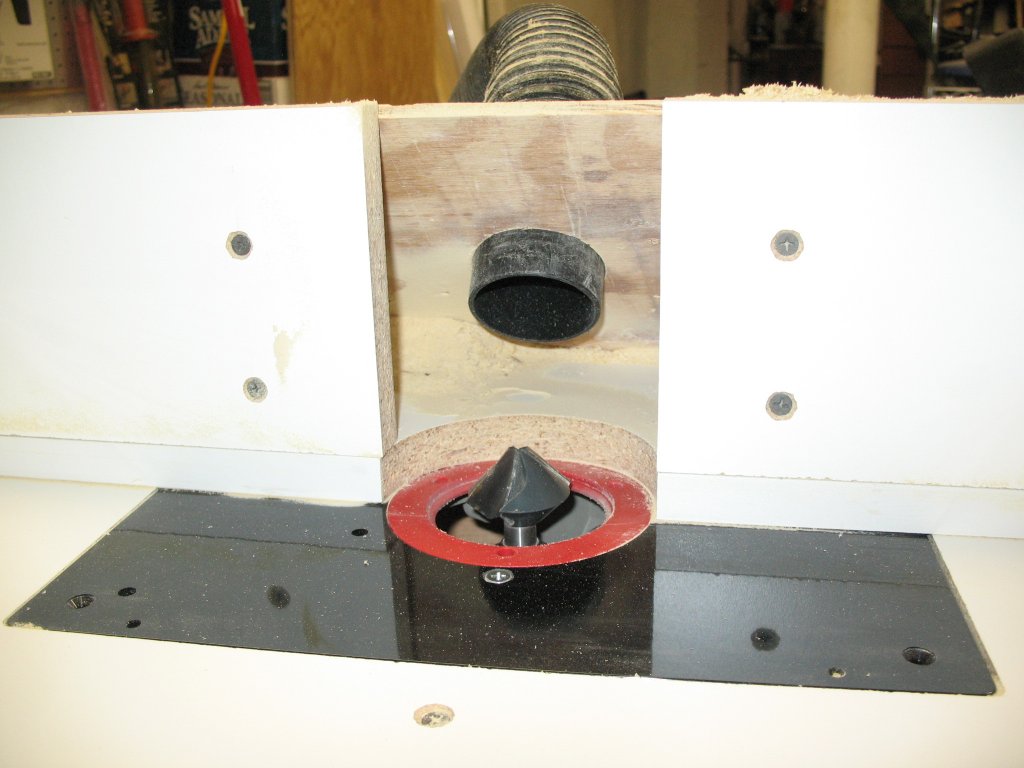
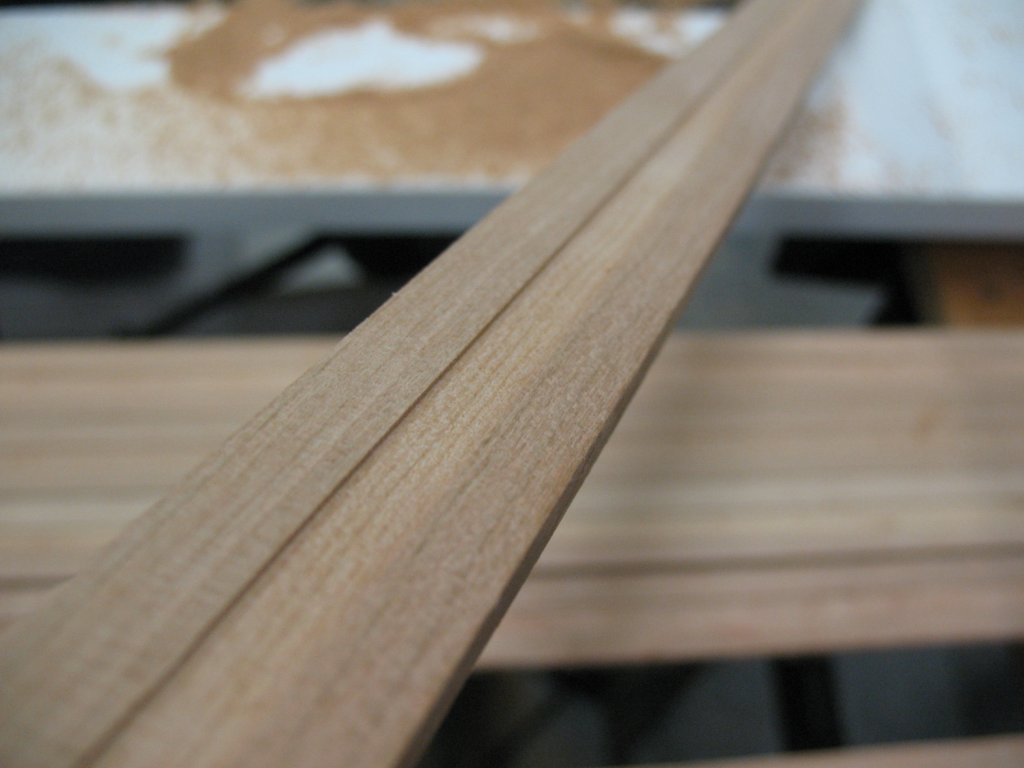
With the main rail assembled, next up is working on the riser. I used a cheap DIY router table & workmate bench to route the inlay channel in the cherry trim pieces for the raised rail.
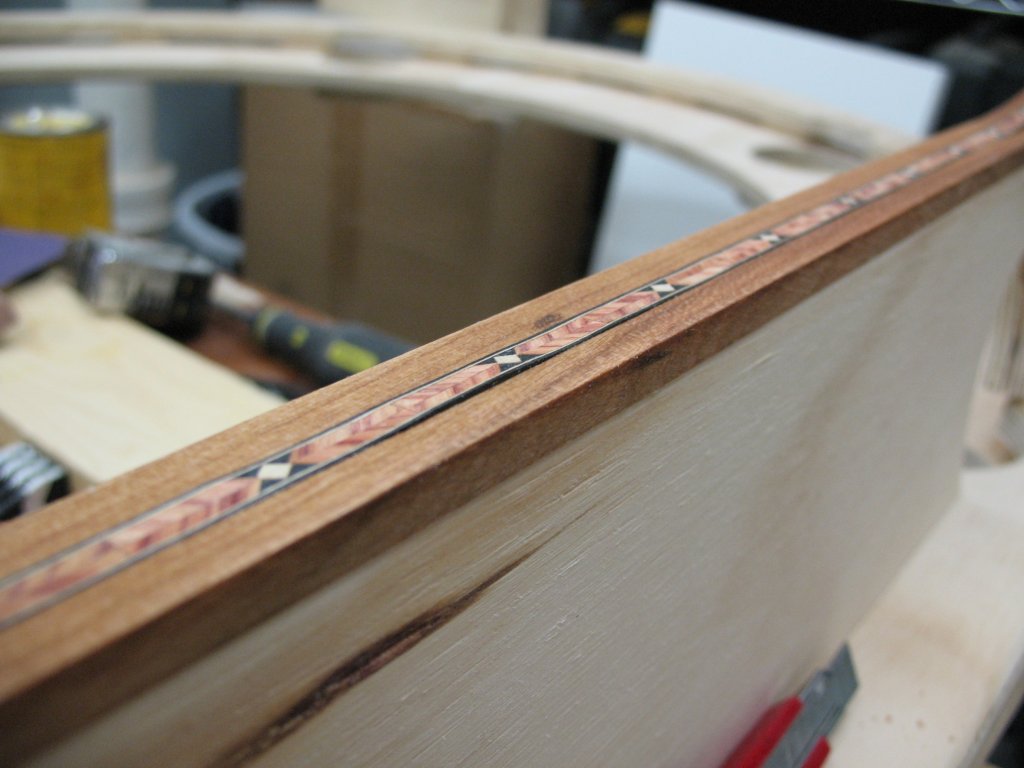
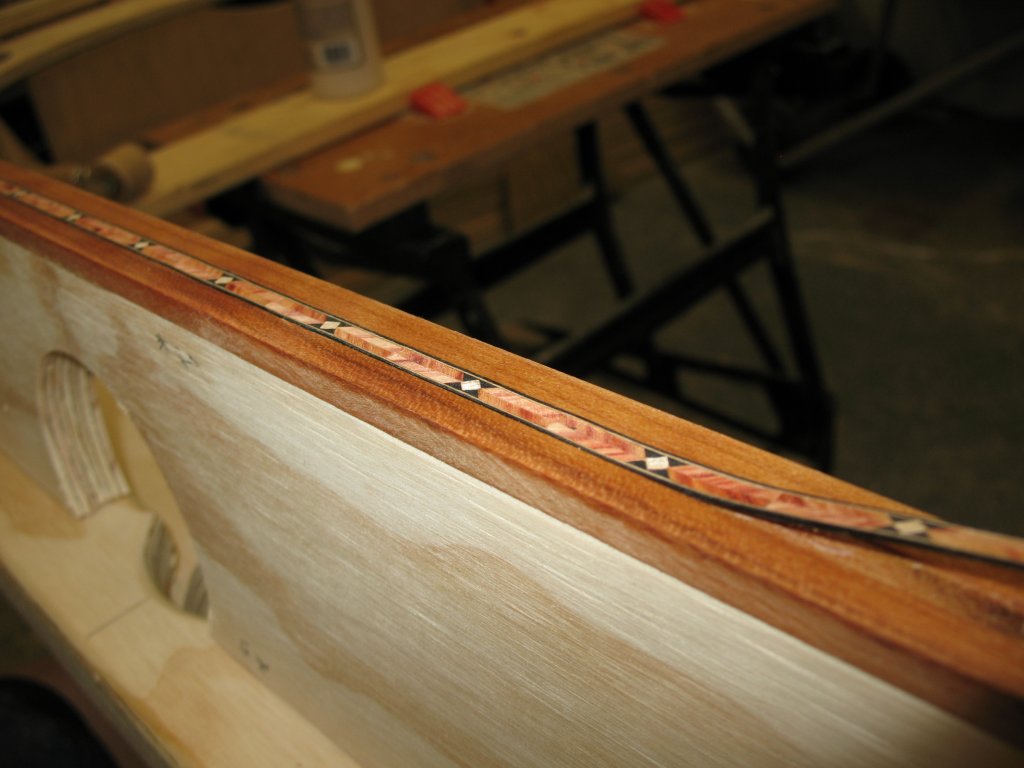
The inlay I picked for the riser (bought online here) is 1/4" wide and really thin (~1/32" - exactly 0.8mm), so the channel can't be too deep. It took a few iterations to get the depth just right on the router. Then, I clamped a straight edge to the router table and routed the channel down the middle of each trim piece with a 1/4" straight bit:
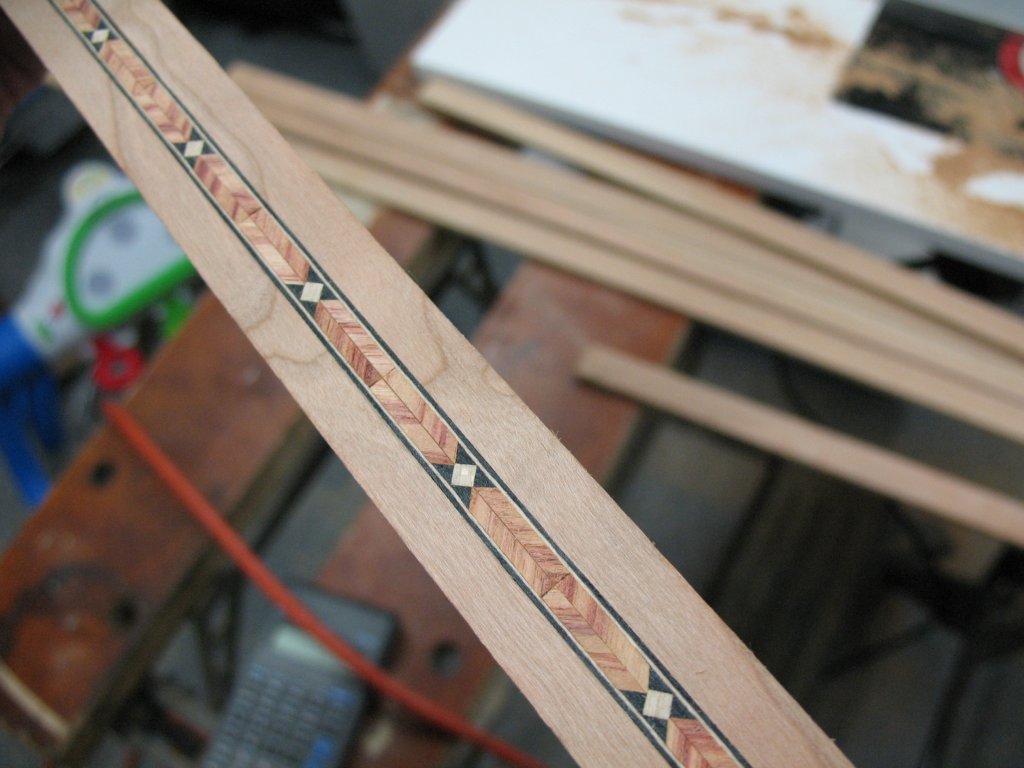
Test fit:
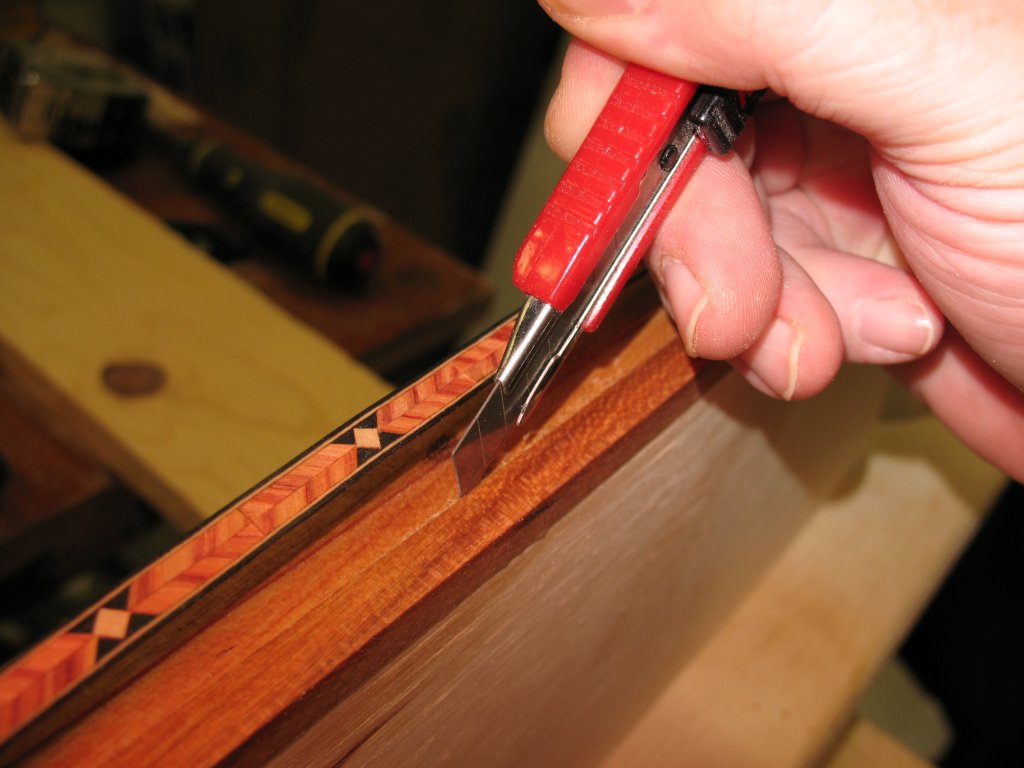
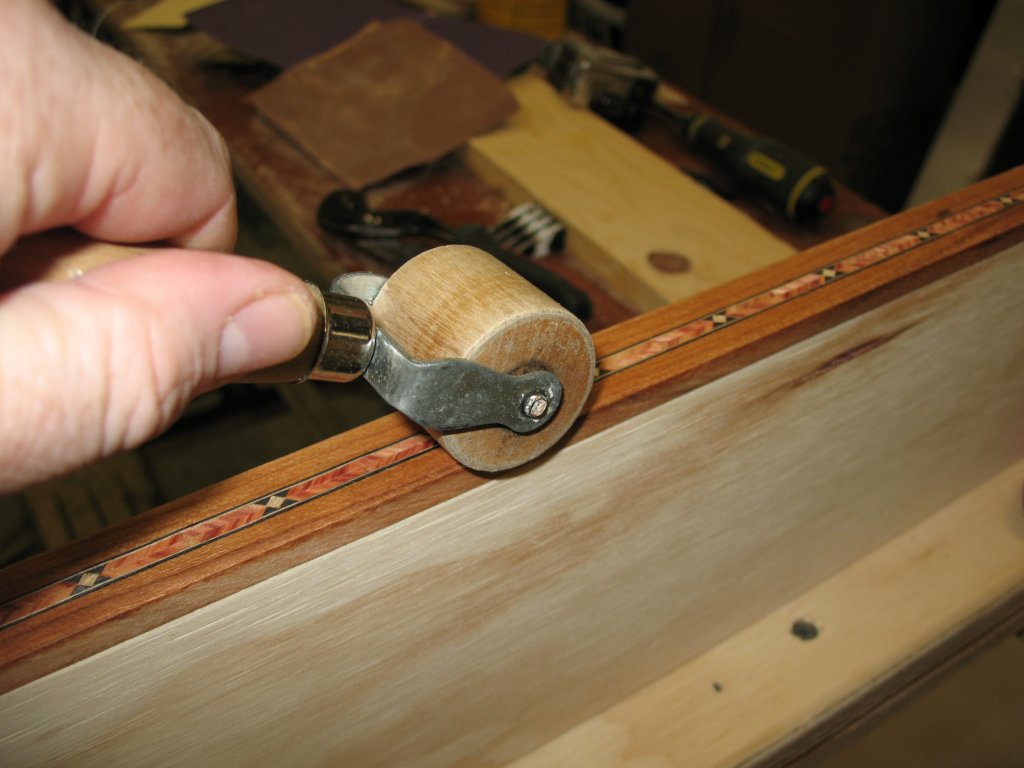
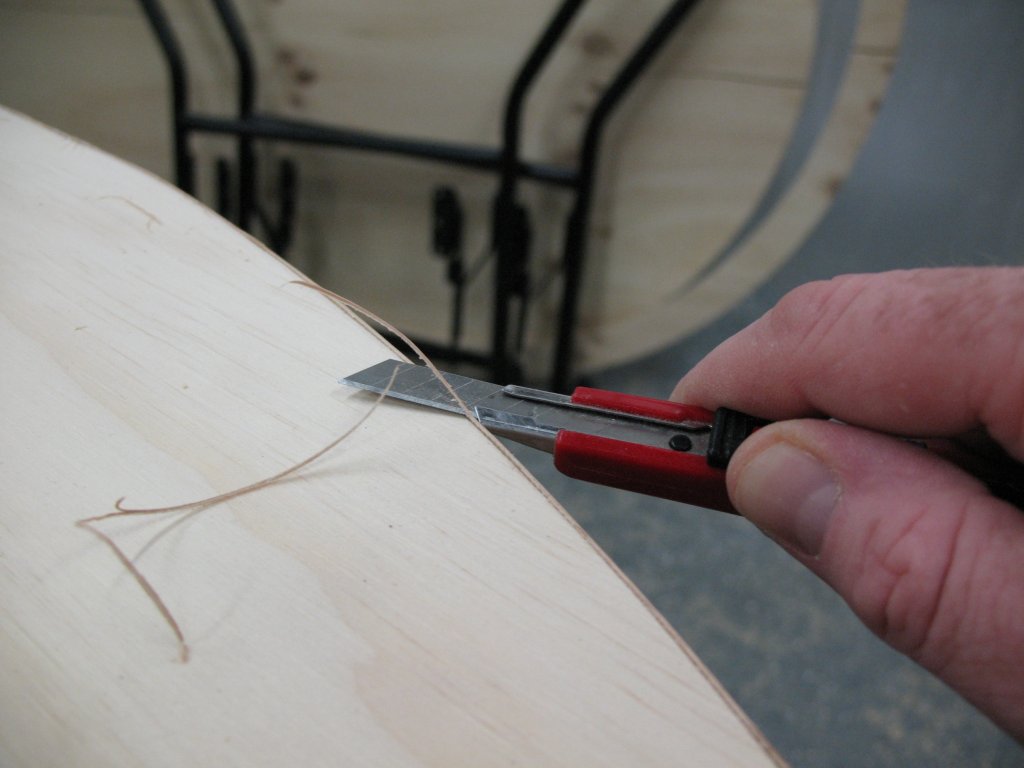
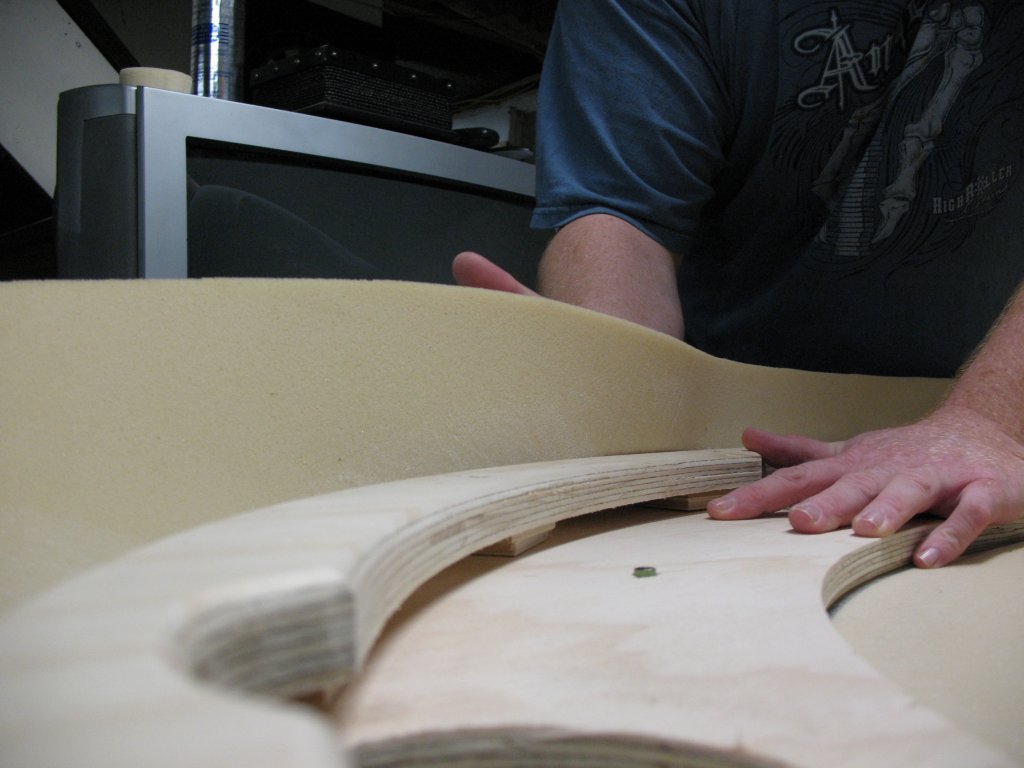
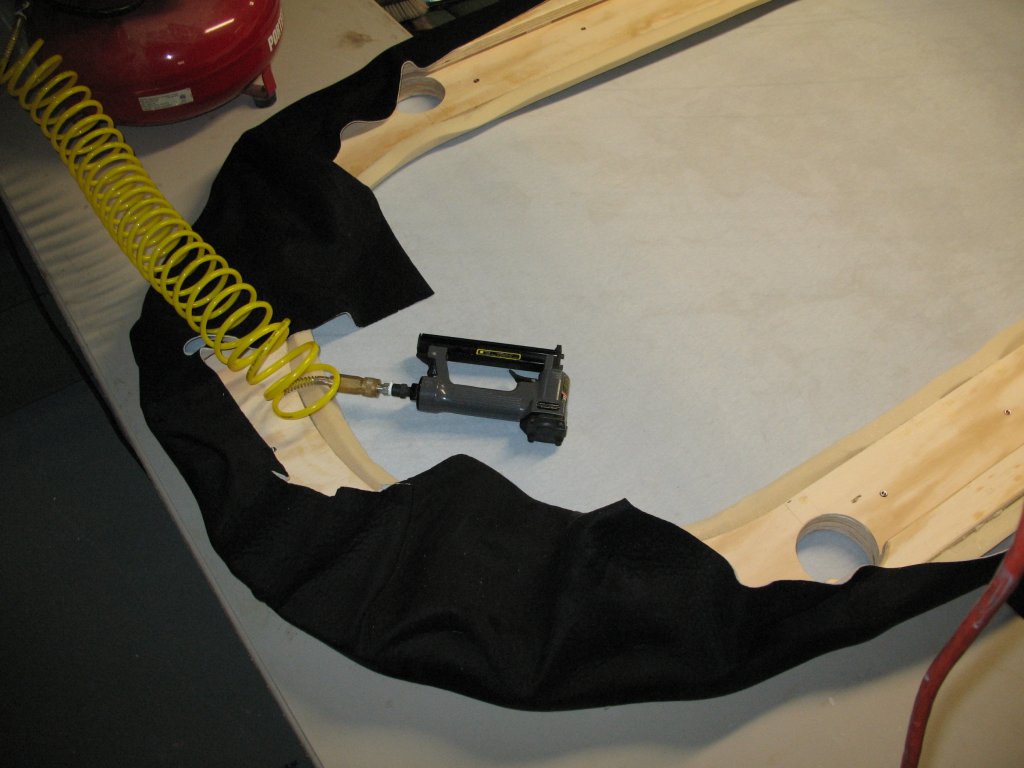
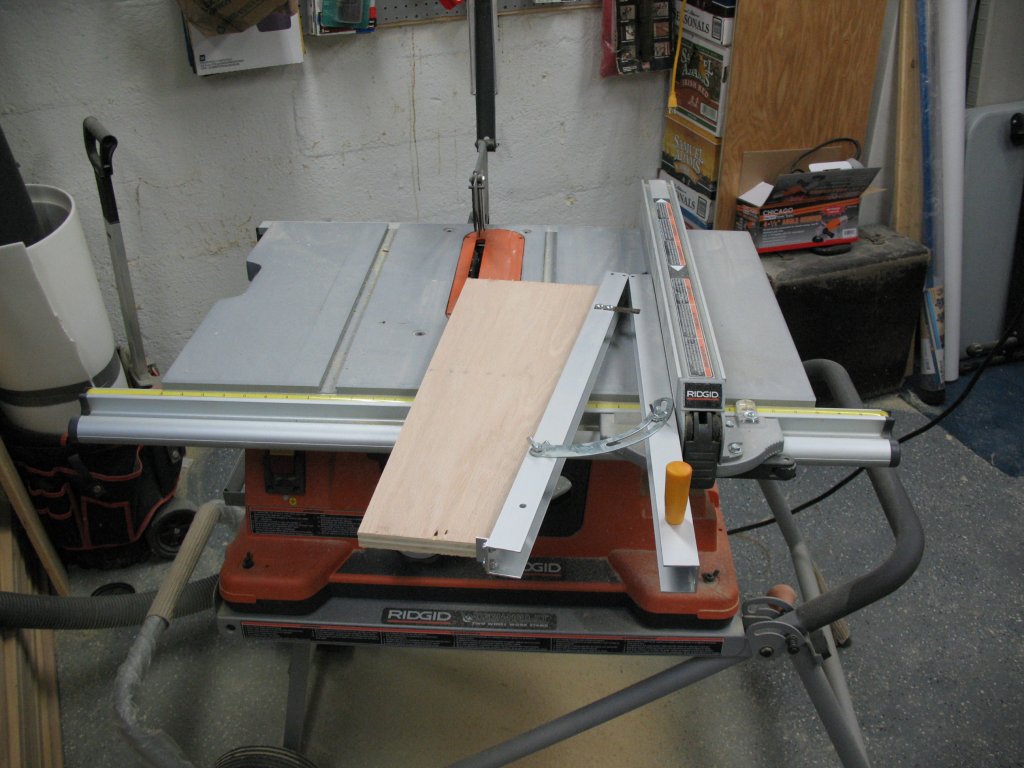
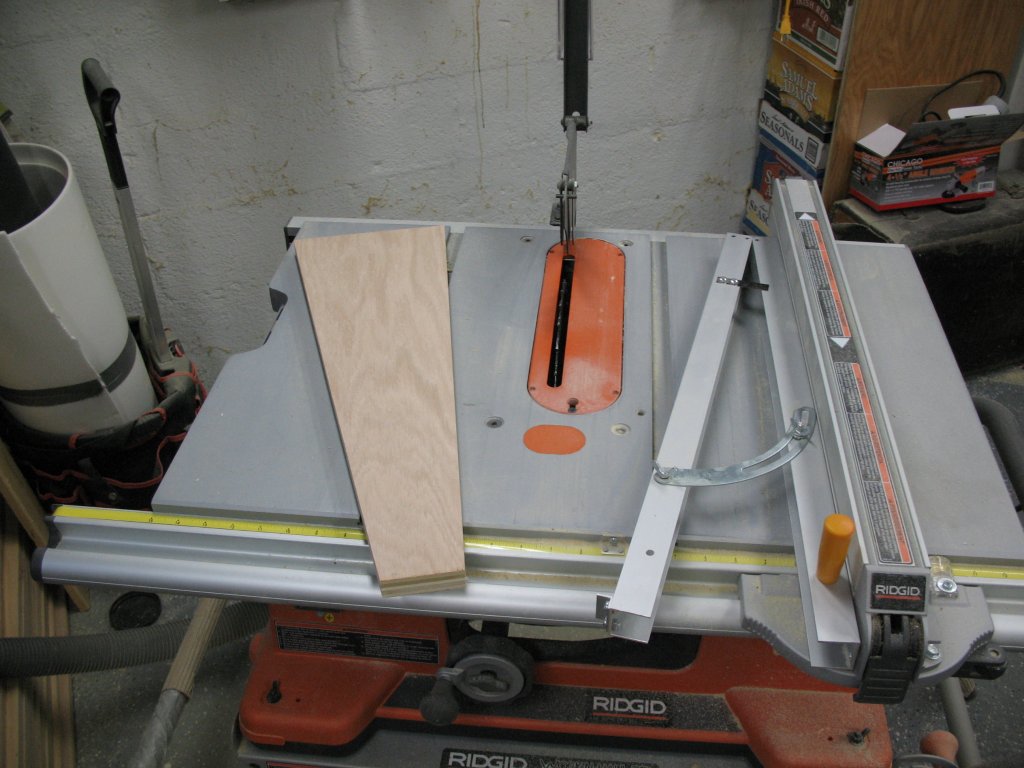
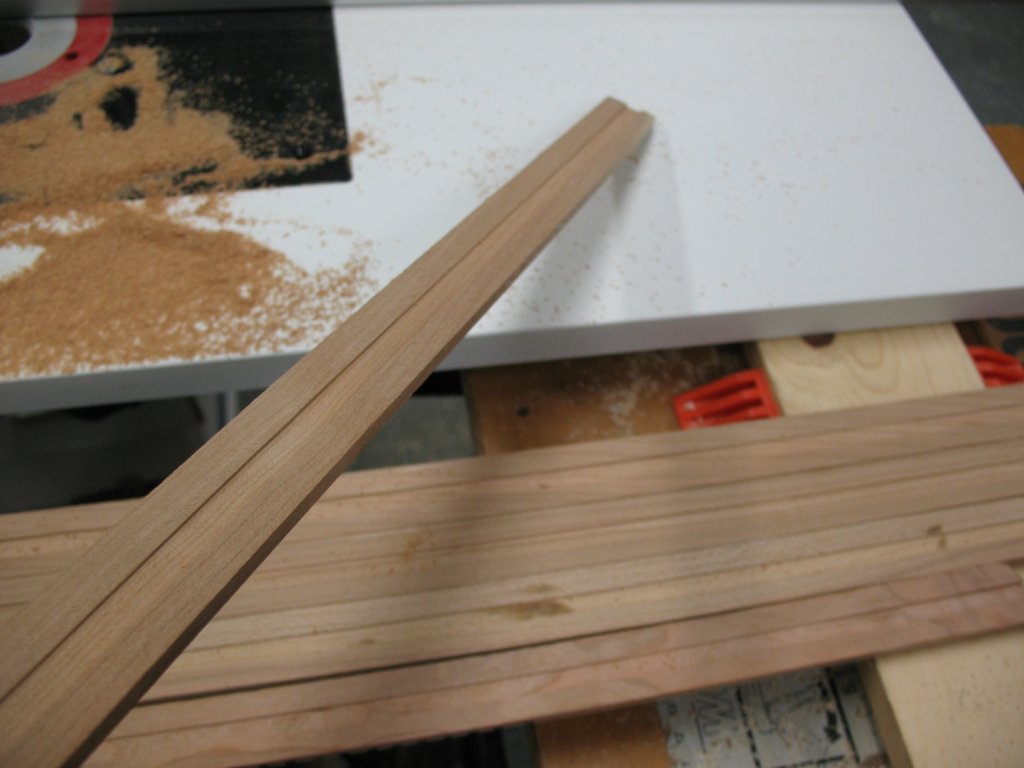
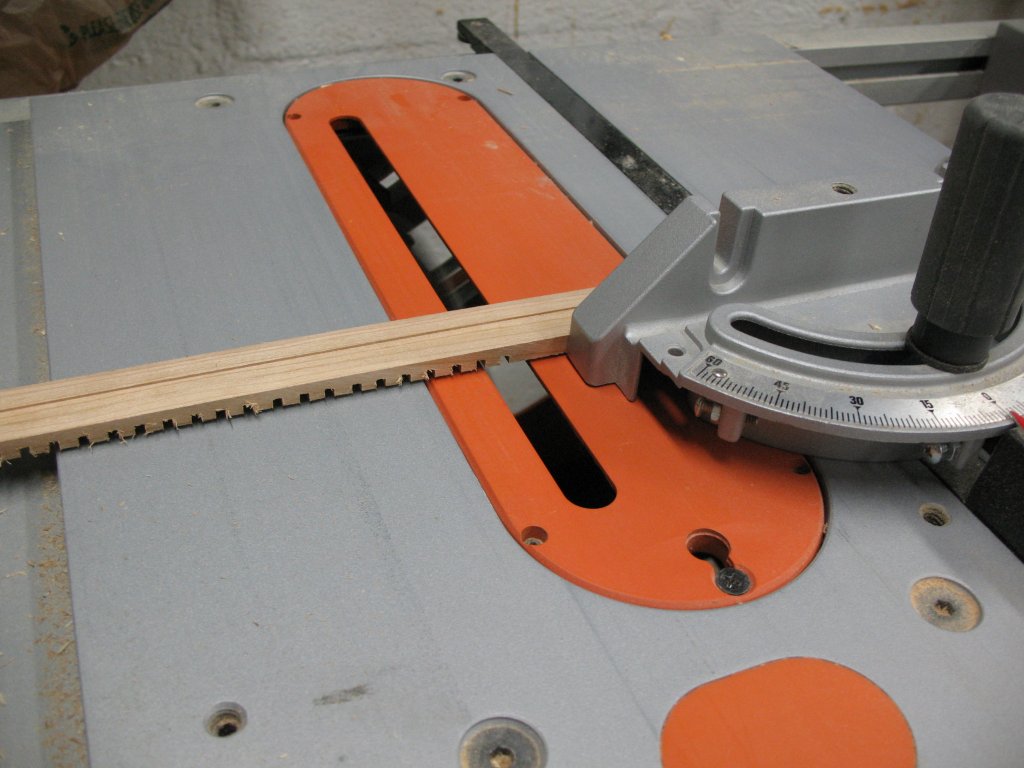
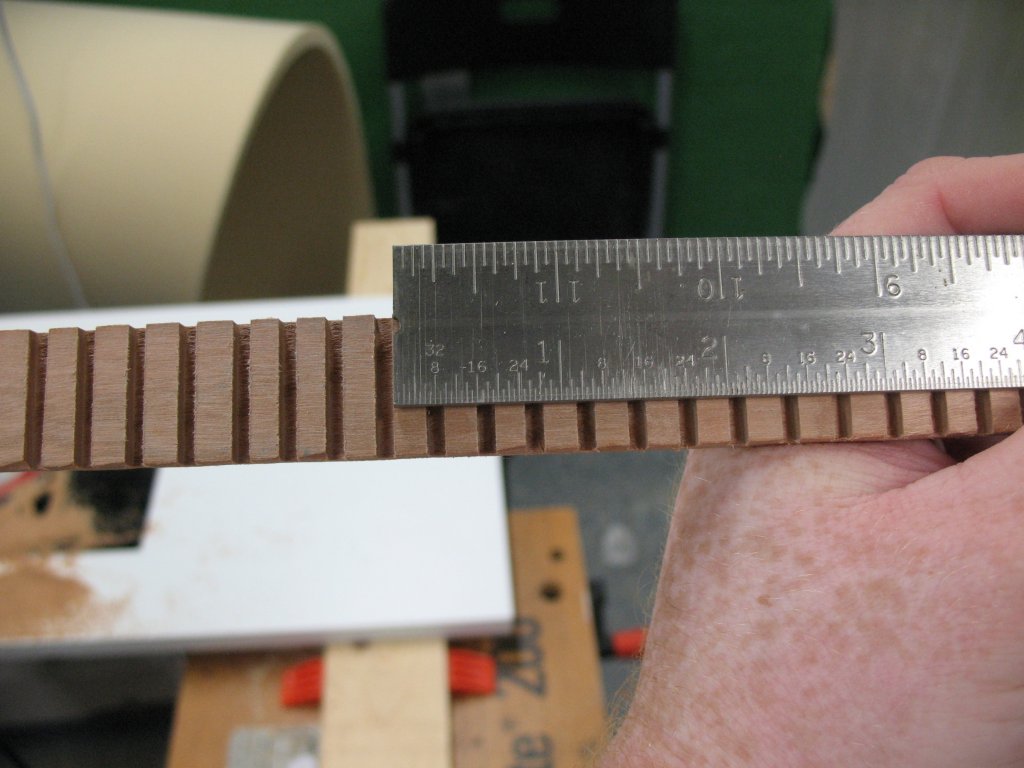
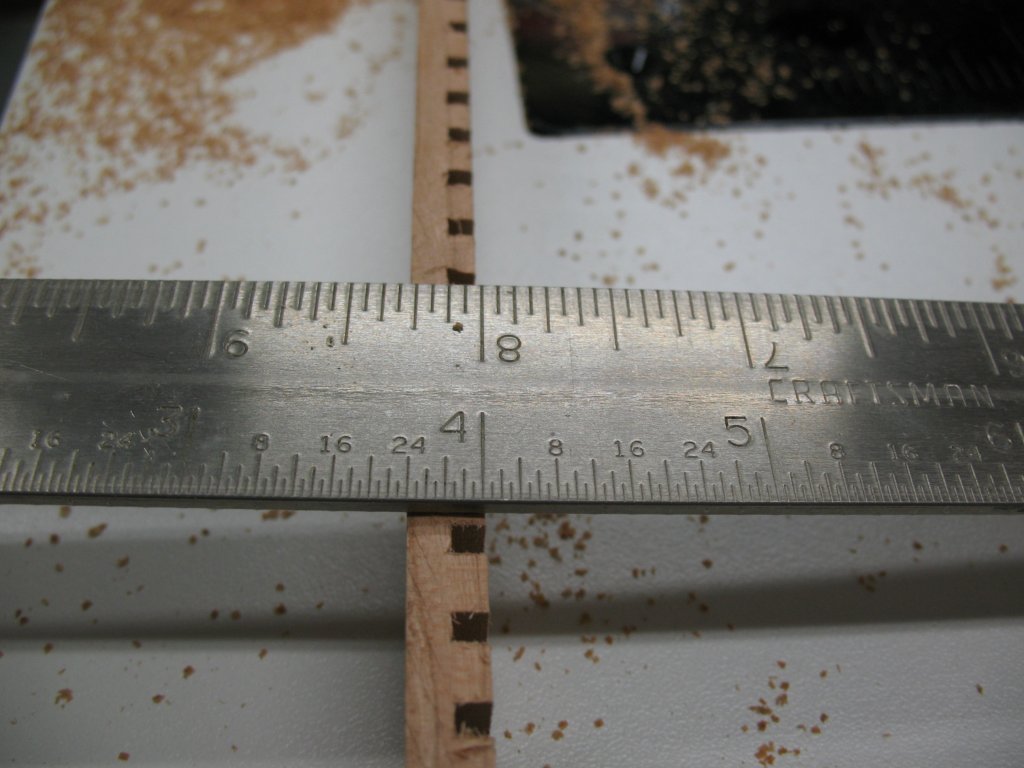
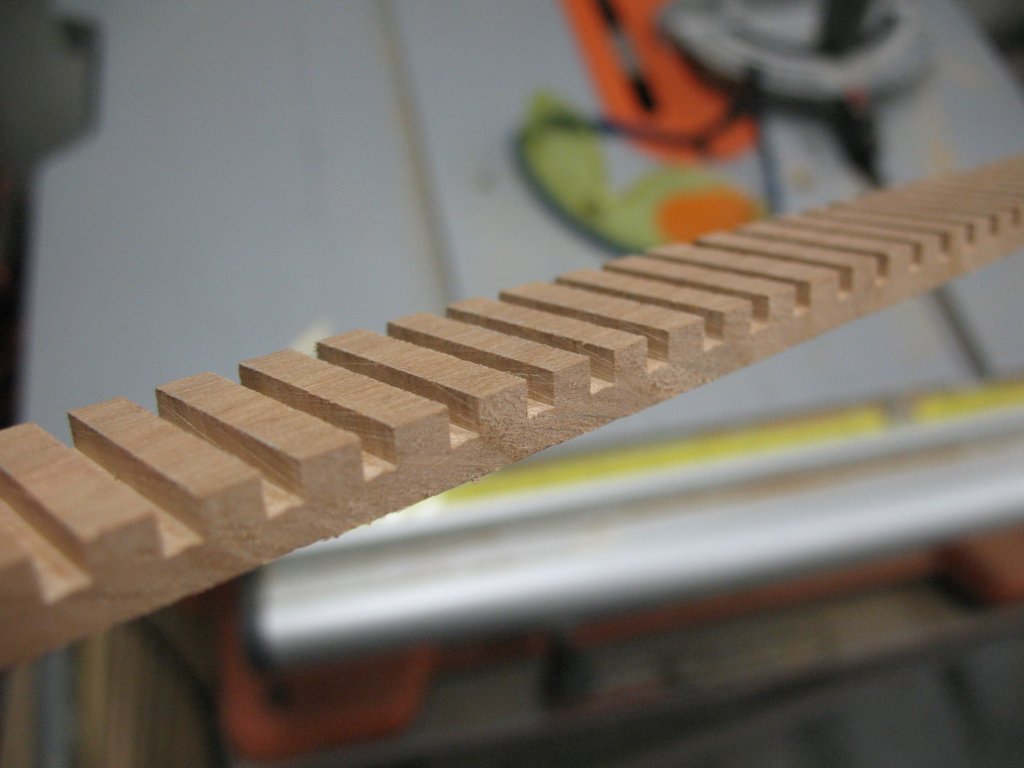
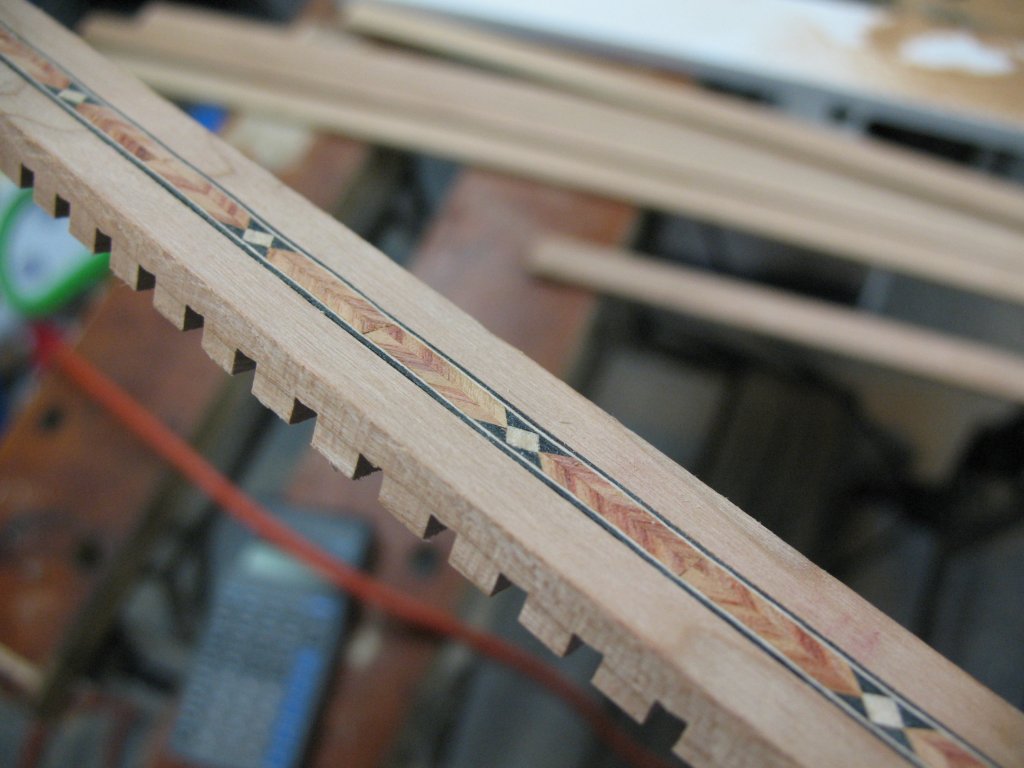
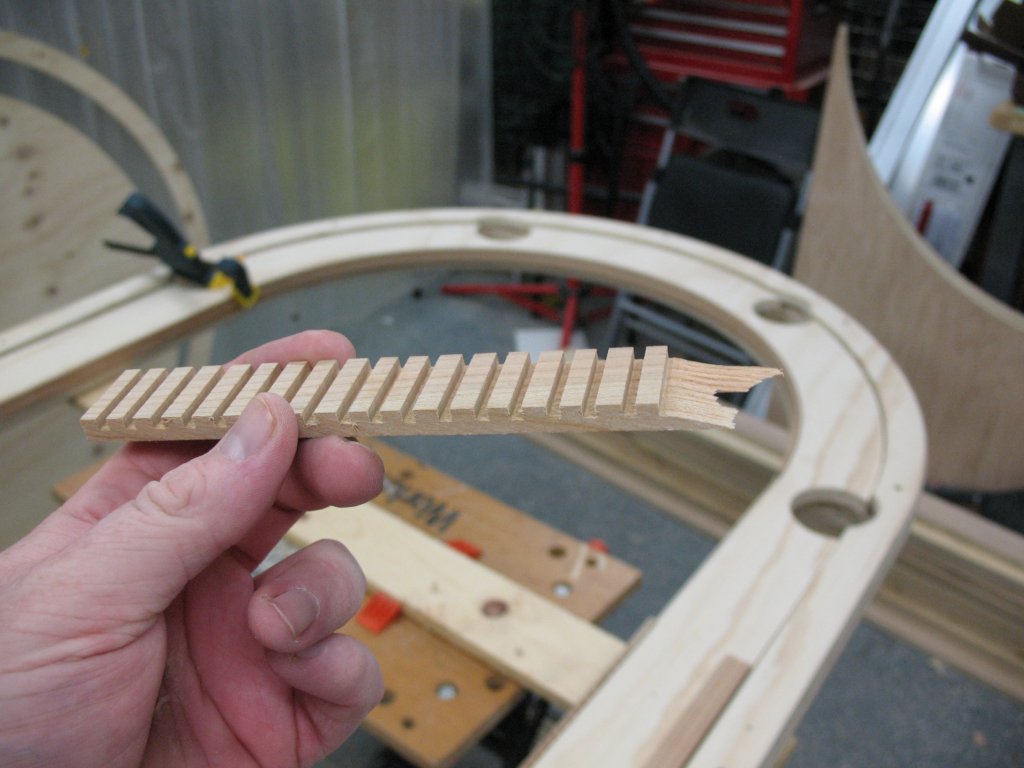
These trim pieces get glued to the side of the plywood riser. The straightaway pieces are easy enough, but the curved portions need some extra work. I used a kerf cutting technique with my table saw on the back of the trim pieces in order to bend them around the inner radius of the riser. I cut the kerfs a little over 1/4" apart, and about halfway through the trim piece (~1/8"):
This spacing/depth worked OK - I was able to easily install a 4' long piece along one of the arcs, but the second did snap as I was placing it (I almost got there... always buy some extras!):
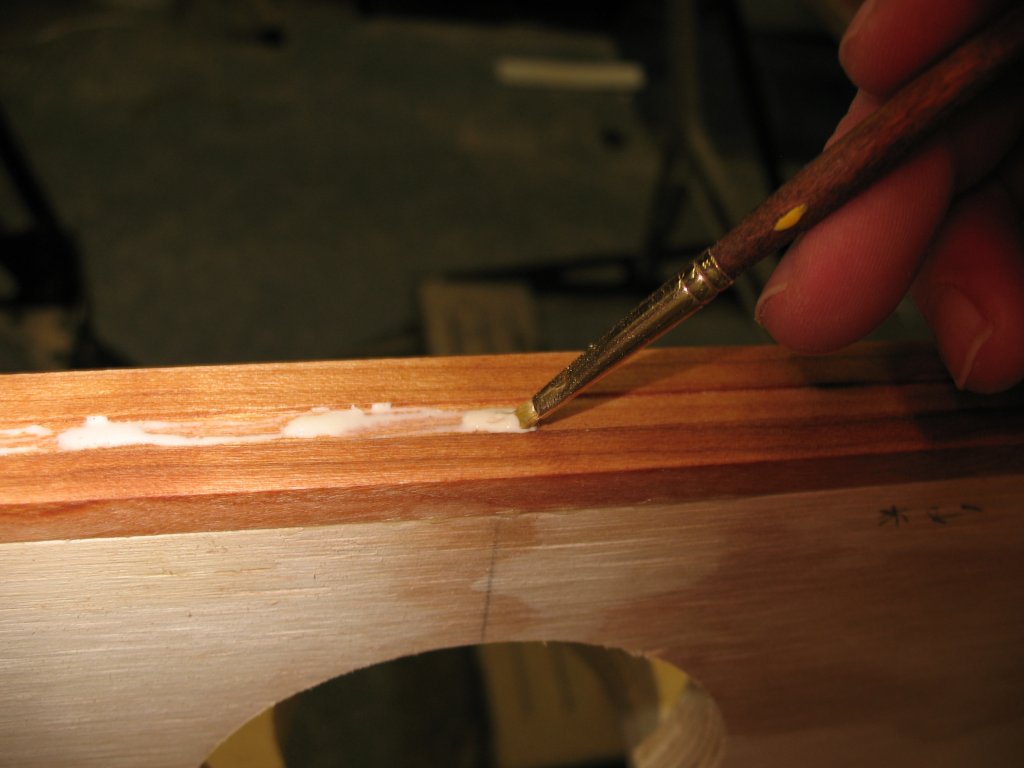
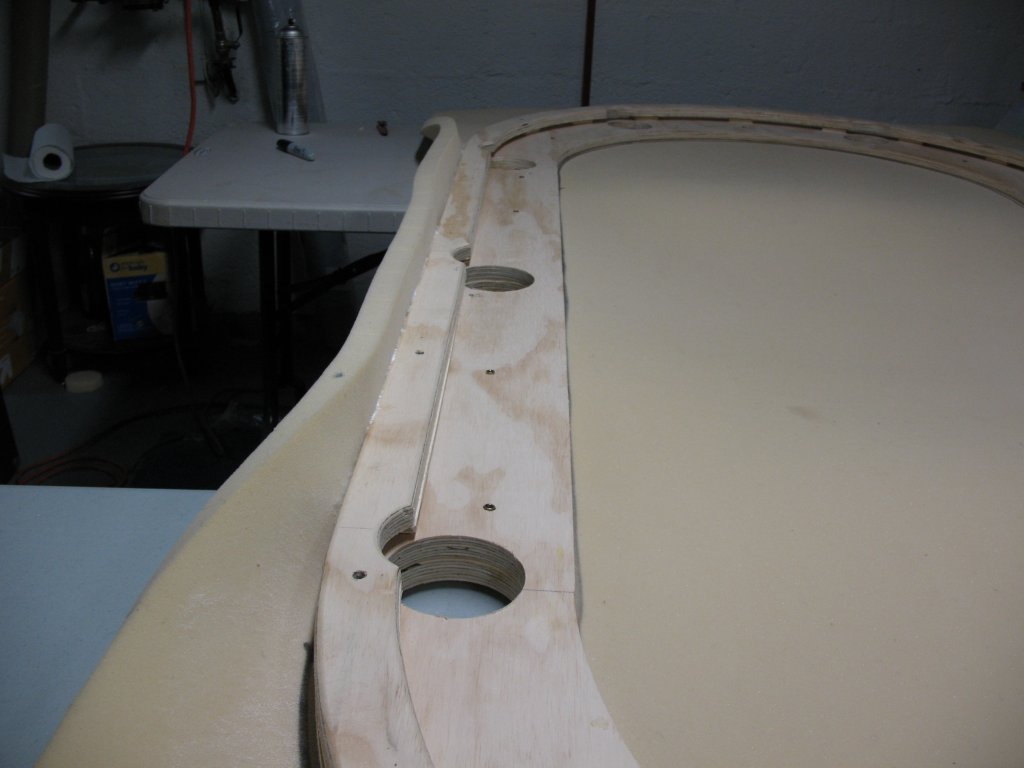
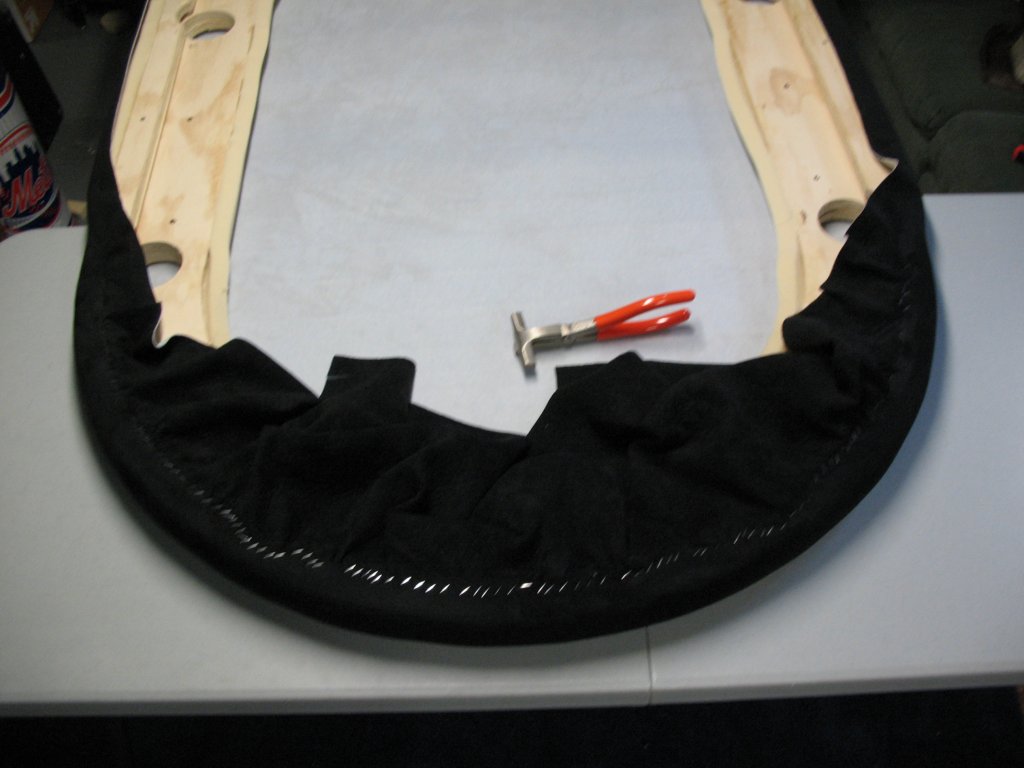
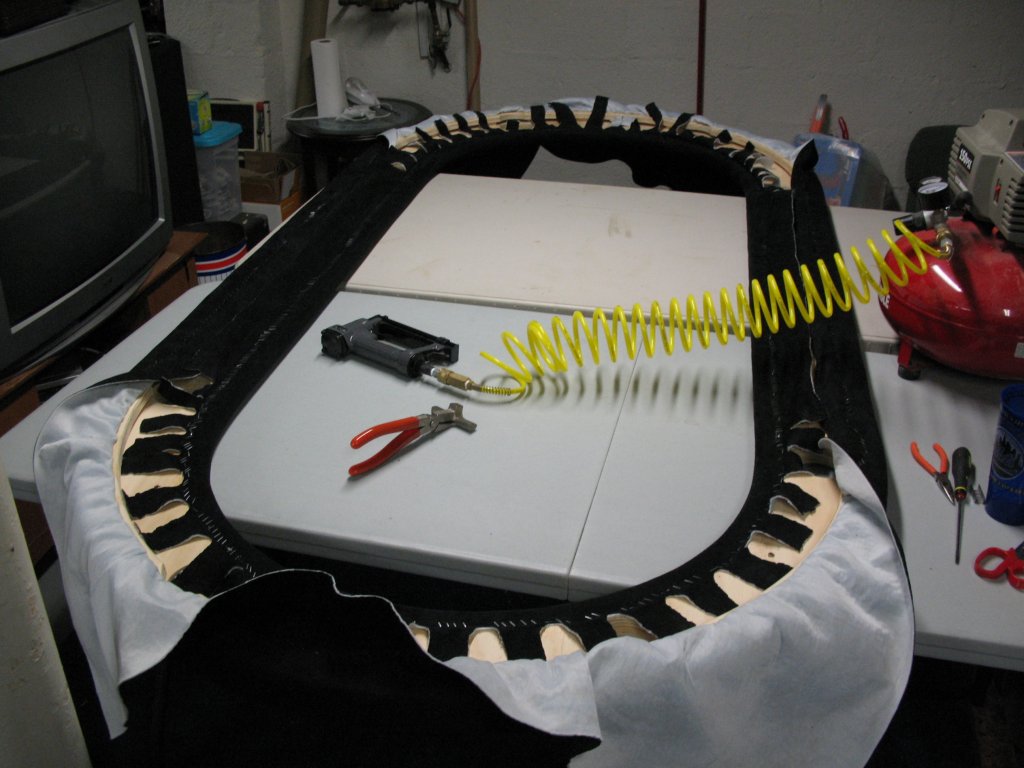
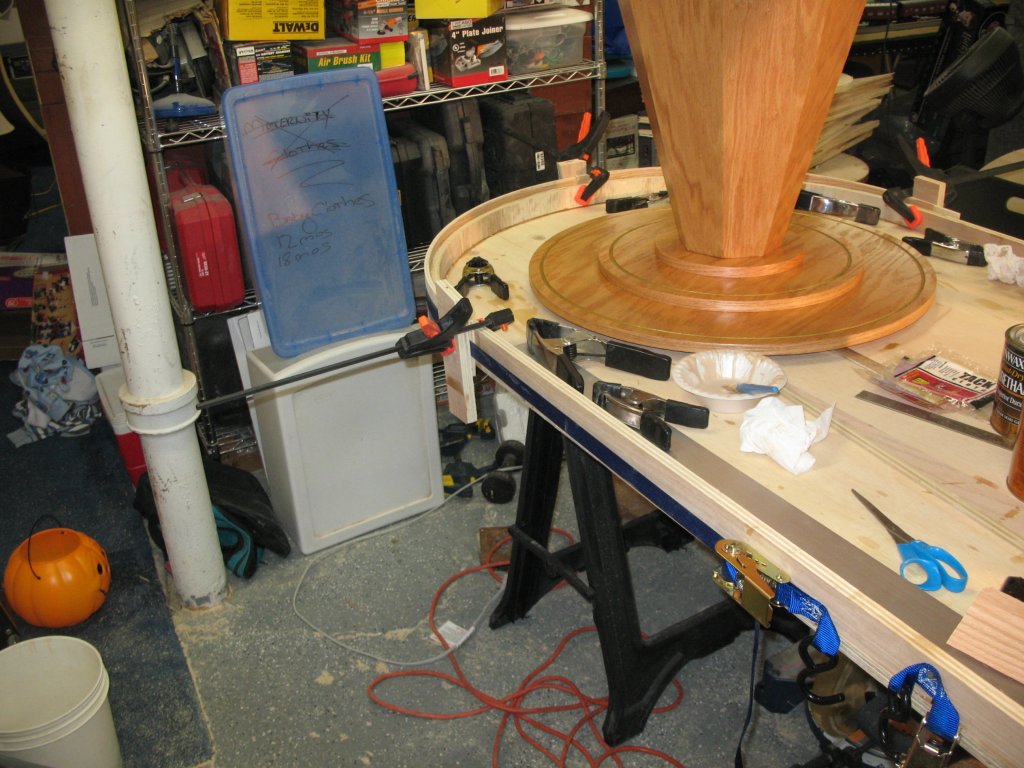
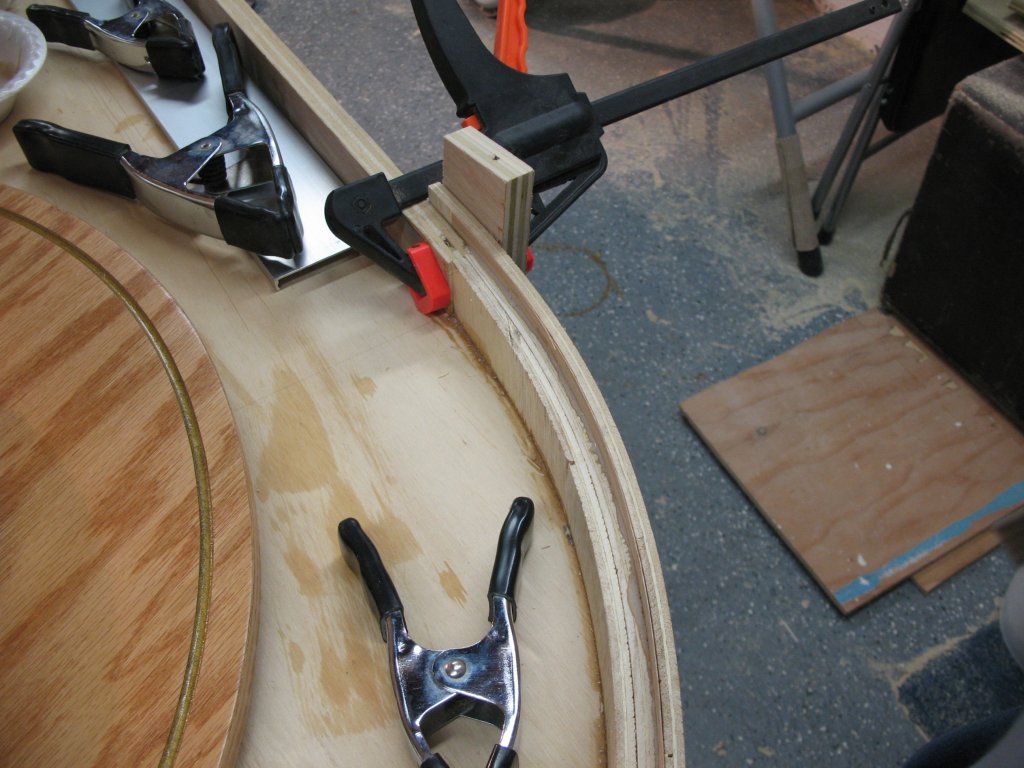
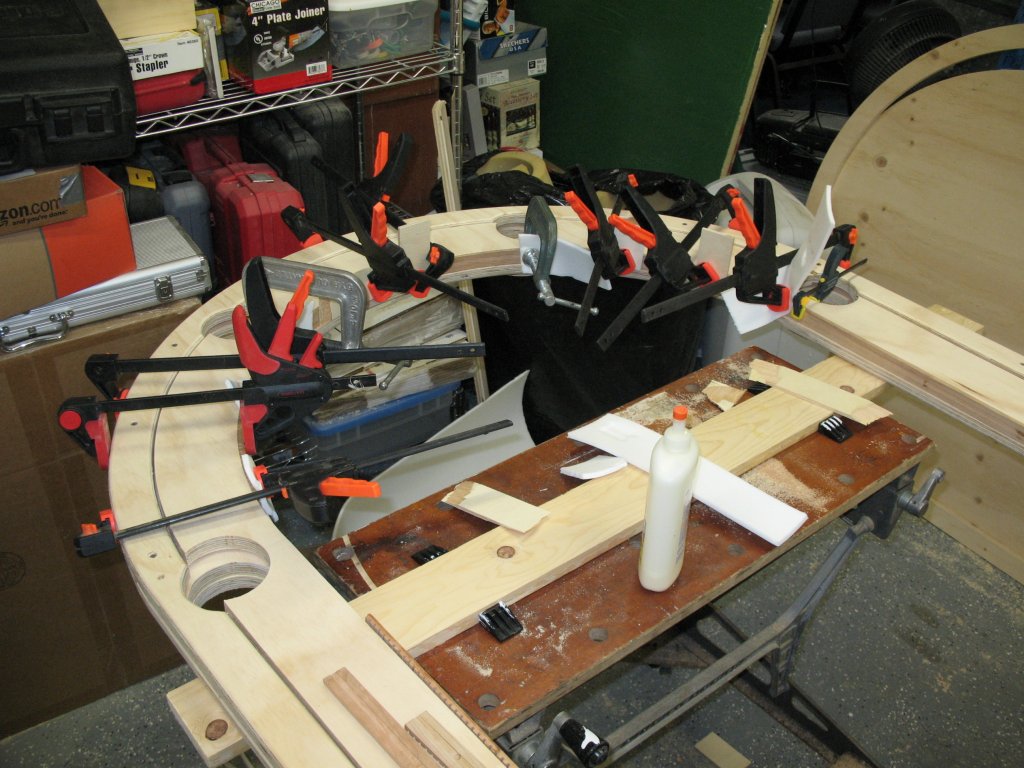
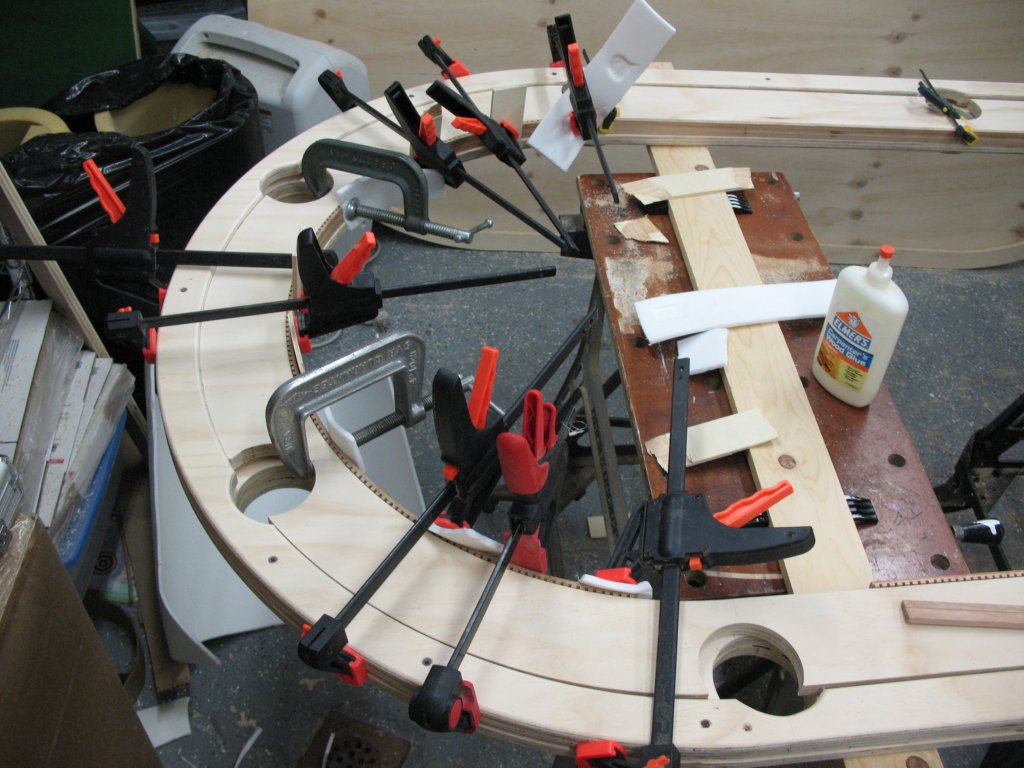
Next, I applied some wood glue on the edge of the plywood riser and secured the trim with a whole bunch of clamps, one arc at a time. The straightaway portions were done in similar fashion:
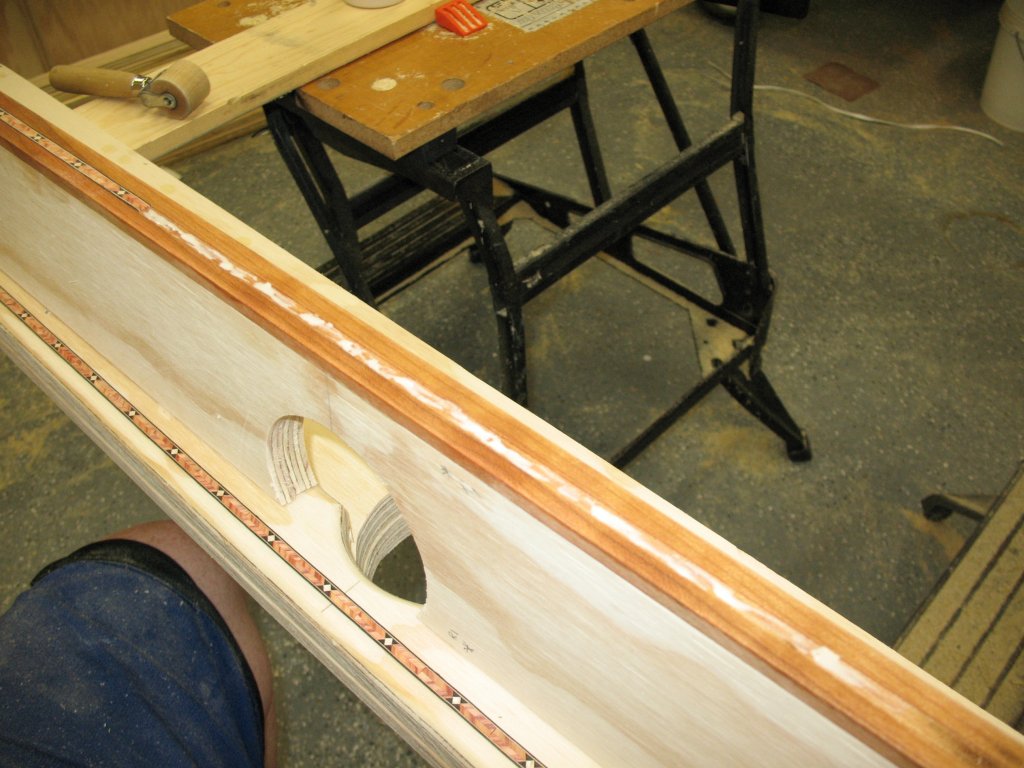
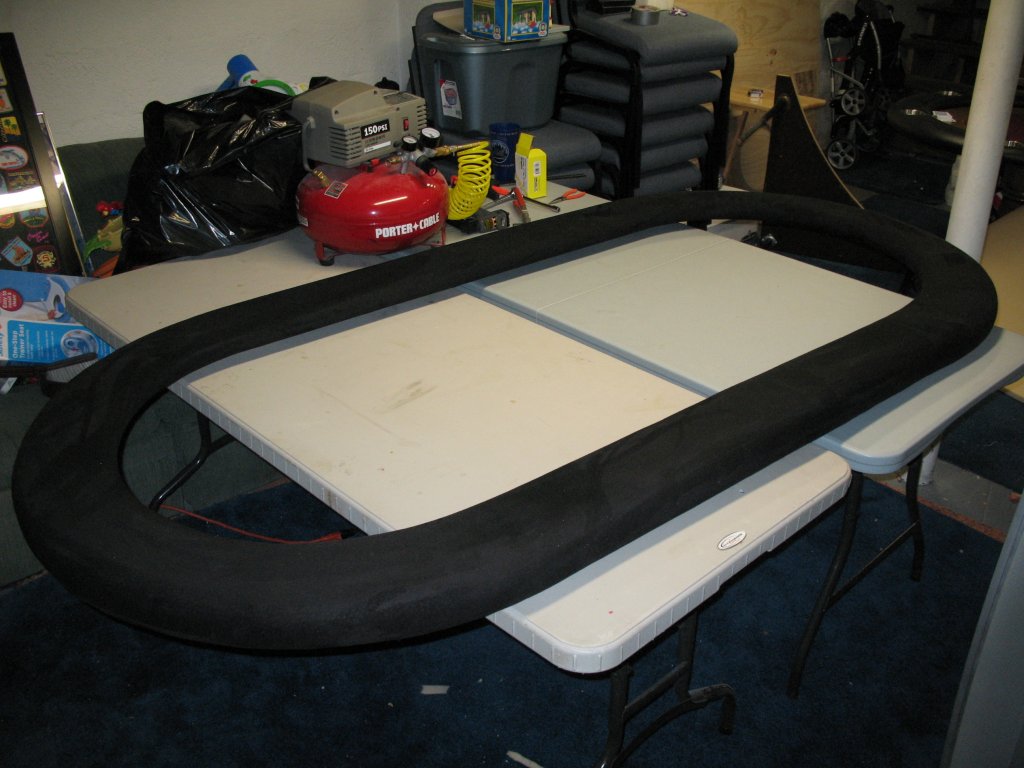
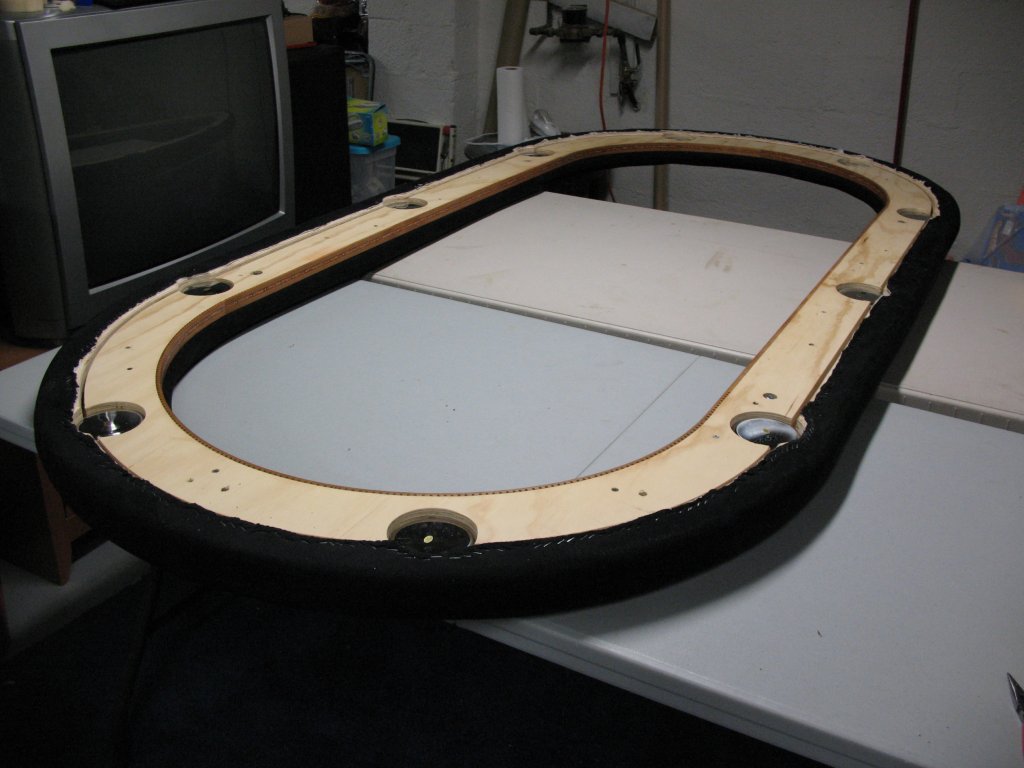
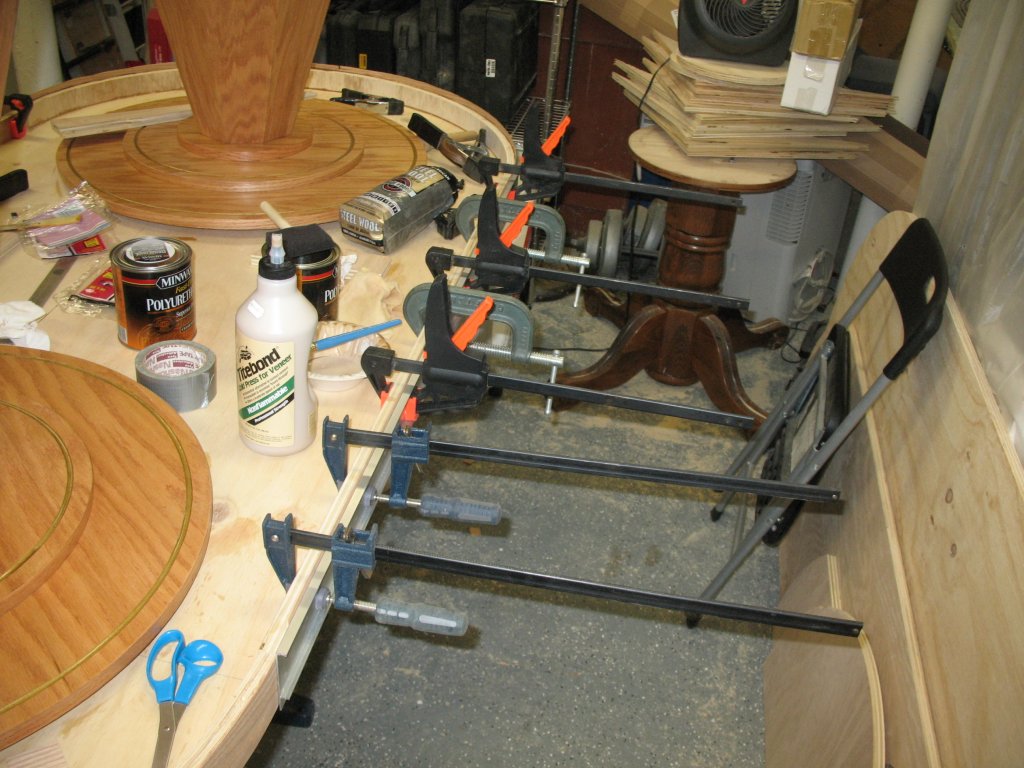
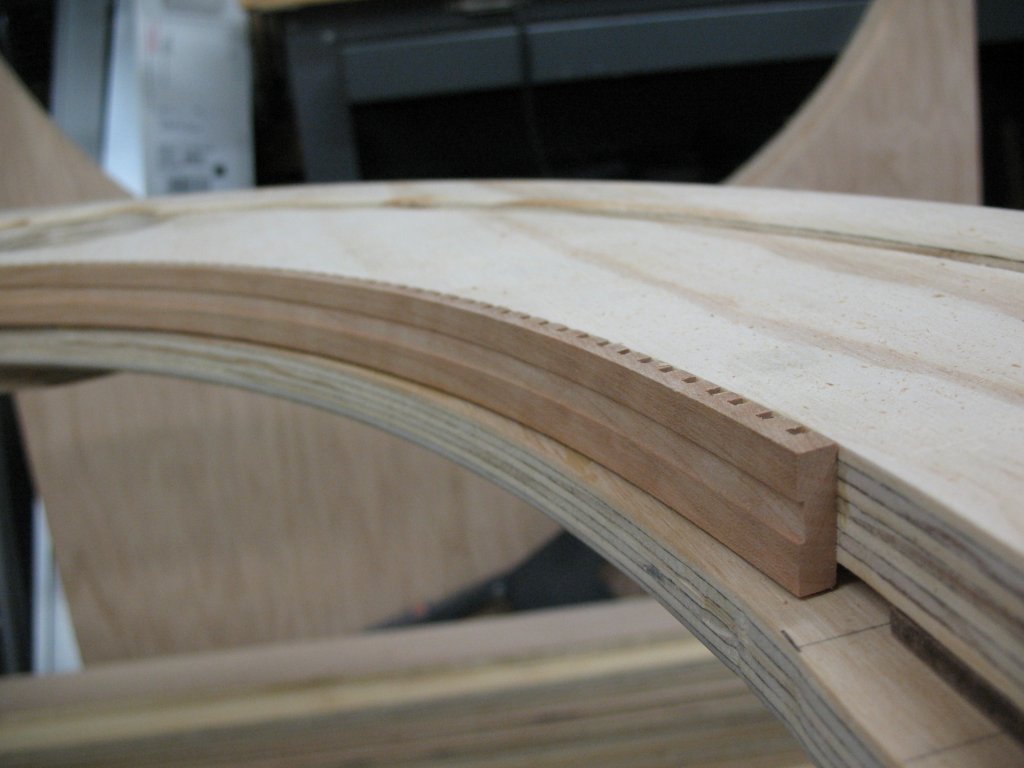
And here are some shots after the glue dried and clamps were removed:
x
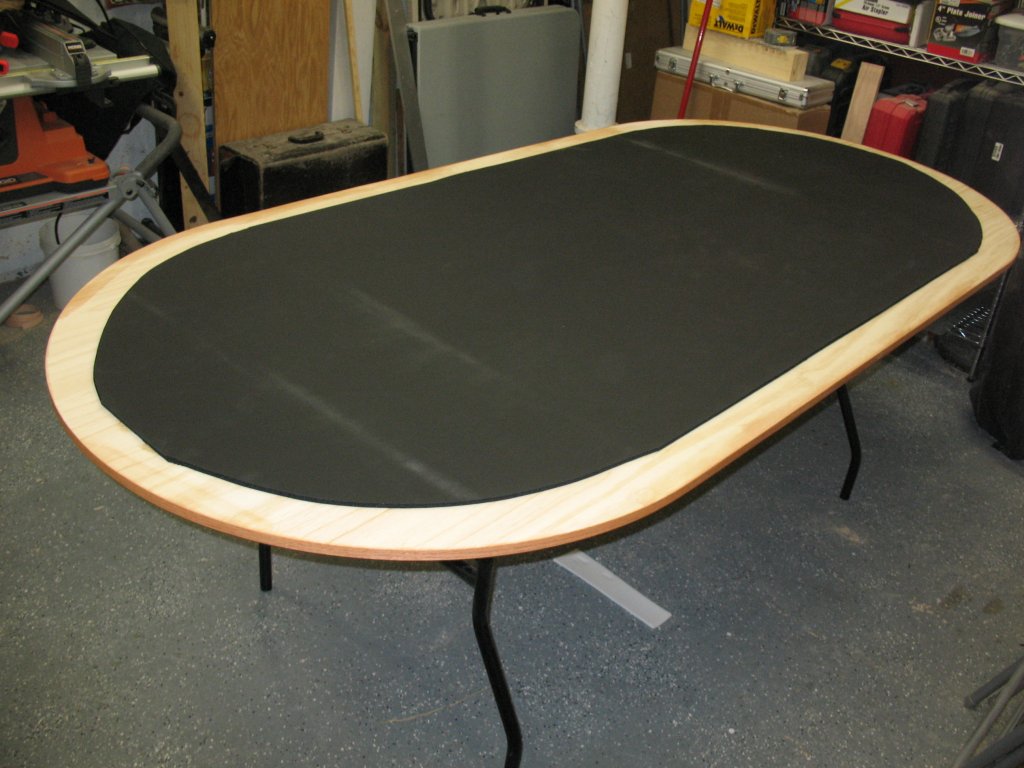
Here's what the table looks like today:
Time to turn back the clock to 2010........
This table build started somewhat on a whim. I had a potential table customer stop by to check out my work and chat about the details for his upcoming build, and he ended up making me an offer on my personal table. Well, in true degenerate fashion, he first tried to talk me into doing a $1000 flip for the table, but I declined on that one.
I had the itch to build myself a new table, so I took him up on the offer, sold that one and started on the new build the next weekend.Here are the table specs:
- 92"x44" 10 man full felt oval
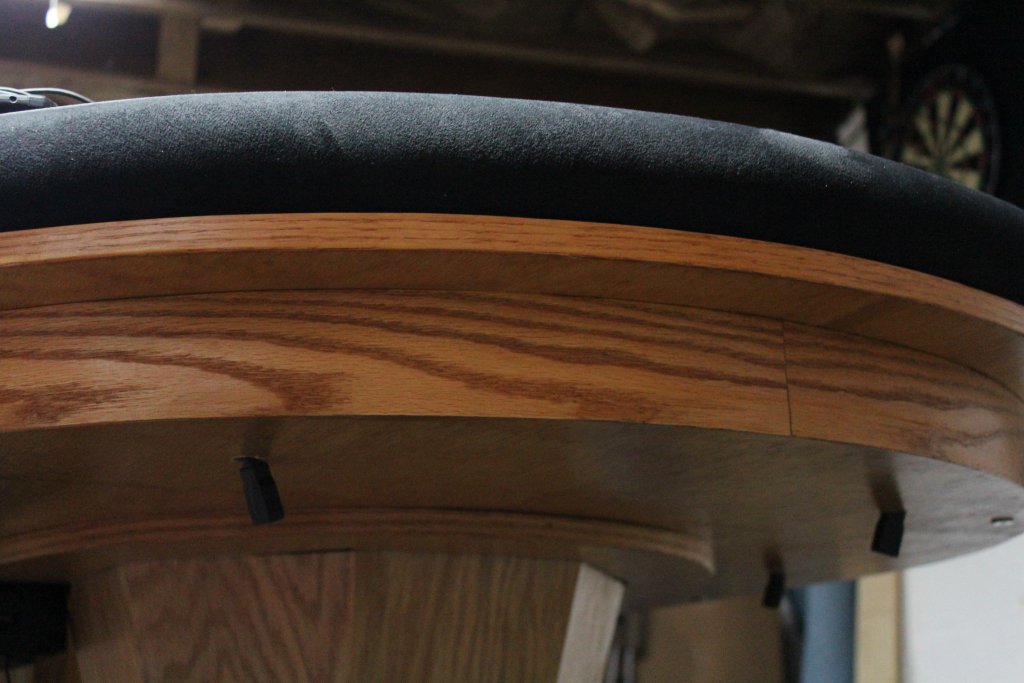
- 6" wide rail with high density foam & padded suede (recently upgraded to Texuede)
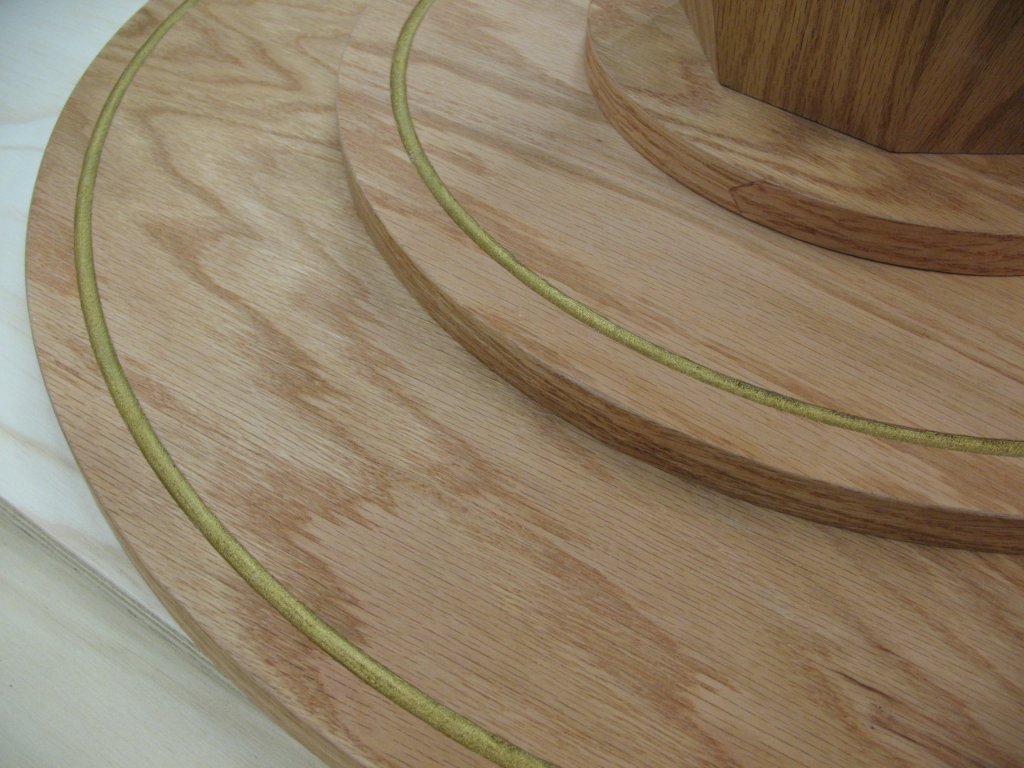
- 7/8" tall raised rail, solid cherry riser with decorative inlay
- Jumbo cup holders build into the rail
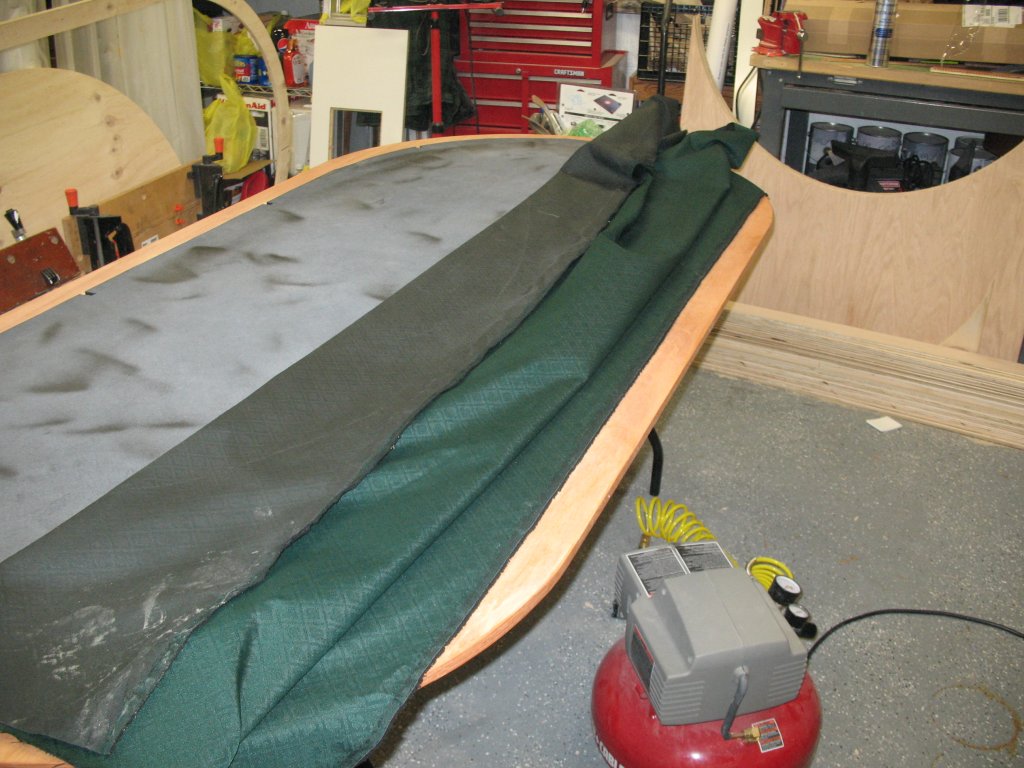
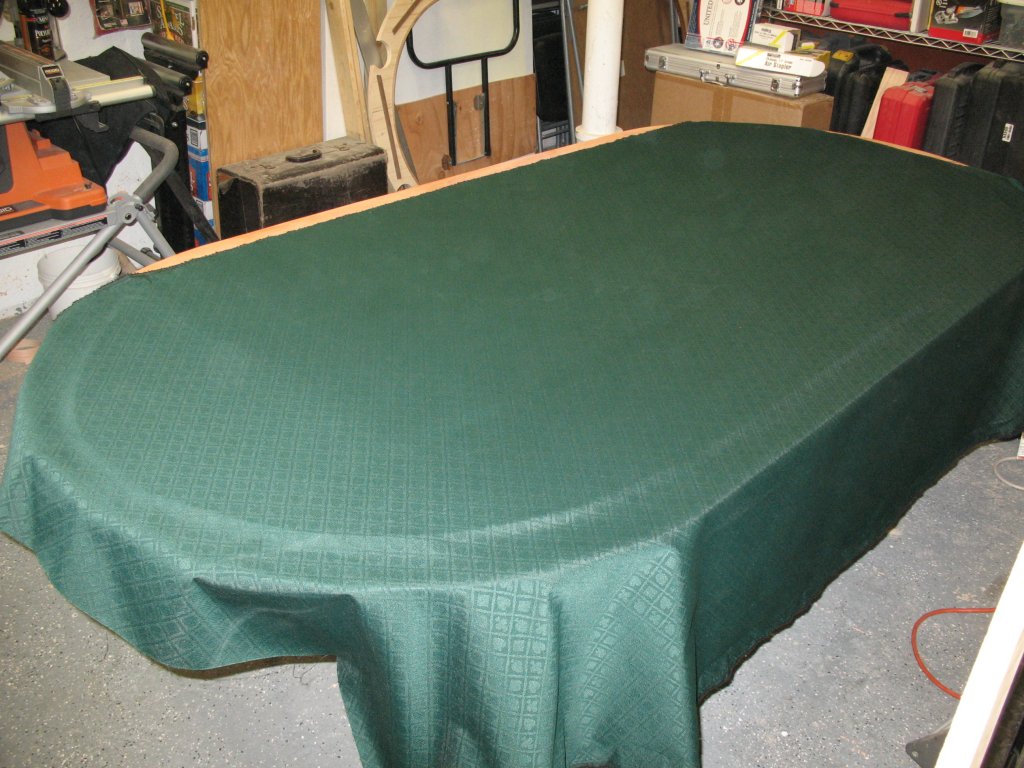
- Playing surface padded with ensolite and covered with suited speed cloth (later upgraded to a custom cloth)
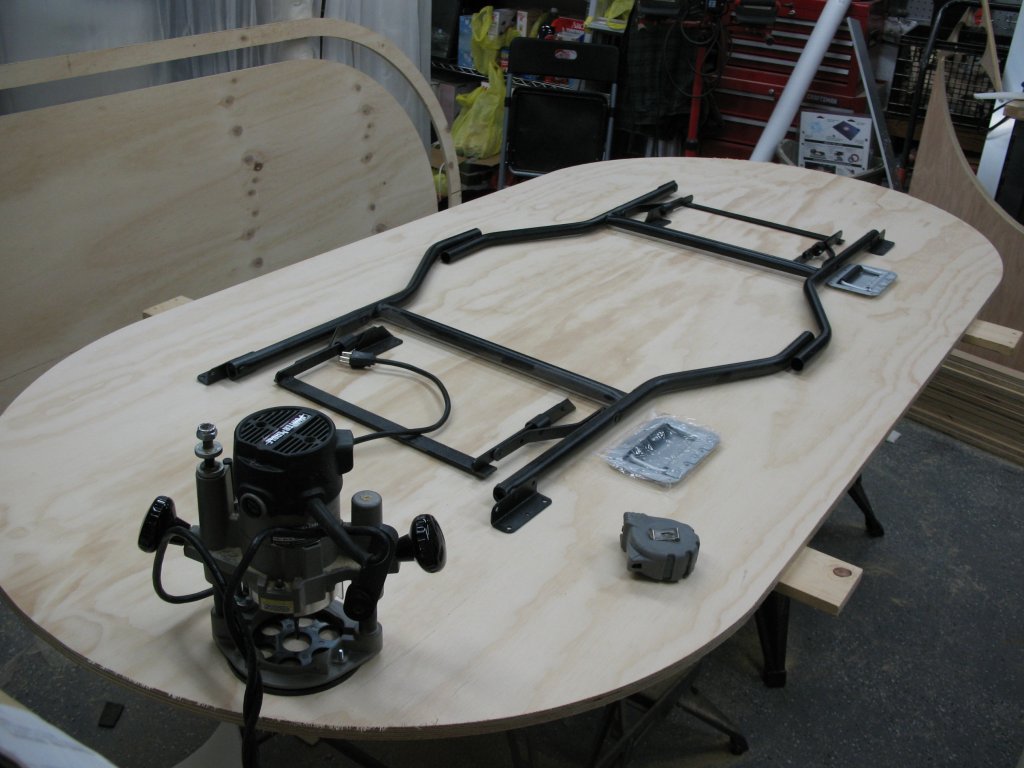
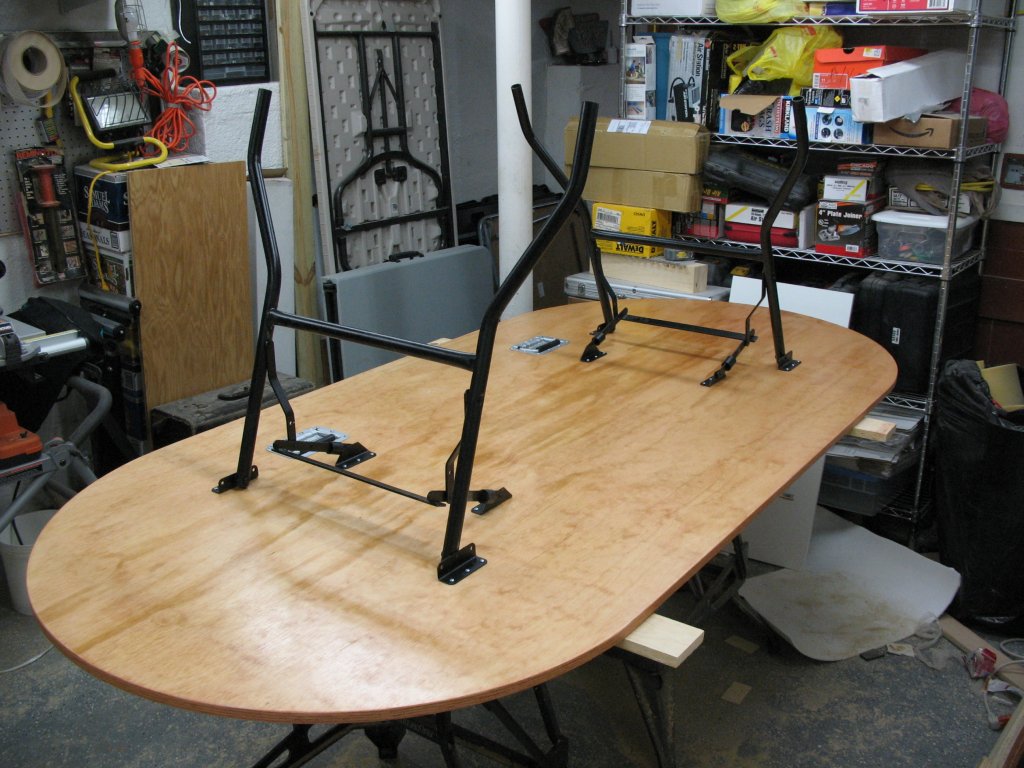
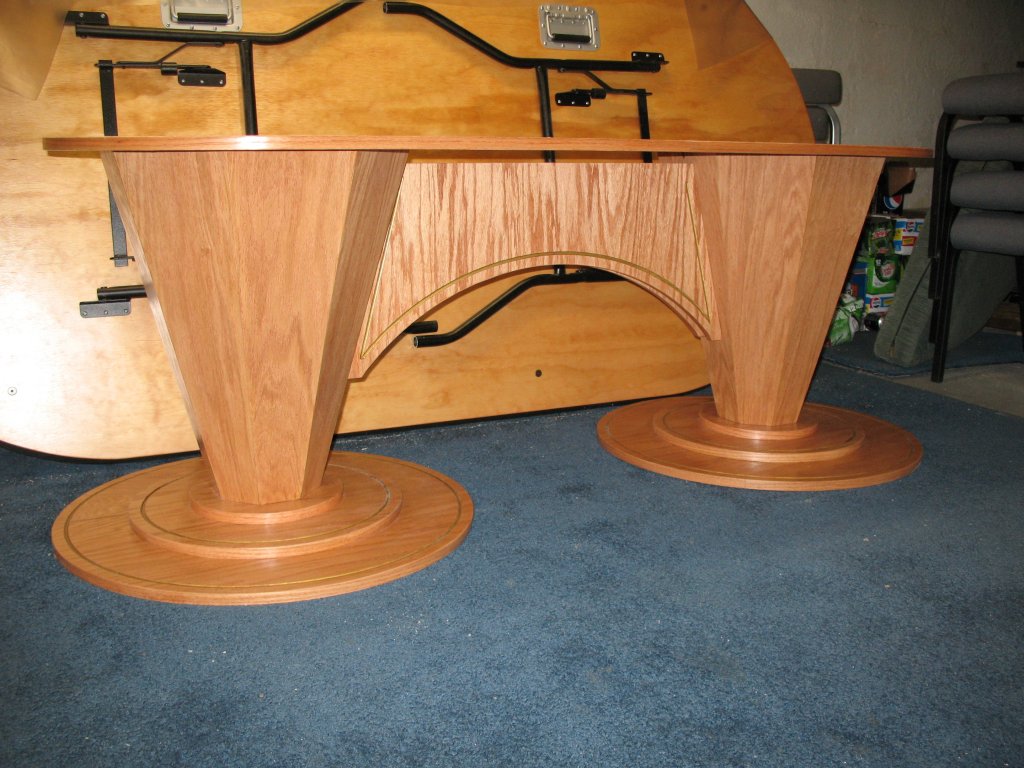
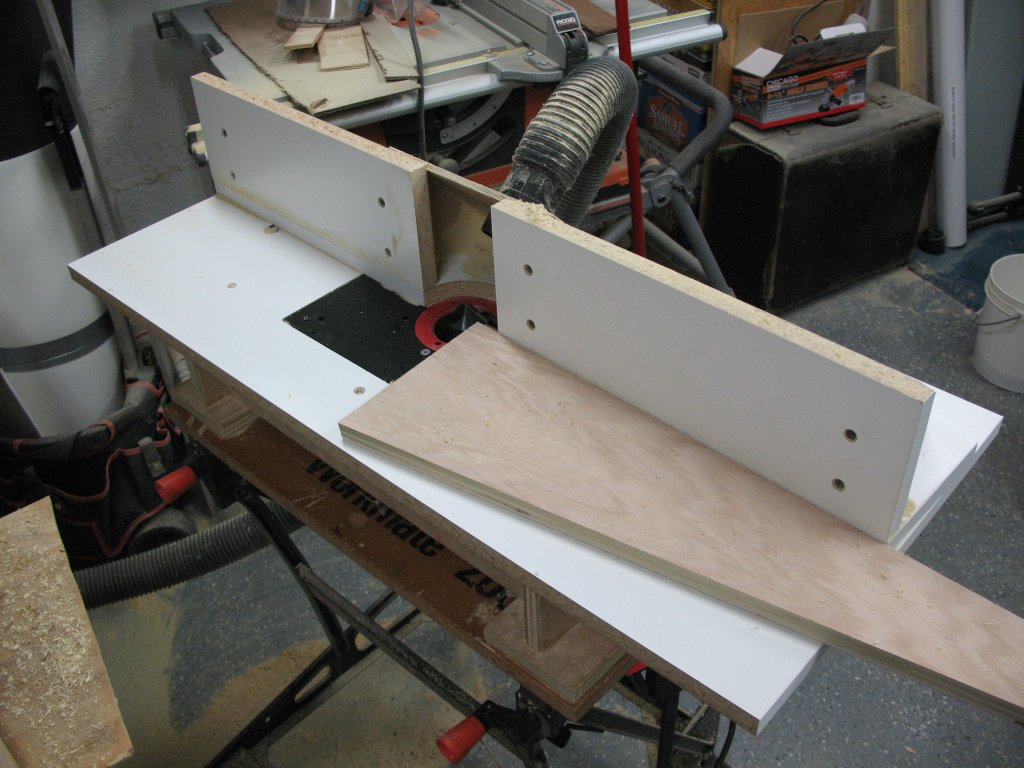
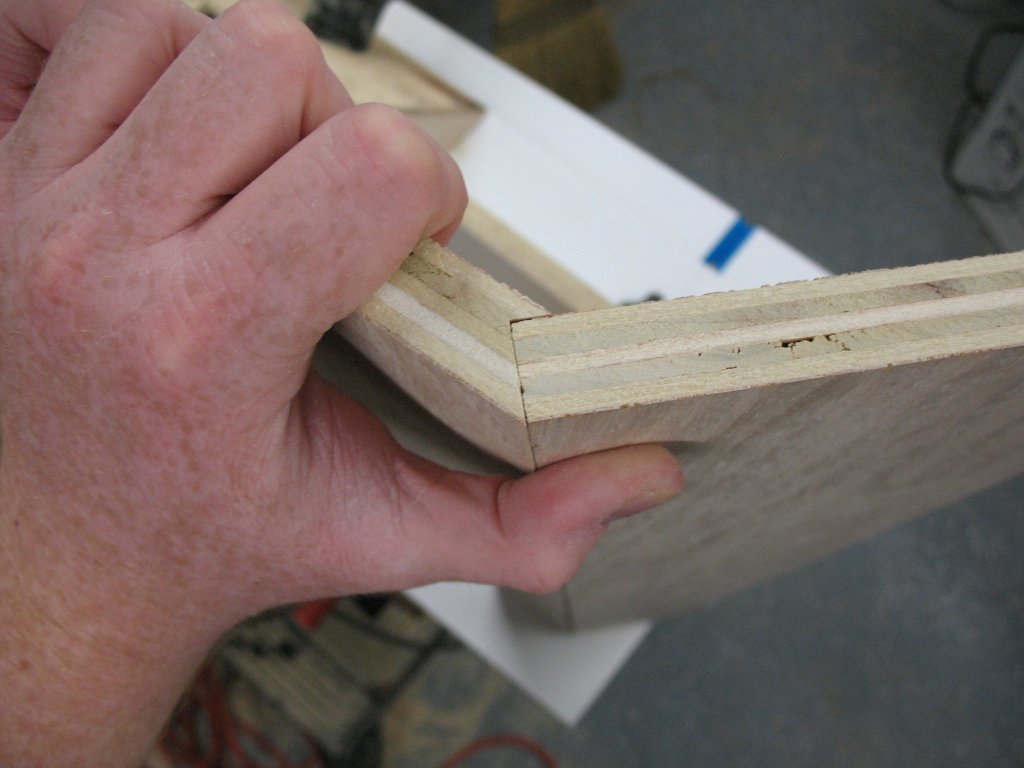
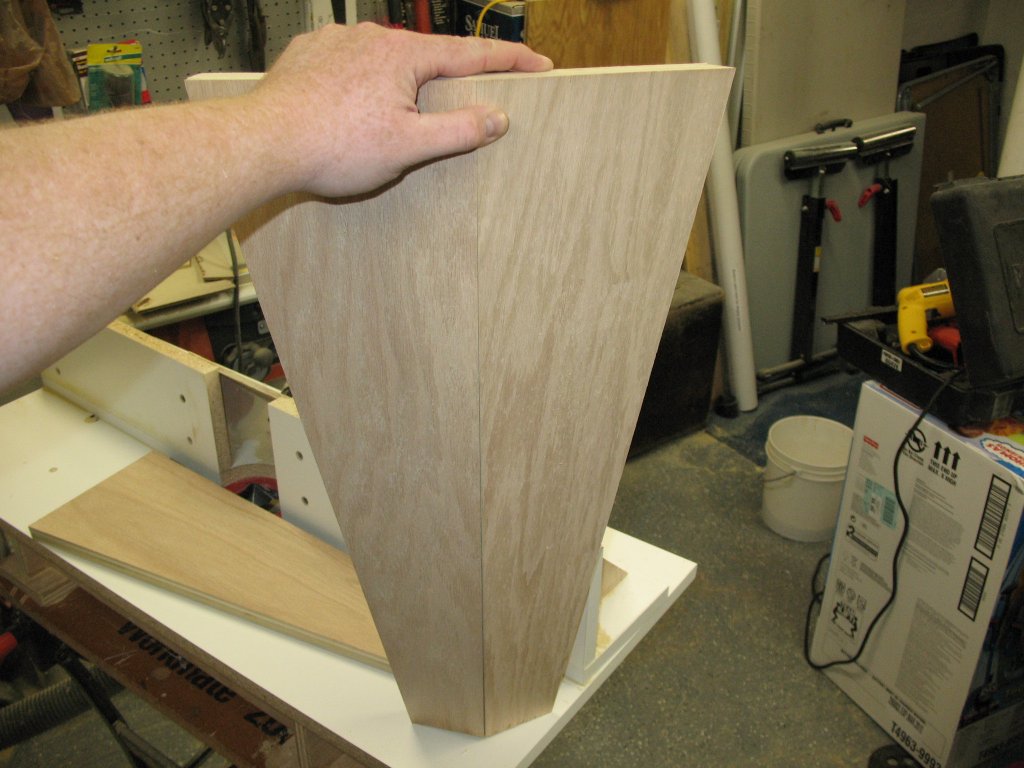
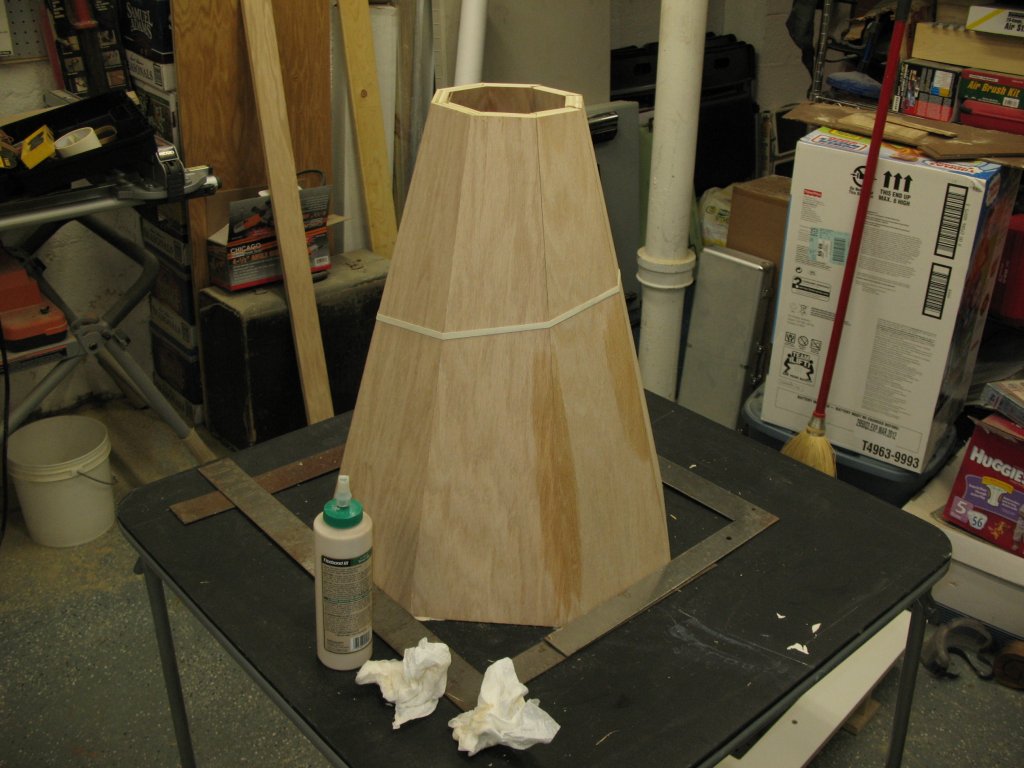
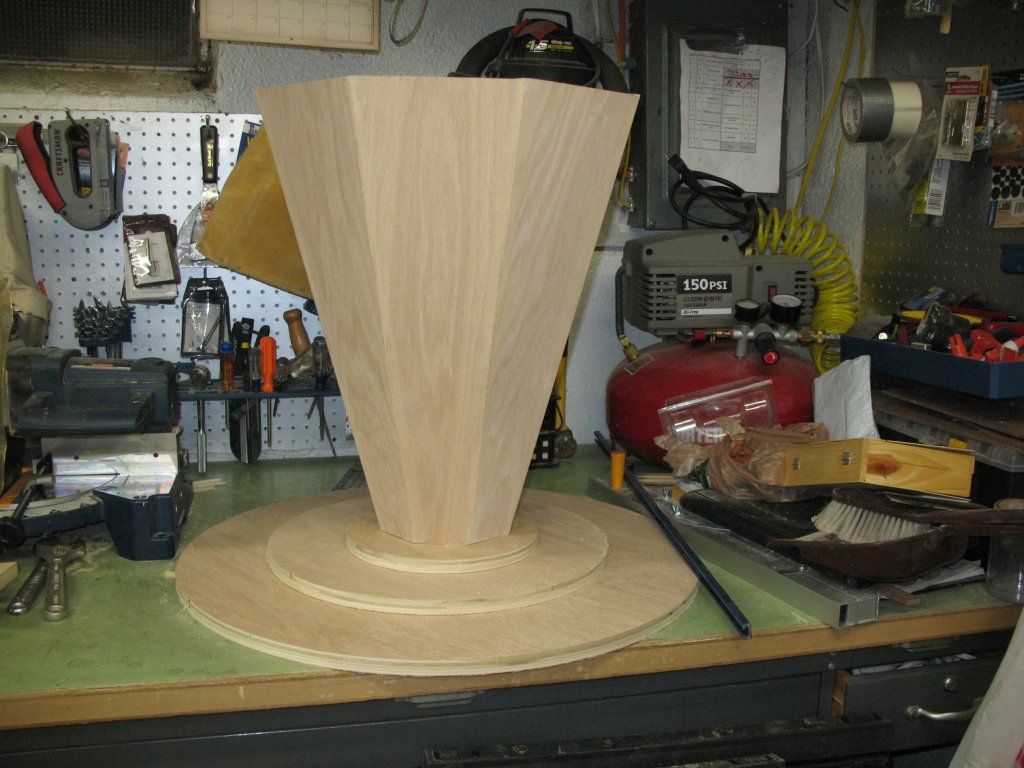
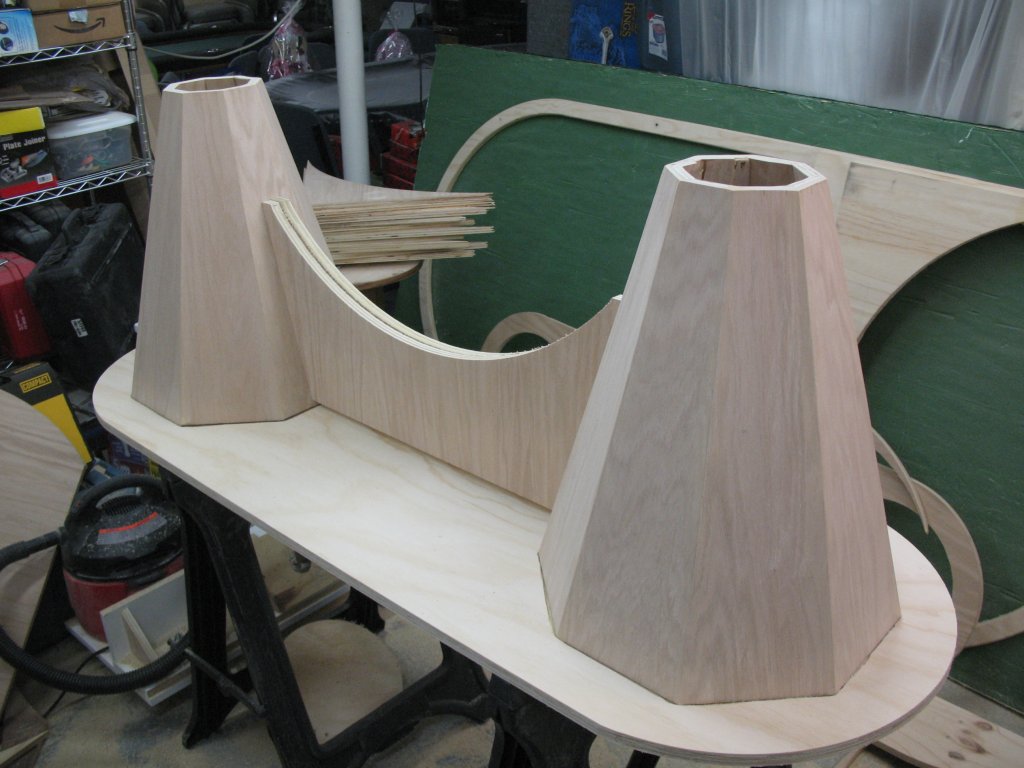
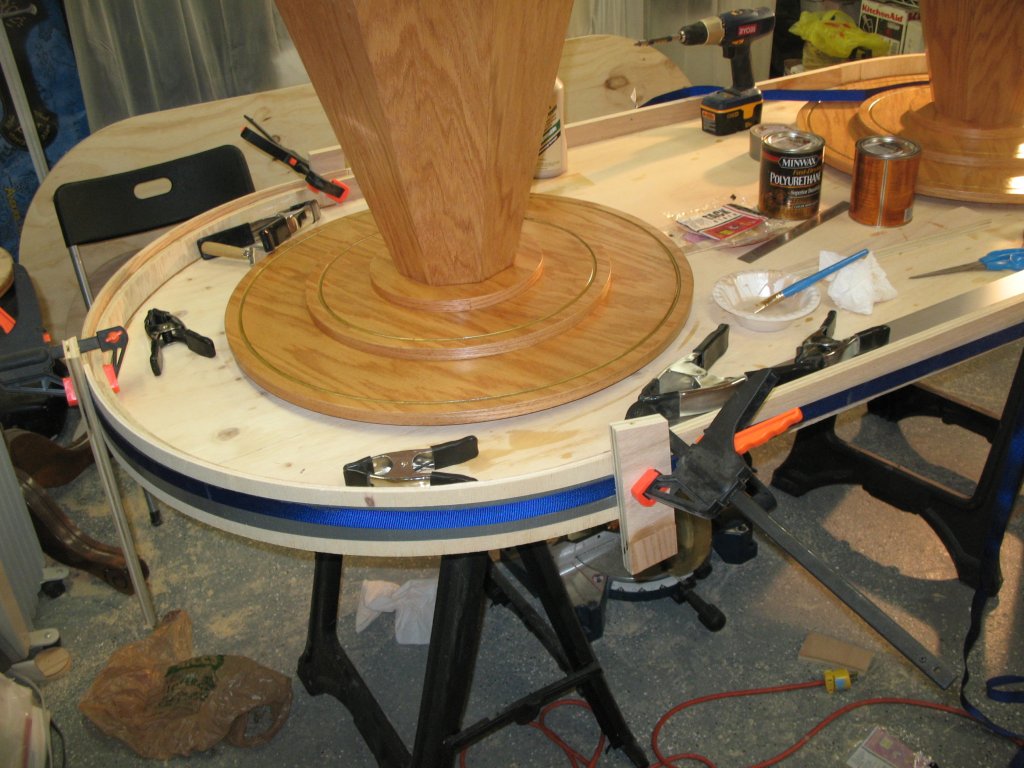
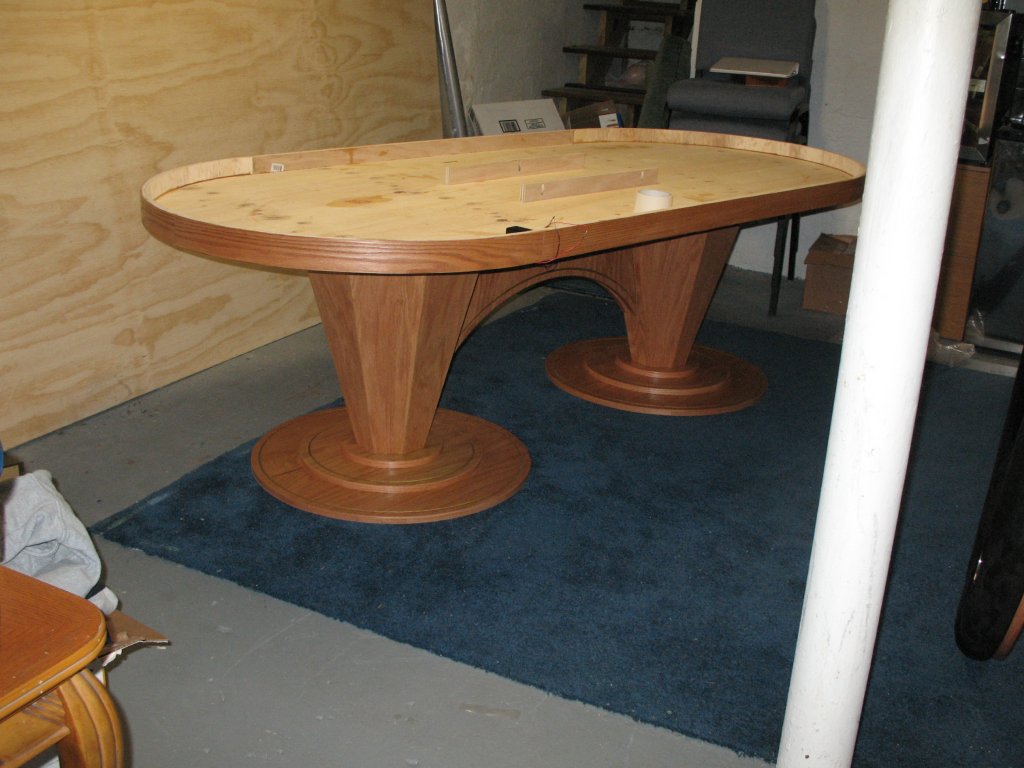
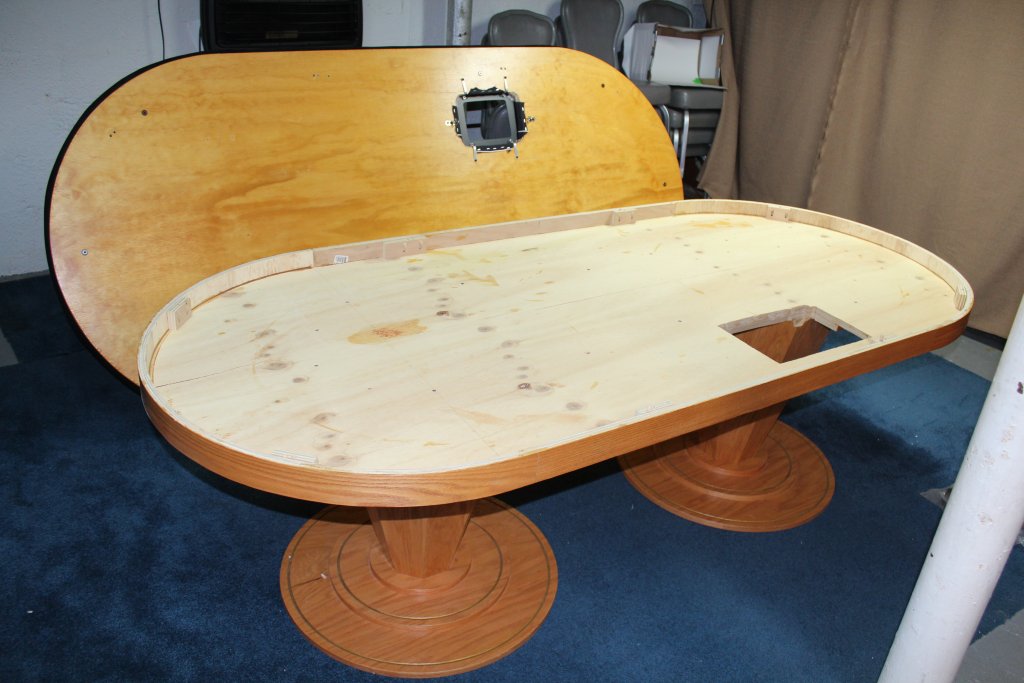
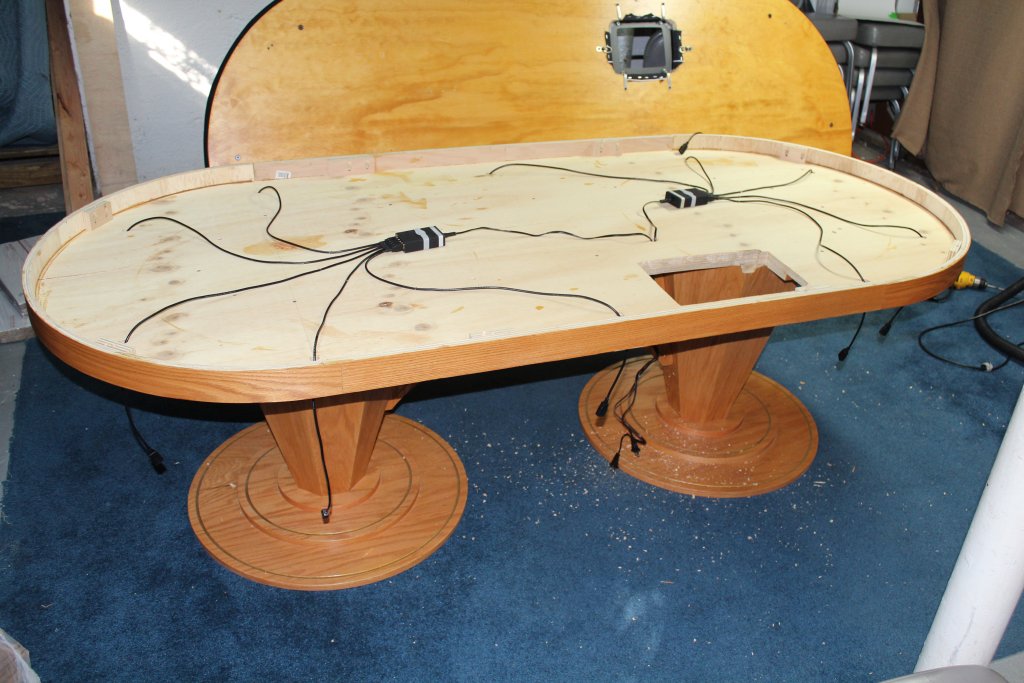
- Custom inverted octagonal pyramid base
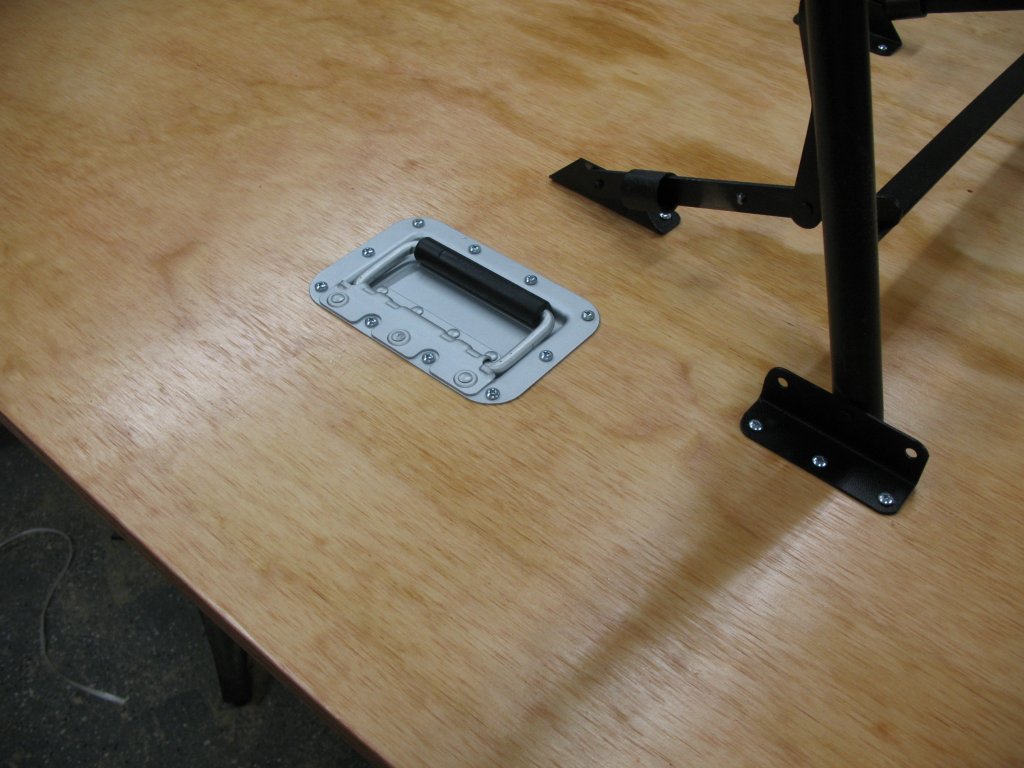
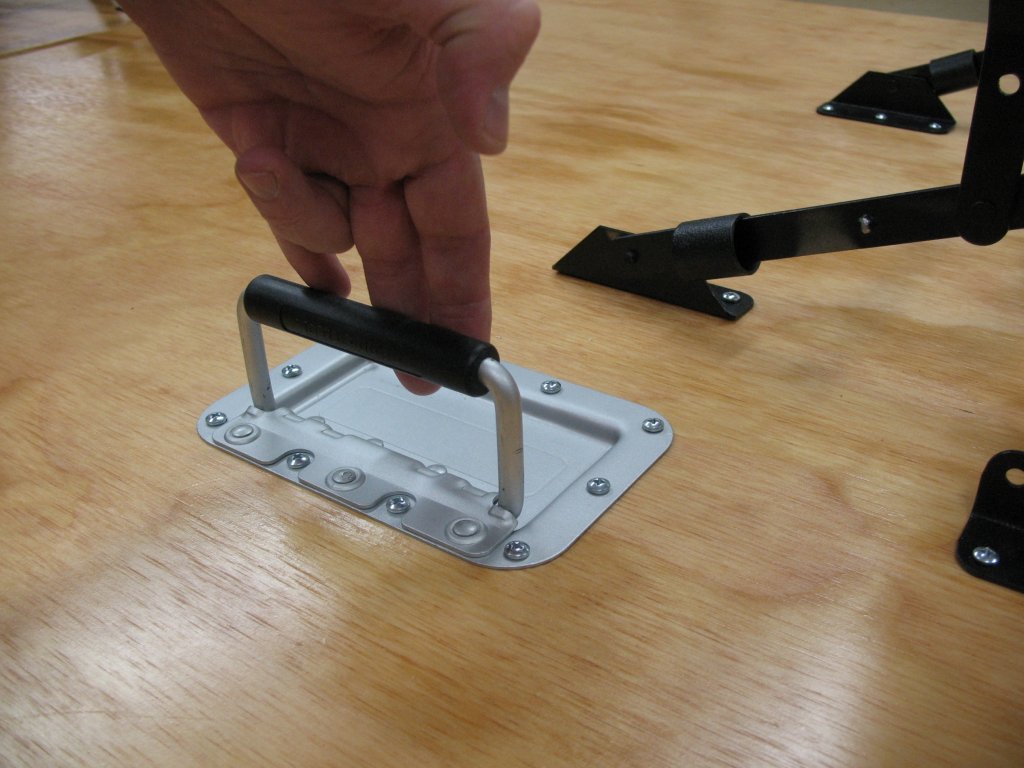
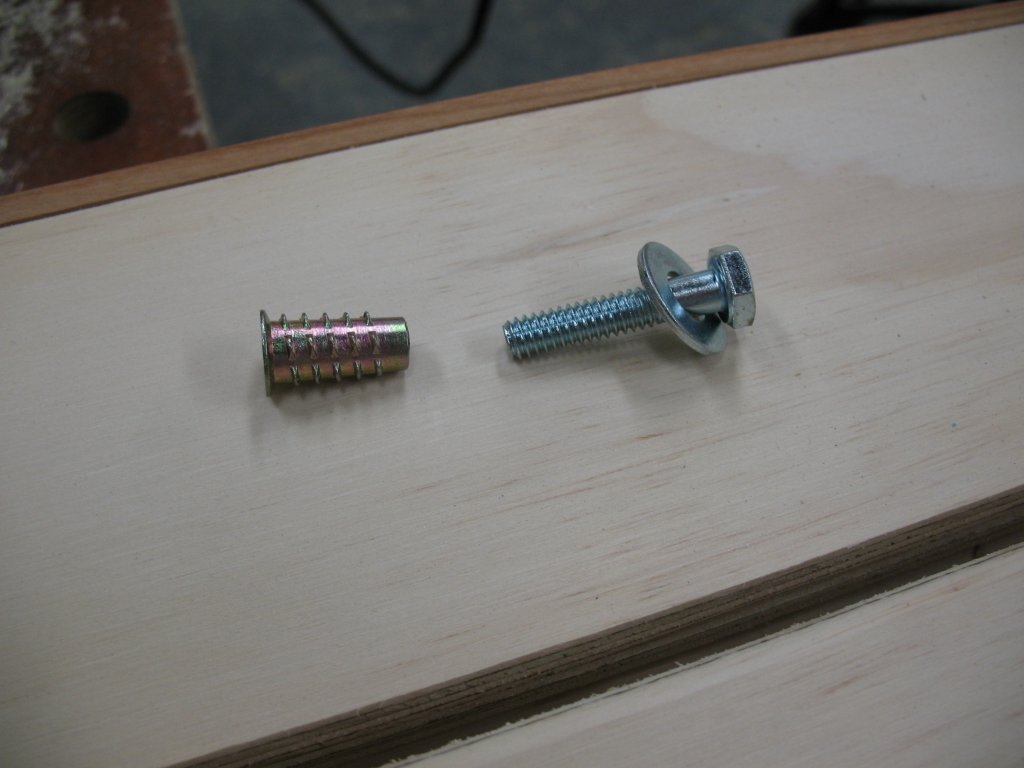
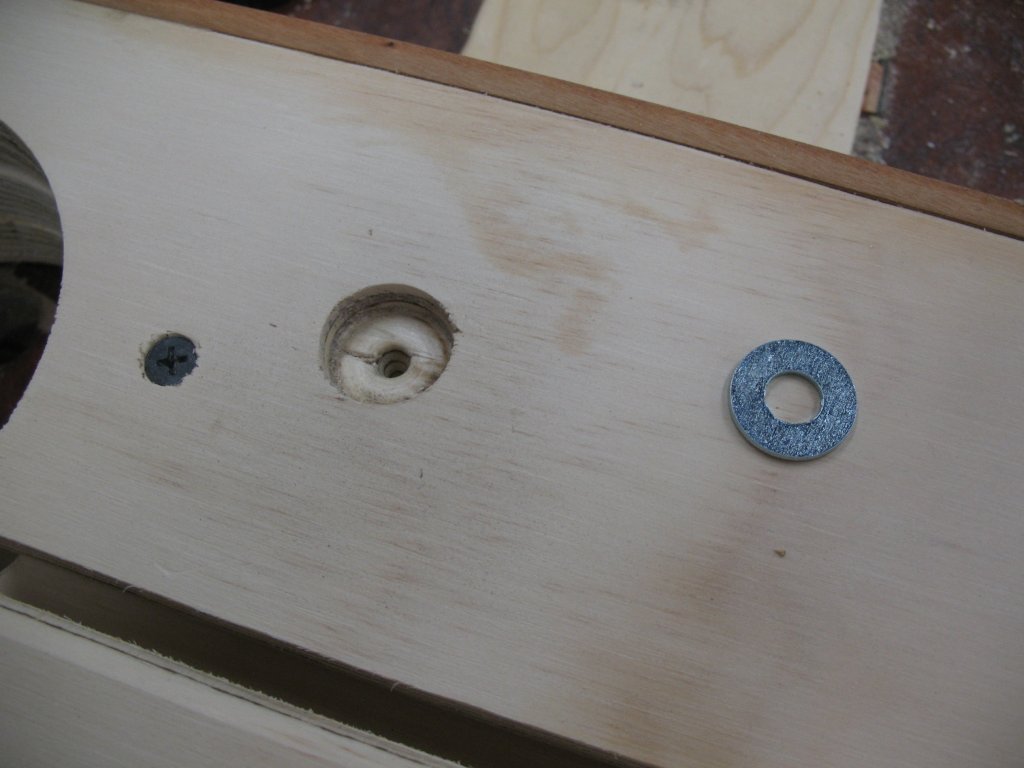
- "The Transformer" sub-base for hiding folding legs to make the table top mobile
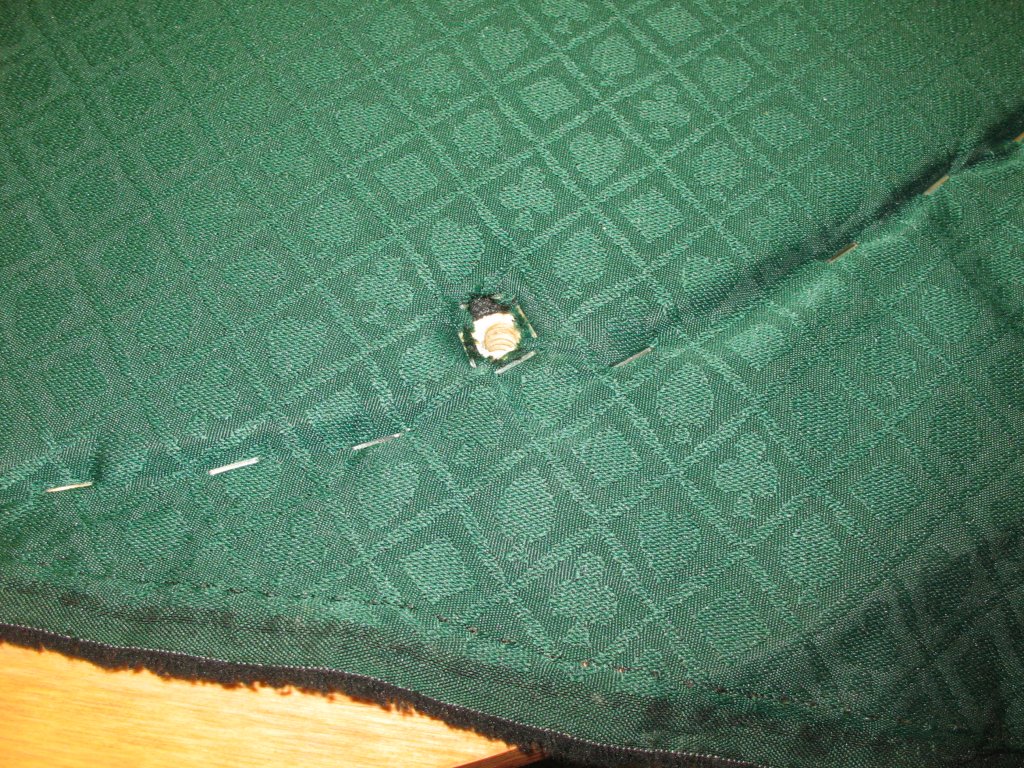
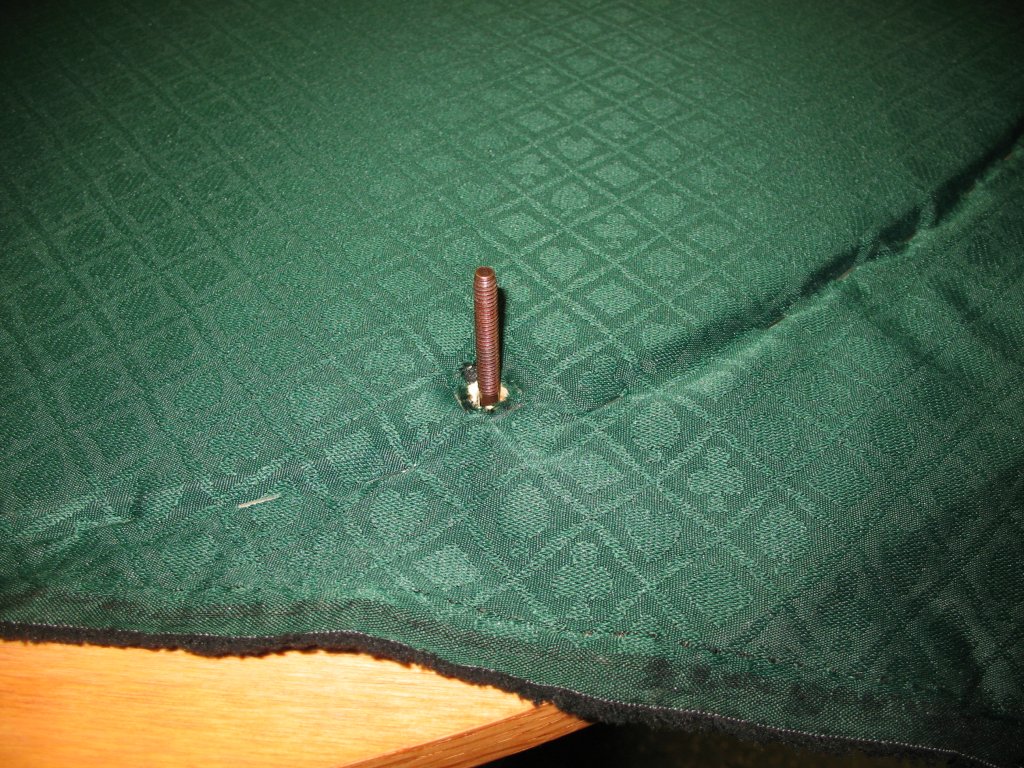
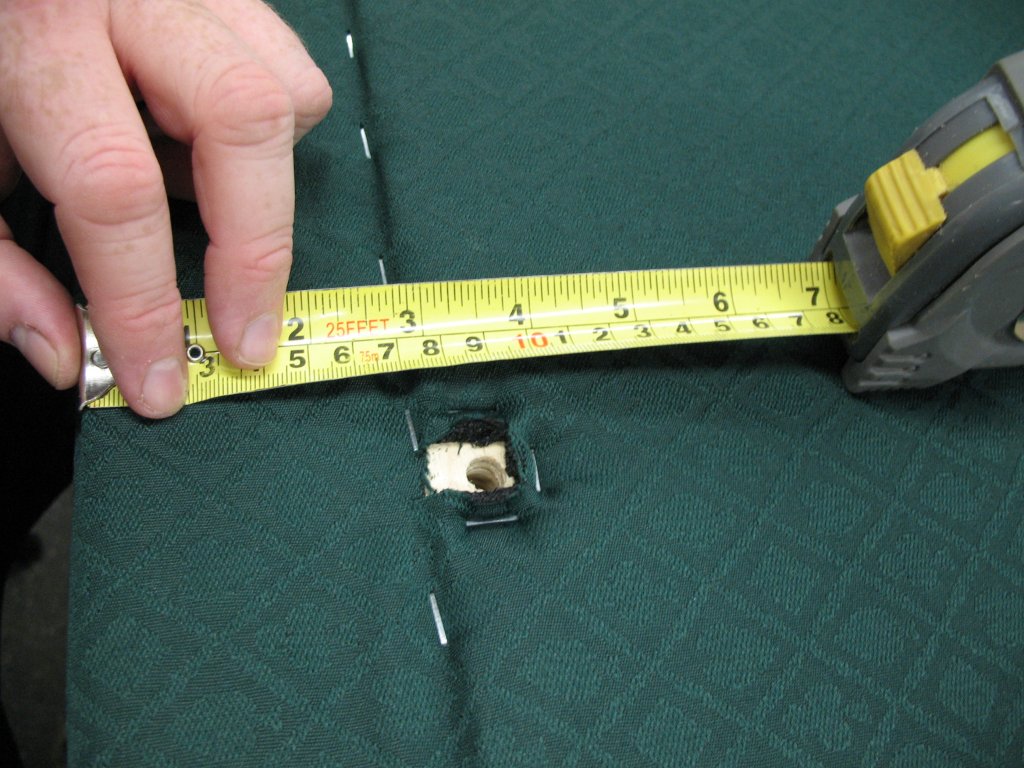
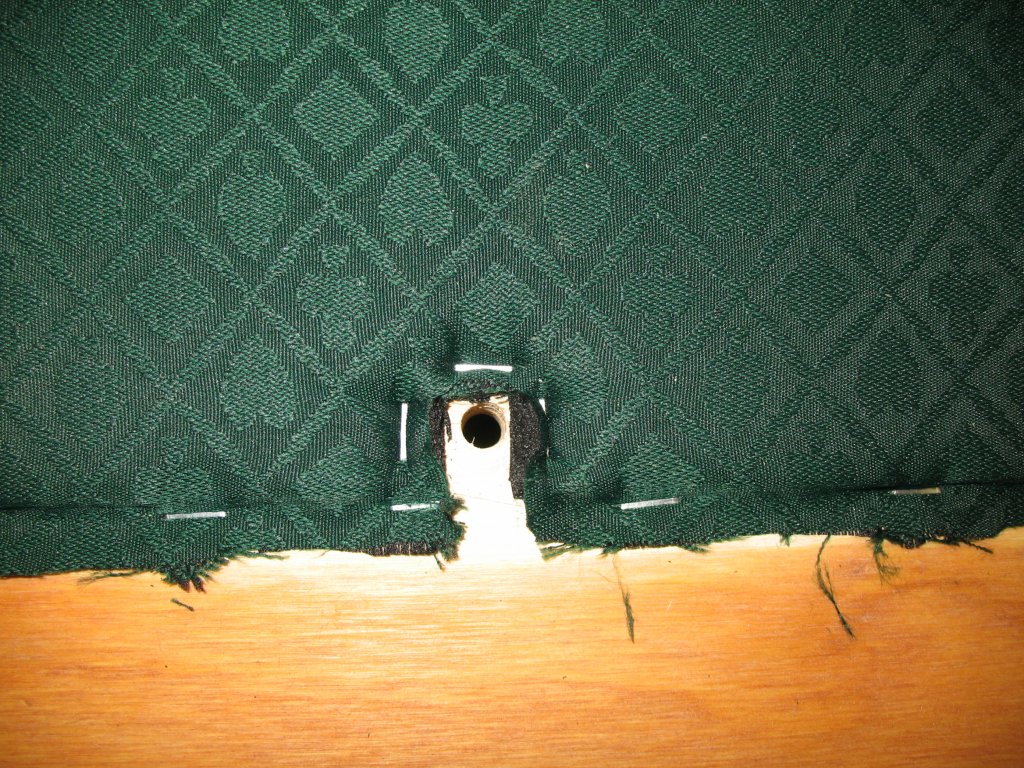
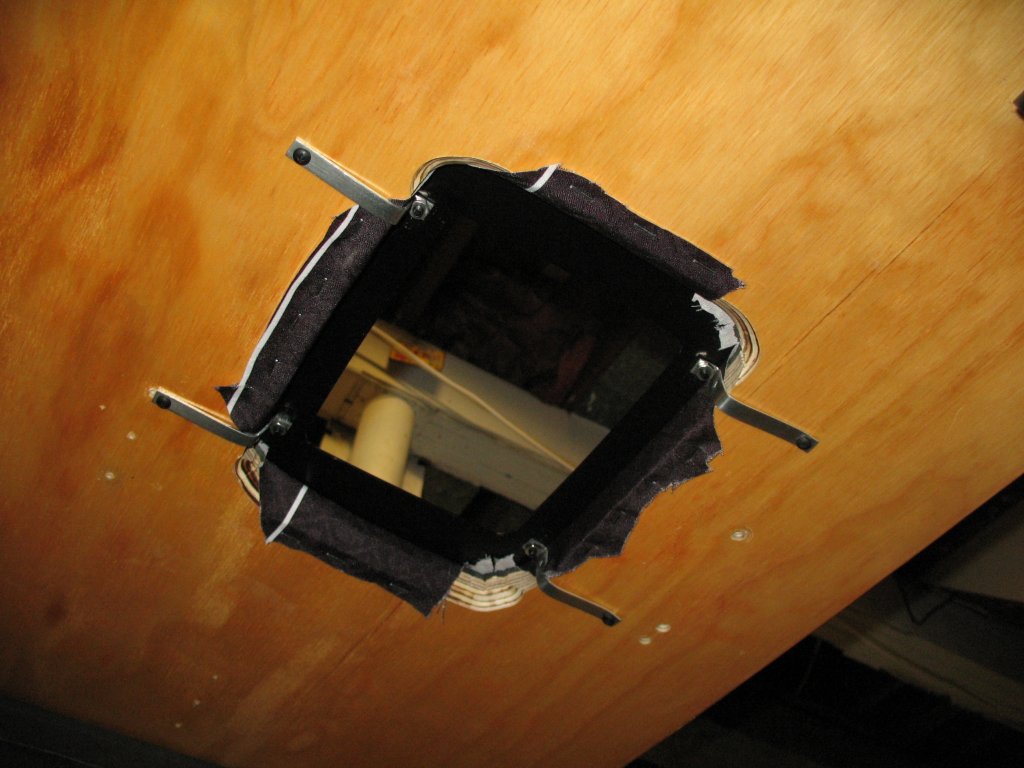
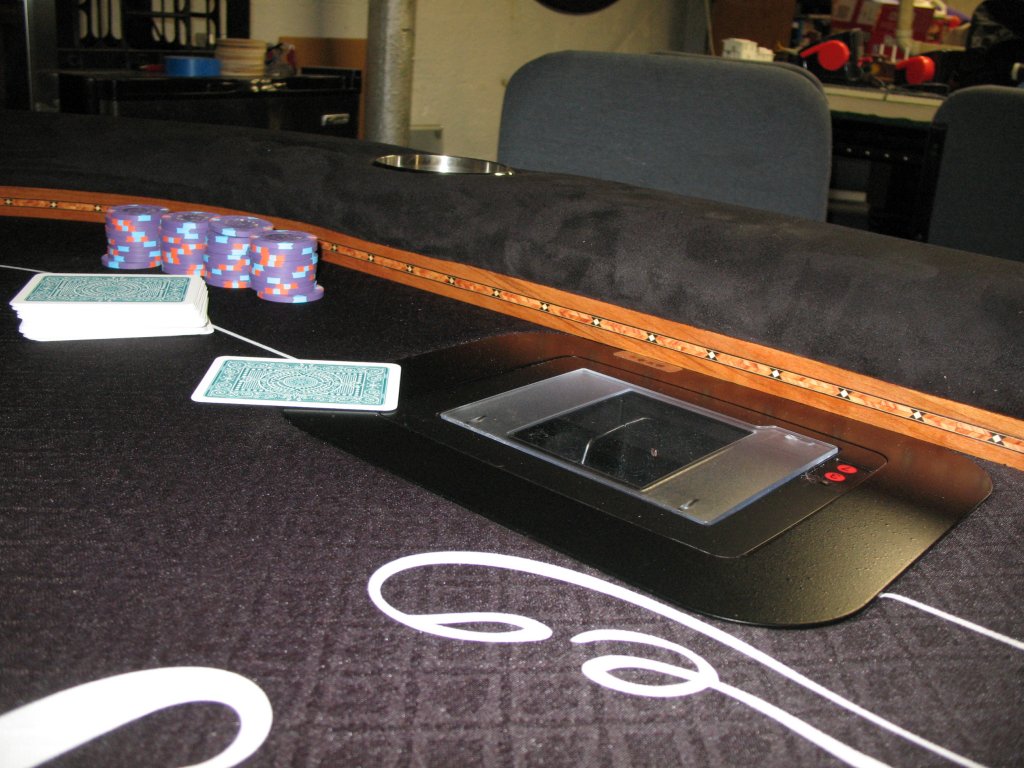
- Shuffle-tech flush mounted into table (added a later date)
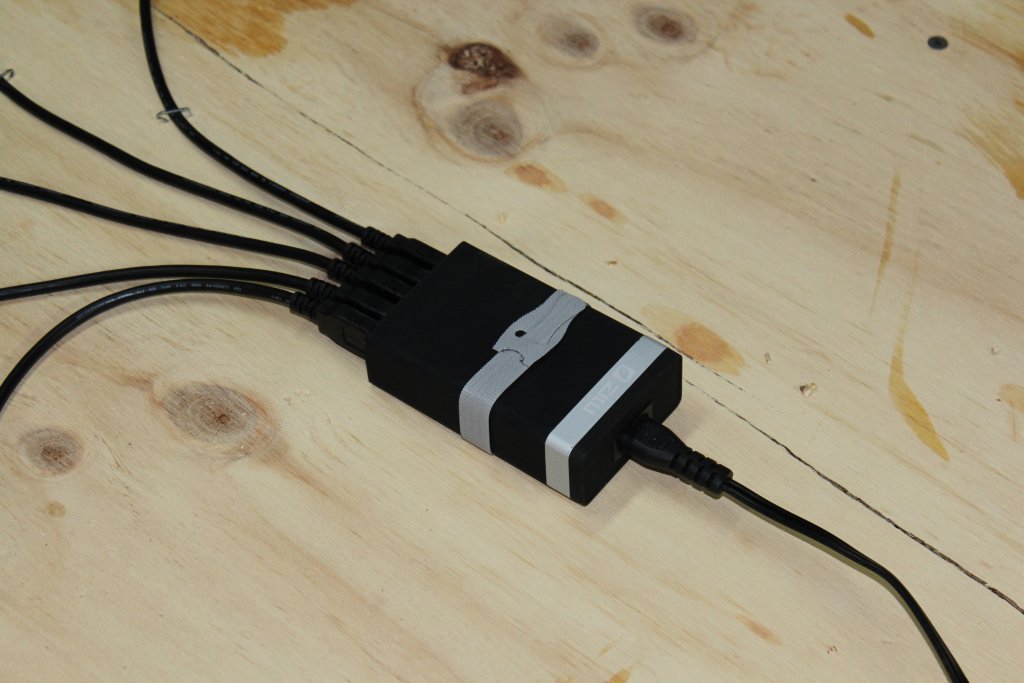
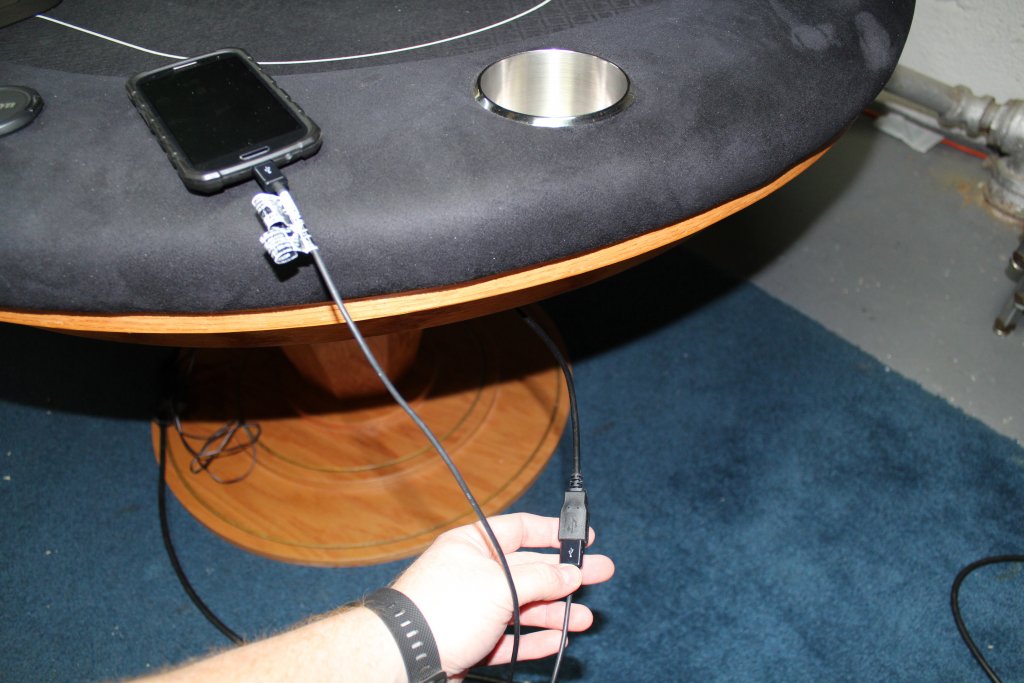
- USB charging ports (added a later date)
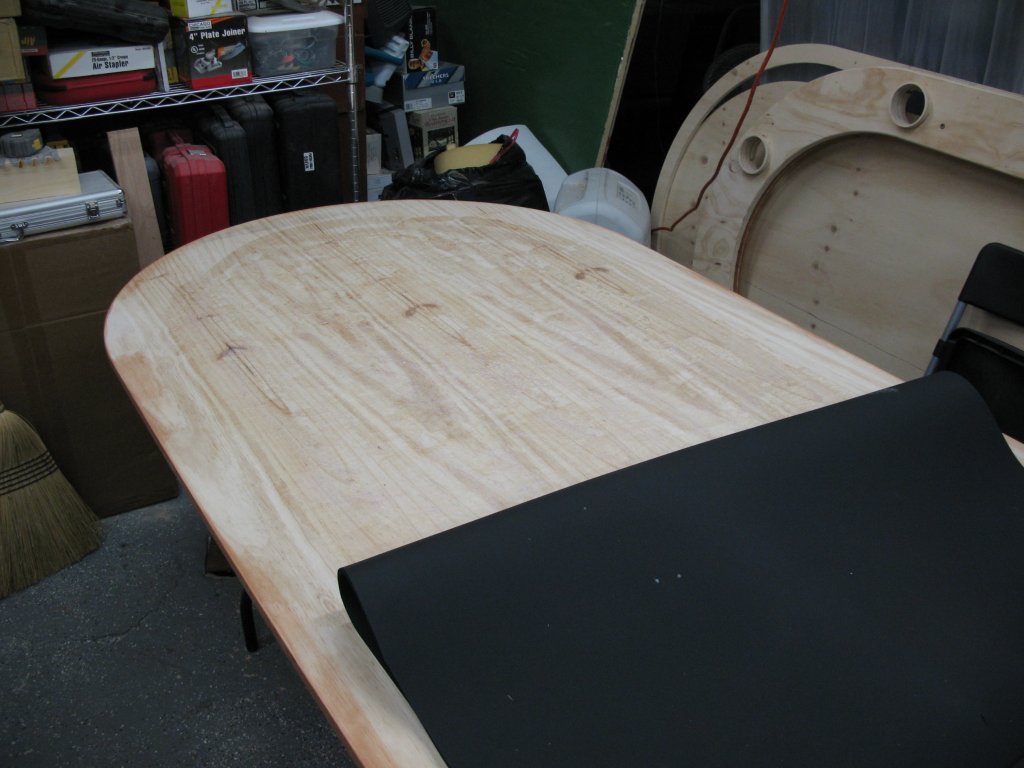
I typically do all my main cuts out on the back deck to save on sawdust cleanup in the shop. I started by cutting off 4" from both the length & width of three 3/4" sheets of oak ply (base sheet, rail sheet and riser sheet) with a circular saw to get the table from 96x48 to 92x44. If you don't own a 8' long straight edge, the factory cut edge of these cutoffs can double as nice straight edge for routering your inner straight rail cuts.
The rest of the first day included routering the outer arcs, measuring out and cutting the cup holder holes in the rail & riser sheets, and cutting the inner arcs and straightaways in the rail & riser sheets.
Once all the main sheets were cut out, next up was assembling the rail. For the riser on this table, I went with solid pieces of cherry, inlaid with a decorative wood inlay. The cherry riser pieces were ~7/8" tall and 1/4" wide, so I had to get creative with spacers. Here's a picture of the table section at the rail:
And an exploded via showing how the pieces separate:
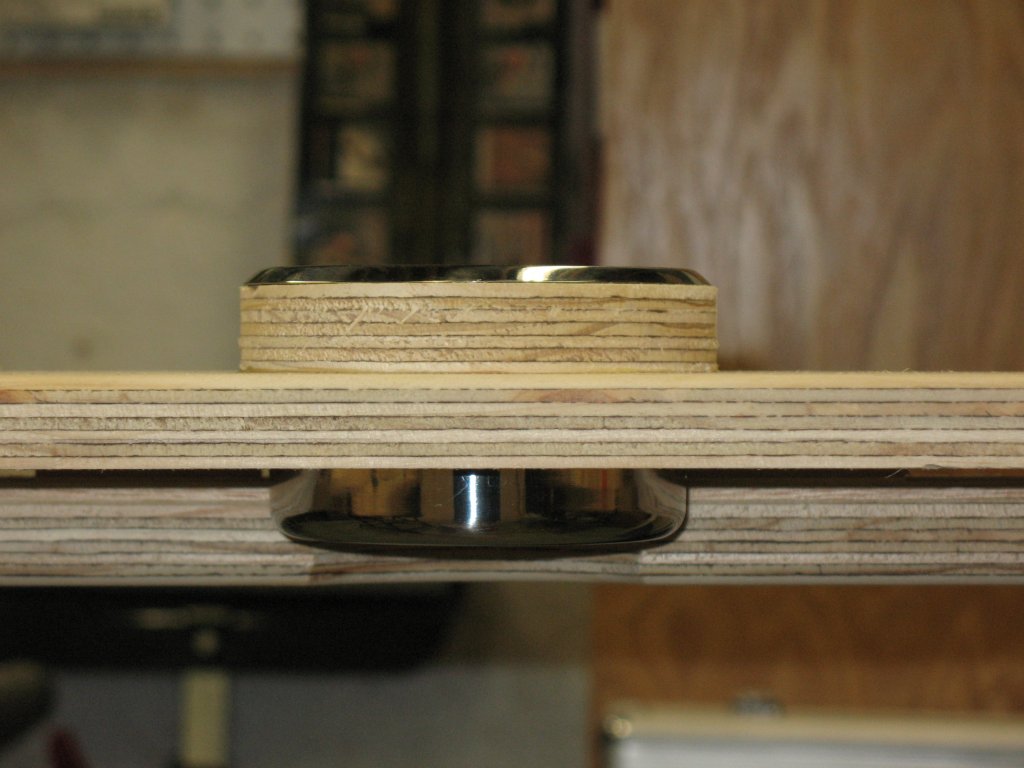
With this style of construction, you have to make sure rail section at the outside of the rail (lip area) is about 1/4" taller than inner rail (exposed riser), to account for the 1/4" playing surface foam. If the lip area is too tall, the riser won't contact the playing surface snugly, and cards may sneak under the rail. If the lip is too short, you may have a little gap between between the rail and the outer edge, depending on the foam you use for the playing surface. HD foam will compress enough where it's not an issue, but you'll get that gap with firmer closed cells foams like volara and ensolite (which is what I used here). I used 1/4" (7/32" actual) plywood spacers for the main rail piece, and 3/16" hardboard spacers for the riser insert to get both sides to equal out:
Height at the riser area:
- 23/32" ply rail piece (S1)
- 3/16" hardboard spacer
- 23/32" ply riser (S2)
- 1/4" playing surface foam
- 1 7/8" total
- 23/32" ply rail piece (S1)
- 7/32" ply spacer
- 7/32" ply riser spacer
- 23/32" ply lip (S2)
- 1 7/8" total
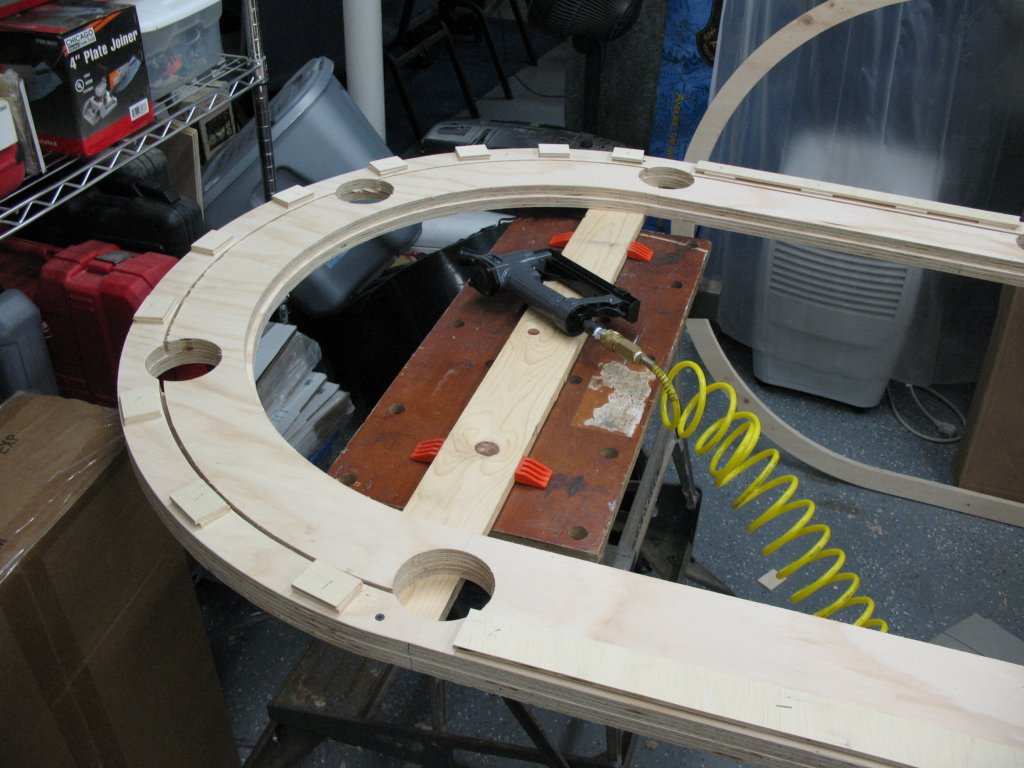
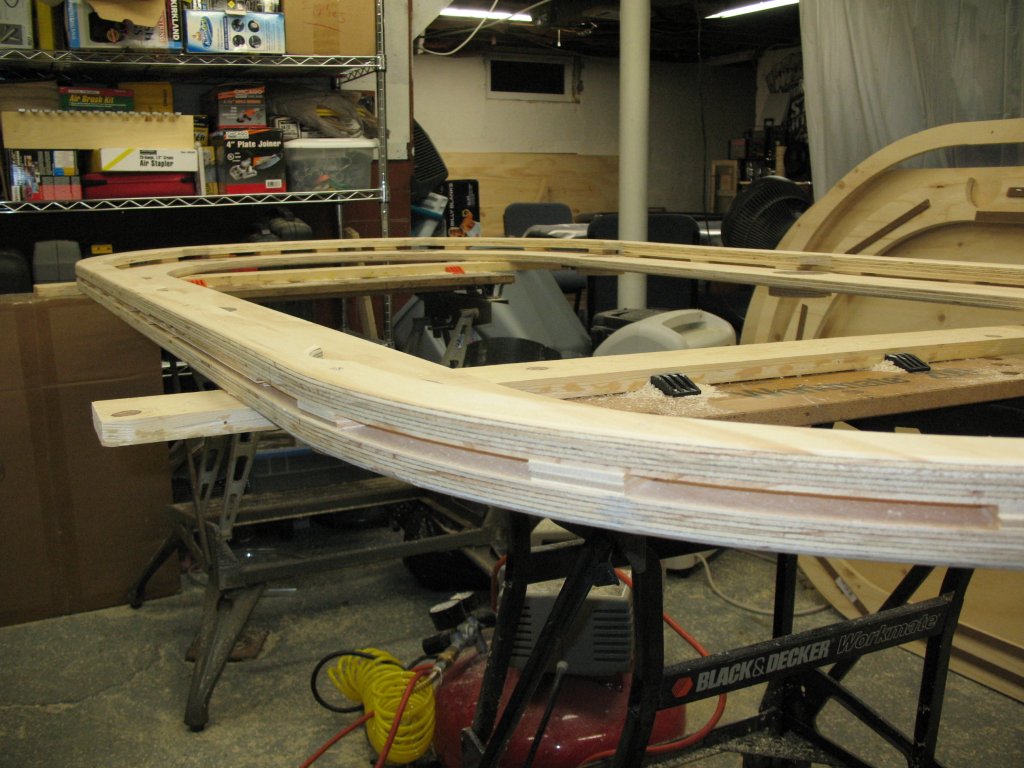
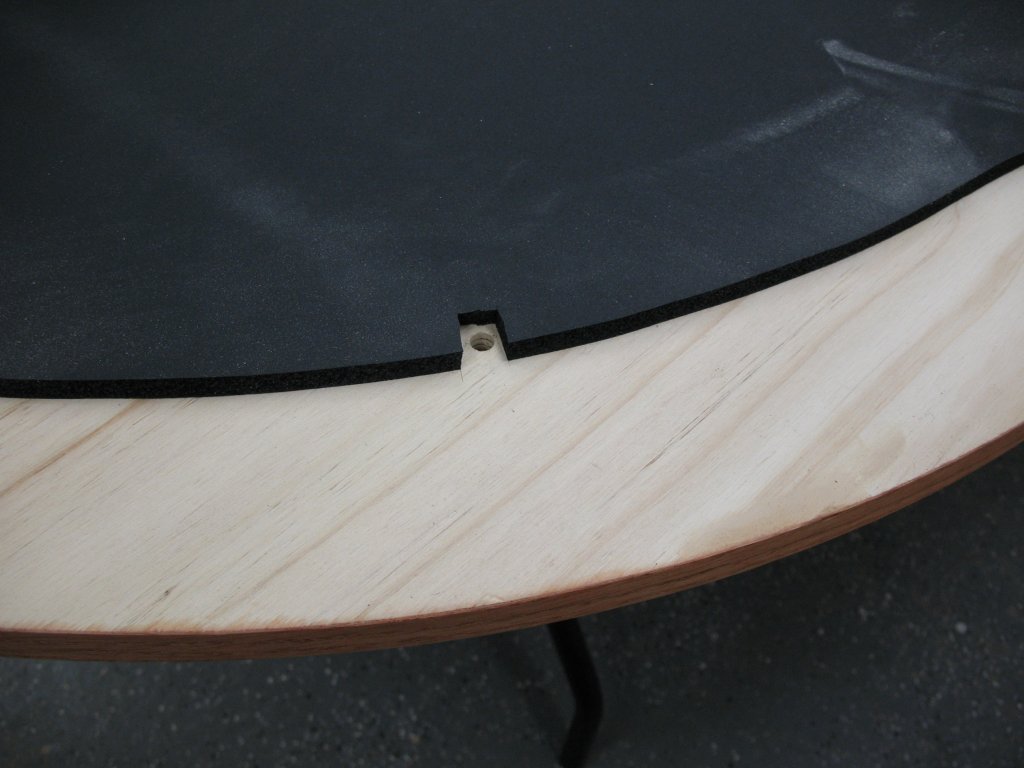
Next up are the cup holder rings, which are glued to the top of the rail. The rings are 3/16" thick and routered from the scrap cutoff corners of 3/4" plywood. These help to give the cups a solid base and prevent them from squishing down too far in the rail padding:
With the main rail assembled, next up is working on the riser. I used a cheap DIY router table & workmate bench to route the inlay channel in the cherry trim pieces for the raised rail.
The inlay I picked for the riser (bought online here) is 1/4" wide and really thin (~1/32" - exactly 0.8mm), so the channel can't be too deep. It took a few iterations to get the depth just right on the router. Then, I clamped a straight edge to the router table and routed the channel down the middle of each trim piece with a 1/4" straight bit:
Test fit:
These trim pieces get glued to the side of the plywood riser. The straightaway pieces are easy enough, but the curved portions need some extra work. I used a kerf cutting technique with my table saw on the back of the trim pieces in order to bend them around the inner radius of the riser. I cut the kerfs a little over 1/4" apart, and about halfway through the trim piece (~1/8"):
This spacing/depth worked OK - I was able to easily install a 4' long piece along one of the arcs, but the second did snap as I was placing it (I almost got there... always buy some extras!):
Next, I applied some wood glue on the edge of the plywood riser and secured the trim with a whole bunch of clamps, one arc at a time. The straightaway portions were done in similar fashion:

And here are some shots after the glue dried and clamps were removed:
x
Last edited: