My Raised Rail Poker Table Build (1 Viewer)

joshualopez1

High Hand
Joined
Nov 14, 2023
Messages
50
Reaction score
121
Location
Brownsville,Tx
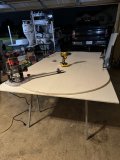
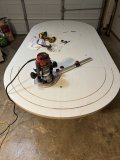
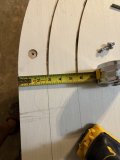
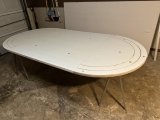
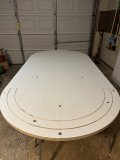
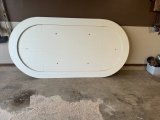
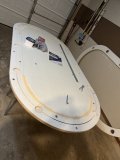
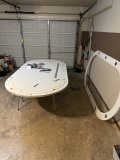
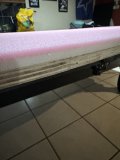
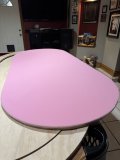
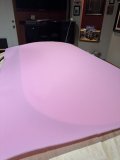
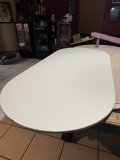
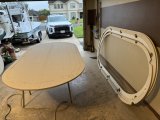
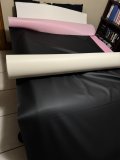
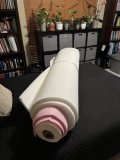
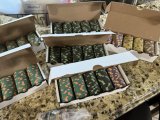
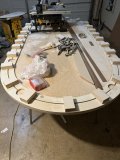
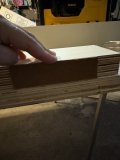
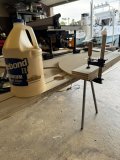
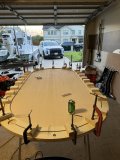
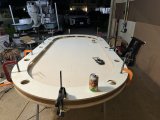
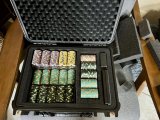
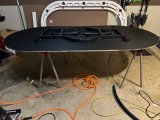
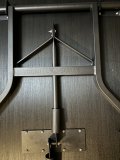
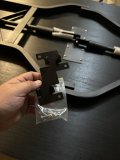
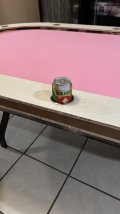
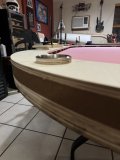
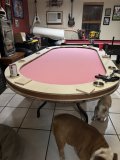
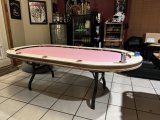
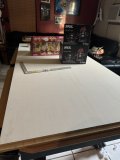
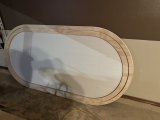
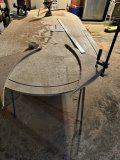
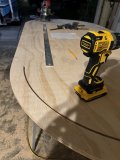
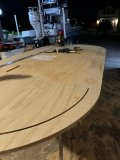
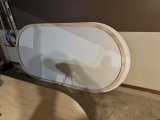
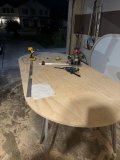
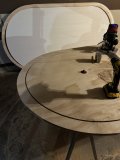
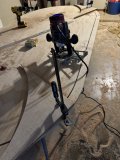
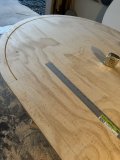
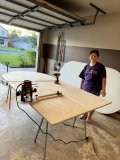
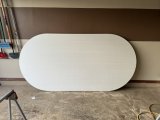
Im new to the forum, been lurking for a few days and finally will be attempting my first poker table build (It will be an 8X4 table). I have limited woodworking knowledge and had never owned or used a router till today. I am using (2) 3/4 Plywood and (1) 1/2 for the top of the raised rail. I welcome all advice or suggestions I’ll add some photos of the progress of day 1 and keep posting photos as it progresses. I also added the poker chips i will hopefully be ordering from cpc to play on this ‍
 

Attachments

  • IMG_8608.jpeg
    IMG_8608.jpeg
    101.6 KB · Views: 216
  • IMG_8761.jpeg
    IMG_8761.jpeg
    114.8 KB · Views: 182
  • IMG_8759.jpeg
    IMG_8759.jpeg
    88.7 KB · Views: 159
  • IMG_8758.jpeg
    IMG_8758.jpeg
    174.1 KB · Views: 151
  • IMG_8755.jpeg
    IMG_8755.jpeg
    118.4 KB · Views: 158
  • IMG_8756.jpeg
    IMG_8756.jpeg
    122.9 KB · Views: 162
  • IMG_8754.jpeg
    IMG_8754.jpeg
    84.2 KB · Views: 160
  • IMG_8753.jpeg
    IMG_8753.jpeg
    137.8 KB · Views: 160
  • IMG_8752.jpeg
    IMG_8752.jpeg
    111.4 KB · Views: 159
  • IMG_8751.jpeg
    IMG_8751.jpeg
    158 KB · Views: 159
  • IMG_8750.jpeg
    IMG_8750.jpeg
    151.6 KB · Views: 190
  • IMG_8747.jpeg
    IMG_8747.jpeg
    188.1 KB · Views: 198
  • IMG_8745.jpeg
    IMG_8745.jpeg
    151.6 KB · Views: 205
  • image.jpg
    image.jpg
    136.6 KB · Views: 214
Looking good so far.
If you want tips, maybe you can share how you plan to continue so the community can weigh in before it’s done.
I would have used the 1/2“ sheet for the playfield to reduce the weight a little. But if you have a dedicated spot for the table it does not really matter.

By the way: nice boat.
i am attempting to replicate this table.
i do no have a dedicated space and will more than likely be moving it around. I am early into this so i dont mind getting another 1/2 sheet if it would make a difference on yalls suggestions.
 
I purchased the 1/2 plywood and will be swapping out the 3/4 playing surface
 

Attachments

  • IMG_8783.jpeg
    IMG_8783.jpeg
    146.7 KB · Views: 48
Had a late start today but swapped the 3/4 plywood playing surface for a 1/2 inch and managed to get some measurements and cuts done as well as attach about half of the T nuts till i ran out of material and it got late to be running the router. Ill continue tomorrow. Still uncertain about putting lights or leave as is.
IMG_8784.jpeg
 

Attachments

  • IMG_8790.jpeg
    IMG_8790.jpeg
    147.4 KB · Views: 61
  • IMG_8796.jpeg
    IMG_8796.jpeg
    107.6 KB · Views: 57
  • IMG_8801.jpeg
    IMG_8801.jpeg
    121 KB · Views: 59
  • IMG_8802.jpeg
    IMG_8802.jpeg
    109.7 KB · Views: 56
I finished attaching the T Nuts and cut out my top rail. I think i might have made a mistake as i cut out my top rail to 5 1/2 Inches but the groove where my diffuser will go extends a 1/4 past the top rail due to my router cut being off… Will the 1 inch foam padding be enough to extend past the diffuser or did i ruin a sheet and have cut a new top rail???
IMG_8840.jpeg
 

Attachments

  • IMG_8841.jpeg
    IMG_8841.jpeg
    153.1 KB · Views: 40
I cut out the rest of the cupholders today and applied some wood filler waiting for it to dry to sand and make a new cut for the diffuser to make sure the rail is over. foam and vinyl should arrive tomorrow also need to cut spacers and glue
 

Attachments

  • IMG_8988.jpeg
    IMG_8988.jpeg
    116.9 KB · Views: 48
  • IMG_8989.jpeg
    IMG_8989.jpeg
    143.3 KB · Views: 49
Whisper Vinyl and foam arrived today from YAT. I finished cutting the rails and playing surface today. I also glued the 1/4” closed cell Volara and 1/4” Pink Sew Foam to the Playing surface. Gorilla Legs have shipped as well and should arrive soon.
 

Attachments

  • IMG_9021.jpeg
    IMG_9021.jpeg
    83.5 KB · Views: 90
  • IMG_9020.jpeg
    IMG_9020.jpeg
    77.3 KB · Views: 89
  • IMG_9019.jpeg
    IMG_9019.jpeg
    57.3 KB · Views: 86
  • IMG_9015.jpeg
    IMG_9015.jpeg
    71.6 KB · Views: 92
  • IMG_9009.jpeg
    IMG_9009.jpeg
    164.1 KB · Views: 91
  • IMG_9008.jpeg
    IMG_9008.jpeg
    163.6 KB · Views: 88
  • IMG_9001.jpeg
    IMG_9001.jpeg
    59.4 KB · Views: 86
  • IMG_8999.jpeg
    IMG_8999.jpeg
    102.9 KB · Views: 88
Whisper Vinyl and foam arrived today from YAT. I finished cutting the rails and playing surface today. I also glued the 1/4” closed cell Volara and 1/4” Pink Sew Foam to the Playing surface. Gorilla Legs have shipped as well and should arrive soon.
Looking good , good choice on legs. Makes the table feel solid
 
Hadnt worked on the table in a while but decided to spend some time on it today after receiving this table saw for my Bday today as well as the poker chips in the pic. I was able to glue and cut the spacers that will be going around the table for the raised rail. I was also able to cut the hardboard trim that will go-around the rail before upholstery. Still Waiting on legs to arrive and Felt is in the process with T_chan ‍
IMG_9134.jpeg
 

Attachments

  • IMG_9141.jpeg
    IMG_9141.jpeg
    170.8 KB · Views: 118
  • IMG_9140.jpeg
    IMG_9140.jpeg
    169.3 KB · Views: 128
  • IMG_9143.jpeg
    IMG_9143.jpeg
    168.2 KB · Views: 120
  • IMG_9138.jpeg
    IMG_9138.jpeg
    82.6 KB · Views: 110
  • IMG_9125.jpeg
    IMG_9125.jpeg
    153.8 KB · Views: 118
@joshualopez1 are you planning on adding any lighting? Have you selected a LED diffuser?

If so, which one?
I dont think im going to add lighting i havnt even attempted to figure out how it would go… i might add it later on once i complete the table im going to leave some space in the rail for it.
 
Last edited:
I was able to finish gluing the spacers down as well as attached the top rail and edge trim around the raised rail. I also purchased the apache case recommended on here and plasti dipped the foam while i waited for the glue to dry. Pic of case with chips is before plasti dip.
 

Attachments

  • IMG_9186.jpeg
    IMG_9186.jpeg
    163.6 KB · Views: 100
  • IMG_9192.jpeg
    IMG_9192.jpeg
    128 KB · Views: 100
  • IMG_9193.jpeg
    IMG_9193.jpeg
    185.3 KB · Views: 101
  • IMG_9182.jpeg
    IMG_9182.jpeg
    241.3 KB · Views: 104
IMG_9241.jpeg
I applied a Varathane finish and and added the Gorilla legs to the table. I also have the piece in the pic not sure where it goes if anyone knows what it’s for. THANKS
 

Attachments

  • IMG_9240.jpeg
    IMG_9240.jpeg
    120.3 KB · Views: 56
  • IMG_9242.jpeg
    IMG_9242.jpeg
    174.7 KB · Views: 52
  • IMG_9245.jpeg
    IMG_9245.jpeg
    173 KB · Views: 54
  • IMG_9238.jpeg
    IMG_9238.jpeg
    82.3 KB · Views: 58
Took her inside to see what it'll look like mostly assembled. Happy with progress so far
View attachment 1244669

Wow! You are making quick work of this project! It's looking good.

I also have the piece in the pic not sure where it goes if anyone knows what it’s for. THANKS

I have not assembled one of these before, but that looks to me like it might be a catch for the legs when they are folded.
1703429054840.png
 
Wow! You are making quick work of this project! It's looking good.


I have not assembled one of these before, but that looks to me like it might be a catch for the legs when they are folded.
View attachment 1244753
Wow! You are making quick work of this project! It's looking good.


I have not assembled one of these before, but that looks to me like it might be a catch for the legs when they are folded.
View attachment 1244753
your correct thanks
 
In this pic, is the top rail and the lower rail (directly below the top rail) are they they same dimensions? OR does the top rail have an over hang at all?
initially i mistakenly made them the same dimmensions. But i went back and made the top rail extend about 1/2” over the lower rail. Im hoping once i add the 1” foam and vinyl it'll extend a bit more.
 
Finally finished cutting out and gluing the cup holder rings. Feels like it took forever i kept making mistakes or breaking the rings. Going to wait till tomorrow to hopefully begin with the Vinyl upholstery.
IMG_9372.jpeg
 

Attachments

  • IMG_9371.jpeg
    IMG_9371.jpeg
    86.1 KB · Views: 69
  • IMG_9373.jpeg
    IMG_9373.jpeg
    111.5 KB · Views: 73
  • IMG_9374.jpeg
    IMG_9374.jpeg
    124.8 KB · Views: 68

Create an account or login to comment

You must be a member in order to leave a comment

Create account

Create an account and join our community. It's easy!

Log in

Already have an account? Log in here.

Back
Top Bottom