Raised rail table questions for a 1st timer attempting to build (2 Viewers)

Cwaters425

3 of a Kind
Supporter
Joined
Mar 17, 2018
Messages
680
Reaction score
845
Location
Ohio
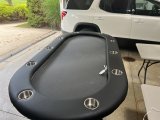
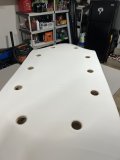
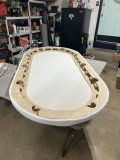
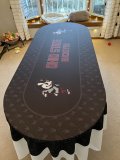
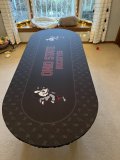
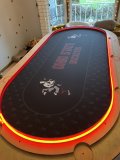
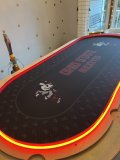
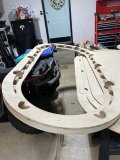
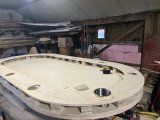
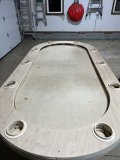
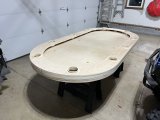
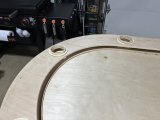
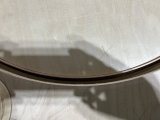
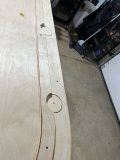
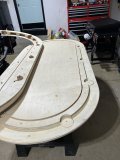
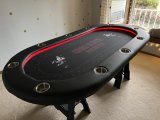
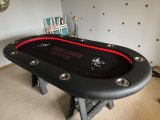
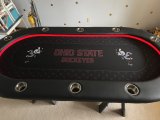
I've gone through every page i can think of on here and I'm still confused on a raised rail table. I am going to attempt to build a table similar to this - https://www.pokerchipforum.com/thre...s-argyle-poker-night-thread.43334/post-806997

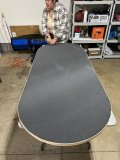
I believe the builder used (2) 3/4in and then (1) 1/2in plywood.

Even though he took plenty of pictures of his process, I'm still struggling to visualize what sheet it used for what layer. Anyone that has built a raised rail table, or familiar with building a similar table care to chime in and to and help a newbie that's going to attempt this, just trying to figure out how the puzzle fits together and what pieces from each sheet fit where.

thanks,
Chris
 
I struggled visualizing it too when I built mine. Working through it in illustrator helped me quite a bit.

This might help (note the to-scale exploded view cross section which is easy to miss):

T5YpnRE.png
 
tyvm! this actually helped tremendously and it finally clicked!
 
tyvm! this actually helped tremendously and it finally clicked!
So much excellent information here. Thanks for asking these questions. Really going to help other first time builders.
 
I struggled visualizing it too when I built mine. Working through it in illustrator helped me quite a bit.

This might help (note the to-scale exploded view cross section which is easy to miss):

T5YpnRE.png
In the cross section image...what is the greenishbrown unlabeled section between the Top Rail and Bottom Rail/Outer Play ?
 
Your rail looks like this once it's put together and before it's bolted to the table.

Screenshot_20230907-114307_Chrome.jpg
 
I’m slowly getting there….now just waiting on my felt from Chanman. The vinyl rail was no joke, I have some wrinkles but I’m fine with it, it was either my sanity or no wrinkles, I opted to leave the wrinkles. Hats off to the builders who do this and make it 100% smooth
 

Attachments

  • IMG_1855.jpeg
    IMG_1855.jpeg
    159.1 KB · Views: 210
  • IMG_1856.jpeg
    IMG_1856.jpeg
    101.7 KB · Views: 190
  • IMG_1853.jpeg
    IMG_1853.jpeg
    147.8 KB · Views: 175
  • IMG_1854.jpeg
    IMG_1854.jpeg
    160 KB · Views: 164
  • IMG_1852.jpeg
    IMG_1852.jpeg
    137.7 KB · Views: 172
  • IMG_1793.jpeg
    IMG_1793.jpeg
    76.6 KB · Views: 189
  • 71443783958__9A9A99F1-5C1F-49F2-824A-DA4A358A38DD.jpeg
    71443783958__9A9A99F1-5C1F-49F2-824A-DA4A358A38DD.jpeg
    132.9 KB · Views: 189
Amazing build! Very well done and thanks for sharing the journey.
 
Awesome build ! Very nice work, I could not have undertook a raised rail on my first build. Table came out great, will definitely use this thread for inspiration on my next build! Did you have a lot of experience prior to this ?
 
Finally finished my build. Thanks to everyone who answered my silly questions along the way @T_Chan @bsdunbar1 and a few others. I do have some wrinkles in the rail, not sure how the pros do it cause it’s annoying as hell trying to get those out but in the end I’m very happy with the end result
 

Attachments

  • 71443783958__9A9A99F1-5C1F-49F2-824A-DA4A358A38DD.jpeg
    71443783958__9A9A99F1-5C1F-49F2-824A-DA4A358A38DD.jpeg
    132.9 KB · Views: 117
  • IMG_1852.jpeg
    IMG_1852.jpeg
    137.7 KB · Views: 108
  • IMG_1853.jpeg
    IMG_1853.jpeg
    147.8 KB · Views: 98
  • IMG_2192.jpeg
    IMG_2192.jpeg
    140.8 KB · Views: 92
  • IMG_2193.jpeg
    IMG_2193.jpeg
    166 KB · Views: 89
  • IMG_2194.jpeg
    IMG_2194.jpeg
    123.1 KB · Views: 94
  • IMG_2195.jpeg
    IMG_2195.jpeg
    104.3 KB · Views: 93
  • IMG_1792.jpeg
    IMG_1792.jpeg
    195.3 KB · Views: 99
  • IMG_1787.jpeg
    IMG_1787.jpeg
    164 KB · Views: 98
  • IMG_1760.jpeg
    IMG_1760.jpeg
    140.7 KB · Views: 96
  • IMG_1781.jpeg
    IMG_1781.jpeg
    128.3 KB · Views: 91
  • IMG_1782.jpeg
    IMG_1782.jpeg
    119.2 KB · Views: 85
  • IMG_1783.jpeg
    IMG_1783.jpeg
    114 KB · Views: 82
  • IMG_1784.jpeg
    IMG_1784.jpeg
    116.8 KB · Views: 78
  • IMG_1785.jpeg
    IMG_1785.jpeg
    115 KB · Views: 81
  • IMG_1786.jpeg
    IMG_1786.jpeg
    137.9 KB · Views: 91
  • IMG_2196.jpeg
    IMG_2196.jpeg
    132.9 KB · Views: 95
  • IMG_2197.jpeg
    IMG_2197.jpeg
    152.8 KB · Views: 97
  • IMG_2198.jpeg
    IMG_2198.jpeg
    128.1 KB · Views: 98
  • IMG_2199.jpeg
    IMG_2199.jpeg
    128.3 KB · Views: 120
I’m slowly getting there….now just waiting on my felt from Chanman. The vinyl rail was no joke, I have some wrinkles but I’m fine with it, it was either my sanity or no wrinkles, I opted to leave the wrinkles. Hats off to the builders who do this and make it 100% smooth
Looks absolutely stunning! Great work!!
 
I’m slowly getting there….now just waiting on my felt from Chanman. The vinyl rail was no joke, I have some wrinkles but I’m fine with it, it was either my sanity or no wrinkles, I opted to leave the wrinkles. Hats off to the builders who do this and make it 100% smooth
Looks amazing! My biggest thing right now is finding a proper defuser for the light..Can I ask what you used/where you got it from?
 

Create an account or login to comment

You must be a member in order to leave a comment

Create account

Create an account and join our community. It's easy!

Log in

Already have an account? Log in here.

Back
Top Bottom