After much experimentation, I’m finding that if I upload my chip design in HEIC format, it seems to lose less resolution.
The main struggle now is getting the color correct, as the output to HEIC, import to Cricut, and output back to my printer seems to alter the color along the way. No idea why, but it’s different than if I just output it straight to the printer from my design program (Pixelmator, a Photoshop substitute).
Getting the laminate down evenly is also going to take some practice. @GreekRedEye showed a good method earlier in the thread, but I am nowhere near expert yet. Lots of bubbles and crinkles. Anyone else have tips?
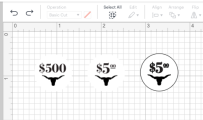
Meanwhile I found that to produce a 26mm label, I needed to make the image a hair larger, around 26.3 mm. It’s possible that the cutting blade tries to center on the outline, or even cuts inside it, losing some material.
What material setting do people use when cutting laminated vinyl? The only one which seemed to match in the Cricut menus cut too deeply, separating the backing sheet from the labels.
The main struggle now is getting the color correct, as the output to HEIC, import to Cricut, and output back to my printer seems to alter the color along the way. No idea why, but it’s different than if I just output it straight to the printer from my design program (Pixelmator, a Photoshop substitute).
Getting the laminate down evenly is also going to take some practice. @GreekRedEye showed a good method earlier in the thread, but I am nowhere near expert yet. Lots of bubbles and crinkles. Anyone else have tips?
Meanwhile I found that to produce a 26mm label, I needed to make the image a hair larger, around 26.3 mm. It’s possible that the cutting blade tries to center on the outline, or even cuts inside it, losing some material.
What material setting do people use when cutting laminated vinyl? The only one which seemed to match in the Cricut menus cut too deeply, separating the backing sheet from the labels.
 Not intuitive, but easy once you know the trick.