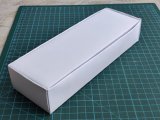
I think the majority of people here have relatively easy access to Warneke or equivalent cardboard chip boxes, but getting them overseas can be either difficult or cost prohibitive. They are by far my preferred way to mail chips though, so I set out to build my own version. All measurements are done using the metric system, because I love it so much (  ).
).

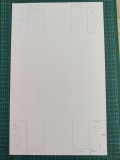
The build consists of three pieces, top and bottom halves of the box as well as the insert. I made the top and bottom halves using the same exact method, only the initial pieces to cut are different in size. For the lower half I cut a piece thats 188mm x 328mm and for the top 192mm x 332mm (edit: top could be a bit smaller, see post #3).
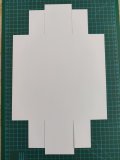
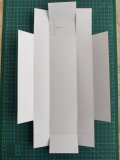
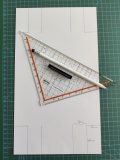
So here’s the bottom half cut into size. Next I drew a few lines and cut them as shown, then created folds along the lines just cut. After that I made two more folds, one on each of the short middle flaps, 30mm from the previous fold.
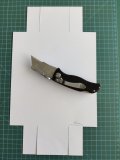
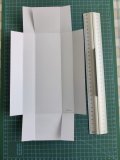
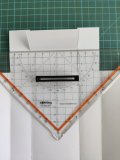
Then I made a locking mechanism by cutting into the short side flaps. The measurement from the flap end should be { 60mm - floor width / 2 }. You need to cut halfway through the flaps, and make sure both cuts originate from the same side LOL. Next I bent the flaps and locked them into place. Finally, and in this part you could use a bit of glue for extra stability, I bent the long sides inwards, followed by the short sides.
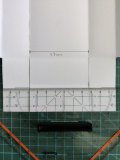
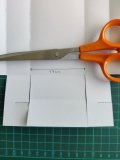
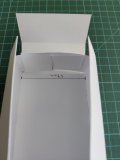
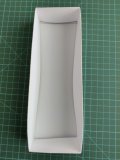
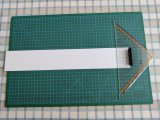
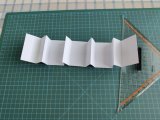
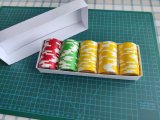
For the top half you just follow the same instructions, and you should end up with a slightly larger version (when instructed to use floor width, obviously use roof width instead). The insert length should be 400mm and the width just shy of the floor width measured previously. For this box I cut the insert to 400mm x 66mm. You need to create folds, starting at one end with a measurement of 40mm, followed by two folds of 25mm. Then again one 40mm fold, followed by two 25mm folds, etc. Once all the folds have been made, make them bend in the right directions and insert the divider in the box.
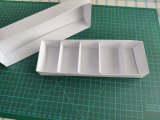
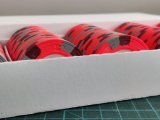
Now your box is ready, put some chips in, close the lid, and enjoy!
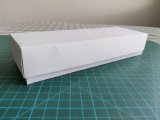
You could reinforce the folds visible on the outside with a few pieces of tape, as I would think those are the weak points. Or put a few tight layers of cling wrap around the box before shipping. I hope you enjoyed this educational, byeee!
The build consists of three pieces, top and bottom halves of the box as well as the insert. I made the top and bottom halves using the same exact method, only the initial pieces to cut are different in size. For the lower half I cut a piece thats 188mm x 328mm and for the top 192mm x 332mm (edit: top could be a bit smaller, see post #3).
So here’s the bottom half cut into size. Next I drew a few lines and cut them as shown, then created folds along the lines just cut. After that I made two more folds, one on each of the short middle flaps, 30mm from the previous fold.


Then I made a locking mechanism by cutting into the short side flaps. The measurement from the flap end should be { 60mm - floor width / 2 }. You need to cut halfway through the flaps, and make sure both cuts originate from the same side LOL. Next I bent the flaps and locked them into place. Finally, and in this part you could use a bit of glue for extra stability, I bent the long sides inwards, followed by the short sides.


For the top half you just follow the same instructions, and you should end up with a slightly larger version (when instructed to use floor width, obviously use roof width instead). The insert length should be 400mm and the width just shy of the floor width measured previously. For this box I cut the insert to 400mm x 66mm. You need to create folds, starting at one end with a measurement of 40mm, followed by two folds of 25mm. Then again one 40mm fold, followed by two 25mm folds, etc. Once all the folds have been made, make them bend in the right directions and insert the divider in the box.


Now your box is ready, put some chips in, close the lid, and enjoy!


You could reinforce the folds visible on the outside with a few pieces of tape, as I would think those are the weak points. Or put a few tight layers of cling wrap around the box before shipping. I hope you enjoyed this educational, byeee!
Last edited:

