OneBrow
Pair
I didn't see any other threads where china clay chips were dyed, so I posted a new one.
I'm planning a buying a set of Apache's the Bank chips, being really sold by the mold as much as anything else. My ideal set has 12 colors, though, and there are only 11 in the Bank, so I tried dyeing my sample set.
This is the set before the work (alongside some Majestics, as well), and my choice of dye (it's specifically designed for artificial fibers and some plastics). I also wanted to see if I could protect the edge spots, so I got some weatherproof tape:


The instructions were to simmer the object being dyed for about an hour. I decided to to see if there were issues with the boiling process first. Since I know the black $100 chip was not going to be dyed, I simmered it for an hour. I taped over some of the edge spots to see what would happen. The tape melted into chip, so I gave up on that notion, but otherwise the chip was undamaged (in any way I noticed at that time. So, into the pot they went, except for the train chip (as both a control, because I want to keep it just as it is, and because it's the same as the .25). I did not take a picture of the pot boiling, but afterward, there were rings left on the bottom of my stainless steel pot.


Also, I noticed later that the chips were scorched on the side touching the pot bottom. So, I will need to use a strainer of some sort when I dye the permanent set. Here are pictures of the top sides in different levels of light (indoor, evening window, full sunlight), except the grey in the second picture and the yellow in the third picture got reversed. The chips are organized in the same fashion as the first picture.


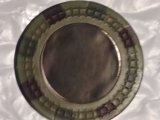
These are the sides that were scorched because they were face down in the pot:


As you can see, for almost all the chips, the true color is obvious in the white, lilac, red, orange, green, and both blues when the light brightens up. The yellows and the gray are much less obvious. The yellow in also seem to have gone from double-stripe edge spots to single-stripe edge spots, while the grey almost entirely loses the green edge spots, keeping the black. However, the most significant change it to the pink $50 chip, which has no trace of the pink left under even the brightest light, and even the edge spots are different colors, rather than disappearing. My daughter calls is a purplish-brown.
Meanwhile, my daughter got the Majestics, in an attempt to see if they can be colored by pastels. While the main chip body apparently can not, the edge spots can, so I gave her the yellow, grey, and pink chips (post-dyeing) to see what she thingks whe might be abler to do with the edges. Pictures will follow if anything comes of it.
One more thing I checked was to see what teh effects would be if a chip were nicked or damaged. The dye definitely goes below the surface level of the green chip.

If anyone has any tips or suggestions, I would enjoy hearing them.
I'm planning a buying a set of Apache's the Bank chips, being really sold by the mold as much as anything else. My ideal set has 12 colors, though, and there are only 11 in the Bank, so I tried dyeing my sample set.
This is the set before the work (alongside some Majestics, as well), and my choice of dye (it's specifically designed for artificial fibers and some plastics). I also wanted to see if I could protect the edge spots, so I got some weatherproof tape:
The instructions were to simmer the object being dyed for about an hour. I decided to to see if there were issues with the boiling process first. Since I know the black $100 chip was not going to be dyed, I simmered it for an hour. I taped over some of the edge spots to see what would happen. The tape melted into chip, so I gave up on that notion, but otherwise the chip was undamaged (in any way I noticed at that time. So, into the pot they went, except for the train chip (as both a control, because I want to keep it just as it is, and because it's the same as the .25). I did not take a picture of the pot boiling, but afterward, there were rings left on the bottom of my stainless steel pot.
Also, I noticed later that the chips were scorched on the side touching the pot bottom. So, I will need to use a strainer of some sort when I dye the permanent set. Here are pictures of the top sides in different levels of light (indoor, evening window, full sunlight), except the grey in the second picture and the yellow in the third picture got reversed. The chips are organized in the same fashion as the first picture.
These are the sides that were scorched because they were face down in the pot:
As you can see, for almost all the chips, the true color is obvious in the white, lilac, red, orange, green, and both blues when the light brightens up. The yellows and the gray are much less obvious. The yellow in also seem to have gone from double-stripe edge spots to single-stripe edge spots, while the grey almost entirely loses the green edge spots, keeping the black. However, the most significant change it to the pink $50 chip, which has no trace of the pink left under even the brightest light, and even the edge spots are different colors, rather than disappearing. My daughter calls is a purplish-brown.
Meanwhile, my daughter got the Majestics, in an attempt to see if they can be colored by pastels. While the main chip body apparently can not, the edge spots can, so I gave her the yellow, grey, and pink chips (post-dyeing) to see what she thingks whe might be abler to do with the edges. Pictures will follow if anything comes of it.
One more thing I checked was to see what teh effects would be if a chip were nicked or damaged. The dye definitely goes below the surface level of the green chip.
If anyone has any tips or suggestions, I would enjoy hearing them.