Table rehab absolute beginner. Advice / links, please! (1 Viewer)

wmaddix

Pair
Joined
Mar 25, 2021
Messages
111
Reaction score
136
Location
Michigan
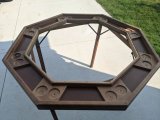
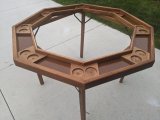
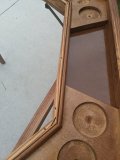
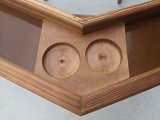
I just found a used folding octagon table on Craigslist (pics below). I have ZERO experience rehabbing / upgrading. Please, I would love input from folks with experience on here. If you've taken on projects like this before, what would you do? Are there any great links and/or forum posts for this sort of rehab project.

My goals are twofold: 1. I want to make this playable 2. probably more importantly, I want to use the experience to start building some new skills. So I'm not really looking to make this the nicest table ever, I just want to develop some experience so I maybe could take on bigger projects later.

Thanks in advance for any advice!


PXL_20210705_165315398.jpg


PXL_20210705_165322161.jpg
 
This looks like a Kestell.

I tried rehabbing one of these a few years ago. It didn't go well. These things are built cheaply with thin wood, glue, and staples. You can't remove any of the pieces without destroying it (cup holders, middle play area, etc).

IMHO, you'd seriously be better off just starting from scratch using a sheet of plywood, etc.

Yup, this is definitely a Kestell. Not worth your trouble OP, sorry.
 
Thank you, @jja412. I agree that would be an enormous upgrade, but it also looks like biting off a little more than I can chew as a rank beginner! Plus, it will likely get a ton more use for board games than poker, so keeping the outer section makes sense--it can contain the bits and bots of board games (Monopoly money, Risk armies, Ticket to Ride trains, etc.).

And I appreciate the insight, @TheDuke and @raynmanas ! Maybe I overspent (I got it for $40). But knowing it's of low quality is a little liberating. If this thing were of high quality, I'd be afraid to mess with it. So I'm still going to give my best effort to removing the center play area and putting some felt on it. If it falls apart when I try to take that center section off, well, I guess I'm out $40.

Looking ahead optimistically, let's say I do successfully get that middle section off. If my goal is to do this on the cheap, anybody know if this stuff will work for resurfacing the middle section and cup holders?

https://www.joann.com/premium-felt/zprd_02109106a.html

Thanks!
 
Your table may be different than the one I had.

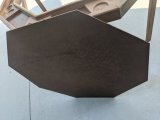
The one I tried working on didn't actually have a full base underneath the middle playing surface wood (which was maybe 1/4 inch thick). So if I tried removing that surface, there was no base to reattach it other than the narrow strips of the edges of the outer area. So if I was to add foam and cloth to it, it would be difficult to reattach without piercing thru the cloth and foam. Picture below kind of shows how my table looked from underneath that shows how the table was constructed.

IMG_1566577127273.jpg
IMG_1566577105099.jpg
 
Not the same table, but a similar project, and other people linked their similar projects
https://www.pokerchipforum.com/thre...-bumper-pool-table-cover-card-surfaces.16118/

Thanks @upNdown ! I wish that discussion thread on the old site was still around. Oh well, it's still great to see some examples of similar tables being re-upholstered. @Mental Nomad mentioned that several people had discussed the merits of different padding for this project. I feel like I'm leaning toward vinyl at this point because it's cheap and locally available--and because I could cut out matching circles to fill the cup holders. But if I did that, would I want to try to put some foam under the vinyl? I see you went with Volara + speed cloth. What's you're opinion of your final result?

THANK YOU!
 
Your table may be different than the one I had.

The one I tried working on didn't actually have a full base underneath the middle playing surface wood (which was maybe 1/4 inch thick). So if I tried removing that surface, there was no base to reattach it other than the narrow strips of the edges of the outer area. So if I was to add foam and cloth to it, it would be difficult to reattach without piercing thru the cloth and foam. Picture below kind of shows how my table looked from underneath that shows how the table was constructed.

Our tables aren't exactly the same, @TheDuke, but they are very similar.

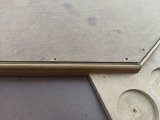
I was able to pry the center section off with relative ease--no glue on mine, just nails and staples to pull out!

PXL_20210707_140536954.jpg

I see what you're talking about re: no base for the middle section, just a narrow strip that the nails went into.

PXL_20210707_140605348.jpg

The middle board is very thin, just 1/8 inch hardboard.

PXL_20210707_140636236.jpg

I'm thinking if I re-upholster that, maybe I re-attach with glue along those narrow strips? Or velcro even? Not quite sure yet.
 
Thanks @upNdown ! I wish that discussion thread on the old site was still around. Oh well, it's still great to see some examples of similar tables being re-upholstered. @Mental Nomad mentioned that several people had discussed the merits of different padding for this project. I feel like I'm leaning toward vinyl at this point because it's cheap and locally available--and because I could cut out matching circles to fill the cup holders. But if I did that, would I want to try to put some foam under the vinyl? I see you went with Volara + speed cloth. What's you're opinion of your final result?

THANK YOU!
The Volara was fine. I guess it was a bit on the thin side for my tastes, but overall, fine. The speedcloth I used was the cheaper Chinese import speedcloth and I wouldn’t recommend it. It didn’t stretch well, and it just felt kind of stiff and coarse, playing on it. It was totally functional, but id spring for the extra bucks for the good speedcloth, or even more for a nice gaming suede or whatever.
overall, a totally worthwhile project. I missed not having a padded rail, but not as much as I thought. It was great for a few years, until I finally sprung for a custom table.
 
Our tables aren't exactly the same, @TheDuke, but they are very similar.

I was able to pry the center section off with relative ease--no glue on mine, just nails and staples to pull out!

View attachment 732807

I see what you're talking about re: no base for the middle section, just a narrow strip that the nails went into.

View attachment 732806

The middle board is very thin, just 1/8 inch hardboard.

View attachment 732805

I'm thinking if I re-upholster that, maybe I re-attach with glue along those narrow strips? Or velcro even? Not quite sure yet.
OK, hear me out. I have a long somewhat detailed suggestion.

I too have looked at tables similar to this and thought about re-habbing. One thing I don't like about this design is that the table surface is the highest point. So if you recover with a nice smooth suited speed cloth or similar, dealt cards can easily slide off the table. I would consider removing a little material on each side of the octagon top, then installing a row of wooden stops around the inside of the octagon of the table, so the top can be recessed below the frame by about a half inch. Depending on what the frame wood looks like - yours appear to be a nicer looking piece of wood on the outside, but basic construction grade stock on the inside - I would probably create a trim piece to go on top of both those pieces. Take that into account when measuring what level to drop the top down to.

Another thing you might do if you like a padded rail for poker is to fabricate 8 individual pads that fit precisely into the recesses that could be removed when you want to use the recess for board games. I would even consider over-lapping one of the drink holders at each seat, because does each player really need 2 drink holders?

And finally, I would punch out the drink holder that I did plan to use so that a deeper stainless steel cup holder could be dropped in.
 
Thank you @TX_Golf_N_Poker for some really good ideas. Probably the main reason I'm undertaking this project is to develop new skills. I'm waiting for the foam and speed cloth to be delivered late next week. So far I've only sanded and put some Danish Oil on it today. The wood cleaned up pretty nicely.

PXL_20210711_234620408.jpg

--I love your idea of a stop around the playing surface...except I've never done anything like that so I'm having a hard time conceiving how I would go about it. Do you know of any youtube tutorials with that step or something similar? I've attached a photo of the inner edge here.

PXL_20210711_234525772.jpg

--The foam padding would indeed be nice. That might be an eventual project I build up to. One step at a time. I agree the double cup holders are overkill. So now you got me thinking--those are only stapled in from the bottom. I bet I could pull out the staples, flip them upside down, and then cut a single center hole for the stainless steel, drop down cupholders. Hmmmm.....that sounds like it'd be better. What do you think?

PXL_20210711_234710846.jpg
--
 
Thank you @TX_Golf_N_Poker for some really good ideas. Probably the main reason I'm undertaking this project is to develop new skills. I'm waiting for the foam and speed cloth to be delivered late next week. So far I've only sanded and put some Danish Oil on it today. The wood cleaned up pretty nicely.

View attachment 734874

--I love your idea of a stop around the playing surface...except I've never done anything like that so I'm having a hard time conceiving how I would go about it. Do you know of any youtube tutorials with that step or something similar? I've attached a photo of the inner edge here.

View attachment 734865

--The foam padding would indeed be nice. That might be an eventual project I build up to. One step at a time. I agree the double cup holders are overkill. So now you got me thinking--those are only stapled in from the bottom. I bet I could pull out the staples, flip them upside down, and then cut a single center hole for the stainless steel, drop down cupholders. Hmmmm.....that sounds like it'd be better. What do you think?

View attachment 734875
--
Honestly, I'm more of an idea guy. Then I look to my son @alecnetwoodworks to tell me how to do things. My thought was to glue/nail some half inch or one inch boards all around. Depending on where you want the table to sit, you could also use those braces under the table for support and pick a wood width that would get to to the correct height. Not sure exactly what tools you have access to. If you have a table saw, you could start with stock that was a little larger than you need and rip it to the exact width so you can use the braces to rest one end of each piece on.

I wouldn't even bother to miter cut the ends. Just cut them a little short. They don't need to go all the way to the corners. Level them, Glue them, clamp them, and hit them with a nail gun if you have one. If not, the wood glue alone should be strong enough since it's not supporting the entire table top, just the center section.

And yeah, flipping and re-punching the cup holder holes in the center of those pieces is a great idea. Make sure they fit back in nicely after they have been flipped. If those mitered corners weren't cut perfectly, they may not go in the same after you turn them over.
 
I actually re-felted a Kestel elongated octagon for a friend of mine. I cut an appropriate piece of foam to fit the octagon center. I think I might not have even bothered to glue it down. Then I took a new cloth and cut it so it had about 1-2" of overhang around the octagon. There is a small groove between the octagon topper and the edge. You can tuck the new cloth into that groove using a putty knife or other thin tool. Once you tuck the cloth in all the way around it is very secure and you do not need to glue or staple it. Plus the tucked in cloth holds the foam underneath in place nicely.
 
You can cut out felt or vinyl circles to fit the cup holder spots. The chip wells at each seat are quite convenient for holding a player's chips and because the table is relatively small, I would be hesitant to put a rail over them as that would cut down on the playable real estate in the center.
 
Aw, are you guys that young?
One's for a drink, the other is for the ashtray.
That makes a TON of sense. Thanks for explaining. I ain't young, more of a tweener. I remember ashtrays, but they've always seemed old fashioned.
 
Honestly, I'm more of an idea guy. Then I look to my son @alecnetwoodworks to tell me how to do things. My thought was to glue/nail some half inch or one inch boards all around. Depending on where you want the table to sit, you could also use those braces under the table for support and pick a wood width that would get to to the correct height. Not sure exactly what tools you have access to. If you have a table saw, you could start with stock that was a little larger than you need and rip it to the exact width so you can use the braces to rest one end of each piece on.

I wouldn't even bother to miter cut the ends. Just cut them a little short. They don't need to go all the way to the corners. Level them, Glue them, clamp them, and hit them with a nail gun if you have one. If not, the wood glue alone should be strong enough since it's not supporting the entire table top, just the center section.

And yeah, flipping and re-punching the cup holder holes in the center of those pieces is a great idea. Make sure they fit back in nicely after they have been flipped. If those mitered corners weren't cut perfectly, they may not go in the same after you turn them over.

These are really good ideas which I appreciate a lot. But I just examined the table and can see that punching a hole in the cup-holder piece wouldn't work because some of them are directly above the legs. Now I'm leaning toward KISS (Keep it simple, stupid). This time I'm just going to see if I can accomplish the re-upholster with foam + speed cloth. If/when I know I can succeed at that part, then I'll aim for more ambitious. But thanks again for helping me think through all these options (and eventual projects).
 
Thank you @Andrew Marks . Tucking the speed cloth into the groove is exactly the clue I was hoping to hear. Because with the center section so thin (1/8 inch hardboard), a staple would have stuck right through. Foam doesn't arrive until Friday, but that's what I'm going to aim to do.
 
Last edited:
I
That makes a TON of sense. Thanks for explaining.
It’s funny how quickly things changed. When I was in college in the 90’s, you could smoke in the dorm rooms and the dorm hallways and lounges. You could smoke on the smoking side of the cafeteria (not sure how clean the air was on the other side. There was a big smoking lounge in the library. Restaurants had smoking sections - you couldn’t go to a nightclub or bar without reeking like smoke when you got home.
And then, within ten years, you pretty much couldn’t smoke inside any buildings. It happened quickly.
 
These are really good ideas which I appreciate a lot. But I just examined the table and can see that punching a hole in the cup-holder piece wouldn't work because some of them are directly above the legs. Now I'm leaning toward KISS (Keep it simple, stupid). This time I'm just going to see if I can accomplish the re-upholster with foam + speed cloth. If/when I know I can succeed at that part, then I'll aim for more ambitious. But thanks again for helping me think through all these options (and eventual projects).
Good luck! Do keep us updated with your progress. I look forward to seeing how this turns out.

Once you get the table done, and start thinking about chip storage, do check out my son's work on his vendor page. If you are going to DIY you will get some great ideas, and if not, he makes and sells some beautiful stuff. Like the display cabinet in my avatar.
 
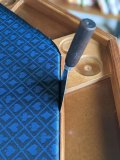
Again, thanks to @Andrew Marks because the use of a putty knife was just a pure revelation for this project. After cutting the foam to match the center section, I nailed the board+foam back right where it came from. I then cut the speed cloth slightly larger than the table and used the putty knife to push the excess speed cloth into the groove (see example picture).

PXL_20210718_135025116.PORTRAIT.jpg

I haven't cut circles for the cupholders and/or wells yet. In fact, I'm not positive I'm going to. I probably will, but I might just decide it looks fine as is.

Notes for others who might try this project:
1. I did about 1.5 inch extra cloth on each side, but then found that to be too long, so I ended up trimming it as needed. I recommend this approach. Go too long at first because you can always trim. You wouldn't want to find you had cut it too short right at the start.
2. Unlike @Andrew Marks I did indeed need to use spray adhesive (I used 3M Super 77). This is because the center section had a slight bow which caused the cloth to billow ever-so-slightly. So I did find the spray adhesive between foam and cloth to be necessary, though your results may vary.
3. Just repeating because it's so helpful: using a putty knife to tuck the edges into that groove made this very easy and solved the problem of the middle section being too thin to staple.

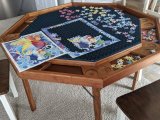
First use of the table this morning by my daughter:
PXL_20210718_153300223.PORTRAIT.jpg
 
@wmaddix I'm so glad I could help you with this. I actually figured out the trick of tucking it into the groove by Googling Kestel table top replacement (https://kestell-furniture.com/files/replace-table-top.pdf), so I can't take credit for the idea, but did find the putty knife (I used a plastic one) just the right tool to do the tucking into the groove. I guess that groove is in there for a purpose. It looks great and like you, I'm pretty much looking for as easy as possible. Nice job.
 

Create an account or login to comment

You must be a member in order to leave a comment

Create account

Create an account and join our community. It's easy!

Log in

Already have an account? Log in here.

Back
Top Bottom