Anybody ever re-upholster one of these old '70s bumper pool table cover card surfaces? (1 Viewer)

upNdown

Royal Flush
Joined
Aug 8, 2016
Messages
21,725
Reaction score
36,962
Location
boston
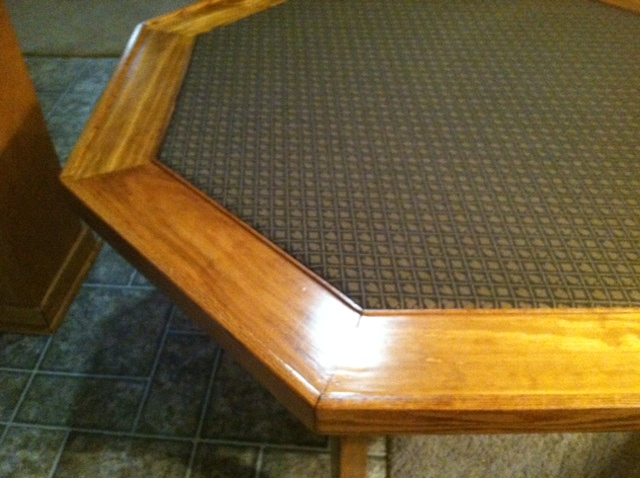
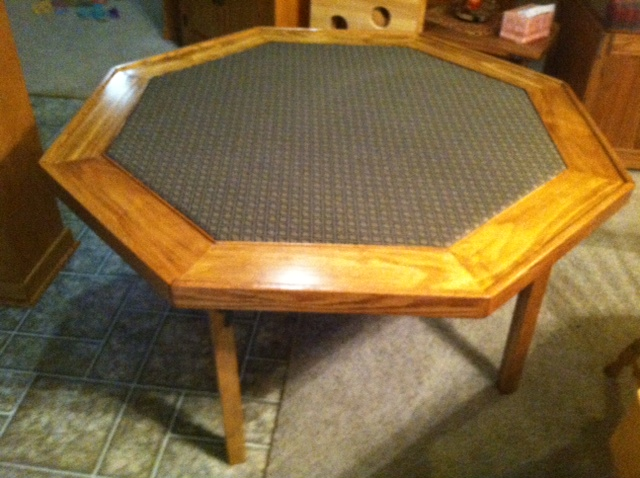
As you can see, this is just one giant sold piece of plastic or fiberglass or I don't know what. But it's solid and its heavy and it's a true 52 inch octagon, so it's better than anything I'd be able to buy cheaply.
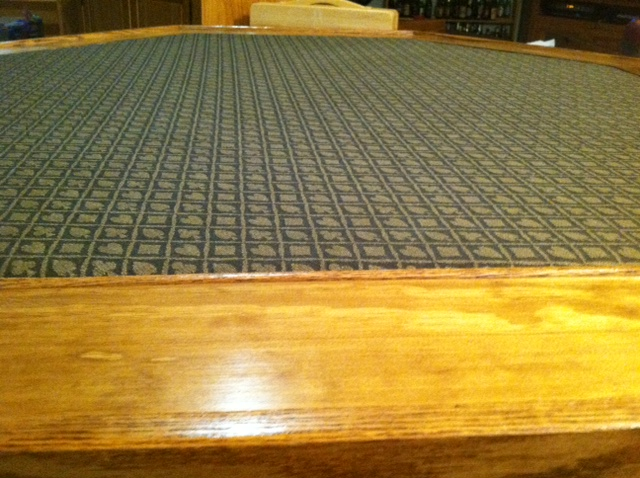
The problem is, the playing surface is 40 year old felt with no padding underneath. I feel like if I reupholstered this with some speedcloth and padding, it could be great. But I have no idea how the center playing surface is attached.
I guess I just need to rip it out and go from there and figure it out?
Anybody ever see one of these dinosaurs?
image.jpg
 
Friend of mine had one (wood construction, though) and he did disassemble it and added new padding and speed cloth. Looked and played great afterwards.
 
Some more and better pics would maybe help. Perhaps pics of the underside as well. Is there a seam where felt meets the hard part or does it look like it mold onto or layed over the plastic. Maybe some close ups of this seam.
 
image.jpg
image.jpg
image.jpg
Some more and better pics would maybe help. Perhaps pics of the underside as well. Is there a seam where felt meets the hard part or does it look like it mold onto or layed over the plastic. Maybe some close ups of this seam.

Wow. I did a little prying, and it looks like it's just glued directly on to the plastic.
 
Seems like this is a simple operation. Pry it all the way off. Reupholster. Glue it back down.
 
Hopefully that old adhesive will pop right off.
Is there a tutorial for redoing this thing? I've never upholstered anything, but this seems like it will be pretty simple, with straight lines and everything. I assume I just cut a piece of padding (WHAT KIND???) to size, put the speedcloth on top, flip the thing over, staple like crazy, and I'm done?
 
I think you could make removable top pretty easy for this. Use some spacer boards the proper thickness for the recess between the ribs (the part with the adhesive). Then drill the spacers and use some T nuts, then glue the top to the spacer boards instead of the ribs.
 
I've done it before. The one I did though was held down by velcro. The playing surface was MDF so I ended up breaking it from pulling too hard. I had to cut a new insert to replace the old one.
 
I think you could make removable top pretty easy for this. Use some spacer boards the proper thickness for the recess between the ribs (the part with the adhesive). Then drill the spacers and use some T nuts, then glue the top to the spacer boards instead of the ribs.

I like the idea of attaching the top to spacer boards instead of the ribs, but I'm not sure what you're suggesting with the drilling and the T nuts. Are you saying I should attach the spacers to the ribs?
 
Put the T nuts into the top so that you can mount from the underside and then in the future take it off a lot easier if you want to replace the gaming fabric.
 
There was a thread on Scott Keen's old forum where a guy posted a bunch of nicely refurbished old Kestell tables. This thread on CT linked to it and this was how I found it way back when, but unfortunately the Scott Keen thread is long gone now.

I believe @Meddler2 refurbished a similar table, but maybe I'm misremembering.

Here's CT user amstelnut's post showing a refurbed Kestell. Looks great!

Photos here for posterity:

FGSoAPH.png


X7M20bx.png


gMnv3zx.png
 
I like the idea of attaching the top to spacer boards instead of the ribs, but I'm not sure what you're suggesting with the drilling and the T nuts. Are you saying I should attach the spacers to the ribs?

The spacers need to go between the ribs. They will need to be as thick as the ribs are tall. You probably just need 4 spacers, since it looks like there are 8 ribs. Put the spacers evenly around the table, drill a hole through each for a t-nut, install the t-nut, drill 4 holes through the table base where you want the spacers to be, and bolt the 4 spacers to the base. Shim up the four spacers with dice chips or washers or whatever so they're a bit taller than the ribs, coat them with some construction adhesive, and put the top down onto them. Use a bunch of heavy books or whatever as clamping force. After the glue dries, you can undo the bolts and add the foam and speed cloth to the playing surface.
 
Jbutler is correct.
I've redone 3 of these. it's easy, relatively inexpensive, and they make great poker tables.

Do you have a link to your original thread? Or maybe a quick rundown of your strategy in refurbing these and pics of your tables? I wouldn't mind a project like this for myself in the coming months and IIRC yours were very nicely done.
 
All right I ordered some suited speed cloth and some volara padding. I'm supposed to glue the padding down, right? Do I need some specific kind of adhesive for that?
 
All right I ordered some suited speed cloth and some volara padding. I'm supposed to glue the padding down, right? Do I need some specific kind of adhesive for that?

3M Spray adhesive is the usual recommendation. 77 or 90, but I've never used volara. Somebody else can probably confirm.
 
Do you have a link to your original thread? Or maybe a quick rundown of your strategy in refurbing these and pics of your tables? I wouldn't mind a project like this for myself in the coming months and IIRC yours were very nicely done.
I couldn't find anything on CT but here's a few pics. If the table was never to be used as a bumper table again, i think it would be cool to remove the bumpers and convert it into a deep walled mosh pit of poker chips by making an insert.

These particular tables were awesome. Purchased new from a local sporting goods store for $150/ea and soon thereafter converted for card use.

insertgone.jpg

noels.jpg

ring.jpg

Octorailpre.jpg

octorail.jpg


newinsert.jpg
 
Well here's the before and after. I should have taken more pictures of the "during" but I've never done any upholstery before, and it was an annoying little job.

image.jpg
image.jpg
image.jpg
image.jpg


I may try to build a padded rail for this thing, at some point. Because the cup holders are dangerous and I have no use for the chip trays.
But that seems like a lot more work.
Maybe I'll just buy something better, when I'm ready.
 
Well here's the before and after. I should have taken more pictures of the "during" but I've never done any upholstery before, and it was an annoying little job.

View attachment 67497 View attachment 67498 View attachment 67499 View attachment 67501

I may try to build a padded rail for this thing, at some point. Because the cup holders are dangerous and I have no use for the chip trays.
But that seems like a lot more work.
Maybe I'll just buy something better, when I'm ready.

Turned out great a padded rail would be easy to make and take anywhere from 2-4hrs. Lots of good videos available to assist.
 
Turned out great a padded rail would be easy to make and take anywhere from 2-4hrs. Lots of good videos available to assist.

Hmm.
I guess it would have to be done in two pieces, since it's 52 inches across. Would I actually join the two sides, or just finish it in two separate pieces, modular-like?
 
I'd go with eight pieces.
I'm not sure if you're serious or joking. I thought about that and I'm pretty sure it would work fine. I think I could build blocks on the bottom of the rails that would snug right into those chip trays for a tight fit, yet they'd be removable, in case somebody would rather use the chip trays than have a comfy rail.
 
Totally serious. Probably easiest to make, upholster, and mount, too. Might consider four-piece construction, but if I were doing it, I'd go with eight. You can optionally mount them through the table for a more stable platform (yet still removable).
 
I've seen that done somewhere very practical.

Once you figure out how to make one, the other 7 are easy peasy.

Just remember that the foam will add to the thickness so you might want to make each piece 1/2 or so shorter so they don't squash too tightly against one another.
 

Create an account or login to comment

You must be a member in order to leave a comment

Create account

Create an account and join our community. It's easy!

Log in

Already have an account? Log in here.

Back
Top Bottom