Montykristo
Sitting Out
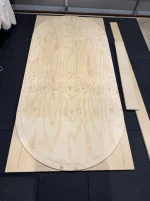
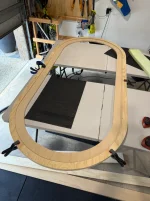
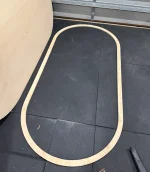
Been about 20 years, but decided to build another table. I have a decent sized dining table (210x90cm or roughly 82x35”) that I currently play games on with a mat, so I figured I could get away with a thinner / lighter table top to go on top of it - that way it would be easier to move it in/out of the garage by myself. Last time I went with a racetrack, but this time (partially influenced by my research on PCF) I decided to go without it.
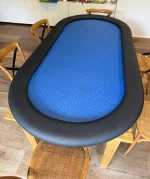
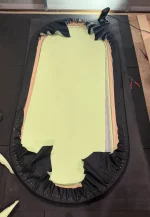
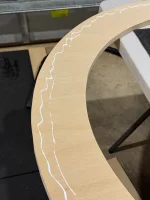
Reflecting over the build: I am happy with how the cuts came out just using the jigsaw, but I think if I were to do it again I would use the router for at least the outside cuts. I also would have purchased an electric carving knife to cut the arm rest foam. I thought that I could get away with just cutting it with a blade, the end result was not as consistent edge. That being said you can’t really tell unless you are looking very close. I forgot how frustrating pulling / stapling that bloody vinyl was! I think would have been easier with a 2nd person. The tips here on PCF about using the hairdryer was gold - made a big difference to smoothing out the finish. In the short term i want to add a betting line, perhaps with paint pen - but still trying to work out the best way to do that. Eventually I was thinking of going a custom topper going forward that would sit under the rail to mix it up. Was a great project that took me a couple of weeks. Thanks for the inspiration from all the builds i have seen on PCF. Really happy with the final result.
Table top size is 230x110cm (~90x43”)
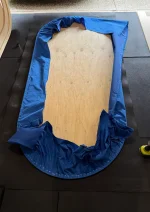
Playing surface:
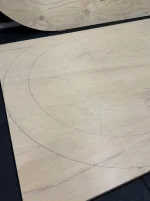
12mm (1/2”) structural ply. (Bunnings)
5mm (~3/16”) EVA30 foam. (MSTOR)
Blue Speedcloth. (Amazon)
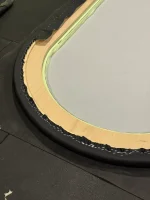
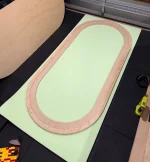
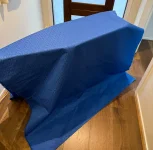
Rail:
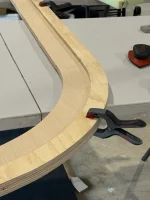
18mm (~3/4”) marine ply. (Bunnings)
32mm (1-1/4”) high density foam. (Foam for Home)
Marine Vinyl. (Clark Rubber)
Other:
Screws, spray adhesive, PVA wood glue, 18V cordless jigsaw and stapler, prob 1000 staples!


Reflecting over the build: I am happy with how the cuts came out just using the jigsaw, but I think if I were to do it again I would use the router for at least the outside cuts. I also would have purchased an electric carving knife to cut the arm rest foam. I thought that I could get away with just cutting it with a blade, the end result was not as consistent edge. That being said you can’t really tell unless you are looking very close. I forgot how frustrating pulling / stapling that bloody vinyl was! I think would have been easier with a 2nd person. The tips here on PCF about using the hairdryer was gold - made a big difference to smoothing out the finish. In the short term i want to add a betting line, perhaps with paint pen - but still trying to work out the best way to do that. Eventually I was thinking of going a custom topper going forward that would sit under the rail to mix it up. Was a great project that took me a couple of weeks. Thanks for the inspiration from all the builds i have seen on PCF. Really happy with the final result.
Table top size is 230x110cm (~90x43”)
Playing surface:
12mm (1/2”) structural ply. (Bunnings)
5mm (~3/16”) EVA30 foam. (MSTOR)
Blue Speedcloth. (Amazon)
Rail:
18mm (~3/4”) marine ply. (Bunnings)
32mm (1-1/4”) high density foam. (Foam for Home)
Marine Vinyl. (Clark Rubber)
Other:
Screws, spray adhesive, PVA wood glue, 18V cordless jigsaw and stapler, prob 1000 staples!
Attachments
-
 IMG_8039.webp77.6 KB · Views: 62
 -
 IMG_8162.webp193.9 KB · Views: 67
 -
 IMG_8132.webp122.1 KB · Views: 71
 -
 IMG_8106.webp49.7 KB · Views: 66
 -
 IMG_8098.webp77.5 KB · Views: 60
 -
 IMG_8090.webp130.8 KB · Views: 65
 -
 IMG_8080.webp113.7 KB · Views: 61
 -
 IMG_8069.webp77.3 KB · Views: 70
 -
 IMG_8065.webp73.6 KB · Views: 61
 -
 IMG_8064.webp123.3 KB · Views: 67
 -
 IMG_8054.webp193.9 KB · Views: 69
 -
 IMG_8045.webp77.3 KB · Views: 68
