My Work in Progress - THC Solids (2 Viewers)

BuckMason

Pair
Joined
Jun 27, 2025
Messages
204
Reaction score
225
Rewards
52
Location
Granville, OH
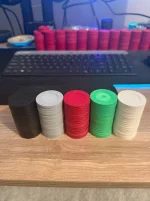
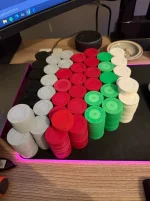
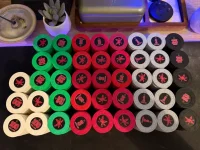
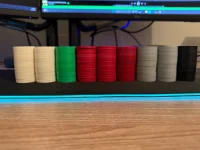
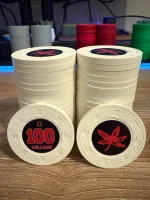
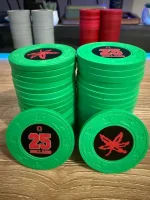
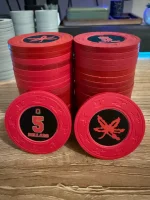
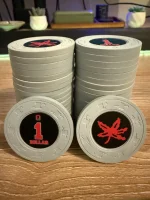
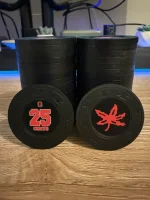
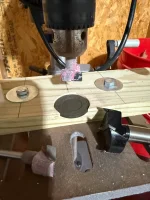
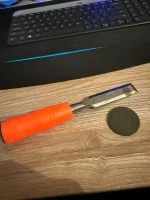
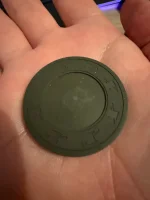
Here's my work in progress Ohio State Buckeye themed cash game set using murdered THC solids. Milling them was a mindless, time-consuming breeze, but it was therapeutic. Currently working through the label design process. Going a slightly different route with the colorways as black will be $0.25s, light grey $1s, red $5s, dayglo green $25s, and white $100s. Looking forward to completing this project and getting my home game back up and running again!
 

Attachments

  • IMG_1404.webp
    IMG_1404.webp
    78.1 KB · Views: 212
  • IMG_1405.webp
    IMG_1405.webp
    103.2 KB · Views: 204
Getting there is half the fun. Going well from what I see. Cannot wait to see your final result.
 
Here's the final product for any of you Buckeye fans out there!
 

Attachments

  • Overhead View.webp
    Overhead View.webp
    133.2 KB · Views: 59
  • Side View.webp
    Side View.webp
    57.4 KB · Views: 57
  • White 100.webp
    White 100.webp
    128.5 KB · Views: 57
  • Dayglo Green 25.webp
    Dayglo Green 25.webp
    98.9 KB · Views: 55
  • Red 5.webp
    Red 5.webp
    91.9 KB · Views: 58
  • Light Grey 1.webp
    Light Grey 1.webp
    81.6 KB · Views: 54
  • Black .25.webp
    Black .25.webp
    77.3 KB · Views: 55
Looking clean! How did you mill these?
Here's how I milled these chips:
You'll see that I used some cheap plywood for the jig. I secured it with some longer bolts, washers, and lock nuts. I drilled a centering hole to make sure everything would be aligned. Then I used a 39mm Forstner bit (pictured on the right of the first two pictures) to put in a little recess slightly deeper than the poker chip itself. Then I made sure a little bit of the poker chip was hanging off the edge of the plywood so I could grab it out of there easily with two fingers and flip it for quick milling of each side. I know other guys on here have used a piece of rubber in their jig to keep the chip in place, but I used the rubber handle on one of my hammers to lock the chip in place while milling by applying a little pressure to the edge of the chip, otherwise the chip would spin, bounce out of the jig, or go flying. The milling bit was a 7/8th inch bit from Magnate (pictured in the jig and on the left of the first two pictures), which is what everyone recommends to use on here. Chips with slight warping or bad warping are pretty hard to mill and the depth will be inconsistent. Luckily, this drill press I borrowed from a coworker has a laser light to ensure each chip is visually centered in the jig. Some chips aren't perfectly centered due to original manufacture flaws or heavy usage, so it can be hard to mill out the center perfectly. As far as depth, I used some sample labels to ensure I was going deep enough to not create spinners when stacking chips. I had a set stop on the drill press, but mostly eyeballed the depth. Once you do ~1,000 of them for your custom set it becomes second nature for how deep to go. The last thing I did was remove the little nipple in the center of the chip that occurs from milling with a flat chisel. Then you apply labels and do a light oiling on the chip edges and you're good to go.
 

Attachments

  • IMG_1575.webp
    IMG_1575.webp
    103.1 KB · Views: 46
  • IMG_1576.webp
    IMG_1576.webp
    113.4 KB · Views: 46
  • IMG_1579.webp
    IMG_1579.webp
    109.4 KB · Views: 45
  • IMG_1580.webp
    IMG_1580.webp
    27.8 KB · Views: 44

Create an account or login to comment

You must be a member in order to leave a comment

Create account

Create an account and join our community. It's easy!

Log in

Already have an account? Log in here.

Back
Top Bottom