BGlover
Sitting Out
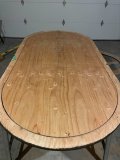
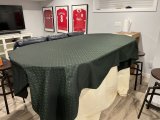
Hi Again, Using this thread to post photos and notes from my first poker table build.
I put about 20 hours into this and in the end I'm satisfied with the results. I had never done upholstery before and was nervous - in the end it wasn't as difficult as I thought - but I had my wife help with an extra set of hands for that part.
LESSONS LEARNED:
1) The main thing: PATIENCE! All the little errors started by feeling rushed or trying to get too much done in too little time.
2) DO NOT ATTEMPT TO USE TWO SEPERATE PEICES OF RAIL FOAM
The foam they had in stock at my local place was in 80 in. lengths - rather than wait on ordering in a 9 foot piece, I took home the 80in sheet and glued a section from the middle onto the end. - this resulted in a noticeable seam through the final - which we attempted to cover with a dryer sheet / dusting wipe. the wipe then wrinkled under the vinyl - causing a ripple that you can slightly notice with your eye - and definitely feel when you touch.
3) ACCOUNT FOR THE FOAM WHEN DRILLING HOLES FOR CUPHOLDERS.
I was concerned that the 3.5 in hole for the cup holders would hang over the inner raiser for the rail - so I set them back towards the players side of the rail - some of the holes ended up a little too close to the edge and there fore the cupholders aren't 100% even and are sort of tilted backwards.. In hindsight - using one in foam, I could've just centered the holes in the rail.
![Image[1].jpeg](/data/attachments/994/994583-8ffc0ed5fd11b6ae89be111a21b9a410.jpg?hash=j_wO1f0Rtq)
![Image[2].jpeg](/data/attachments/994/994584-4e485285670e17ccd68cbe58b0fbe087.jpg?hash=TkhShWcOF8)
![Image[3].jpeg](/data/attachments/994/994587-4ad006262b990081dd67bd761c2bbd8e.jpg?hash=StAGJiuZAI)
![Image[6].jpeg](/data/attachments/994/994588-bad9237aa6091fd65f4597b8961d4c4d.jpg?hash=utkjeqYJH9)
![Image[3].jpeg](/data/attachments/994/994590-16bc1bdf0701b1245aaf6d5358e4a887.jpg?hash=Frwb3wcBsS)
![Image[4].jpeg](/data/attachments/994/994591-c1dc3b9c738127aeb1b7e0bbfae2eb6c.jpg?hash=wdw7nHOBJ6)
![Image[4].jpeg](/data/attachments/994/994592-d02ecea7db083f5e37c578d81131bafa.jpg?hash=0C7Op9sIP1)
![Image[5].jpeg](/data/attachments/994/994593-a70e6585885123dc679b802f2b2ef8fd.jpg?hash=pw5lhYhRI9)
![Image[6].jpeg](/data/attachments/994/994594-d9529b8c2a94e9e1f7043e005f23aeab.jpg?hash=2VKbjCqU6e)
 awesome look