I explain how I did it in Inkscape here:How did you do the edge marks? all of the tutorials that I found for that type of measuring was for illustrator.
Dunno if this is the best or correct way, but it works for me.Looks like a lot of the stripes are starting at the top of the chip (12 o'clock) but I definitely see examples where it seems to start elsewhere on the chip.
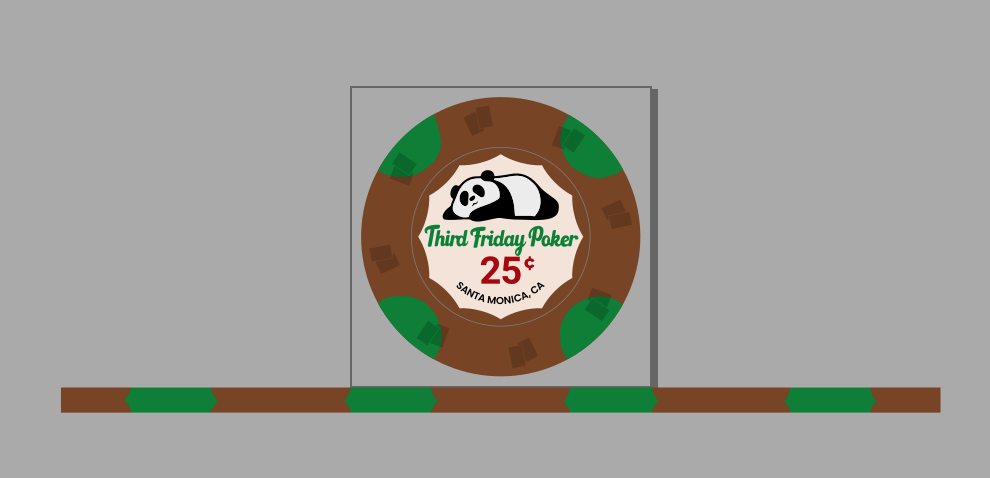
Below is what I did to build my edge stripes in Inkscape, for the 4-moon chip above. I could have probably just used simple math to calculate the edge length of one moon, multiple by 4, subtract from 122.522mm (circumference for 39mm chip), then take the remaining amount and divide that by 4, and then space them out evenly. But I've applied a "Roughen" path effect to some of the shapes, so the elements may vary (probably by less than 1mm), so this is (I think) a more precise but more time consuming method...
Use the Measure tool in Inkscape to find the chord length between two points:
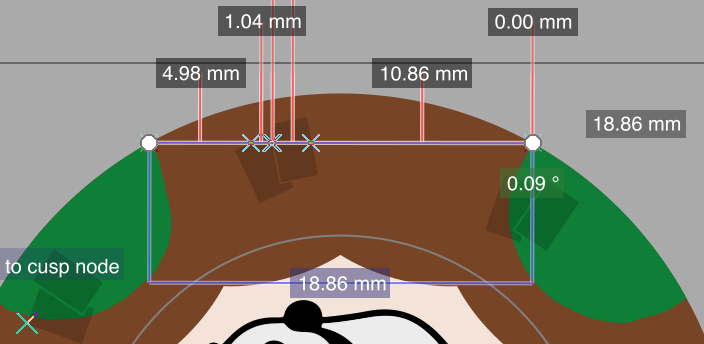
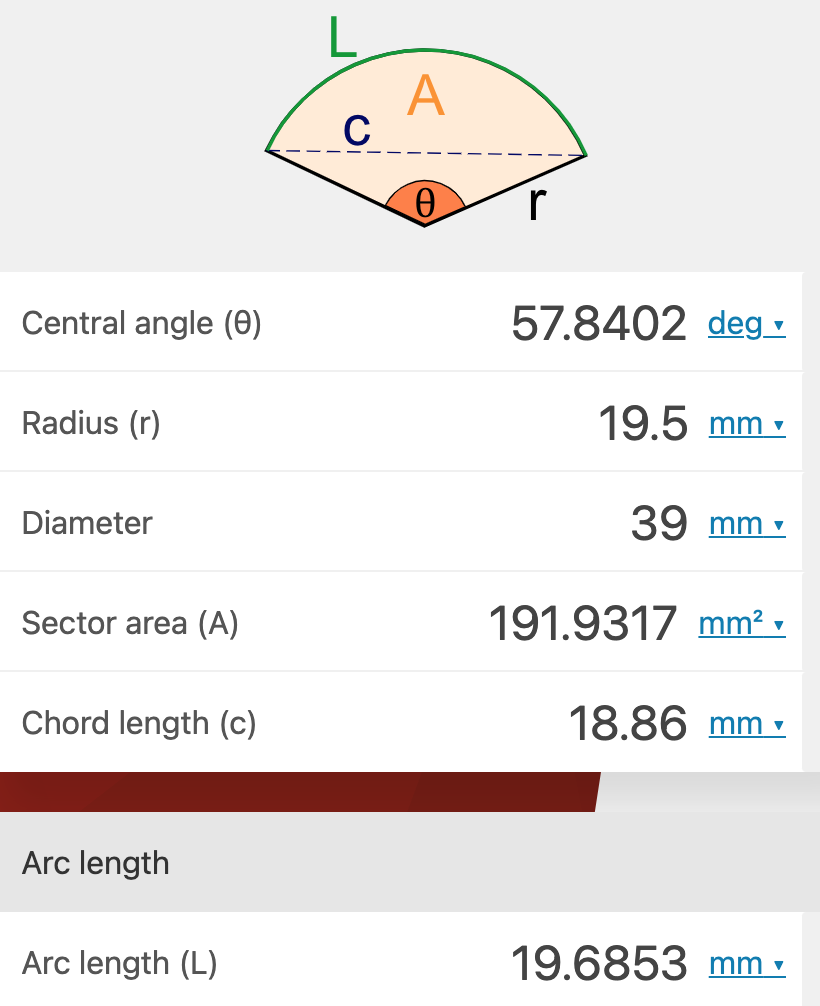
Plug the chord length (18.86mm) into this calculator to get the length of the arc (19.6853mm)
Since I'm starting at the top of the chip, I divide the arc length by 2 and get 9.842mm. So I create a 9.842mm x 3.5mm rectangle in the brown.
Then I use the Measure tool again to measure the chord length first green moon, which is 10.75mm:
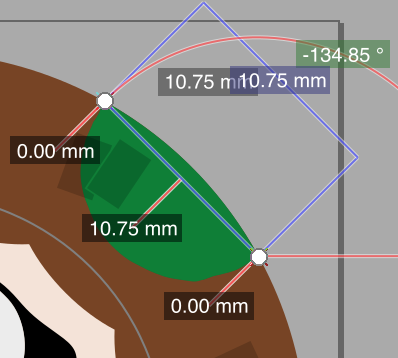
I use the above calculator to figure out the arc length, which is 10.891mm. I create a green rectangle with that width and a height of 3.5mm and grouped it with the brown rectangle. I repeat the process for each segment and added the final half brown stripe at the end.
When I added it all together it was ~122.2mm, which is a little shorter than the 122.522mm circumference for a 39mm circle, so I increased the width of the stripe to match. I added some effects to the edge stripe to make it seem more authentic, like I've seen others do:

Edit: Just read more about split spots and since the tri-moons are green, then that's the color that'd get squeezed:

Maybe for the quarter pies I'll cheat and just take 122.522 and divide by 4 and make the stripe that way. When we're talking tenths of millimeters I'm not sure if my above method is worth the time. Imaging doing this for bear claws...
I have changed the process a little in that I start at the bottom center and go clockwise. That way the tiny bit of overlapping ink that may occur when the stripe meets itself is at the bottom of the chip when you’re holding/stacking it with the design upright to you.
Last edited:


