louBdub
4 of a Kind
- Joined
- Oct 23, 2021
- Messages
- 5,003
- Reaction score
- 18,421
- Rewards
- 0
- Location
- My fortress of solitude.
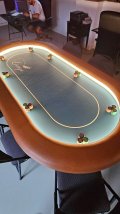
I love 8
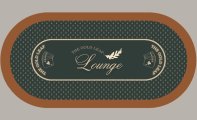
It's such a cigar lounge style right?!I love 8
I choose the first one, because I prefer more empty center areasOkay... 2 more... I should also probably sleep haha
#1
View attachment 1251214
#2
View attachment 1251216
Yes I get it too... its been something that I've been thinking about as well! I made one version where I removed the rock glass and left the cards instead too... still not 100% sure on the overall designI choose the first one, because I prefer more empty center areas
Have you tried putting the leaf where the cards are? Could fit in nicely with the curve of the text. Also, just personal preference but I think having the repeating small icons around the edge looks great, I'd just have them very muted so they are subtle.Yes I get it too... its been something that I've been thinking about as well! I made one version where I removed the rock glass and left the cards instead too... still not 100% sure on the overall design
The leaf definitely fits well with the txt! I agree too with making the outside pattern more subtle for sure great point!Have you tried putting the leaf where the cards are? Could fit in nicely with the curve of the text. Also, just personal preference but I think having the repeating small icons around the edge looks great, I'd just have them very muted so they are subtle.
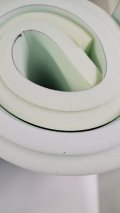
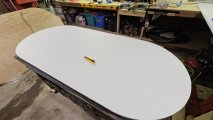
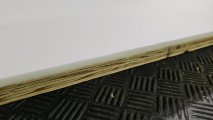
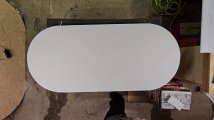
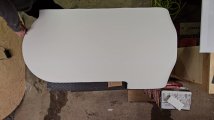
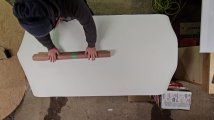
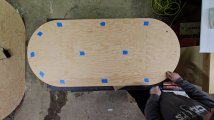
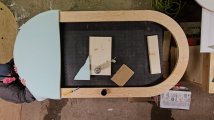
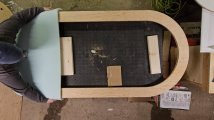
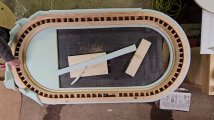
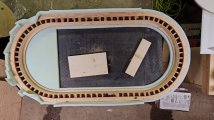
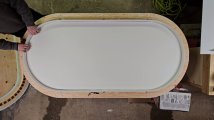
Looks great! Definitely saving this thread for when I get around to building a table.Rail is completely glued and nailed and the correct bolts for the playing surface came in... now to find all the right materials for foam, vinyl and felt!
Any suggestions of the foam would be great!!
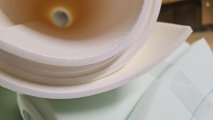
View attachment 1249661View attachment 1249662View attachment 1249665
If you have any questions I'd be happy to share any lessons learned! Haha Just finished gluing all the foam yesterday. Will update tomorrow!Looks great! Definitely saving this thread for when I get around to building a table.
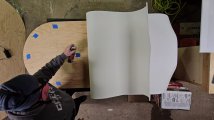


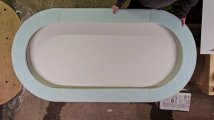

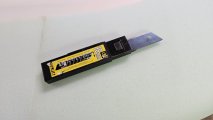
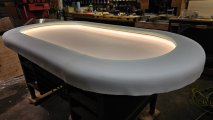
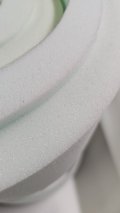
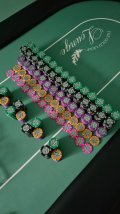
I found some packing foam and tested different thicknesses that seamed to work really nicely at diffusing the light! Maybe a future product!
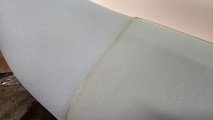
") . I used (very high density) white EVA foam for mine and it works brilliantly and gives a soft surface for cards to bounce off if over pitched. I went that route mainly because my table needs to come apart so it seemed a better option than trying to use acrylic . It is a good alternative (imo) for any table though.
. I used (very high density) white EVA foam for mine and it works brilliantly and gives a soft surface for cards to bounce off if over pitched. I went that route mainly because my table needs to come apart so it seemed a better option than trying to use acrylic . It is a good alternative (imo) for any table though.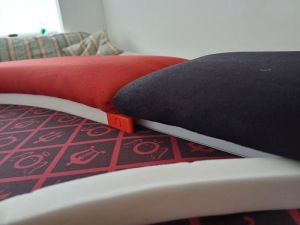

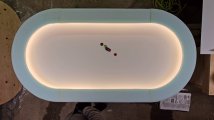
It's so crazy how good a job it does making such a soft lighting effect!!!Just caught up with this thread - nice going - I used the same foam for my rail and playing surface, (although I went open cell on both), so that will be perfect!
Interested in a comment you made early on...
Was excited that someone may be joining me in the foam-as-a-diffuser gang but alas I'm still on my own I think
Following with interest - rail upholstery soon
@Nymor This table also comes apart using the white acrylic. The rail, playing field, diffuser support ring and base are 4 separate parts that are all removable.I went that route mainly because my table needs to come apart so it seemed a better option than trying to use acrylic
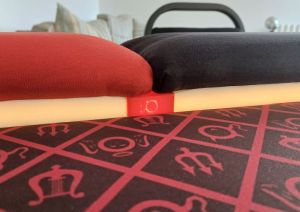
I'm leaning towards a cognac coloured vinyl for the rail but I'm having an incredibly hard time finding it? Also, most places close to me don't sell whisper vinyl and instead they all sell marine vinyl. The difficult part is that it's not that stretchy.... does anyone know what kind of viny you used for your rail? Was it 2 way stretch or 4 way stretch? Is there a good online source that delivers to Canada?

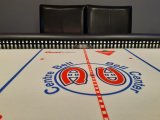
I know the feeling...I worked for weeks on the computer, and have more Mirage felt design variations than one would ever want or need. The hockey rink design was quick and easy...well compared to the Mirage one anyway.
Great job on everything. It looks amazing. I purchased my vinyl at a fabric store (Fabricville) and I picked one that had stretch both ways.I'm leaning towards a cognac coloured vinyl for the rail but I'm having an incredibly hard time finding it? Also, most places close to me don't sell whisper vinyl and instead they all sell marine vinyl. The difficult part is that it's not that stretchy.... does anyone know what kind of viny you used for your rail? Was it 2 way stretch or 4 way stretch? Is there a good online source that delivers to Canada?
Yes I believe we have the same franchise but it's call Fabricland here. I'll have to do some more hunting!Great job on everything. It looks amazing. I purchased my vinyl at a fabric store (Fabricville) and I picked one that had stretch both ways.
I can't remember what it was called, but the store had a wide variety of vinyl and colors.
I'm not sure if that store brand is in your area or not. Try any large local fabric franchise, and they should have tons of vinyl to pick from.
Still stuck on design... unfortunately I think I might order a cheap Amazon SSC for now until I can finalize the design. I also built another entire 8 player table from the scraps of this raised rail table too! I'll be posting details on that soon as the scrap table! HahaGreat writeup so far. I also love your felt designs. This is gonna be a great table, I’m sure. Looking forward to the next update.
Several of the poker table vendors/members do it. Check out vendor pages and websites for:Has anyone experimented with different techniques to customize the led diffuser on a raised rail table? Stickers? Decals? Vinyl wrap?....
I got decals done in vinyl and stuck them on the front of the plexiglass. It took 9 strips at 23.5 long. My diffuser is only 3/4" high. Chanman sells custom diffusers on his site.Has anyone experimented with different techniques to customize the led diffuser on a raised rail table? Stickers? Decals? Vinyl wrap?....
Ahhh okay awesome! Thanks buddy!! I'm just waiting on 2 semi-custom simple felts from them now. I couldn't decide on a design yet so I did something super simple for the time being haha I'll definitely ask them about the custom diffuser options before they ship out the felts!I got decals done in vinyl and stuck them on the front of the plexiglass. It took 9 strips at 23.5 long. My diffuser is only 3/4" high. Chanman sells custom diffusers on his site.
https://www.chanmanpokertables.com/product-page/suited-diffusers
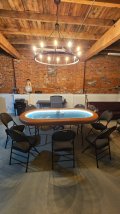
I ended up going with a semi custom more simple design for now. Sorry I haven't made any updates to this post! I'll get the rest up this week! Here's a look at the main table in action...(teal) and the secondary table (green)Any updates? I’m invested now, I like a lot of your designs
Post in thread 'Table Showcase (pics)' https://www.pokerchipforum.com/threads/table-showcase-pics.17451/post-2431421Any updates? I’m invested now, I like a lot of your designs
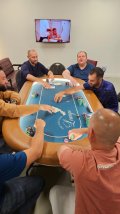
Looks killer! How do you like the rail lights? Do you play with them on or do you find yourself leaving them off most days?Post in thread 'Table Showcase (pics)' https://www.pokerchipforum.com/threads/table-showcase-pics.17451/post-2431421
They're always on. The group I play with hasn't ever complained about it to be honest. I also have a custom vinyl sticker (kind of like a decal) that I'm going to get printed for the diffuser so that it's not so bright white.Looks killer! How do you like the rail lights? Do you play with them on or do you find yourself leaving them off most days?