Building 2 NEW Tables - Argyle Poker Night Thread (4 Viewers)

Lancew09

Pair
Joined
Apr 18, 2019
Messages
155
Reaction score
402
Location
Flower Mound, Texas
Seven months ago, I turned on ESPN and re-runs of the WSOP were playing, I watch for a few minutes and reminisce about all the fun I had playing poker in high school and college. I began to think about playing again, so I texted a few friends if they would be interested in getting quarterly game going - they all said sure! The next day I ordered chips! Thinking of all the issues we had with dice chips not having denomination on them, my main goal was to find a decent looking chip with cash denominations b/c I figured we'd played cash games 99% of the time - I settled with Monaco Casino insert chips from Discount Poker chips.

301564


Table?!?! Where are we going to play? I started looking up poker table online and thought about making one. I'm a hobbiest woodworker, with more then 7 years of woodworking experience - however I decided to look on Facebook Marketplace and CL for a table, cheaper and a lot faster then building one - especially since I didn't know if this whole "Poker Night" would stick. I found a racetrack style table in decent condition on CL for $100, I decided drive 45 minutes across DFW to pick it up. I figured 2 sheets of plywood would cost me $100 - so this had to be a decent deal even if I replaced the vinyl and put SSC on it. Thats exactly what I did, spent $80 on new fabric - $180 for a nice poker table to get us up and running.

301565


New vinyl and SSC installed!

301566


The only thing left to do was set a date, our first 2 poker nights we played .25/.50 NLH 6 handed - we played for about 6+ hrs each night - everyone had a blast! The next poker night, we had enough for a two table tournament, 16 showed up, we all started with $200 in chips and had 1 hour blinds. The tournament was a success, however I learned a lot running my first game - it ran horrible looking back at it now, only 7 months ago! lol

301567


Our first Poker Tournament - 16 seat tourney.

301569


Fast forward seven months and 5 poker nights later with 3 tournaments under my belt - things have drastically changed for the better!! We now have over 60+ people in our poker group, running 3 table $80 buy-in tournaments now. With the drastic growth, I found myself researching "hosting home poker tournaments" online and came across this awesome forum 6 weeks ago.

The first thing I changed after the tournament was my blind structure & adding a blind level clock everyone could see was a must! However I still had some room for improvement on the structure of the game. The 2nd tournament ran better then the first, with some more research on PokerChipForum I knew I needed get the folding card table replaced with another borrowed poker table & the low denomination chips had to go!!

301570


2rd Poker Tournament

301571


After hours of researching clay chips, I decided to sell my metal insert chips and but the Majestic from Apache for my new tournament chips - we now start with T10000 starting stack - a lot of time went into determining how many chips I would need for 30 seat tourney with 1 re-buy. I also bit the bullet and pre ordered the new 43mm Royal chips for my cash set - we play $1/$1 after the tournament now.

I bought blank orange Majestic and had labels made, I wasn't a fan of the brown T5000 chip.

301573


I ordered the following Royals now that I know what chips I need.

200 - $.25 (I don't really need them, just like the chip + when/if we play lower stacks games, I'll have .25's)
200 - $1
300 - $5
75 -$25
25 - $100

301607


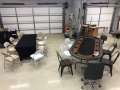
Showing the 2 borrowed tables - soon to be replaced!

301608


$290,000 in play!! Love the finishing chips of the Majestic's

301572


Our $1/$1 NLH cash game - almost $3,000 on the table at the end of the night - I had $650 in front of me before losing $200 on one hand, in for $120, out for $447 - not a bad night!

301576


June 8th was our last poker night, we had 3 poker tables, 29 buy in's and we played with the Majestic T10000 starting stack and the tournament ran so smoothly that we've settled on this structure - P.S. T2000 bonus chips for early registration works!! Everyone showed up and we started on time!!

Now that you're caught up on the rapped growth of our Poker Night, we now need 2 new tables!! The borrowed tables worked, however they are small and a pain to get my hands on every time we play.

First off, I want to thank Bill! bsdunbar1 He was a huge help and these tables below are his design! Thanks again Bill, I hope these pictures help someone else in their building journey.

And so here we go....................... time to start buying material for 2 tables!!
 

Attachments

  • 54728104_743916460496_6743764181377351680_o.jpg
    54728104_743916460496_6743764181377351680_o.jpg
    150.5 KB · Views: 380
Last edited:
Build Day #1 & #2

We decided to go with Baltic Birch plywood, a great stable multi layered plywood.

301609


I decided to spend a little extra money for the Gorilla Gaming legs - money well spent! My buddy might return the legs he bought because he's that impressed with them - there is NO movement!

301610


301611


301612


I had some left over hard maple from a project, so I decided to make my own hardwood edge banding since these table were going to be mobile, this would protect the plywood edge better.

301615


301618


301868


301867


Once the edge banding was trimmed to the plywood thickness, we could then use a template router bit to copy the other plywood pieces.

301623


301629


After marking all the layouts, we then connected the bottom 2 pieces of 3/4" plywood together with T-nuts.

301624


301627


I used the Jasper circle jig with a 1/4" spiral up cut bit to cut out the cup holders.

301633


After the cupholders holes were cut, I could then start separating the 3 individual pieces - the bolts are still installed at this point. I'm only cutting about 1/16" into the base plywood.

301635


301637


Cutting the ID of the rail, using the track as a guide to get a clean cut.

301638
 
Last edited:
Day #3

All the main pieces are complete, I've been playing with rounding over the ID of the rail to get a cleaner look with the 1" HD foam. I'm also using both 1/4" Volaro and 1/4" sewing foam from YAT. All my materail was ordered from YAT, I'll be using Whisper vinyl as well. Here I'm playing with the layout and using a white piece of paper for the plexi, I'll be spray painting the plexi to make the felt.

301639


301640


301641
 
Thanks for sharing your journey into hosting poker and building those tables that seem to be coming along just fine!

I saw this:
The tournament was a success, however I learned a lot running my first game - it ran horrible looking back at it now, only 7 months ago! lol

I've been trying to host as often as I can in Singapore but still learning so much about being a better host and wanted to ask what were your other major changes that you made over time apart from the blind structures and adding the blind level clock.
 
Thanks for sharing your journey into hosting poker and building those tables that seem to be coming along just fine!

I saw this:


I've been trying to host as often as I can in Singapore but still learning so much about being a better host and wanted to ask what were your other major changes that you made over time apart from the blind structures and adding the blind level clock.

1. I have a Facebook page where I communicate everything, easiest way to communicate to 60+ people - of course there are 10-15 who aren't on facebook and I have to text them. If you don't have a page - I suggest getting one set up!
2. I installed a TV in my garage thinking it would be nice to have the "Big" sports game on while we play, however it actually hurt the pace of play b/c players were not paying attention to the hand they were in, so I now use the 40" TV to show the blind level, using a HDMI cable to my laptop. I used the free version of the https://www.thepokertimer.com/ however, you cannot stop and start the free version, so I ended up buying it, $20 well worth it - does everything I need it to do!
3. I use the early bird bonus chips to get players to show up on time, this was a huge success, we had everyone in the room 15 minutes before we drew seats. This helps you run a tight ship, meaning retention to get players to come back. The tourney before, we started 35 minutes late - people were just sitting around.
4. The Blind Structures changes have been huge, the first game last WAY too long, the blind level dragged out forever, 2nd tournament was better but still too long of levels. Using cash chips ($200) starting stacks felt weird, players didn't understand that $50 was 25% of your stack - felt more like Bingo! lol
5. The T8K + 2K early bird starting stack for T10K with the new 20 minute blind structure & eliminating 100% level jumps has made the game flow so much better then the previous 2 events where people felts like they had to shove because of the next level going from $5/$10 to $10/$20 etc.
6. We now play every 6 weeks, and I promote pretty hard to get the seats full by running a seat list on the FB page & I also start a waiting list as well b/c there has always been 3-4 people who back out the day off.
7. We start at 5:30, pretty early - some of the guys like to play late, some don't - I try to structure the tournament to finish around 11:30 +/- so the winners can play in the cash game.
8. We payout top 5, means more people are making money, hopefully they'll come back
9. We always play $1/$1 cash game after, once a table opens up and there is 5 people who want to play.
10. Friends or Friends are invited, guest are welcome once they've played one event - we've also tapped into 2-3 smaller dying poker groups where they had 5-7 guys that would play randomly.
11. We play in my garage/shop that is temperature controlled, the garage has its own side door - so players rarely in my house except to use the restroom, most pie outside. Beers have spilled and its not a big deal since we're in the garage - one reason for making new tables, is to have cup holders in the rail.

I've gotten some great feedback from the players on changes, and some of these changes I've obviously witness first hand and can see how they've improved the flow of the game - I believe if you run a smooth game, players will want to come back. Once these 2 new tables are complete, retaining players for a 30 seat tournament should be easier - the joke before when drawing seats was who was going to get stuck on the square card table!!?? lol

Hope this helps, remember I'm about to host my 4th poker tournament - I'm still a newbie!
 
Lance, following this. I'm in Little Elm -- we aren't that far apart! Sending PM.
 
I'm not sure which is more impressive, your first table build, or the fact that you were able to grow your game from nothing so quickly.

Great work!
 
Love the workshop & awesome collection of top notch tools. Quick tip on the rail, in the section pictured in post #3, it looks like you have the underside corner rounded off. You want to hit all of the outside corners with a round over bit as well - even though they're under the padding, this will help take the edge off so there are no sharp corners to lean on, it makes the rail more comfortable.
 
Love the workshop & awesome collection of top notch tools. Quick tip on the rail, in the section pictured in post #3, it looks like you have the underside corner rounded off. You want to hit all of the outside corners with a round over bit as well - even though they're under the padding, this will help take the edge off so there are no sharp corners to lean on, it makes the rail more comfortable.

Yes, I plan on using 1/2” round over on all the corners.
 
Love the workshop & awesome collection of top notch tools. Quick tip on the rail, in the section pictured in post #3, it looks like you have the underside corner rounded off. You want to hit all of the outside corners with a round over bit as well - even though they're under the padding, this will help take the edge off so there are no sharp corners to lean on, it makes the rail more comfortable.
It will also extend the life of the rail.
 
I got the blanks for the spacer pieces in the vacuum today at lunch, I'm hoping to get all the woodworking completed by the end of the weekend.

I used the center 1/2" plywood from the top of the rail for the spacers - I'm using 3 1/2" pieces for my spacer - this give me a 1" plexi reveal from the playing felt.

I have enough for 4 2" wider spacer between each cup holder, however I'm considering only using 3 because I don't think we need 4, this will also reduce some weight of the table - I plan on hanging this from the wall using chains and hammock brackets, more on this later.

301957


301958
 
I cut the spacers tonight after work - I made them 4" x 2 1/2" & I ended up only using 3 spacers between cup holders.

302126


I used the cross cut sled and a stop to repeat the cuts - makes cutting 60 spacers a lot easier.

302128


All 30 spacers laid out - next is glue!

302129


I used my disc sander to shape a small radius of the curve - I'll add some hardboard pieces to flush up everything so the 1" HD foam sits nicely over everything.

302130
 
I got another few hours in the shop today, I glued down the raised rail spacer blocks & also picked up a sheet of hardboard and ripped some piece down to size to fill in the spacer voids. Just glue and staples are holding it.

302566


I used a piece of hardboard to make sure I have the correct offset to allow strips of hardboards once the spacers are glued up.

302567


LOTS OF CLAMPS REQUIRED! LOL

302568


While the glue was drying for a few hours, I finished cutting out 9 more cupholder spacers. I used the jasper circle jig, a scroll saw to remove the pieces from the sheet of plywood - then some disc sanding to flush everything up. Pretty easy process, just takes a while.

302570


302571


302572


I glued on the hardboard strips to cover the voids, next I'll glue on the top rail piece after a bite to eat! Here's a mock up what it will look like once it's all glued up. I can't wait to play on it in a few weeks!

302573
 
Last edited:
I glued on the cup holder rings this morning, used CA glue and activator along with Titebond II to make quick work of this task. The CA glue acts as a clamps while the wood glue dries.

302756


302758


Playing around with the upholstery, can't wait to get some chips and cards flying on this table! The table will have a 1" plexi reveal below the rail, I'll be painting it red to match the playing felt.

302762


Playing with the betting line, trying to determine how big to make it.

This table is 46" wide by 94" with a 5 7/8" rail. I made the plexi reveal too deep so I reduce the top rail to help compensate the mistake, hopefully I don't run into cupholder issue later, where the cup holder is peaking out over the vinyl as the vinyl is rapping around the rail.

302766
 
Last edited:
I made the plexi reveal too deep so I reduce the top rail to help compensate the mistake, hopefully I don't run into cupholder issue later, where the cup holder is peaking out over the vinyl has the vinyl is rapping around the rail.
Ha! You made a mistake! May as well start over.

Send the current table to me for "disposal". :whistle: :whistling:

You may as well finish it before sending, in case you have other mistakes you need to work through.
 
Ha! You made a mistake! May as well start over.

Send the current table to me for "disposal". :whistle: :whistling:

You may as well finish it before sending, in case you have other mistakes you need to work through.

Thats funny!!! I've made a couple more mistakes, good thing about this "type" of woodworking, the upholstery will hind "ALL" of them! lol

I had the router edge guide move on me when routing the plexi grove, the vacuum shut off b/c it was full and it distracted me, next thing I was of course.
 
Got some more work done on the table tonight, I took a stab at upholstering the rail using Whisper vinyl, this was my 2nd poker table I've upholstered and I'm still learning to say it lightly! lol This is by far the hardest part to get "right" building a poker table.

I ordered the staple remover last minute on Amazon, good thing - b/c a few, a lot of staples came back out! lol Overall, I'm ok & satisfied with the vinyl, there are some wrinkles on the corners closer to the bottom of the rail, being that its a raise rail, I think it made it more challenging then the previous rail I rapped. I don't know how you can cover a rail without wrinkles, it seems impossible.

The cup holders fit perfectly into the rings, nice snug fit - there not coming out!

First I glued on the 1" HD foam, used 3M 77 adhesive. I decided to cut the holes prior to using the adhesive, worked out pretty well.

303797


303784


303785


303786


303791


303788


303792


303793


303794


303795


I also go my felt approved and sent into production, hoping to get it by the end of he week so I can install the playing surface. Also, my plexi should be ready to pick up this week as well - things are moving along. I still have a lot of work to do on my buddies table, we were building them simultaneously, however I jumped a head!!! :)


303796
 
I got 2 phone calls today, one from the plexi company letting me know my plexi was ready to pick up & the other was from CasinoSupply.com letting me know my felt was ready as well - guess what I'm doing tomorrow???!?! lol

That being said, I went a head and glued up my playing surface tonight in preparation for my felt being installed tomorrow.

I used some washers to to make the T-nuts flush with the plywood, the blue tape is there just to hold them down until I got the Volaro installed with 3M 77 adhesive. I decided to go with both Volaro & sewing foam from YET - I really like the feel of the combination. My other table only has the Volaro, and it's a little to firm for my liking.

304118


304119


304120


304121


I had to throw some cards on it with some chips!!! Felt is going on it tomorrow night, plexi will be installed this weekend sometime - I have to paint the plexi and let it dry before installing.

304122


304123
 
I should be going to sleep as it's midnight but I just spent the past 45 mins going through the pictures from start to here and in awe of this custom table... WOW!
Thanks guys, the woodworking part is the easy part - the upholstery was a by far the hardest part. I'm going to get my felt and plexi today, hoping to install the felt tonight.
 
Thanks guys, the woodworking part is the easy part - the upholstery was a by far the hardest part. I'm going to get my felt and plexi today, hoping to install the felt tonight.
The upholstery is much easier if you have 2 people working together. 2 hands to pull, and one to staple. That 1 extra hand goes a long way.
 
The upholstery is much easier if you have 2 people working together. 2 hands to pull, and one to staple. That 1 extra hand goes a long way.
My wife helped, but she doesn't have the had strength I needed - it came out pretty good, it could have been installed better but I'm happy with it - a lot better the my other table I got off CL and re-upholstered.
 
Last edited:

Create an account or login to comment

You must be a member in order to leave a comment

Create account

Create an account and join our community. It's easy!

Log in

Already have an account? Log in here.

Back
Top Bottom