This is my first and current project and ran into a dead end. So I learned that just a good paper and laser printer is not enough. If these at all get wet the ink bleeds. I've hear modge podge or acrylic spray or laminate works well. I'm doing new labels with vinyl paper and having my wife cut them out with a cameo machine. Looking for recommendations on how to best seal the inlay in. Any input is appreciated.
You are using an out of date browser. It may not display this or other websites correctly.
You should upgrade or use an alternative browser.
You should upgrade or use an alternative browser.
At a deadend (7 Viewers)
- Thread starter zo121179
- Start date
gopherblue
Straight Flush
flipupchipup
Straight
Psypher1000
Straight Flush
Laminate would be my suggestion, but...Looking for recommendations on how to best seal the inlay in.
@gopherblue has the right of it, IMO. Your one stop shop is @Gear labels. Cost of laminated labels through him will likely be cheaper than time spent and materials purchased to DIY, not to mention the quality of his product (which is outstanding).Any input is appreciated.
detroitdad
Royal Flush
Save yourself and contact @Gear
Laminate would be my suggestion, but...
@gopherblue has the right of it, IMO. Your one stop shop is @Gear labels. Cost of laminated labels through him will likely be cheaper than time spent and materials purchased to DIY, not to mention the quality of his product (which is outstanding).
lock it up. These two have nailed it
")
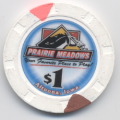
I was looking at this route but the website is down. Didn't know if we were still doing labels. Looking for something similar in look and feel to this attached. I like the smooth sticker that shines in the light. Not sure if I can do that.
@Gear does have a glossy labels available. Website is still under construction, but he's responding to e-mails here.
Hey, come on guys. Gear does the best work, and anybody would be well served to engage him, but that's not what this is about. This is about somebody trying to do it for himself. Somebody thinking outside the box. A little of the good ole yankee ingenuity.
I don't have any suggestions personally, but lets get this guy some better advice than "pay somebody else to do it."
I don't have any suggestions personally, but lets get this guy some better advice than "pay somebody else to do it."
detroitdad
Royal Flush
"pay somebody else to do it."
This is clearly the best option. Especially if your looking for quality workmanship.
Rhodeman77
Straight Flush
Poker Zombie
Royal Flush
I ran into a similar issue with my first relabels. Answer was obvious. Peel them off, replace with Gear Labels at 10¢-15¢ per label.
His website has been down for a while. I assume that is because...
His website has been down for a while. I assume that is because...
- He is so busy making labels that he does not have time to work on a website
- He is so busy making labels that he does not need to advertise (beyond PCF)
- Is out spending our monies, because he has been busy making labels.
Hey, come on guys. Gear does the best work, and anybody would be well served to engage him, but that's not what this is about. This is about somebody trying to do it for himself. Somebody thinking outside the box. A little of the good ole yankee ingenuity.
I don't have any suggestions personally, but lets get this guy some better advice than "pay somebody else to do it."
Okay, I'll bite.
There are matte and glossy sealants for model paints. You could give those a try. Just get the ones that don't smell. I would apply it carefully with a model brush so you get mostly label and not much of the chip face. I, myself, would prefer the matte rather than the glossy.
Truly, though, I would get a recommendation from an artists' supply shop (not a craft or hobby store unless they specialized in model miniatures for serious enthusiasts). The staff should be able to give you best recommendations for a sealant that will protect and not discolour. Bring a few chip and label samples with you so they can see the materials.
Back in the day, the recommended product was Krylon Preserve It. Spray the Krylon on the labels and let dry before removing the labels from the backing sheet. That was 6-7 years ago. I have no direct experience with this product, however.
Maybe something like this Kodak paper
Print, then use lamination sheet after ink dries. Then have your wife cut them on her cameo?
Print, then use lamination sheet after ink dries. Then have your wife cut them on her cameo?
You can buy self adhesive vinyl sheets or even pre-cut labels that are laser printer safe and weatherproof. I got mine from onlinelabels.com
Meddler2
Full House
I've done this many times and haven't had any issues with ink bleeding. Spray the entire sheet with clear acrylic. Let it dry then cut out the labels.
P.s. I'd recommend a well ventilated or outdoor space.
P.s. I'd recommend a well ventilated or outdoor space.
Whatever you end up doing, don't use paper labels on poker chips that will actually see use. Even Krylon won't protect long-term.
I can appreciate the do-it-yourself mentality, but it will end up costing you more in time and money and result in an inferior product vs going with a proven and experienced vendor.
I can appreciate the do-it-yourself mentality, but it will end up costing you more in time and money and result in an inferior product vs going with a proven and experienced vendor.
200 Motels
Flush
That's what i did for my nexgen paper labeled. Spray the labels outside. Let em dry. Apply.Back in the day, the recommended product was Krylon Preserve It. Spray the Krylon on the labels and let dry before removing the labels from the backing sheet. That was 6-7 years ago. I have no direct experience with this product, however.
But ya, gear labels are great.
This is my first and current project and ran into a dead end. So I learned that just a good paper and laser printer is not enough. If these at all get wet the ink bleeds. I've hear modge podge or acrylic spray or laminate works well. I'm doing new labels with vinyl paper and having my wife cut them out with a cameo machine. Looking for recommendations on how to best seal the inlay in. Any input is appreciated.
Your one stop shop is @Gear labels. Cost of laminated labels through him will likely be cheaper than time spent and materials purchased to DIY, not to mention the quality of his product (which is outstanding).
Hey, come on guys. Gear does the best work, and anybody would be well served to engage him, but that's not what this is about. This is about somebody trying to do it for himself. Somebody thinking outside the box. A little of the good ole yankee ingenuity.
I don't have any suggestions personally, but lets get this guy some better advice than "pay somebody else to do it."
Back in the day, the recommended product was Krylon Preserve It. Spray the Krylon on the labels and let dry before removing the labels from the backing sheet. That was 6-7 years ago. I have no direct experience with this product, however.
I have no doubt that Gear does fantastic work. The testamonials are scattered throughout these forums.
But there are tons of people ... like me ... who want a cheaper option for a variety of reasons. Maybe they are putting labels on cheaper chips (I know it's hard to believe, but not everyone here has thousands of dollars invested in their chip sets). Maybe they have 2000 chips and don't want to spend $600 on labels. Maybe they are just a big ol' DIYer.
I did a lot of research, and I found onlinelabels.com. They have a Maestro Label Design tool (free) that allows you to upload your artwork and see what it would look like on a chip label. Once you have your designs finalized, you can either have them print your labels for you, or you can print them yourself. Personally, I had all sorts of alignment issues when I printed myself, so I ordered a couple of sample pages prior to placing my larger order. I ordered their white weatherproof polyester labels. So, not paper. From what I have read online, the polyester labels are even better than vinyl for certain uses … http://arcadvisor.com/faq/polyester-vinyl-labels. When I had onlinelabels print my 1" circle labels, there were no alignment issues to speak of.
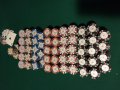
In addition onlinelabels recommends spraying their labels with Krylon Preserve It! https://www.krylon.com/products/preserve-it-digital-photo-paper-protectant. I chose the glossy version (I believe there are matte and satin finishes, as well), and I love it. One spray can allowed for two coats on 64 label sheets. I could probably get a third coat out of the can, but I stopped at two. Total cost was less than $200 for about 4000 commercially printed, weatherproof polyester, coated labels. Here is a pic of the finished product:
They turned out great! This is a good option for someone with cheaper chips like metal sluggers. I home printed and labeled some outlaws with stuff from onlinelabels.com - they turned out fine for chips that cost 14c each.
Though if I was labeling clays that I spent over $1 a chip on, I would want the solid laminate and not a spray layer so there are really only a couple places I know that you can go for that - Gear or ABC.
Though if I was labeling clays that I spent over $1 a chip on, I would want the solid laminate and not a spray layer so there are really only a couple places I know that you can go for that - Gear or ABC.
Though if I was labeling clays that I spent over $1 a chip on, I would want the solid laminate and not a spray layer so there are really only a couple places I know that you can go for that - Gear or ABC.
Yep. That's my point. If you spend thousands on your chips, it makes all the sense in the world to get Gear or ABC labels. But that's not everyone.
I agree that for most jobs, hiring Gear is surely the best thing. I have been on the verge of placing some large orders for a while myself, and am hoping to complete my end of the job soon.
That said, for very small batches of chips (10-40, say), I have been having fun experimenting with making my own labels.
Here’s some thoughts from learning the hard way:
• I’ve bought glossy vinyl waterproof labels intended to work with inkjet printers from https://www.onlinelabels.com with varying results.
• I’ve also tried to use their semi-gloss options, but they are very slightly thicker, and don’t cut cleanly with the various brands of punch that I’ve used.
• My first batch were pre-cut 1" round labels. I found that even with a high-quality inkjet printer, it was nearly impossible to get the registration correct. I might be lucky to get 1 sheet in 10 to hit correctly.
• So I switched to full-page labels, and began experimenting with various circular hole punches. This took more trial-and-error, because the correct size to fit various 39mm and 43mm molds varies slightly. Also, it’s hard to find true metric size punches for more precision.
• You need punches where you can look at the alignment on the bottom. I press the lever slightly down to hold the label in place once it’s aligned, then carefully flip it over to make the punch on a hard surface. You can expect some loss due to imperfect alignment, and also sometimes the edges don’t come out crisply.
• Once I find the right size punch for a chip, I buy at least two in case one is not working well. They aren’t that expensive. I’ve tried sharpening them by punching tinfoil (per the suggestion of @allforcharity , and it seems to help, but I can’t say for sure.
• The first two batches of labels that I did came out splendidly (one set for relabeling 40 SB5Ks, one applied to 20 Apache Royal blanks for seating chips). They do not smudge, and look very sharp.
• Perplexingly, when I went back to produce another set (relabeling one barrel of SB100s), the printing came out great again, but the labels were easily smudged — even after letting them “cure” for a while. This was true both when printing from my original stack of sheets, and a second batch I ordered.
• The problem may have something to do with my printer settings; I believe on all of them I used the same configuration (selecting glossy paper and fine printing options), but some things I’ve read suggest that even small tweaks with the printer can change the outcome. I need to contact the label company and see if they have advice.
• In the meantime, I have been experimenting with coating the glossy label sheets after printing (but before cutting with Mod Podge (often mistakenly called Modge Podge).
• The Mod Podge definitely seals the the labels well. I can’t smudge the labels at all after just one coat. It also does not seem to cause problems cutting with my punches. It also slightly dulls the glossiness of the labels, making them look more convincingly “real” to my eye.
• Bug/feature: I’ve yet to find the trick of applying Mod Podge without getting some subtle streaking. I’ve tried foam brushes and other techniques, but can’t seem to hit upon the right application to get a totally even surface. That said, the streaks are very subtle, and if you like a textured label, these again can arguably add to an authentic feel.
Anyone out there have any ideas about either (A) why the vinyl, waterproof inkjet labels sometimes can be smudged, and sometimes can’t, and (B) the best way to apply Mod Podge for an unstressed surface?
I tried home printing and found the same alignment problems. I also tried cutting which didn't solve anything either. Both ended up wasting money when I was trying to save some.
I think the best plan is to get them printed by onlinelabels.com provided thy have a label the right size for cheap chips. I'm still going with ABC though.
I think the best plan is to get them printed by onlinelabels.com provided thy have a label the right size for cheap chips. I'm still going with ABC though.
(A) I think just because it’s inkjet and not laser. Laser bonds itself to the page, whereas inkjet is applied onto the page.Anyone out there have any ideas about either (A) why the vinyl, waterproof inkjet labels sometimes can be smudged, and sometimes can’t, and (B) the best way to apply Mod Podge for an unstressed surface?
Meddler2
Full House
I've done this several times and recently with great results.Back in the day, the recommended product was Krylon Preserve It. Spray the Krylon on the labels and let dry before removing the labels from the backing sheet. That was 6-7 years ago. I have no direct experience with this product, however.
I’ve always removed the backing sheet (i.e. the non-label part of the page) prior to spraying. Because the spray can adhere the label to the backing sheet otherwise, and create a peel-off of the protectant.I've done this several times and recently with great results.
Some digging around the interwebz suggests that when printing waterproof vinyl inkjet labels, one should use a “normal” or medium quality setting... that higher DPI can lead to oversaturation and smudging. That may explain why one batch is perfect and the others smeary. Though I don’t remember using a lower setting on either.
ekricket
Royal Flush
Here is what I did for a set a while back, I may have posted this here already
Take two sheets of your labels and have them laminated together back to back, so the printed sides are out. Use the thinnest laminate your store can do.
Then cut the laminate all around, right up to the paper. You can then separate them, and now the labels themselves are laminated, but the peel and stick side is not. Now you can cut them out with your method of choice, punch or machine, and you have peelable laminated labels.
Similar threads
- Replies
- 7
- Views
- 215
- Locked
- Replies
- 2
- Views
- 448