Workbench Build (1 Viewer)

timsta007

Pair
Joined
Aug 5, 2017
Messages
103
Reaction score
191
Location
NorCal
Note: The first few portions of this thread are copied from PMC. The Workbench is an ongoing work in progress and will be updated periodically.


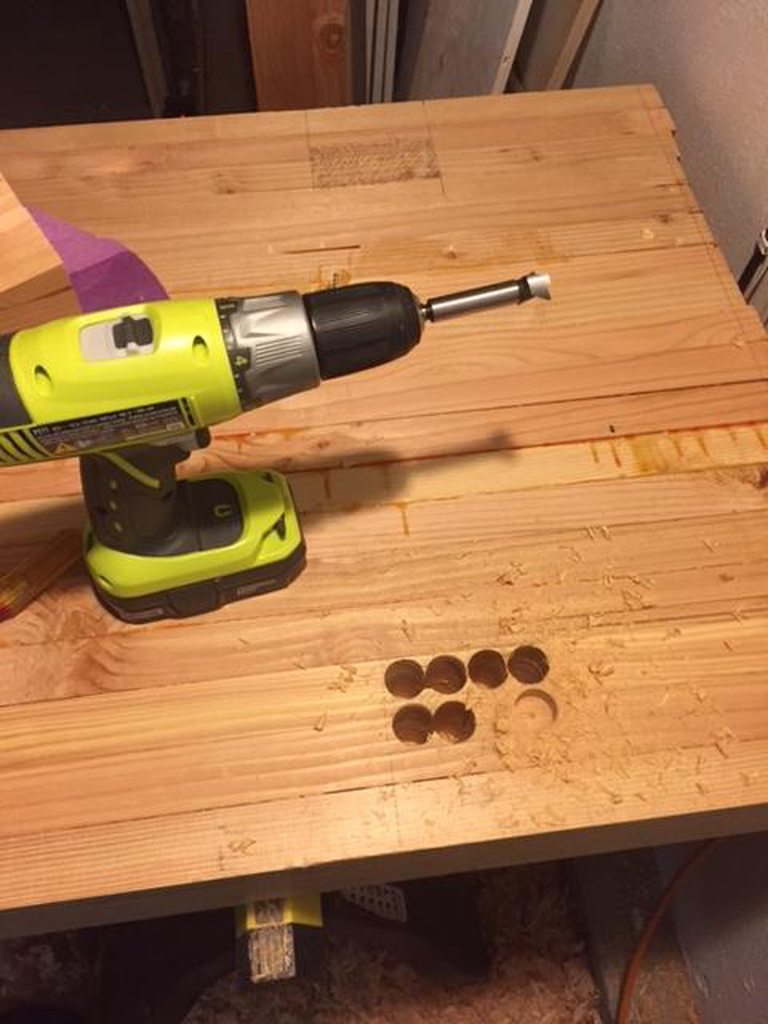
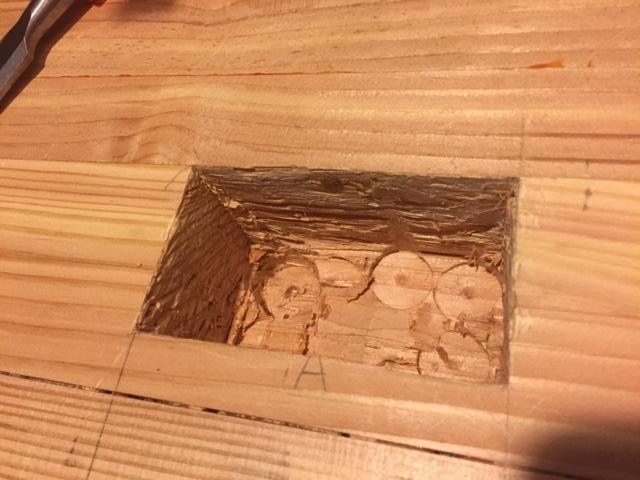
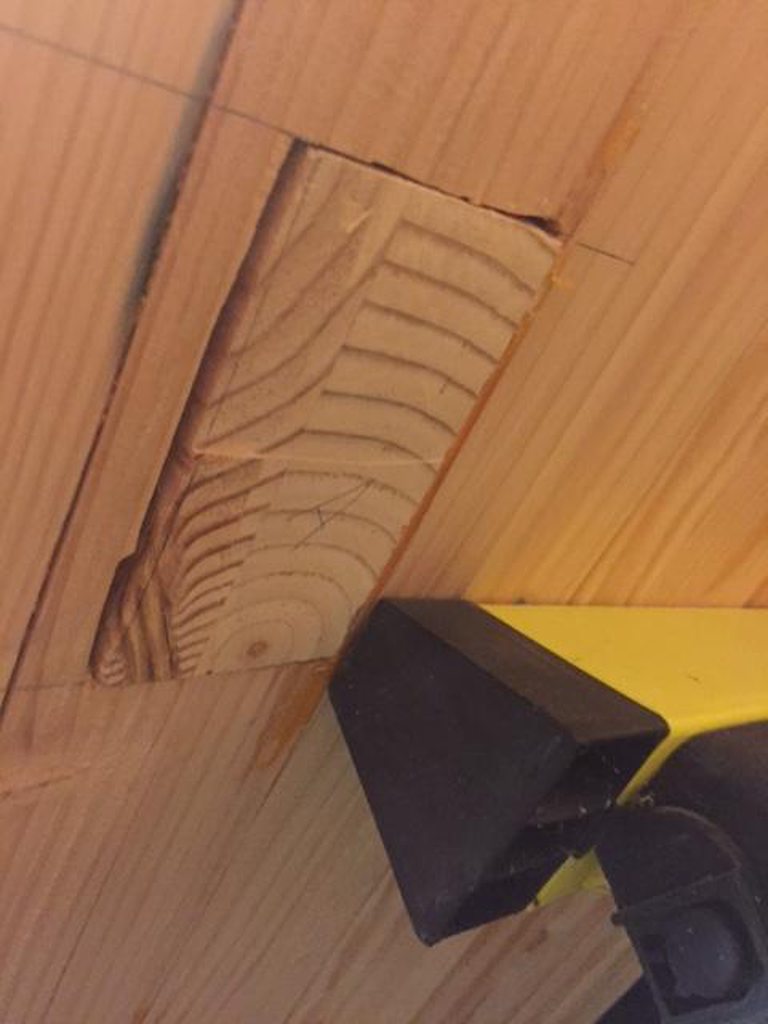
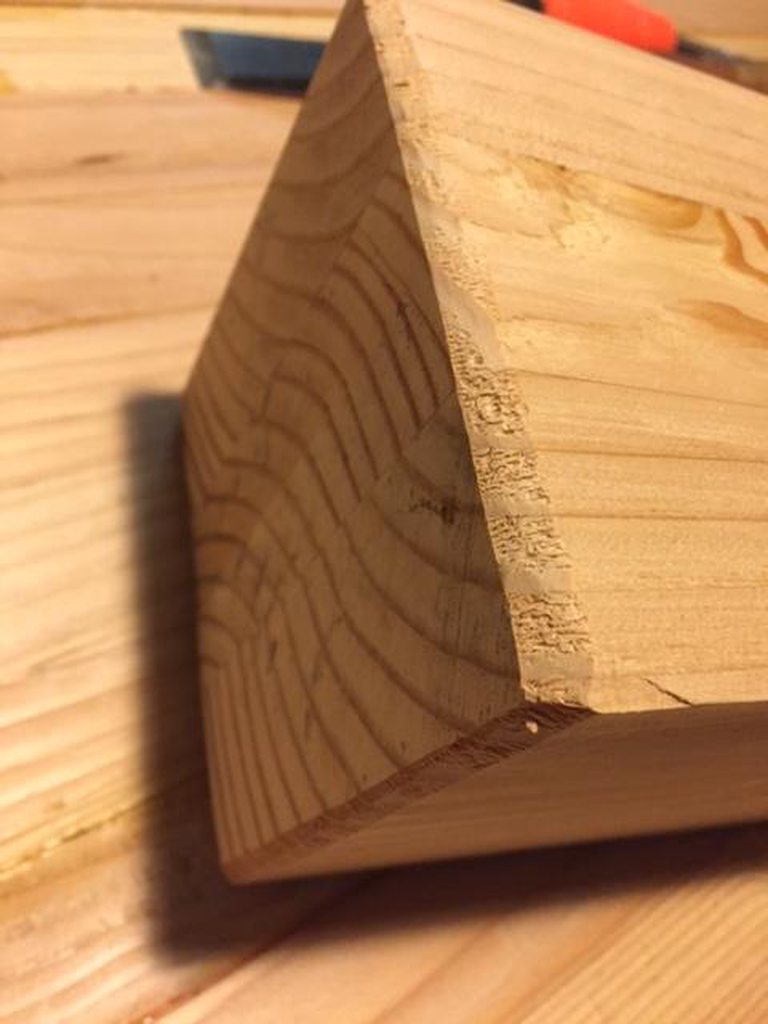
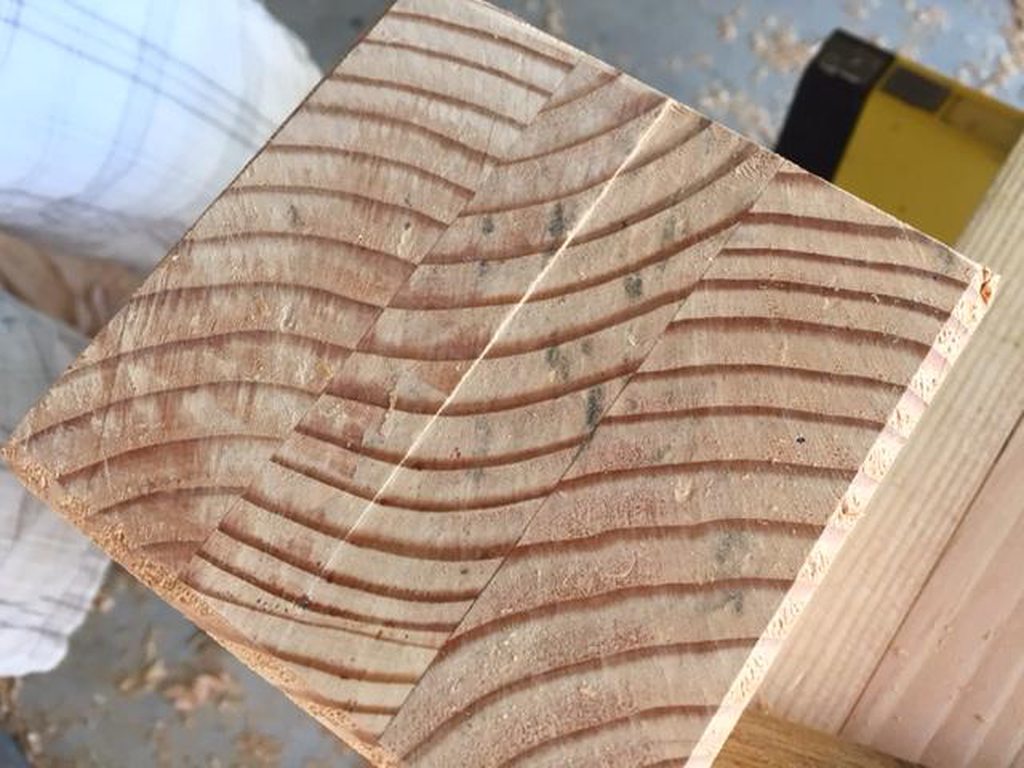
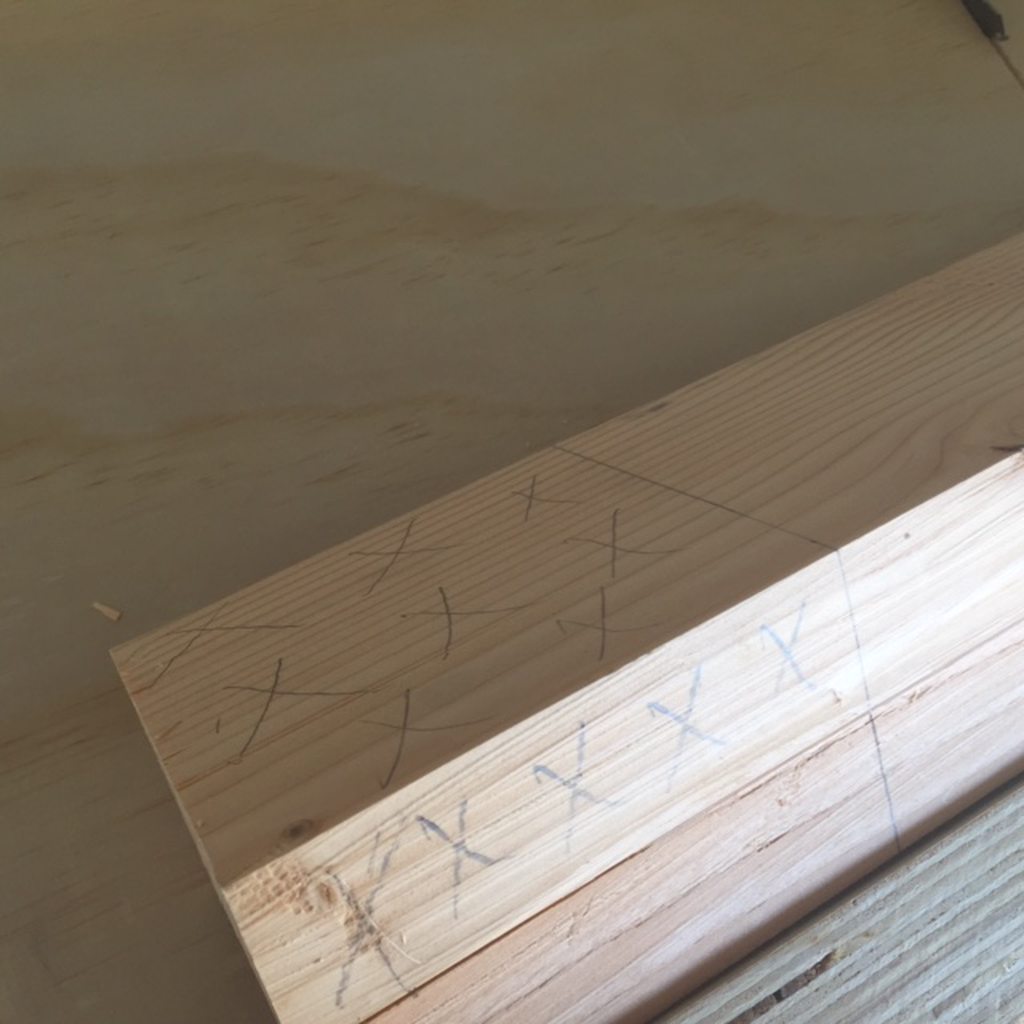
About two months ago, I got a wild hair up my ass to take up woodworking as a hobby. The first project I decided to undertake was to build a legitamate workbench. My thought on this was that it would be a useful tool for many years regardless of if I actually follow through and continue to do woodworking projects or not and at a minimum it would teach me a shit load of new skills. After much research on youtube, I decided to use Jay Bates workbench as a guide for the one I wanted to build. A relatively simple design (much less involved and less expensive compared to a roubo style bench) but solid as all hell and perfect for all sorts of projects in the future.


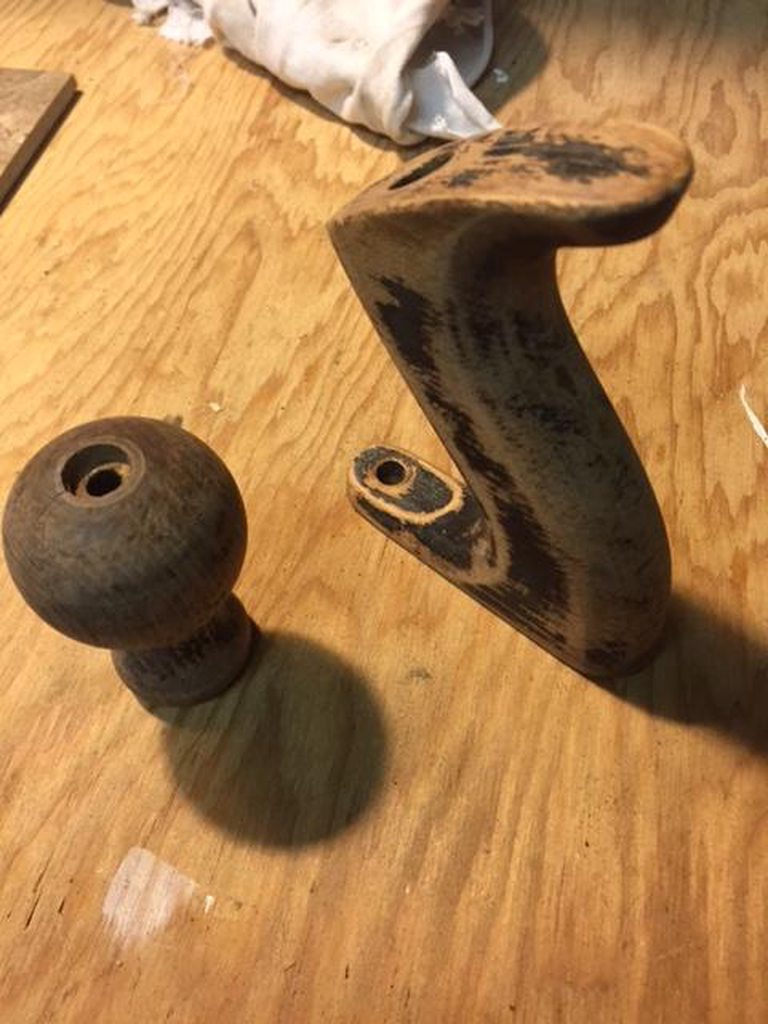
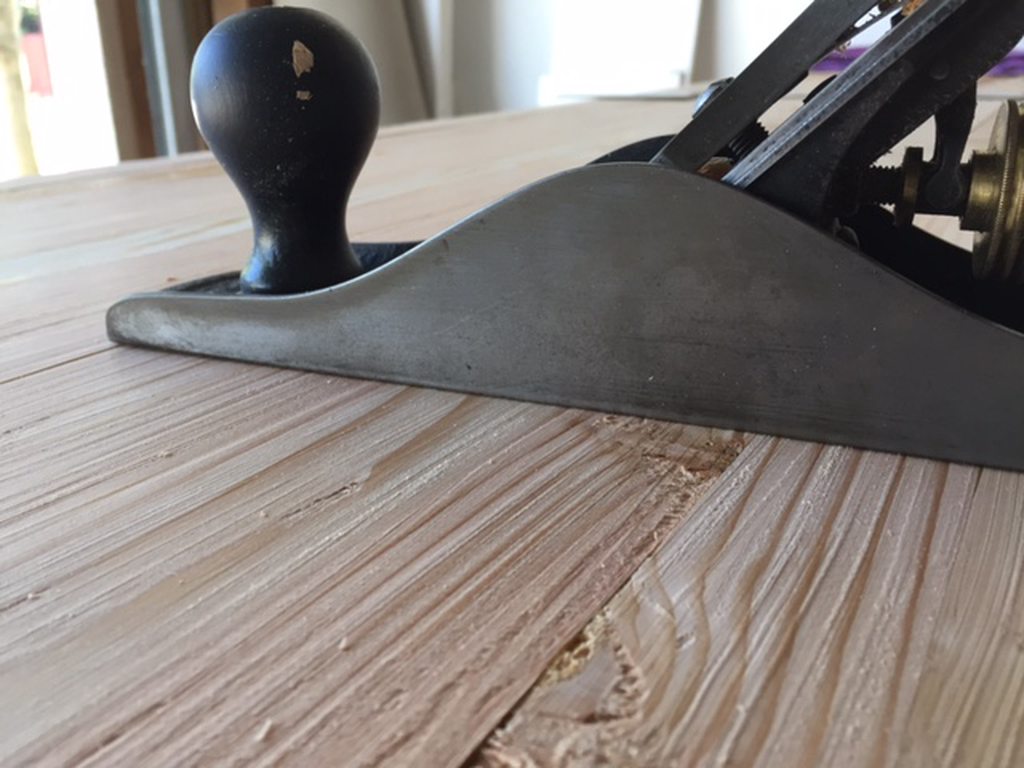
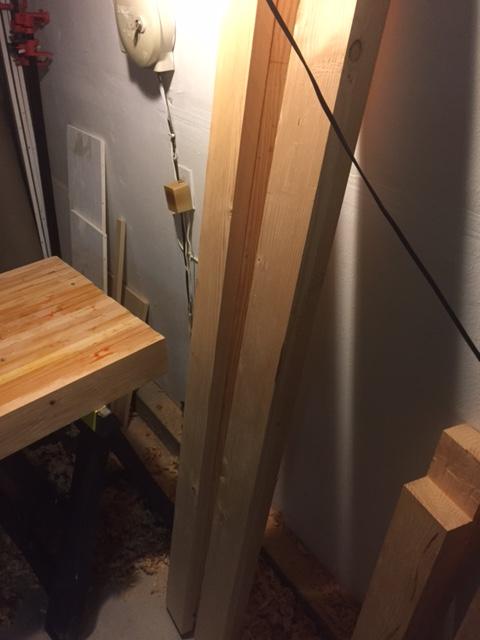
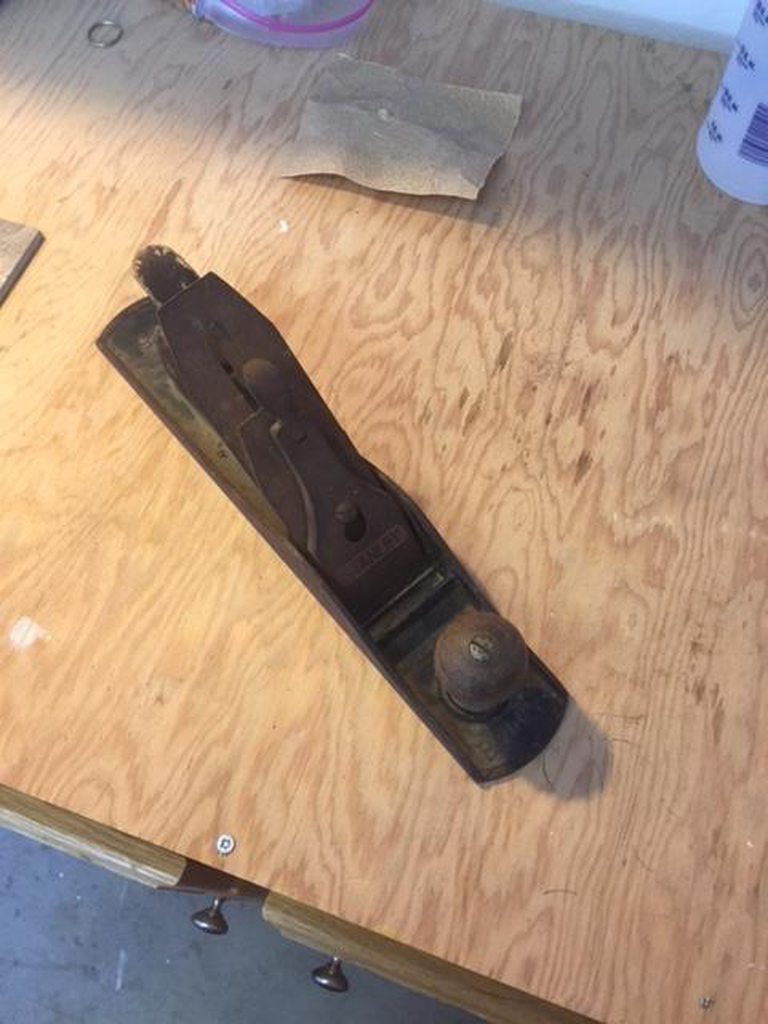
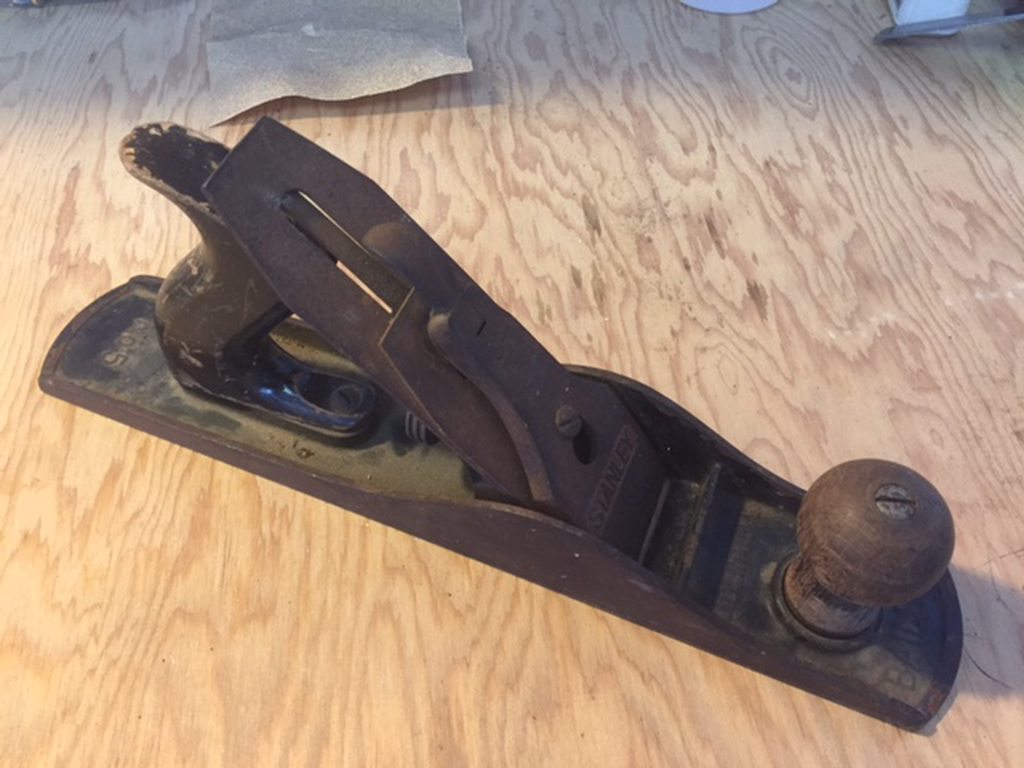
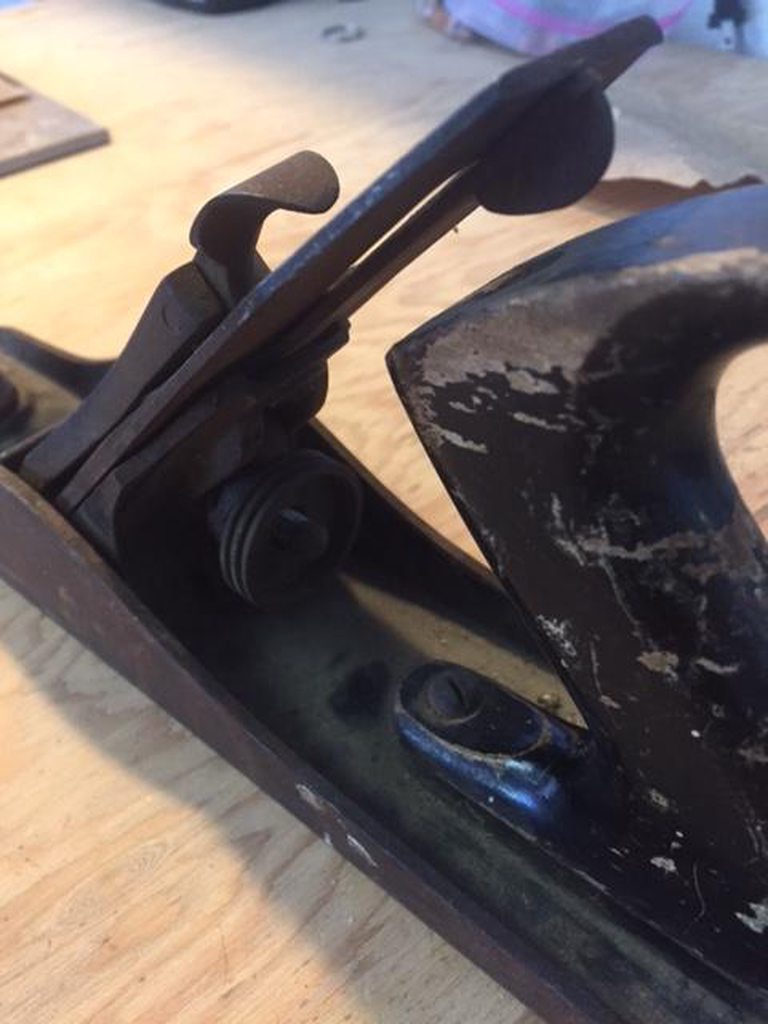
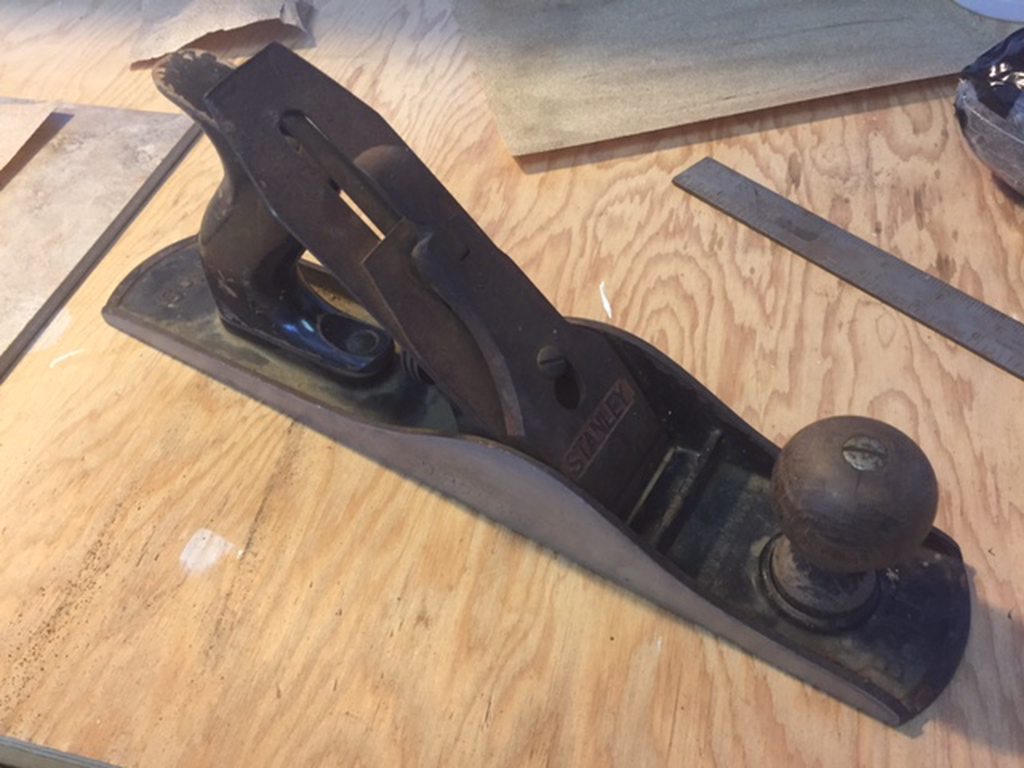
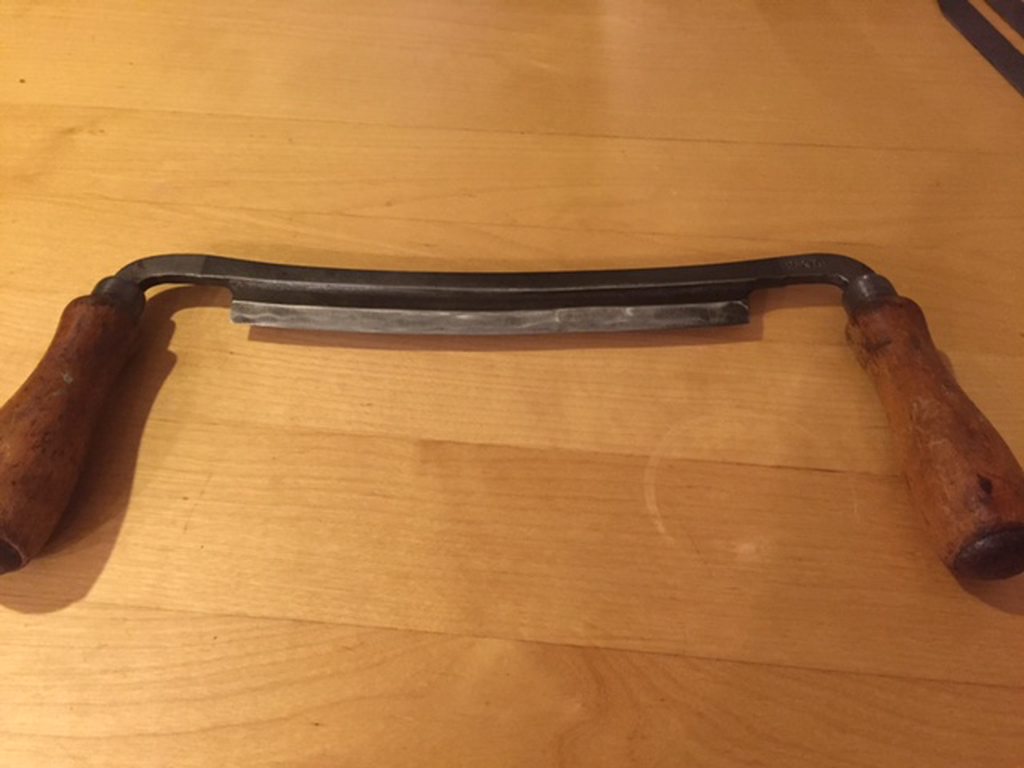
The first dilemma to tackle was that I was severely limited in two ways - money and space. Money was a big factor because I just don't have many tools yet, and space was another consideration since many shop tools are huge. My work area is half of a small 2-car garage and ideally I'd like to park the car in the garage when I'm not actively working on projects. The first stop was raiding my dad for some old tools that he acquired many years ago and probably hasn't used in 30-40 years. The three tools I "borrowed" are a Stanley No. 5 Jack Plane, a draw knife, and a combination square. The draw knife (probably won't be used for the workbench project) is just rusty and needs a sharpening and the square is rusty and the rule is slightly bent, but the big job here is restoring the jack plane. Here's a few pics of how these looked when I took possession of them.


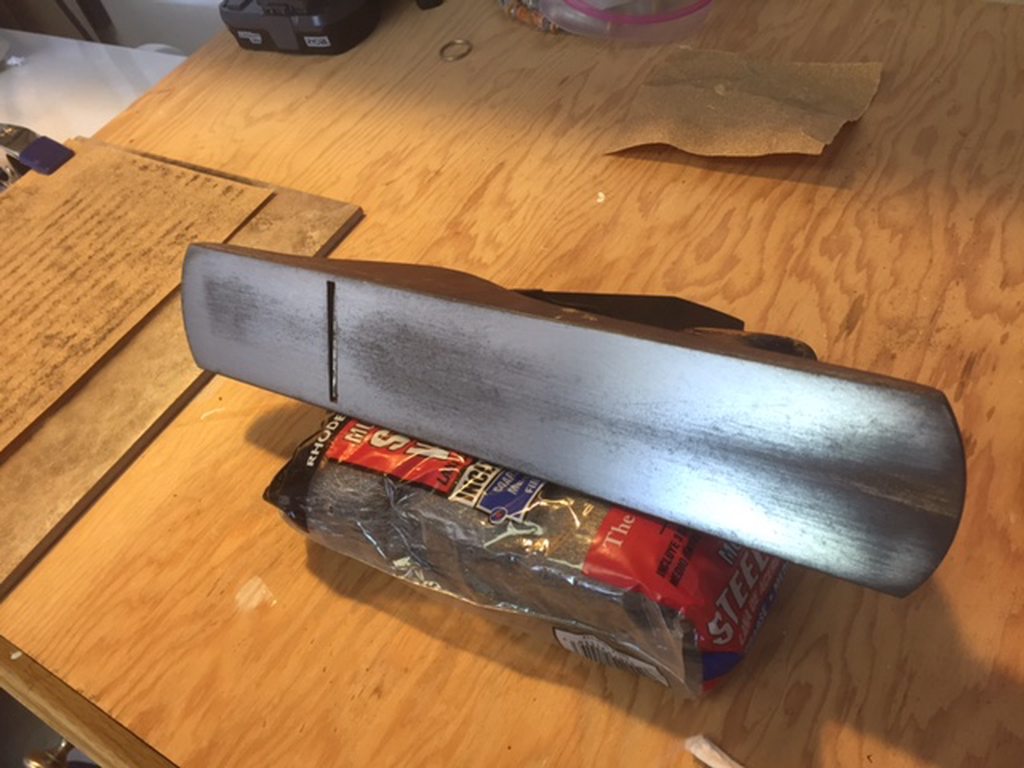
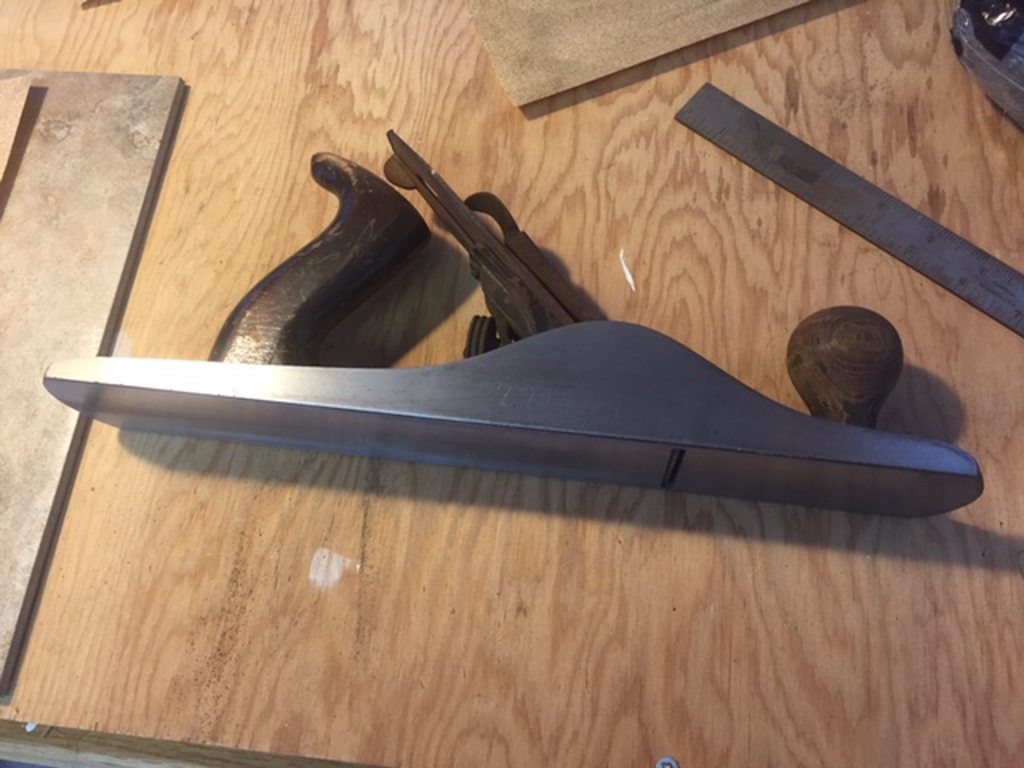
First I got the rusty parts of the draw knife and square soaking in diluted white vinegar to help remove the rust, then I turned my attention to the plane. First step there was to remove the rust and flatten the sole using a relatively coarse sand paper. It's worth noting that counter intuitively you should flatten the sole fully assembled. When the blade and frog are clamped down it will slightly change the flex of the shoe. If you disassemble and then flatten the sole, the shoe will warp when you reassemble and then you'd have to redo the work to reflatten the sole.


Getting started...


After about 5 minutes of work...


Another 5 minutes...


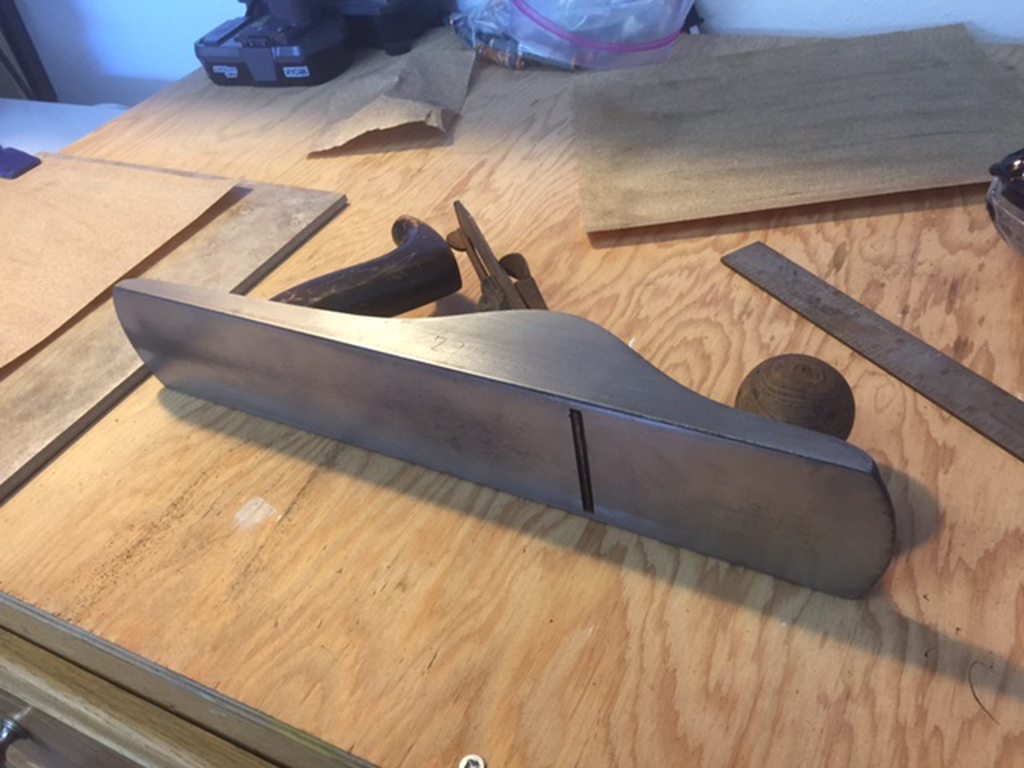
You can see where the high spots on the sole are based on where the rust/discoloration remains and where the sand paper has progressively flattened down to reveal bare steel. Once I got the sole pretty well flattened out I started work on the sides as well. These are some finished shots of the sole and the sides.


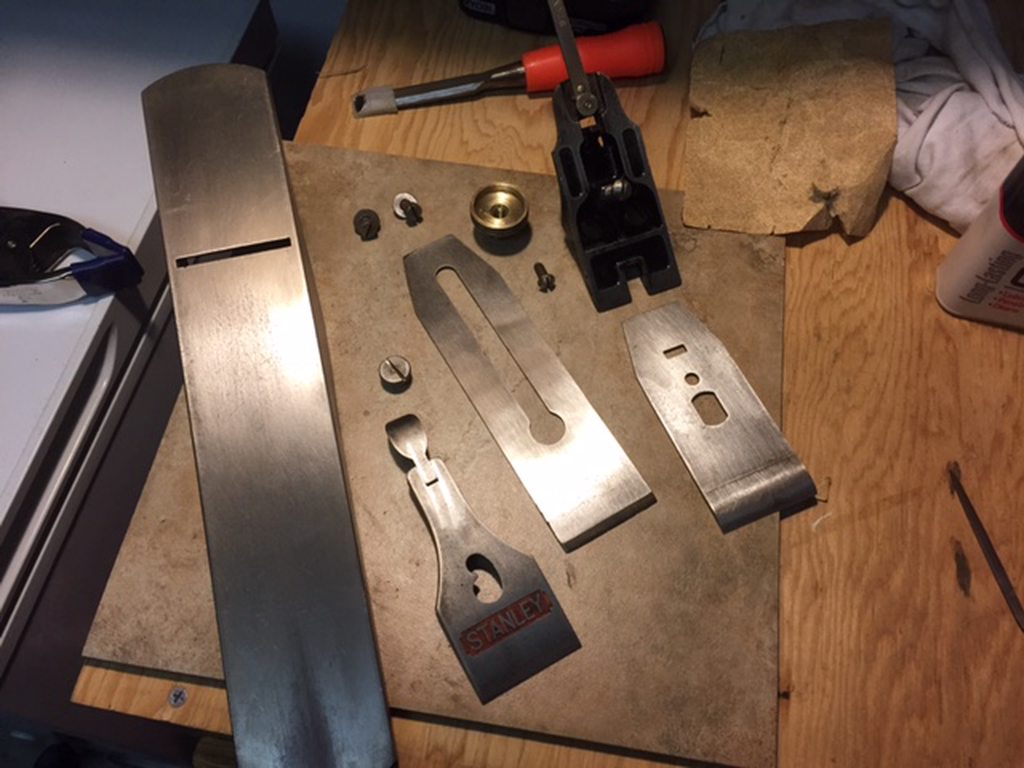
By now the other tools were ready for some attention. I disassembled the plane and got all the rusted parts (other than the shoe) into the vinegar for a soak.


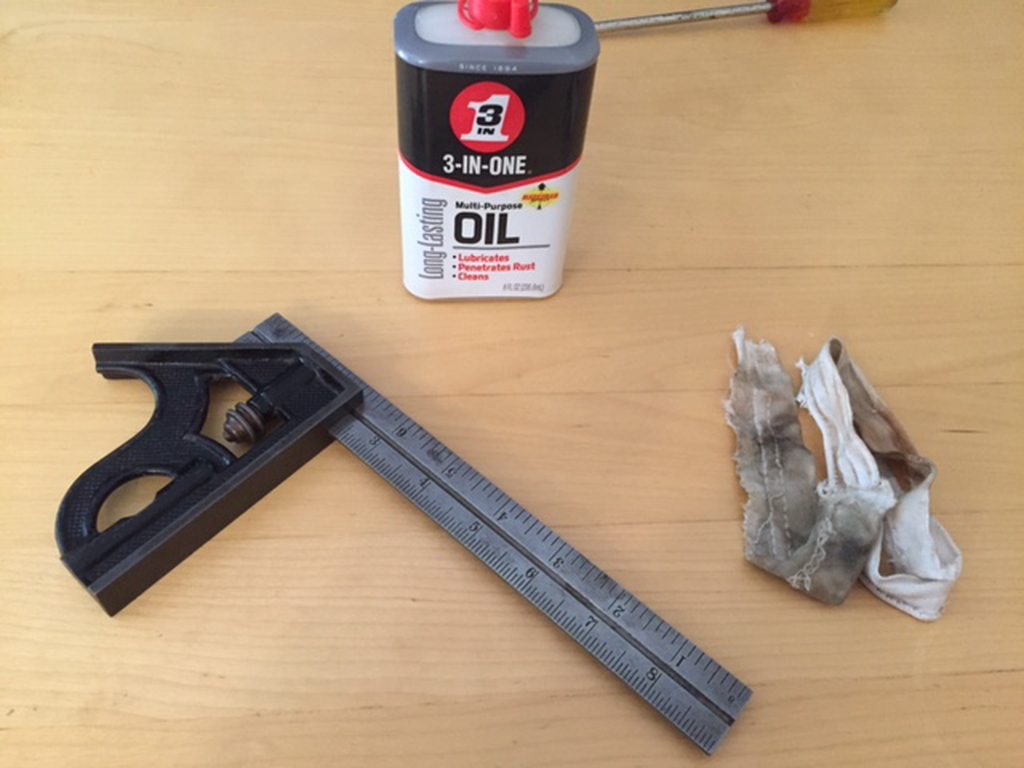
In the meantime I used a wire brush and some steel wool on the draw knife and square to remove the rust and finished the square with some 3 in 1 oil. The draw knife needs more work and then sharpening so that will come later.


Next was to strip the wooden handle and knob which I did with the flat side of a chisel and finished with some sand paper. These will get repainted black later.


Next up was cleaning and removing as much rust as I could from all of the jack plane parts. No action shots but here's the finished product. I wasn't able to completely remove all rust but hopefully a rubbing of oil and regular maintenance will help prevent it from spreading.


Spent a couple hours today grinding a new edge for the plane blade as well as doing the same for my chisels which were in sad shape. Made me wish I had a grinder but sand paper got the job done. Then sharpened them up along with the draw knife. A few finishing touches like painting the handles and such. It's by no means perfect, but a sight better than it was a few days ago.


Part of what makes this build great is that it is entirely made out of inexpensive construction grade lumber that you can get from any big box hardware store. Yellow pine is great, my area had douglas fir which works fine. There's a huge argument regarding if a bench should be made out of hard wood or if soft wood is ok, but based on what I've researched the cost savings and the fact that it's much easier to work with sold me on using soft wood. I purchased 9 2x10 12 foot long boards and had them cut the short way to make it easier to get them home. I then used a recently acquired table saw to rip them all in half giving me 12 2x5 boards 4 feet long and 24 2x5 6 foot long boards. The painful part of buying cheap lumber is that its generally going to be somewhat warped and that warping got worse when I ripped the boards since much of the wood grain tension is released. To get a reasonably good product these boards need to be planed down to be as close to flat and square as possible. Enter the recently restored hand plane! Here's a picture of the first three boards for 1 of the legs being glued up after being planed flat and the stack of boards up against the wall are still to be done...


A few days later all four legs are done. On to the table top.


This is clearly the slowest most boring part of the project - planing each board that will make up the laminated top. To give you an idea of what this entails check out this video:

How to Square, Flatten, Dimension Rough Boards by Hand - YouTube

A few things about my process that are different than the video: 1) I don't need the boards to all be 100% perfect but I'm trying to get them as close as I can to square and straight, 2) the longer narrower boards present different challanges compared to the smaller wider stock he's using. Many of the board I have aren't too bad but I've encountered a few that turned into pretzels after ripped the 2x10's in half.

Boards that are relatively straight and don't have too much bow, cup, or twist only take 5-10 min to plane down. Some boards I've worked on have taken well over 30 min which is why this part is going slow. I decided to glue the top up in three sections of 6 boards each. Gluing these boards is stressful as you have to work quickly with the glue drying as well as trying to adjust the clamps and keep the boards all lined up.

gpy8Zuqh.jpg


2RuhGIZh.jpg


The boards on the outside of the glue up are not part of the top, I'm just using them to protect the wood from being damaged by the clamps.

Here's what I have left to do to finish the top.

YjPpr9Vh.jpg
 
Finished planing the sides of all of the boards for the top and I've glued them into three parts.


Getting close to needing to cut the legs down to size and then cut out the tenons for the legs so I took some time to build a cross cut sled for my table saw which should make things easier and safer for those cross cuts. Not many pics from that build, but here's a quick snap of the finished product. Basic but functional.


Tonight I started planing down one of the table top sections. So satisfying to see the clean raw wood exposed as the glue is planed off. This surface is just the bottom of the first third so I'm not going to make it perfect like the top eventually will be but still came out great.


Still a long way to go but starting to get excited as some of the pieces are coming together.
 
Made bit of a mistake gluing the top up in three segments. It definitely helped keep the process simpler during gluing but the exterior boards warped horribly under the stress of the clamping pressure. When I tried to match up the three portions of the top they required removal of a lot of material to get them flat and square. Took almost 4 hours though part of that was resharpening the iron on the plane. Finally got the top fully glued up.


I still have top do a rough plane on the top just to make moving it around a bit easier, but some of the fun stuff is coming up. I'll be cutting the legs to length, cutting the tenons out of the top of each leg, hogging out the mortices from the laminated top, and cutting the ends of the top to square. That should keep me busy for a week or two.
 
Started work flattening the top. I'm just doing a rough flattening to make some of the future steps easier to do precisely but the final flattening will be the last step. Here's what it looks like to start...


Here's after about an hour of work. Coming along nicely.


Also finished planing the legs.


Then I cut the legs down to length (not shown). Next on the legs is cutting the tenons. I don't have a dado stack for my table saw so I just did a bunch of close cuts using the cross cut sled and chiseled the excess waste out afterwards.


Two leg tenons done, two more to go.

Note: This is pretty much caught up to current progress as of today.
 
I'm curious as to how many times you've sworn through this process so far. I have a feeling it's 0.
I made a simple workbench in 1 afternoon and swore like a sailor and nearly lost my shit.

You're doing a great job so far. I could tell by the results on the jack plane that you have the patience for this.
Keep the updates coming.(y) :thumbsup:

I can assure you it hasn't been zero haha. But only a few times. The ones I can remember most distinctly was when I tried moving the fully glued up top and it slid off one of the sawhorses and bashed a corner on the cement. Luckily very minor damage to the wood, probably I'm he only one that will notice but I definitely let loose with a string of sailorese.
 
Is that workbench made out of... wood?

Very nice work so far.
 
Finished up the other two legs. Didn't take photos since they all look the same. Next up was starting to work on cutting the mortices out of the table top. I used the legs to get a good measurement and then started using a forstner bit on my electric drill to hog out the majority of the material. Then finished with a chisel and mallet.


First off, wow did this take longer than I was expecting. No big deal since it's really enjoyable work but good to know. Chiseling against the grain of the wood is particularly difficult. Ran into a couple problems as well. My cheap Ryobi drill just isn't powerful enough for this work. My parents have an old plug in power drill which will be much more suitable, I just need to run over there and get it. Second, I don't have an extension for the drill bit so I can only go a little over half way down through the boards. I'll see if my parents have a bit extender, otherwise I'll have to try and measure as well as I can and clear from the other side and hopefully meet in the middle. More updates to come on this soon.

Next up was cutting the ends of the table to as square as possible. I'd marked them off and then used a long straight edge to give myself a guide for the circular saw. The blade only cuts about 1.25 inches so even after cutting on both sides of the table there was still another 1.5 inches to go through. I finished this with a hand saw. Here's the finished product. A few places need to be fixed where the hand saw went off track a bit. Wish I had a block plane for that. I may end up using a belt sander if the hand plane I have can't handle the end grain.


These will be used for the stretchers. I still need to plane them down, then measure and cut the stretchers and and cut the half lap joints into the stretchers and legs.


These were the last boards that needed to be glued to so I took the opportunity to clean up the shop, put away the clamps and the tarp and just tidy up in general which was overdue.

AKCgfsH.jpg
 
Very nice timsta, reminds me of the build sniper did a few years back.
 
Nice work so far! I also have the woodworking bug. Nice plane restoration. Yeah, don't worry about a little discoloration, with work, they break in nicely. Here is my no. 5

JackPlane1.jpg
JackPlane2.jpg


Do you ever watch Paul Sellers' work? He has great info on cutting mortises, sharpening irons, etc...

Build looks solid, I need to build a real workbench - mine built out of reclaimed wood and I consider it temporary. Look forward to updates!
 
Very nice timsta, reminds me of the build sniper did a few years back.

That is high praise considering the results he got. This is nowhere near his skill and precision, but thanks all the same. I picked this particular design because I felt it would push my rudimentary skills and teach me a lot without being way more than I should try and bite off for a first big project.


Nice work so far! I also have the woodworking bug. Nice plane restoration. Yeah, don't worry about a little discoloration, with work, they break in nicely. Here is my no. 5

Do you ever watch Paul Sellers' work? He has great info on cutting mortises, sharpening irons, etc...

Build looks solid, I need to build a real workbench - mine built out of reclaimed wood and I consider it temporary. Look forward to updates!

That No. 5 looks so sweet. A friend just brought a beautiful No. 4 Stanley over and I showed him how to restore it. I've actually been interested in woodworking for several years but haven't had the space until just recently (and even now it's extremely limited). Finding Paul Sellers youtube channel and watching numerous of his videos was what finally gave me the confidence to undertake this project. So many youtubers show you how to make things using $15,000 worth of shop tools but Paul's channel has a video series showing him building a legit workbench with nothing more than a No.4 Stanley plane, a set of Harbor Freight bar clamps, a hand saw, a basic set of chisels, and a drill. Just incredible. I've recommended his channel to several people since finding it.
 
Ran into a bit of a problem two nights ago. As noted above, I was planning to use four boards, glued two and two for the stretchers that will be attached to the legs with half lap joinery. The problem came up in what I believe is an error in Jay Bates plans. He does not specify the length of the stretchers but shows that you can get 1 long stretcher and 1 short stretcher in half of a 2x10x12 (ripped legthwise and glued together). I relied on that when I had the wood rough cut at the hardware store to get it home, but when I actually measured it out, his plans call for 39.5 inches between the legs in the long direction to accommodate a plywood cabinet underneath. The legs are about 6 inches wide so that means the long stretchers need to be approx. 51.5 inches long. The short stretchers should be about the depth of the bench top which for me is 26 inches. 51.5 + 26 is 77.5 inches which is longer than the 72 inch glued boards i have. If I'd known this ahead of having the boards cut at the hardware store, I could have accommodated all of the stretchers with the 1 2x10x12 but by cutting it in half I end up with not enough length to do 1 long and 1 short on each piece. Very frustrating.


The good news is that I still have the two extra boards I've been using as sacrificial to protects the others in my glue ups. I took a look at them and I think they can be used without too much trouble to make both of the short stretchers. The bad news is that they were two of the worst warped and twisted boards of the lot and had been set aside as the least desirable to use. This solution just takes lots of time and sweat though. And of course I only realized this after I put the tarp and the clamps away :lol:. Got them pretty flat last night and glued them together. In the meantime I've been continuing to work on the leg mortices in the bench top. It's slow going but the progress is very rewarding. Here's a few progress pics.

Additional stretcher glue up


Mortices in the bench top


Love the tool restoration as part of your "bug." I very much approve.

Also, learning these skills and running into snags are good reasons to do a project like this with less expensive lumber your first time... And the pine is much easier to chisel than a harder wood.

Following.
 
Finally made it through the first of the mortices. I did end up having to measure the spot for it on the other side of the top and I was terrified of mismeasuring and having the two holes not line up perfectly it worked out just fine.


The cheap set of chisels I have are rather short and don't make it all the way through the table top easily. This caused me to take my first notable injury of this project in a strange way. My finger got trapped between the bench top and the chisel handle when I was pounding on the chisel and the force of the impact caused the skin on my finger to split like a grape. Some ice and a quick bandaid and I was back to work.


A little bit more cleaning up the mortice...


I then started testing the fit of the tenon and making small adjustements on both pieces to improve the fit. Here's the progress on that..


Felt so good to finally slide it all the way home. Almost like... well you know. Here's a shot from underneath (which is the top of the bench). I feel like I could have done a better job of this, as I have a bit of tear out on the side that will show. Some of that will be mitigated by adding some tiny wedges to lock in the legs but I'm hoping I can improve on the other three.

 
Got a welcome package today. Upgraded my set of chisels from the cheap short set I had before.


Here's a comparison of the two side by side to show how much longer a standard set is. Very pleased to have these although the vast majority of the chiseling work on this project is done.


I did make some use of the new tools this evening and was able to completely finish the mortices for the legs. I mentioned before this took a lot longer than I originally expected but I guess I should have known better. It was also slowed some by some unexpected elbow pain from all the repetitive stress. I haven't had tendonitis in my elbow before but this may be that. After a relatively rough job on the first mortice, I refined my strategy somewhat. I started working from the top to get a good fit on the remaining three and then went back and finished it from the bottom. By no means are they perfect but I think I improved somewhat from my first attempt. Here's one of the better ones finished.


And looking at it from underneath (the top of the table). This shows how much improvement I made from the first, cleaner walls and less gaps I'll have to deal with later.


All four finished and fitted. By god it's starting to look like something!


Took the time to put a chamfer on the bottoms of each of the legs as well. This is important to help prevent damaging the wood around the edges when moving the table after its completed. I don't have a router so I did this with a freshly sharpened blade on the hand plane. A tricky piece of work since it's easy to have tear out when cutting the chamfer but thanks to a tip from Paul Sellers, I managed to do it properly.


Only a handful of steps left to go. I need to cut the stretchers to length and one of them needs to be planed square, cut the half lap joints on the stretchers and the legs, finish flattening the table top (this will take a while still), and then final assembly of everything. Hoping to be completely done by next weekend.
 
Last edited:
Some good progress and some frustrating mistakes in the last couple of days. First up was taking care of a small problem at the bottom of the legs. When I cut them to length I had to do it in two passes with the table saw and that left a small irregularity in the flatness of the leg. I purchased an inexpensive japanese style block plane ($10) to flatten these out. I could have used a palm sander but I prefer not to sand on the bench top and I will need to trim down the ends of the tenons so this seemed like a good solution. It will be handy to have for future projects as well. Difficult to set up and adjust but once I had it set properly it worked really well. Razor sharp out of the box too which was a plus.


Before:


After:


Finished planing all three stretchers. These came out really nice. There's a huge improvement on the planing work I did at the start of this project and the results I can get now.


Next up was cutting the stretchers to length. These didn't need to be perfect since they are going to be longer than the final length and will be trimmed using a hand saw once fully assembled.


Next is cutting the half lap joints into the stretchers. This was a very similar process as cutting the tenons in the legs.


One of the bigger mistakes I've made was on cutting the length of the half lap joints on one of these stretchers. I was doing the 2nd of the two long ones and I used the cuts of the first long stretcher as a rough guide rather than doing it properly measuring against the legs. I gave myself a good 1/2 inch extra figuring that would be enough to work with to then do small trim adjustments on the table saw to get a perfect fit. Unfortunately for some reason the distance between the legs on one side is over a 1/2 inch different from the other side so I won't have a great fit there. Not surprising that I cut a corner and immediately get punished for it. I should be able to fix this issue from a structural standpoint by gluing a shim into the extra space and it's on the inside so it won't be too visible. Don't have a picture of this but I'll take one to show once it's assembled.

Here's all of the stretchers with the half laps cut.


One of the other issues I discovered is that I didn't do a very good job making the legs square. I think this was part of the reason why the measuring between the legs wasn't great. I spent some time today planing the legs, being very careful to avoid making any changes to the tenon portion of the leg joint. An additional benefit of this was I was able to get a much better flush fit between the legs and the edge of the table.

 
Last thing I did today was cut the first half lap joint into the legs. This required a lot of attention since it would be really easy to cut this not just in the wrong place measuring from the bottom, but also on the wrong face of the leg since there only one way to install the leg into the bench top.


The strategy on these is to cut them a little small to start and then using the associated stretcher dial in the width to fit perfectly. Unfortunately my skill using the table saw as a precision cutting tool is a bit lacking. I made this first half lap joint about 1/32" too large. It's almost not worth mentioning, but any extra play in these joints will potentially make the table wobble a little. This particular mistake may not be big enough to make a noticeable difference but I'm hoping to get the other three a bit more precise.
 
Last night I finished cutting all of the half lap joints for the long stretchers. Fucked up one of my measurements slightly but was able to get them to fit together with a bit of creative alteration to the joint that involved lots of chiseling to remove a few problem spots.


The second side I did a much better job of, here's a closeup of the fit on this joint.


Feels good seeing it finally come together.


Tonight I was able to get all of the rest of the half laps cut for the short stretchers.


After I made the cut on the first of the legs, I just about shit myself thinking that I'd made the cut on the wrong side of the leg. I ran around the shop trying to figure out if I could swap the problem leg with the opposite side. It took me about 5 minutes to realize I had just misread the label on the end of the leg and put it in the wrong tenon. All was well but damn did that make me sweat!

Here's a few shots of the table base completely dry assembled. Damn that feels good to have finished! The joints on the short stretchers came out nearly perfect, having learned from the mistakes I made on the long ones.


Lastly took about an hour to clean up the garage and all the sawdust I made with the table saw cutting the half laps. First time in a couple months that its been this clean, clear and the saw horses folded up against the wall. Next up is gluing the joints, gluing the top, flattening the top and a few finishing touches.

 
Very cool! Thanks for taking us along as you do this!
 
Unfortunately my skill using the table saw as a precision cutting tool is a bit lacking.

Do you have a good slide table for the table saw? If not, well worth building one. Easy build, and it massively improves accuracy. You can even tack/clamp jigs to the slide table to run things through the table saw with repeat accuracy.

I just about shit myself thinking that I'd made the cut on the wrong side of the leg.

LOL! I've totally been there on various types of projects. The good news is that you're working in construction-grade fir; it wouldn't have been all that bad!
 

Create an account or login to comment

You must be a member in order to leave a comment

Create account

Create an account and join our community. It's easy!

Log in

Already have an account? Log in here.

Back
Top Bottom