Raised rail veneers? Need example pics (1 Viewer)

jja412

Full House
Joined
Nov 6, 2014
Messages
4,144
Reaction score
8,206
Location
St Louis
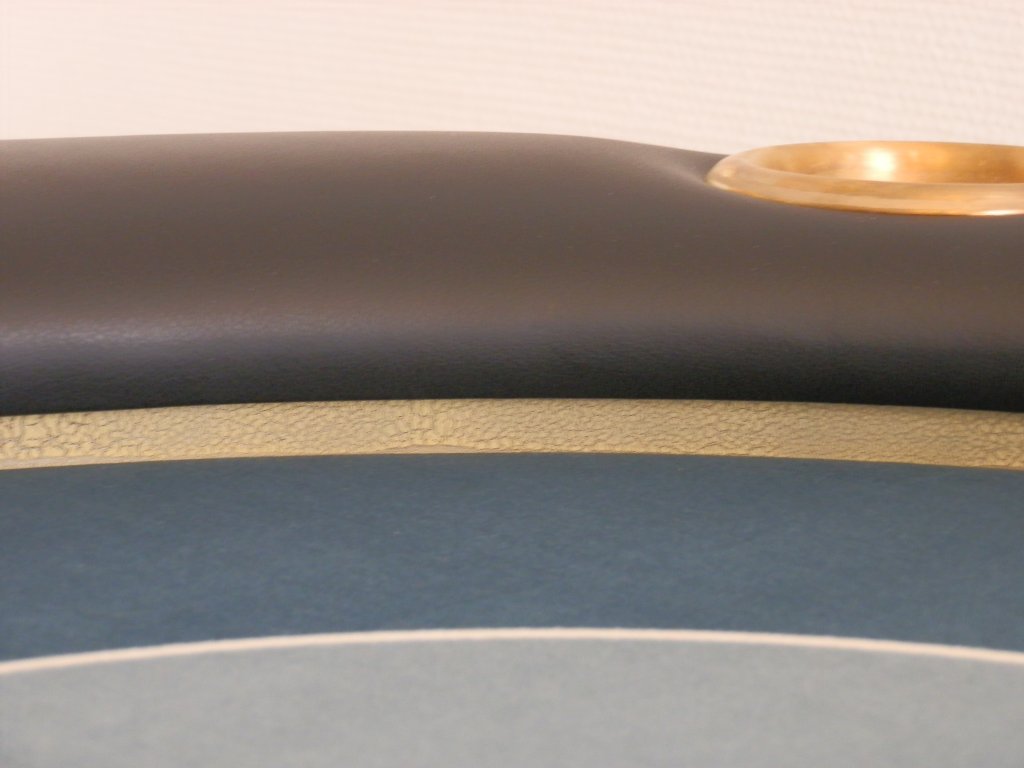
I'm considering removing the lighted brushed aluminum raised rail from my table, and going with something less "modern" or "garish." I was thinking of wood veneer edge banding or something more classic looking. The table has a natural oak topper and legs.

Just looking for pictures of alternative raised rail ornamentation. Post 'em if you got 'em - especially close ups!!
 
20170630_165833.jpg
20170630_171850_001.jpg


Hope that helps! Don't mind the chips, my customs are on the way :)
 
Wood trim with decorative nails. Sorry no close ups.

IMG_1452.JPG


IMG_1453.JPG
 
I don't recall exactly how this was done, I think paint + lacquer over aluminum, but I like the organic look achieved (completely smooth to the touch though).

full
 
These crappy pictures are all I can find at the moment. Might be able to get you better later.

aMu5LO6.jpg


919l4WW.jpg
 
I’m on the road, so pics not available, but chateau de noix or associated table build thread has pics. I used a walnut band and stained it. I placed decorative nails. Came out great.
 
@mashoo 's natural oak (pics in post #2) look to be perfect for your application. How tall is the riser area?

20170630_165833-jpg.150100
Right now it is 1.25". But after I de-engineer the LEDs, it will be .75". Just looking for different styles. Lots of great ideas so far....keep em coming!
 
Here are some better pictures of bending the wood for the rail and of the final product.


Poker Table 010.JPG
Poker Table 012.JPG
Poker Table 019.JPG
Poker Table 024.JPG
Poker Table 057.JPG
 
That raised rail looks awesome. Can you share more detail on how you bent it? I have a fully functional woodshop - but have never tackled a project like this. Would like to do a raised rail with inlays like this.


Took the wood, measured out the center and routered out the middle. Then from there I used a custom made steam box (water on bottom, put a few boards in the water and then the rail on top so its not actually in the water) and heated it up to the point where it was able to bend it, glue it, and then clamped it down. After drying I stained it, let it dry, and thrn used a small amount of glue to get the inlay in. From there I put poly over everything.
 

Create an account or login to comment

You must be a member in order to leave a comment

Create account

Create an account and join our community. It's easy!

Log in

Already have an account? Log in here.

Back
Top Bottom