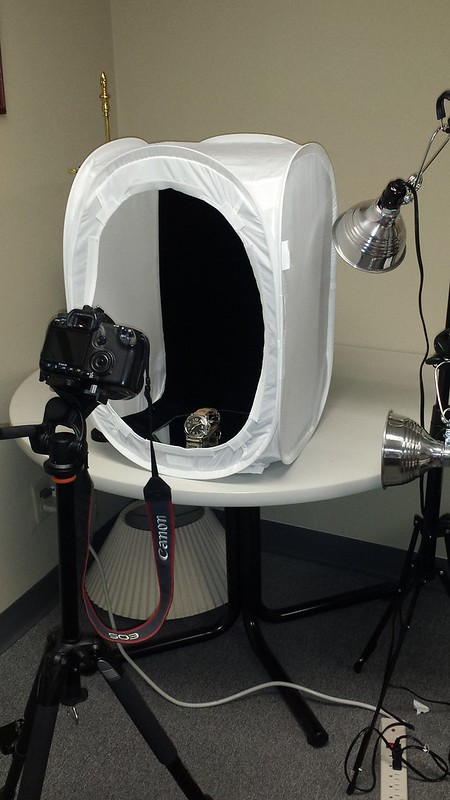
I'll make a comment here on these two topics. Agree on the flash. You can use flash, but in order to use it correctly you need to bounce it and probably need an umbrella. All that is just not necessary. For me the light box and continuous lighting does a really good job and once set up it is super easy. Here is my light box set up below. I jus leave it up so I can use it at a moments notice.
The whole too blue or too yellow thing...
The technical terminology for this is white balance. All light has a temperature. The easiest way to think about it is think about the color outside late in the day in the hour or so before the sun goes down. The lighting is quite yellow, right? They call this warm lighting. Then there is cool lighting. Flourescent lights are usually a good example of this. Rather harsh almost blue lighting. In order for your pictures to look good the setting on your camera is going to have to match the temperature of the light of the light source. This temperature is measured in degrees Kelvin. Just about every camera will have a bunch of automatic settings: sunlight, inside lighting, cloudy etc. Those automatic settings will match the Temp K that the camera manufacturer associated with those conditions. The will work relatively well most of the time. There will also always be a way to adjust the white balance manually and get a custom Temp K. Sometimes you will need to do this, but probably not most of the time. The newer and better the camera, the better white balance seems to work