Barrington poker table thread (12 Viewers)

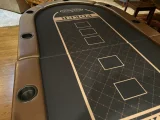
Anyone else have issues with sloping near the center of the table? Sitting in the center while dealing, the top two or three cards always slide off the top of the deck. Table was bought new and has been used for a total of 4 home games so far, no outrageous bills Mafia body slams have occurred either.

I haven’t myself but the table should have a turnbuckle underneath and you can adjust the slope by tightening or loosening the turnbuckle.
 
Mine starting sloping after 3 games. As @horseshoez stated there is a tightening device underneath the table. I Haven’t tried it yet to see if it resolves issue. Next game will try and see if it solves the problem.
 
Yes, that’s what the cable is for under the table. Since there is no other support for a split table, the cable is what keeps it from collapsing in. Set that turnbuckle so that the table is perfectly flat.
 
Last edited:
Also, for those who don’t like the faint crease that appears when the topper is laid on the felt, I recommend placing thin sheets of poster board down the center of the table. Just make sure they don’t reach the edges, so they remain hidden when the topper is on top.
 
Also, for those who don’t like the faint crease that appears when the topper is laid on the felt, I recommend placing thin sheets of poster board down the center of the table. Just make sure they don’t reach the edges, so they remain hidden when the topper is on top.
I always wondered if those silicone gap fillers that they make for kitchen countertops would work for the gap under a topper:
IMG_6999.jpeg

IMG_7001.jpeg
 
On the phone, I use an app called Keepa. There is another one called https://camelcamelcamel.com/ which is web based and doesn't have an app but still works just as well. ShopSavvy is a good app but it's mostly for price comparisons rather than being alerted to a price drop for specific items.

Overall, Keepa is the way to go.
Keepa says it’s an Amazon price tracker?
 
Mine starting sloping after 3 games. As @horseshoez stated there is a tightening device underneath the table. I Haven’t tried it yet to see if it resolves issue. Next game will try and see if it solves the problem.
I’ve had to tighten mine up a couple times. Super easy and effective.

I think the turnbuckles might just loosen some from folding and unfolding. So it’s best to tighten them after every setup/takedown. I put mine up after every game, so it moves about once a week.
 
So Keepa amazon price tracker will also track Walmart prices? Thanks for you input BTW

No, for Walmart I use the Google Chrome price tracker that's built into the browser. However, what will happen sometimes is that when Keepa shows you a price drop on Amazon, sometimes the Walmart price will have also dropped as a result.
 
Big shout out to @greedyintern , just did the LED mod. I used a different brand but it was a COB LED.

The hardest part for me was routing the LED from the top of the table to the bottom. Instead of a dimmer, I installed a zigbee controller and I got a rechargeable wireless battery to power them. Now I can control the LEDs from my phone thru HomeKit.

I also installed the handles. Going to attempt the cupholder mod next.
This is awesome! Can you help me understand how you connected both light strips and the power pack? The photo is unclear and I am not seeing how online.
 
IMG_1511.webp

I finally took the plunge on replacing the horrible stock LED strips with COB lights!

It was nerve racking to peel off the old lights and figure out how to get the new ones set up, but learned some things along the way. This was a harder project than I expected because I didn’t have the right equipment at the first attempt to install. I would feel much more confident doing this project again after figuring it out.

1. Go slow with peeling off the old lights to avoid ripping any extra material.

2. Wait to pull adhesive backing off and make any extra cuts until placement of new light strip has been double checked. I have a centimeter of dark space (see if you can find it) because I didn’t confirm placement first before peeling off adhesives.

3. Start placing new LED strips on opposite side of the red power button/original power setup and make sure the cuts are as close to the fold gap as possible to ensure continuity.

4. The hardest part is threading the new LED strips through the existing holes where the lights connect under the table. Some super thin needle nose pliers may help.

5. Flipping the table on its side makes working on the underside of the table MUCH easier and helped avoid it collapsing (the legs did collapse on me when I tried the “slightly closed upright position”

Lights used: MIWISE COB LED Strip Light... https://www.amazon.com/dp/B0CLLJ2513?ref=ppx_pop_mob_ap_share

Super easy to use solder-less connectors that I wish I would have bought first and saved me 2 hours of time. GXILEE 2 Pin 8mm Cob LED Strip... https://www.amazon.com/dp/B09VKVR99Y?ref=ppx_pop_mob_ap_share

Dc power splitter 1 female-2 male cord https://a.co/d/8xPuYQr
 

Attachments

  • IMG_1510.webp
    IMG_1510.webp
    103.4 KB · Views: 39
I’ve had to tighten mine up a couple times. Super easy and effective.

I think the turnbuckles might just loosen some from folding and unfolding. So it’s best to tighten them after every setup/takedown. I put mine up after every game, so it moves about once a week.
Hi

Is there any video of how to tighten or loosen that turnbuckle cable ? I’m not able to figure it out
 
First thanks to all those who posted their process and procedures and tools used.

Finally did the cup holder upgrade! A major improvement in usefulness. I used the Jumbo cup holders from Amazon. And the Milwaukee hole saw. I used a hairdryer to loosen the glue to pop out the old cup holders. Then I drilled a pilot from above (moved in towards the table 1/4 inch to account for the size difference) and then flipped the table to cut with the hole saw from below. In the corners, you can see on the saw how it rubbed the leg poles. The power box had to be moved for drilling, but then went back to original location. Drilling from the bottom saved the vinyl.

I honestly don’t know how you guys are doing this in basements or apartments. The mess was pretty unbelievable and I did it in the driveway.

IMG_4707.webp


IMG_4708.webp
IMG_4709.webp


I use custom toppers from @rjdev7, so I am not pressured to change out the felt. I have different toppers for different sets.

Mud
 
Man just opened up my Barrington 10 person table and the rail / padding on one side is ~1 cm off! Whole point of getting this is not have to DIY anything other than getting a custom table topper xD. Tell me if im being OCD in being bothered by this lol
 

Attachments

  • IMG_6703.webp
    IMG_6703.webp
    103.4 KB · Views: 43
  • IMG_6702.webp
    IMG_6702.webp
    59.2 KB · Views: 42
  • IMG_6699.webp
    IMG_6699.webp
    155 KB · Views: 42

Create an account or login to comment

You must be a member in order to leave a comment

Create account

Create an account and join our community. It's easy!

Log in

Already have an account? Log in here.

Back
Top Bottom
Cart