My Man Cave Remodel (5 Viewers)

Nope... My dad will be installing it. :) Not sure if we have to do any mud work. The top will fasten to the vanity and the side and back splashes get glues to the wall. Then some clear silicon to seal the joints and were it meets the wall. I could be wrong though as that is not my expertise.
 
I tried one of those Ideal Push In type connectors. These are neat.

20130812_194602.jpg
 
Nope... My dad will be installing it. :) Not sure if we have to do any mud work. The top will fasten to the vanity and the side and back splashes get glues to the wall. Then some clear silicon to seal the joints and were it meets the wall. I could be wrong though as that is not my expertise.

I think reese was talking about the drywall mud
 
Those ideal connectors are cool. I've only used them in lighting applications. Never in device boxes or for grounds.
 
I plan on using them just in that one receptacle box as a test. I'm sure they would be fine to replace wire nuts in general. They are UL and SA approved. I never read of one failing when install correctly. I did using them in both lighting circuit for the basement, plus the cans come with pre-installed.

I can see the coming in handy when find some short wires in a switch or receptacle box. Otherwise I use the Tan Twisters.
 
Cool, I like the connectors don't get me wrong. Just think they are pricey to be using instead of wire nuts. They could def be handy in spots like you describe though when some weekend warrior left you two inches of wire in the box lol.
 
Was doing some wiring last night and this morning. Nothing exciting. I did snap a pic of my panel to show how I use some cardboard as a little extra protection. Definitely don't want anything to accidentally bump into the live service cable. Touch one leg you will probably survive, touch both legs = death.

20130814_224943.jpg
 
Safety first! You sure you weren't an electrician in a past life?

LOL, I am just a good listener when my dad or someone else in the trade offers info and tips. :)
 
I've only recently seen those new push-in connectors on some can lighting I installed over my deck, I didn't realize they're available in general to replace wire nuts too. They seem to work pretty well.

I was asked why I mixed metal with wood framing. A buddy from work gave me a few bundles of metal studs and some track. (can't beat free) I didn't use the metal on the exterior walls for fear of thermal bridging so I used it on the interior back wall that separates the finished from the unfinished area. I probably would of been OK with using the metal on the exterior with the 2" XPS in behind it. Better safe then sorry.

I did a double bottom plate for two reasons.

1) To avoid using trim screws into the metal track.
2) To have more of a nailer for the baseboard since I will be using the Delta-FL and either 1/2" OSB or plywood before the finish flooring.

The 1.5" furring lap pink XPS was really my only option due to the clearance with the steps. The R-7.5 rating of it still works for my area.

My house is 43 years old. Over time floor joists bow a little (have some shims on hand) and the slab wasn't perfect. I can say though that the poured concrete walls were pretty much as straight and flat as they could be.

Sounds like you are ready to get that basement finishing underway! I hope you post a thread documenting it as well. :)
If you have any questions along the way, please ask and I will try to help. Do you plan on conditioning the space as well?

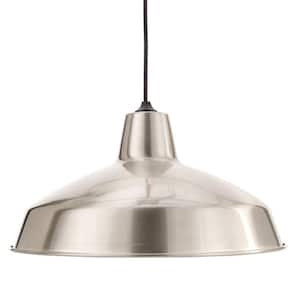
I am still trying to figure out what kind of light I want to put above my poker table. If anyone has suggestions, please tell!

I've been planning this basement reno since we bought the house 8 years ago... ;) I think I'm finally almost there though, was hoping to get started by Christmas. The space is "partially" conditioned - in the summer, it stays relatively cool (75 max) and I have a dehumidifier running when it gets muggy. I also have an air vent/return from the central AC, but keep that closed while the area is not being used. During the winter it does get cool down there (down to 60 if it's really cold out), I have a wall mounted vent-less heater (natural gas) that heats up the room nicely. The space doesn't get used every day, so I only turn on the AC/heat when I know I'll be down there for the day like when I've got a card game that night.

For your poker table lighting - I think the best solution is to have a sufficient amount of indirect lighting so you don't need a dedicated "poker light". You get the added benefit of being to able to move the table around a bit without having to recenter the light or move it to another location. I think those LED can lights you're putting in should be more than enough. If you need one though, I'd recommend something similar to those lights you'd see over a pool table with either the CFL or LED lighting. IMHO you want to avoid halogens, they put off such a strong beam of light that you often get glare on the cards. One of my buddies has a setup with multiple halogens, depending on where you're sitting you sometimes feel like you're under those lights they use to keep fries warm at a fast food place. :) He keeps a fan going to counteract.
 
I re-ran a deciated 20A line to my furnace and air handler to eliminate an unnecessary j box that I had already removed 2 other circuits from. I used those Ideal In-Sure connectors in the 2 gang metal box on the side of the furnace which has a switch and receptacle in it. My Halo cans came with them. I was going to cut them off and use wire nuts, but I feel these are fine.

I been using those cable stackers for multiple runs inside the joist bays. These things are great.

wire_stackers.jpg

Thanks for the suggestions for the table light. I just tested the lights for poker room side of the basement this morning. I covered all the windows and turned all the other lights outs.

testing_lights.jpg
(the area old rug is just for the dog to lay when I am working in the basement)

I think I will need a light above the table. The can lights will be on a dimmer so I can adjust those as needed. The light that I put over the table will also be on a dimmer just in case it is too bright. I may go with this light...it takes one bulb up to 150 watts or LED/CFL equivalent. One of those dimmable 23w CFLs might do the trick.

e7087118-dd06-411e-9210-d8ab40b6add1_300.jpg
 
I am going to have another 4 runs down that same joist. I am going to add another set of stackers. Those wires will be closed in so I didn't get to crazy getting the romex perfect.

The pic below is another area of the basement that will not be a finished area.

20130822_121034.jpg
 
Don't agree with need for a lot of lighting for poker... the game is traditionally played in lower light. Indirect or dimmable lighting works great. Better yet, add some neon man cave lighting.

Everything looks great thus far. Keep the pics coming. Still waiting for an table pic
 
Looks good man. Nice spacing = )

LOL, I had extras! ;)

Don't agree with need for a lot of lighting for poker... the game is traditionally played in lower light. Indirect or dimmable lighting works great. Better yet, add some neon man cave lighting.

Everything looks great thus far. Keep the pics coming. Still waiting for an table pic

Thanks. I may get one neon sign for down there. Every lighting zone will be dimmable for sure. For the times when more light is needed, it's there. I will be getting those Lutron Maestro multi location dimmers. I have one 3 way circuit and one 4 way so those will work great. Plus I have 3 singles too.

Table came in last month... a few pics are here in this thread. Start at post #29.

http://www.pokerchipforum.com/showthread.php/65-Buying-a-Poker-Table/page3
 
Installed the bathroom light/fan/heater combo unit and ran the exhaust pipe (semi-rigid flex aluminum pipe) down the joist bay about 8ft and out the wall.

20130822_120928.jpg

I ran 3 small self tappers in on all the duct joints to make sure they will never come apart, then you can either use mastic or silicon to make an air tight seal. I used silicon and re-spray foamed around the duct on the inside where it exits.

20130822_121015.jpg
(don't mind the romex that is just hanging there, I haven't stapled it to the inside of the joist yet.)

Had to make a 4 1/4" hole in the outside brick for the birdcage vent.
d6b94d1a-bcd4-4d93-9698-23a8af7ce2f4_300.jpg
Went with this NuTone unit

0c38767e-f683-4716-b331-4396b2962519_300.jpg

I use OSI Quad for sealing around the vent and windows outside. Great stuff. Not intended for inside use.

406dd33d-5552-4980-8e00-d0c961ae170c_300.jpg

Have some paint thinner on hand too when using this stuff. If you are like me and don't always get a perfect caulk job, dab a little paint thinner on your finger and run it down the caulk joint. It helps make a nice smooth looking caulk job. :)
 
I'm miserable with a caulking gun. When I was working for a GC a couple summers ago I would get that crap everywhere and always went through a roll of paper towels haha.
 
LOL. I was the same way! I've gotten a better using blue painters tape, and this novice tool. ;)

pro-caulk.JPG
 
No progress to report today. I went to Home Depot and picked up a few things, came home and mowed the lawn, trimmed, edged, the whole nine.

grass.jpg
(got the strips going) :)

Now I just feel like being lazy and having a few beers out back. :)
 
Since I decided to go with a granite counter for the wet bar, I beefed up the wall with some wood studs. Plus this will be better for the cabinets too. Less blocking to do. I also forgot to add the receptacle for the under counter frig so I started working on that.

20130827_195820.jpg

20130827_195855.jpg

Looks like a lot of studs, but we are going to be running one sheet of each corner through. Then you screw the sheet from inside the wall. You get a stronger corner that way. The small gaps between the studs are gauged for 1/2" rock. Anyone who does drywall should know what I mean in case I didn't word it right. The inside wall around the furnace is also getting rocked too.

20130827_195838.jpg
Wall going under the I-Beam behind the wet bar.

Got some more wiring done in the panel today. I only have two more circuit to run (GFI for wet bar and GFI for bathroom) then I can button up the panel.
 
I did a ton of studs, but regretted not blocking more in areas I knew I would be hanging a wall mounted plasma. It would have been nice to be able screw in anywhere vs trying to find studs
 
I've slacked off this past weekend. :) The only thing I have done is strengthen the upstairs floor with some extra blocking and use some PL-400 adhesive where the sub-floor plywood meets the top of the floor joist to get rid of the squeaks. I have hardwood floors upstairs so I can't do it from up there. I would say 95% of the floor squeaks are gone. :)
 

Create an account or login to comment

You must be a member in order to leave a comment

Create account

Create an account and join our community. It's easy!

Log in

Already have an account? Log in here.

Back
Top Bottom