Av8tion Poker: Custom Table Build (2 Viewers)

That sounds like a fun idea. For the logo in the middle, why not use brass?
So, pour half the resin in, let it cure, have the logo made of stamped brass, put it in the center, then pour the rest of the resin? The logo would be 4 pieces of brass (circle around the Av8, the A, the V and the 8) that would have to be positioned absolutely perfectly... sounds like an absolute nightmare to pull off...
 
Yes that sounds painful.

I had a different thought process in mind. Decal sounds good though.
 
So I decided to (attempt to) do the pedestal myself... $100 in building materials and $300 in tools from Harbor Freight (love those discounts..) is still considerably cheaper than the $1,200ish it would cost to have made... and of course I have the tools to use in other endeavors....

47b57f603ae5ca44ce09adc756140866.jpg

0dd2408d2f0af07edfbc201e42283f68.jpg
 
Hollar if you need help...
AHHHHHHHHHHHHHHHHHHHHHHHHHHHHHH

kidding aside.... the rough cuts on the U-shaped base are done... it was actually a blessing that the sketchup model was polygonal... I used a few of the points to make markings for the cuts, and then I'll just sand it so it's rounded out...

My plan going forward is to clamp together and belt-sand the 1x3 boards to ensure they look like one combined board... then each board will be painted individually...

Next up, I'll construct and paint the U-shaped base and glue/nail it to the top 1x3 board, then I'll glue/nail the bottom 1x3 board to the 2x4 board, then lastly glue/nail the top 1x3 to the bottom 1x3

As far as the electrical goes, I plan to drill a hole to run wire from the 1x3 boards up through the U-shaped base... from there, one wire will run straight up to the centerpiece to power the LED strips, and one wire each will go to the two ends of the U to provide electrical power to the table itself (LEDs, USB power outlets, etc.)

Once the pedestal is mostly complete, I'll shift my attention to constructing the centerpiece... since that involves a bunch of ordering stuff online, I can shop for it when I'm at work next so it's ready for when I get back...
 
How will you keep the table from rocking?
When we have small bases under a large table we involve steel for support rapped by wood...
 
How will you keep the table from rocking?
When we have small bases under a large table we involve steel for support rapped by wood...
I don't get your meaning? This base is massive... it's a 4 foot base for a 7 foot table...
 
used primer to seal/protect the wood... going to give it a good sanding when I get back home and then it's getting a vinyl wrap... carbon fiber for the U and gold chrome for the pedestal... quick question for the table builders here... I love the pattern of the carbon fiber vinyl wrap I'm using... would it be doable to use the same material for the rail should I decide to build the table portion myself? or do I need a different type of vinyl for that? I linked what I'm using below for reference... @T_Chan @Rebelwork

72600e2181b8a6d17efb4b6d74e06443.png


https://www.amazon.com/gp/product/B01N7MOVE1
 
No you would need a different kind of vinyl, that kind def doesn't work to wrap the rail with.
 
I think I have a solid plan on how to get this to work... I'm only hung up on one part... what material is used to make the frosted acrylic LED diffuser? The acrylic I know and love isn't flexible, so what is it I'm supposed to use?

To clarify what I'm talking about... the white sections in the drawing below...
2f05a56a9f506d31fa4d946eea0926a1.png
 
Meanwhile, I've got enough parts to start working on the centerpiece of the pedestal base... the mold is created... just need the epoxy resin to come in and I can pour and see what happens!
08ee450a51f09774cd92dda5939273bf.jpg

9d5d0a98f9d53b4943a01d75b99dcb64.jpg
 
So after reading through a few dozen old forum posts I've tried to piece together the LED diffuser question... acrylic can bend enough to work... I figured it would snap like trying to bend plywood... my next question which there is no answer to on any of the forum posts I've gone through... how do you hide the seams between sections of acrylic? I'm trying to get a seamless, continuous look with no visible gaps or seams... how do I pull that off?
 
So after reading through a few dozen old forum posts I've tried to piece together the LED diffuser question... acrylic can bend enough to work... I figured it would snap like trying to bend plywood... my next question which there is no answer to on any of the forum posts I've gone through... how do you hide the seams between sections of acrylic? I'm trying to get a seamless, continuous look with no visible gaps or seams... how do I pull that off?
@T_Chan @Rebelwork anyone??? I'd really prefer to have a seamless-looking acrylic around the exterior rail...
 
Yes what ^ said pretty much. I have acrylic material that's 25' long so you only end up with 1 seam, but it's special order material that's not particularly cheap. Works great though to get the best seamless look.
 
Meanwhile, the base is taking shape. The U-shape section is finished... just completed the vinyl wrap this afternoon. The gold chrome wrap for the pedestal section comes in this coming week as does the epoxy resin required to complete the centerpiece. Until those components arrive, this project is on a brief hold. While I wait, my @Gear labels should be arriving tomorrow... so expect an all-nighter getting nearly 4,400 labels applied to the custom poker set... completed pics of the U-base below:
655ab43c8e327f5d19c0252ea0bfe76b.jpg

99e70867bca149b3683f84bbbb1dfa7c.jpg
 
Looove the look of carbon fiber. That base is going to look really nice.
 
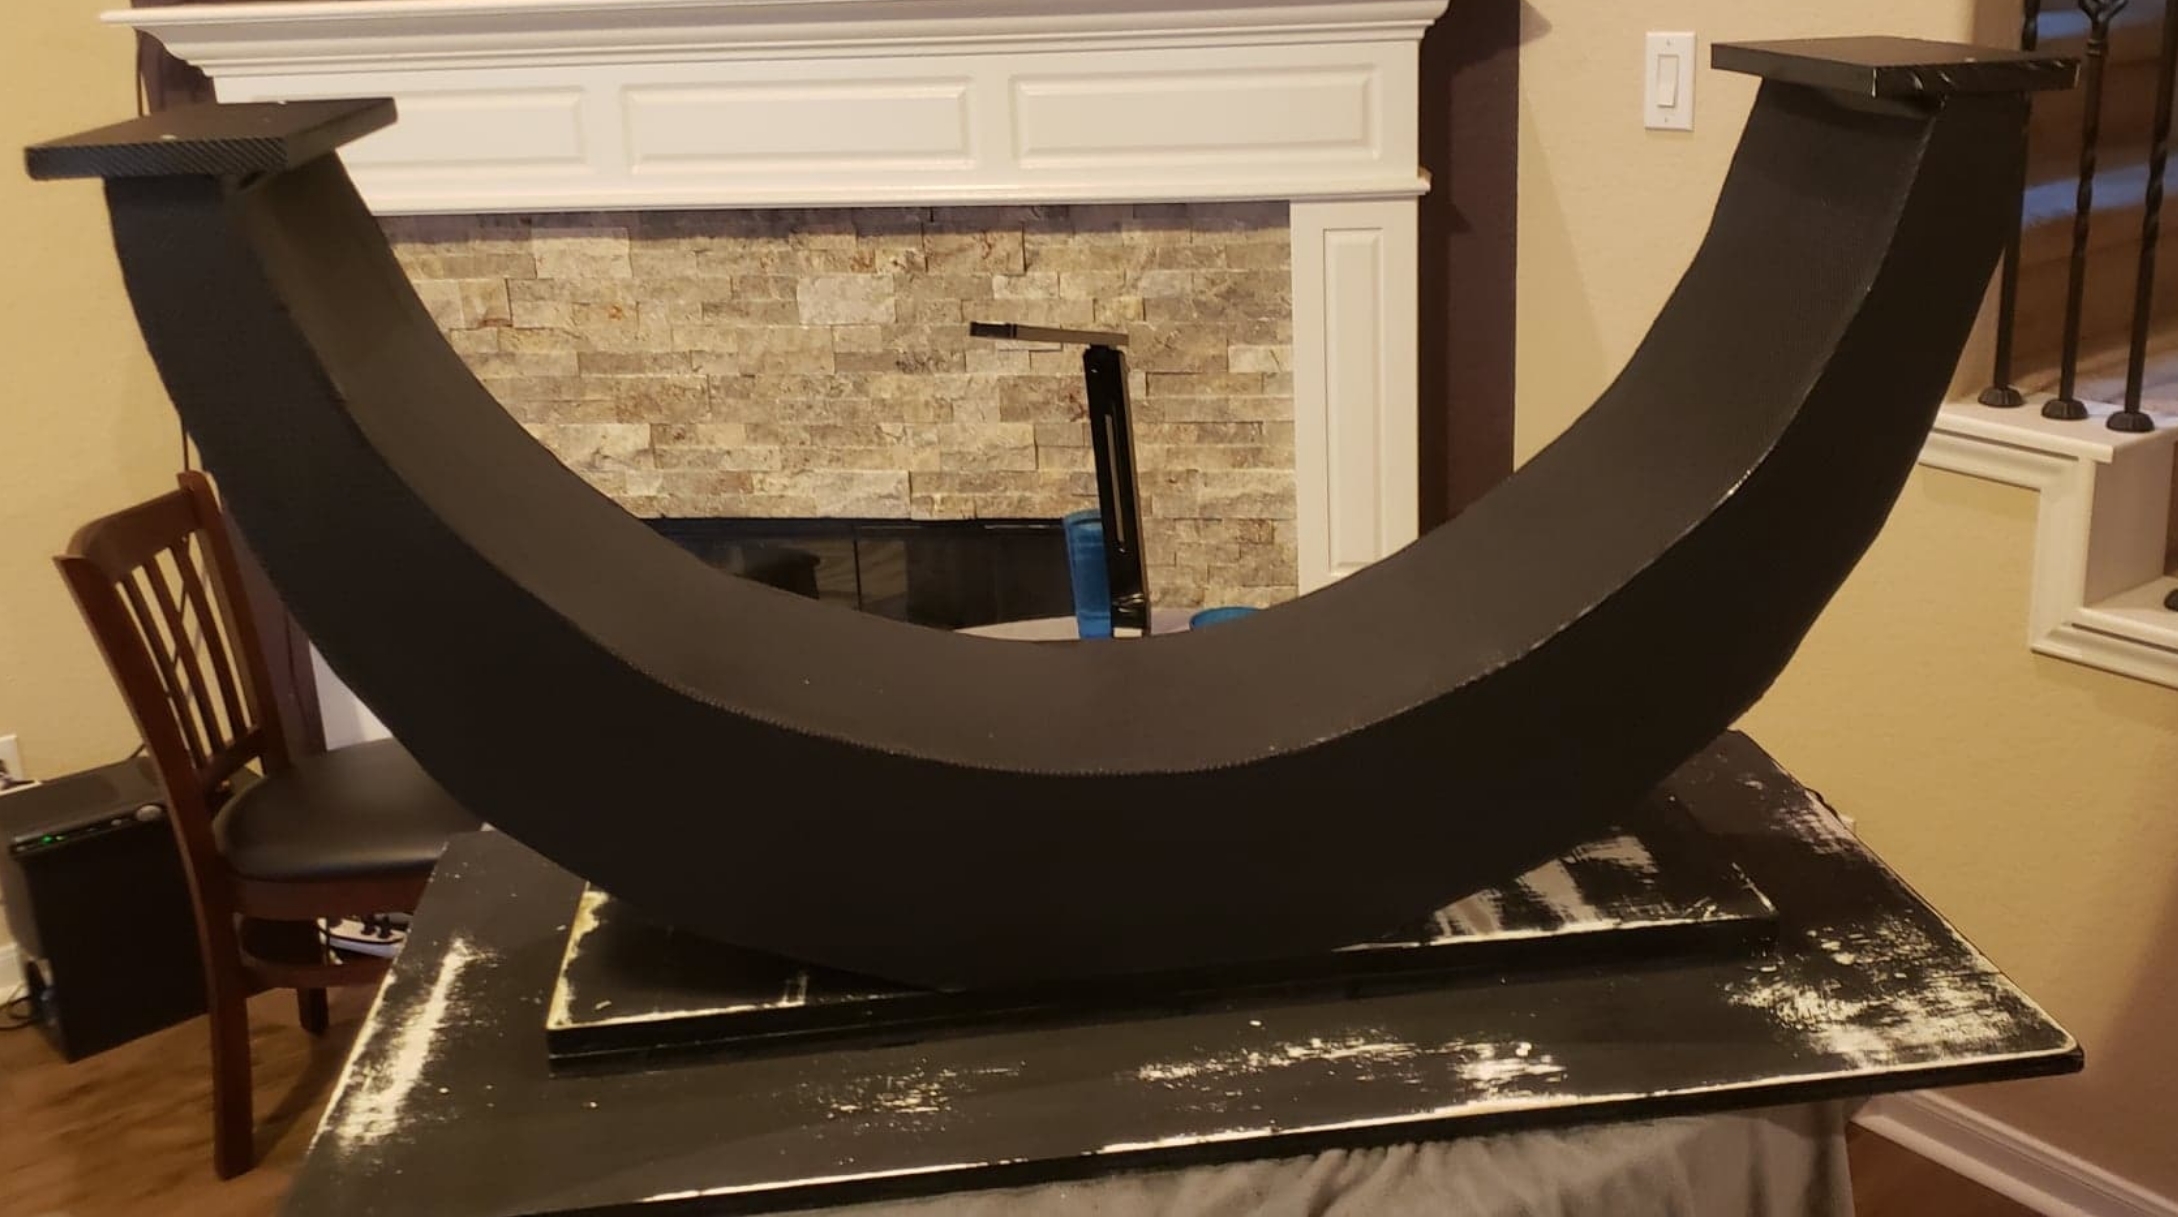
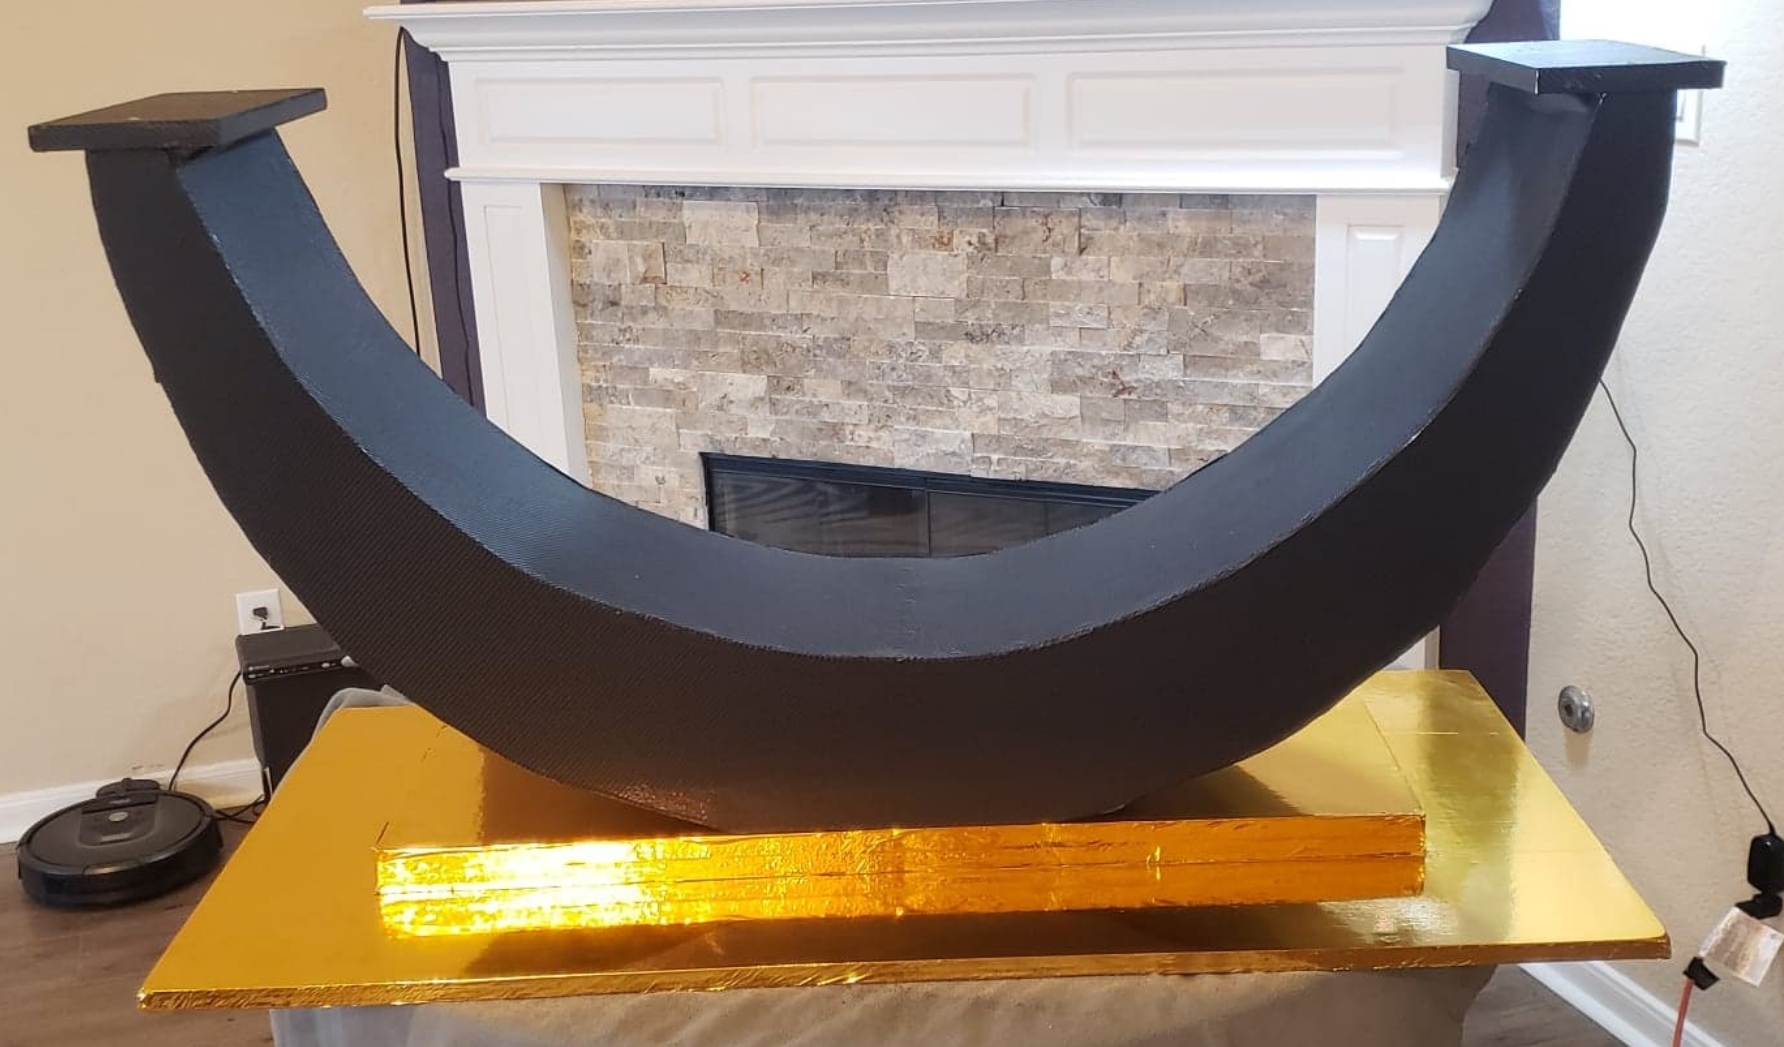
Other than the custom felt, all the other materials just arrived and it's time to start assembly... redefining the term "some assembly required"

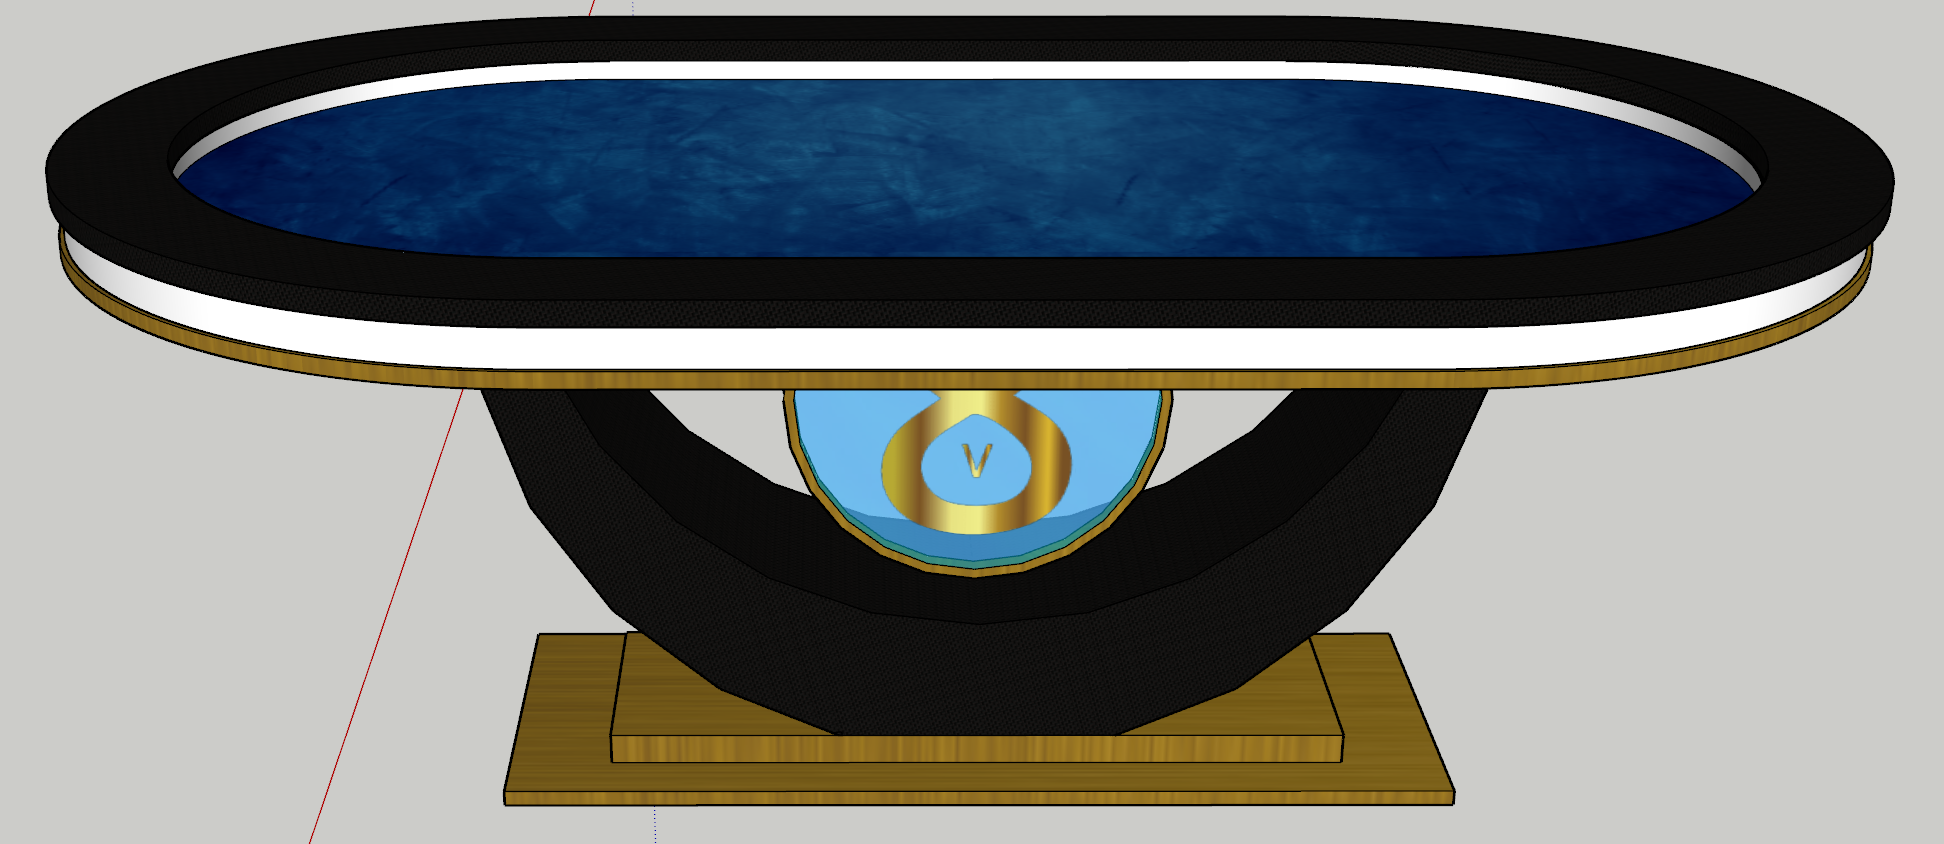
I've come up with several ideas on how to make this, and I've settled on a plan to do it quickly and efficiently within my capabilities...

Step 1: Assemble Components
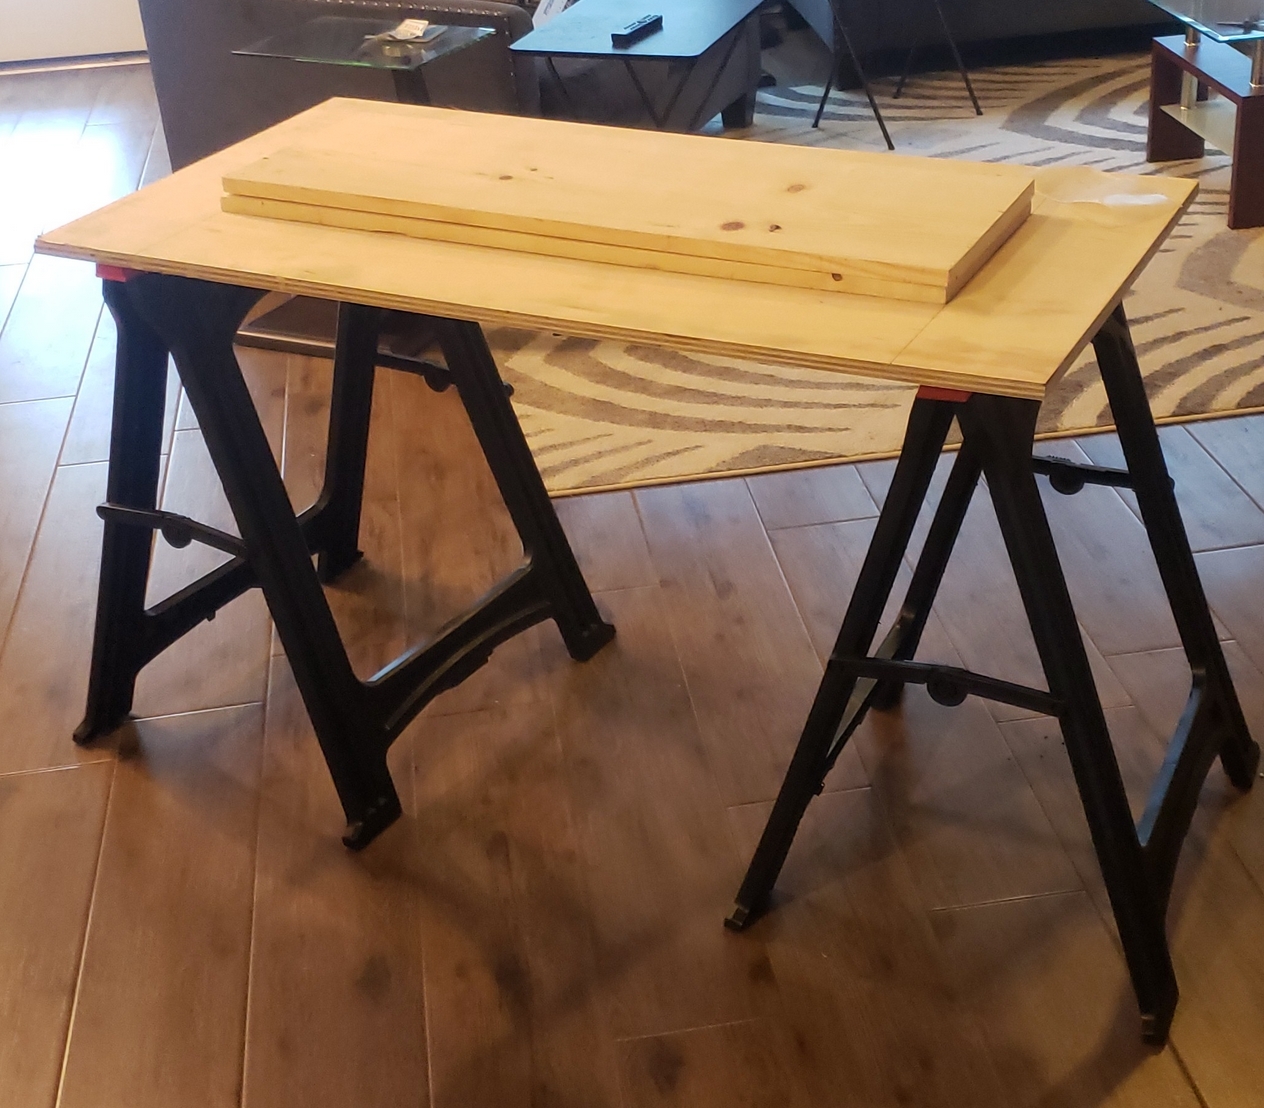
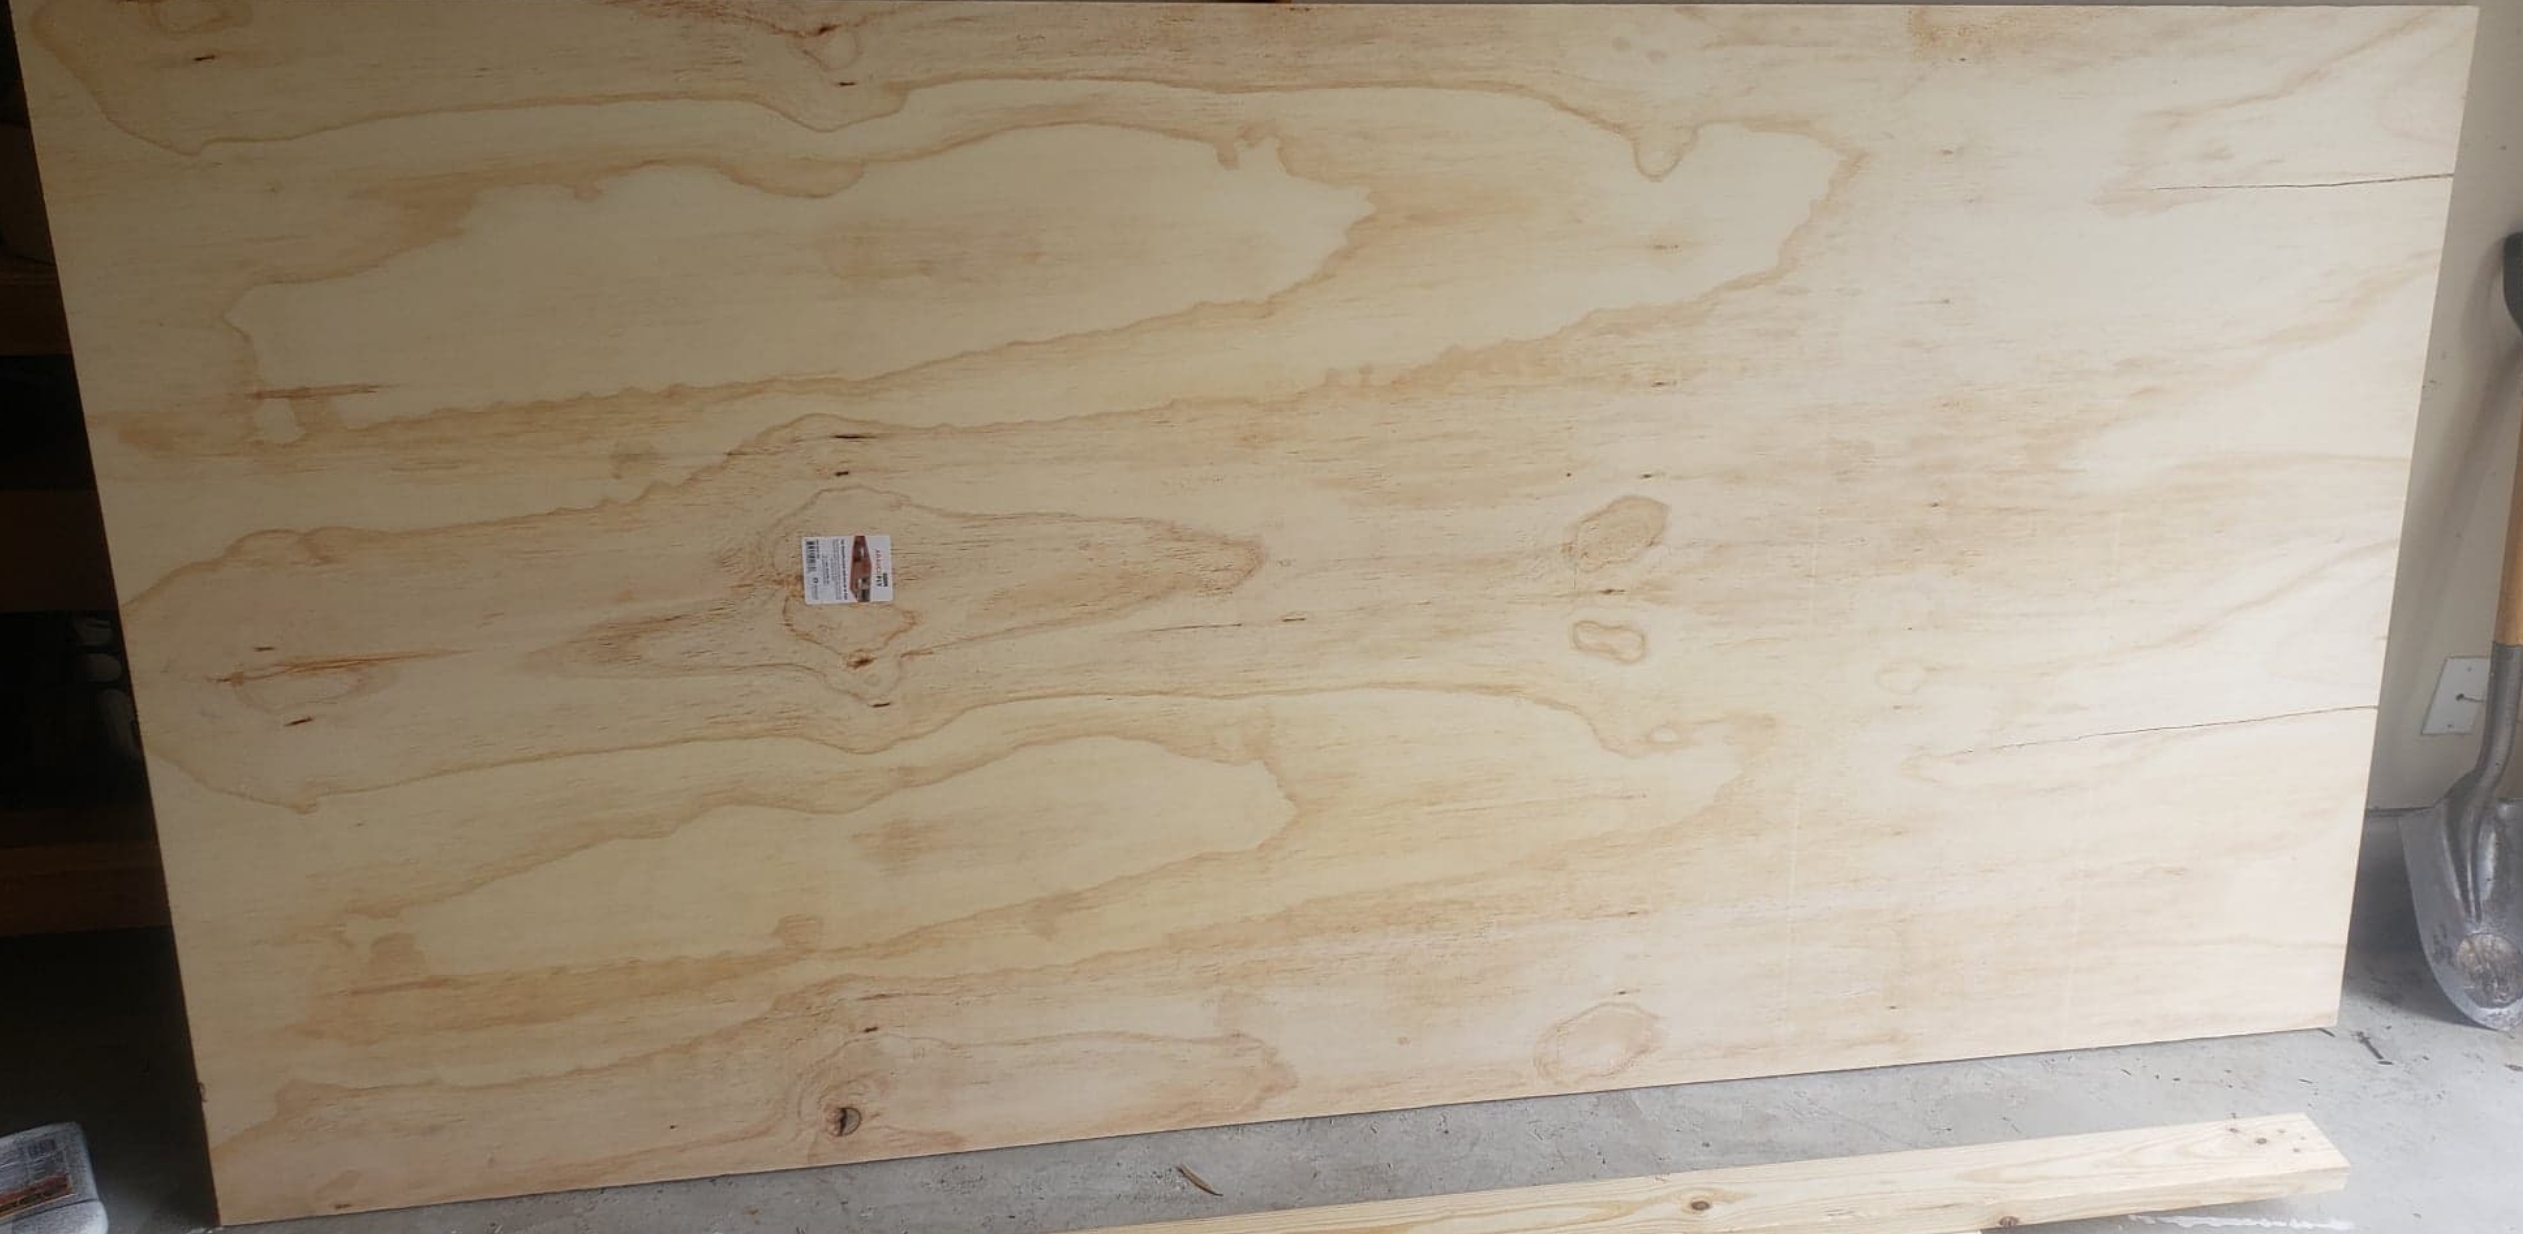
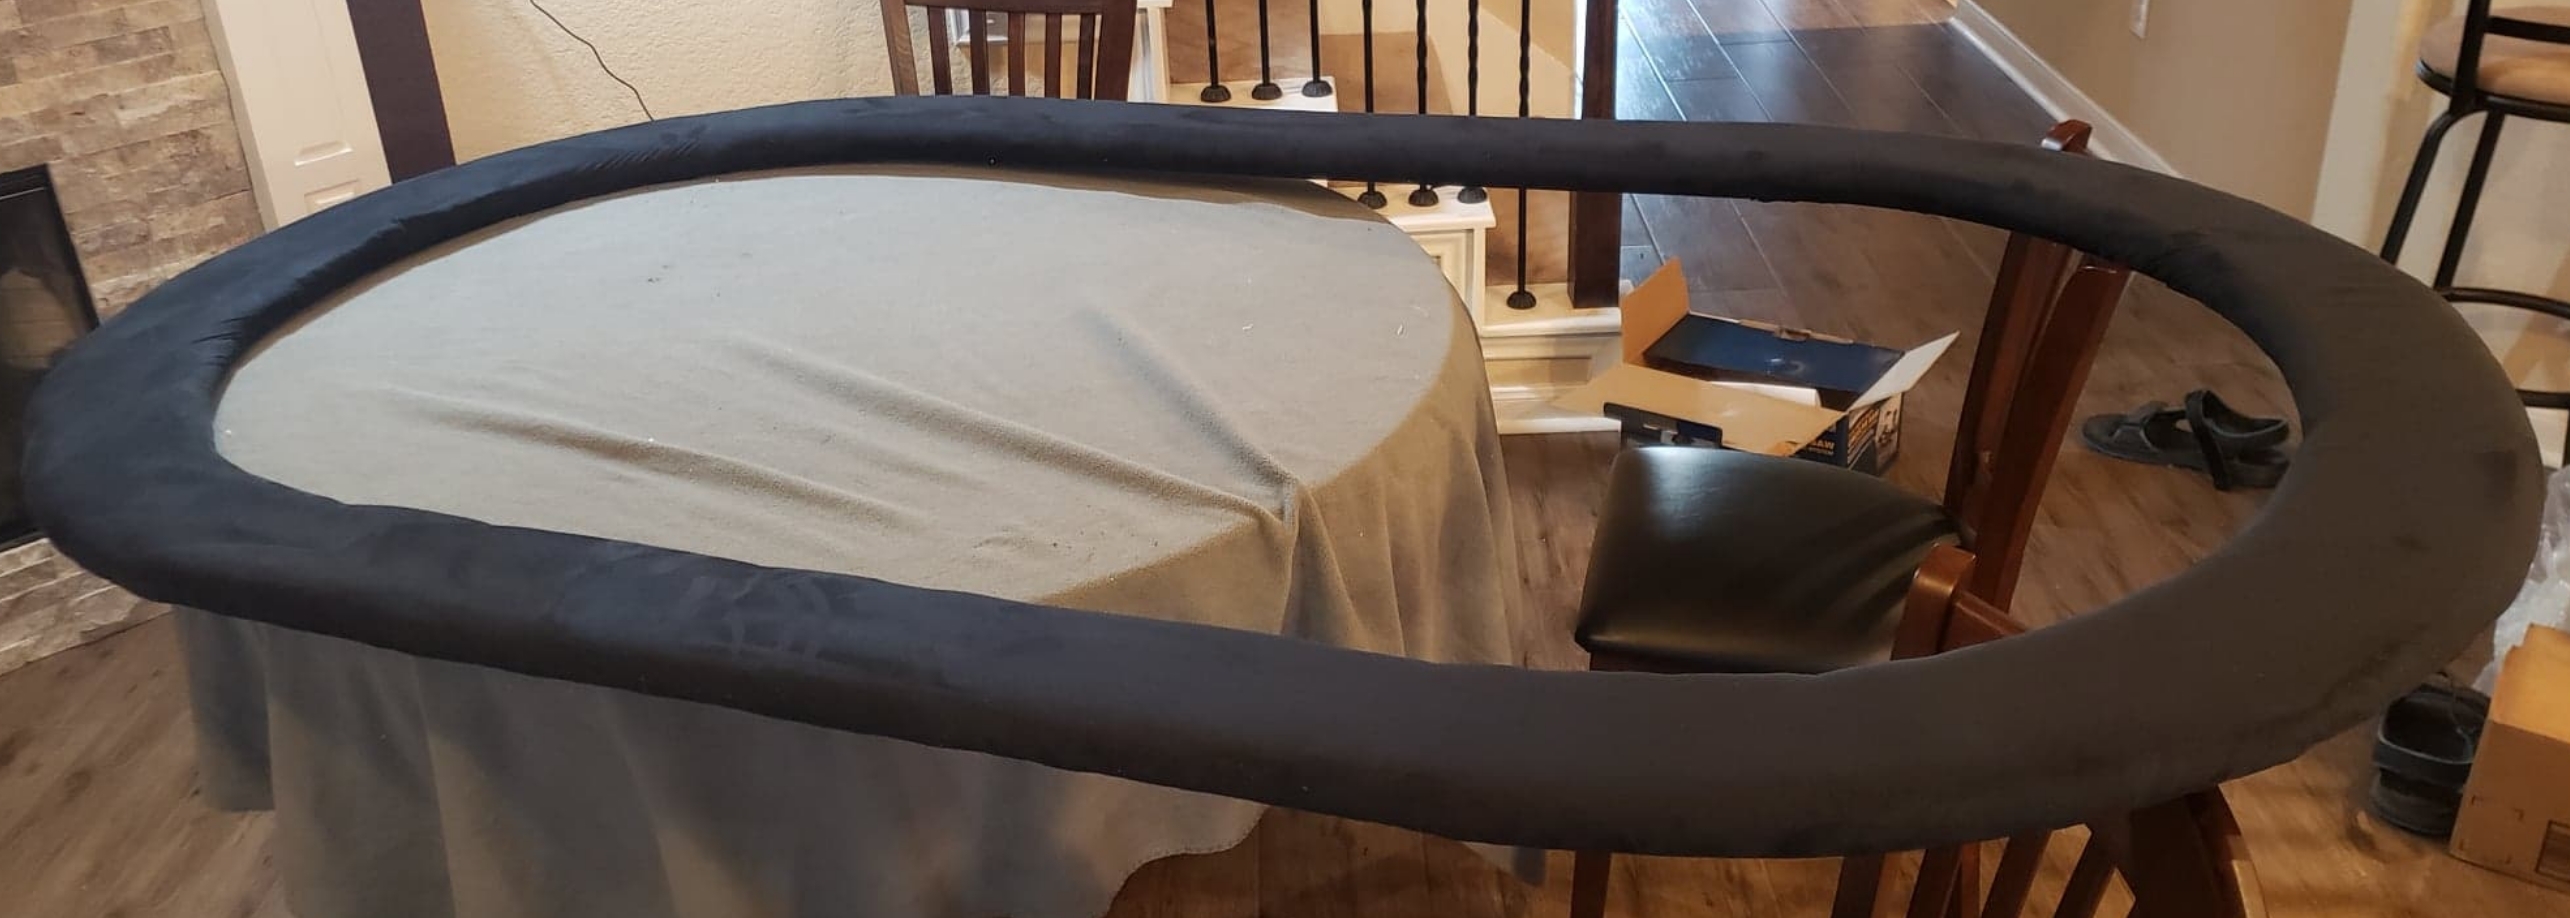
I rented a panel van from Home depot and got myself two 4'x8'x3/4" plywood sheets (since that ain't fitting in my Accord...) along with two 2"x4"x96" studs that will be part of the interior of the table. The foam and suede rail came in from YAT today (incredibly fast shipping... highly recommended). Everything else I pretty much got off of Amazon... Total cost of materials for this build was $650 (241 of that was the felt, so honestly it's an incredibly cheap build if I manage to pull it off...)

1479d6be4a4ade99ff82de0b6d009376.jpg


Step 2: Trim Plywood To Size
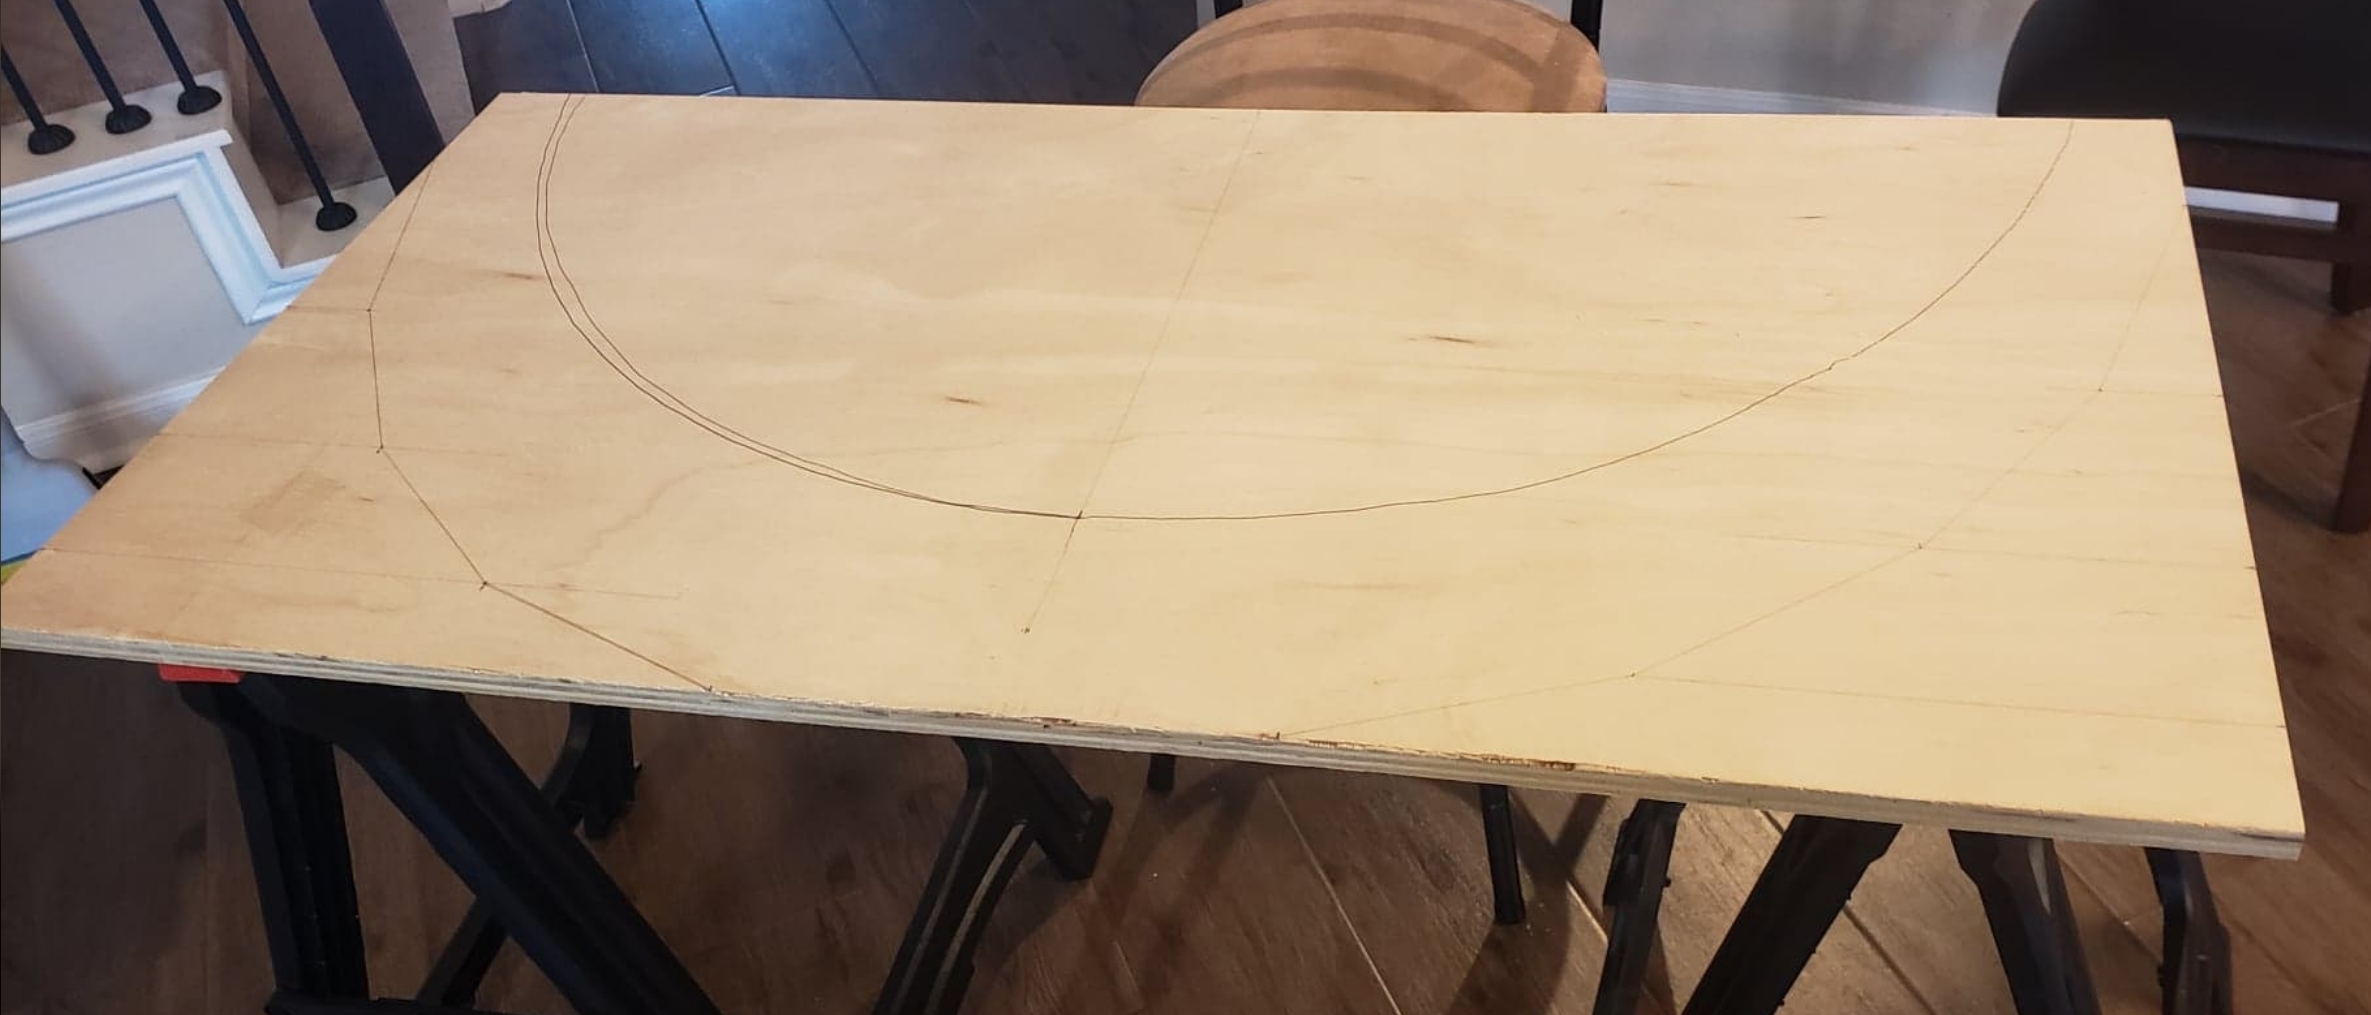
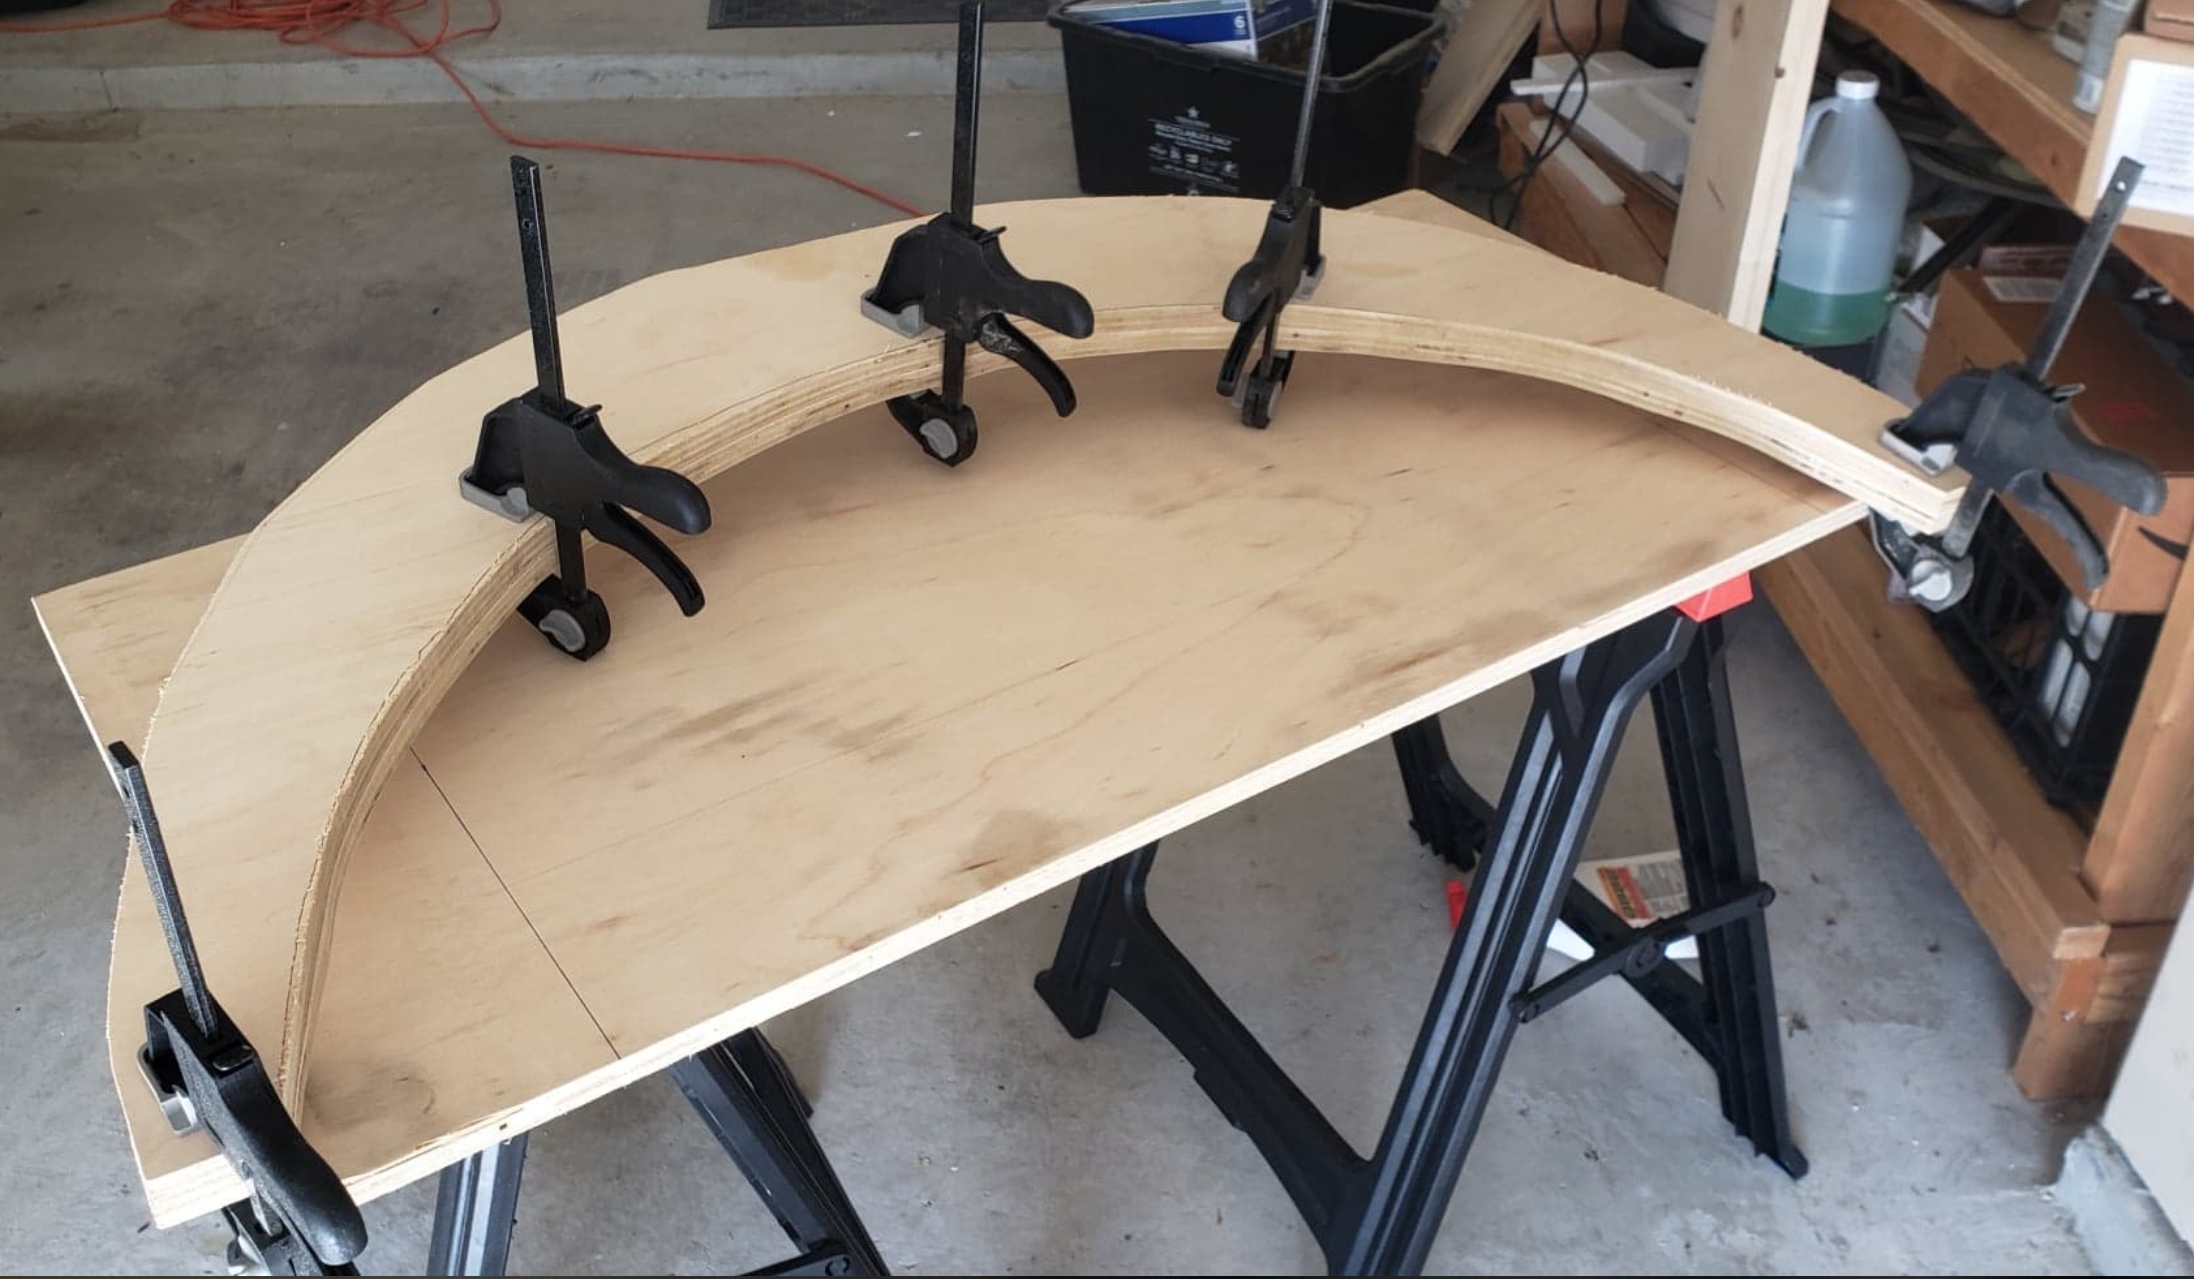
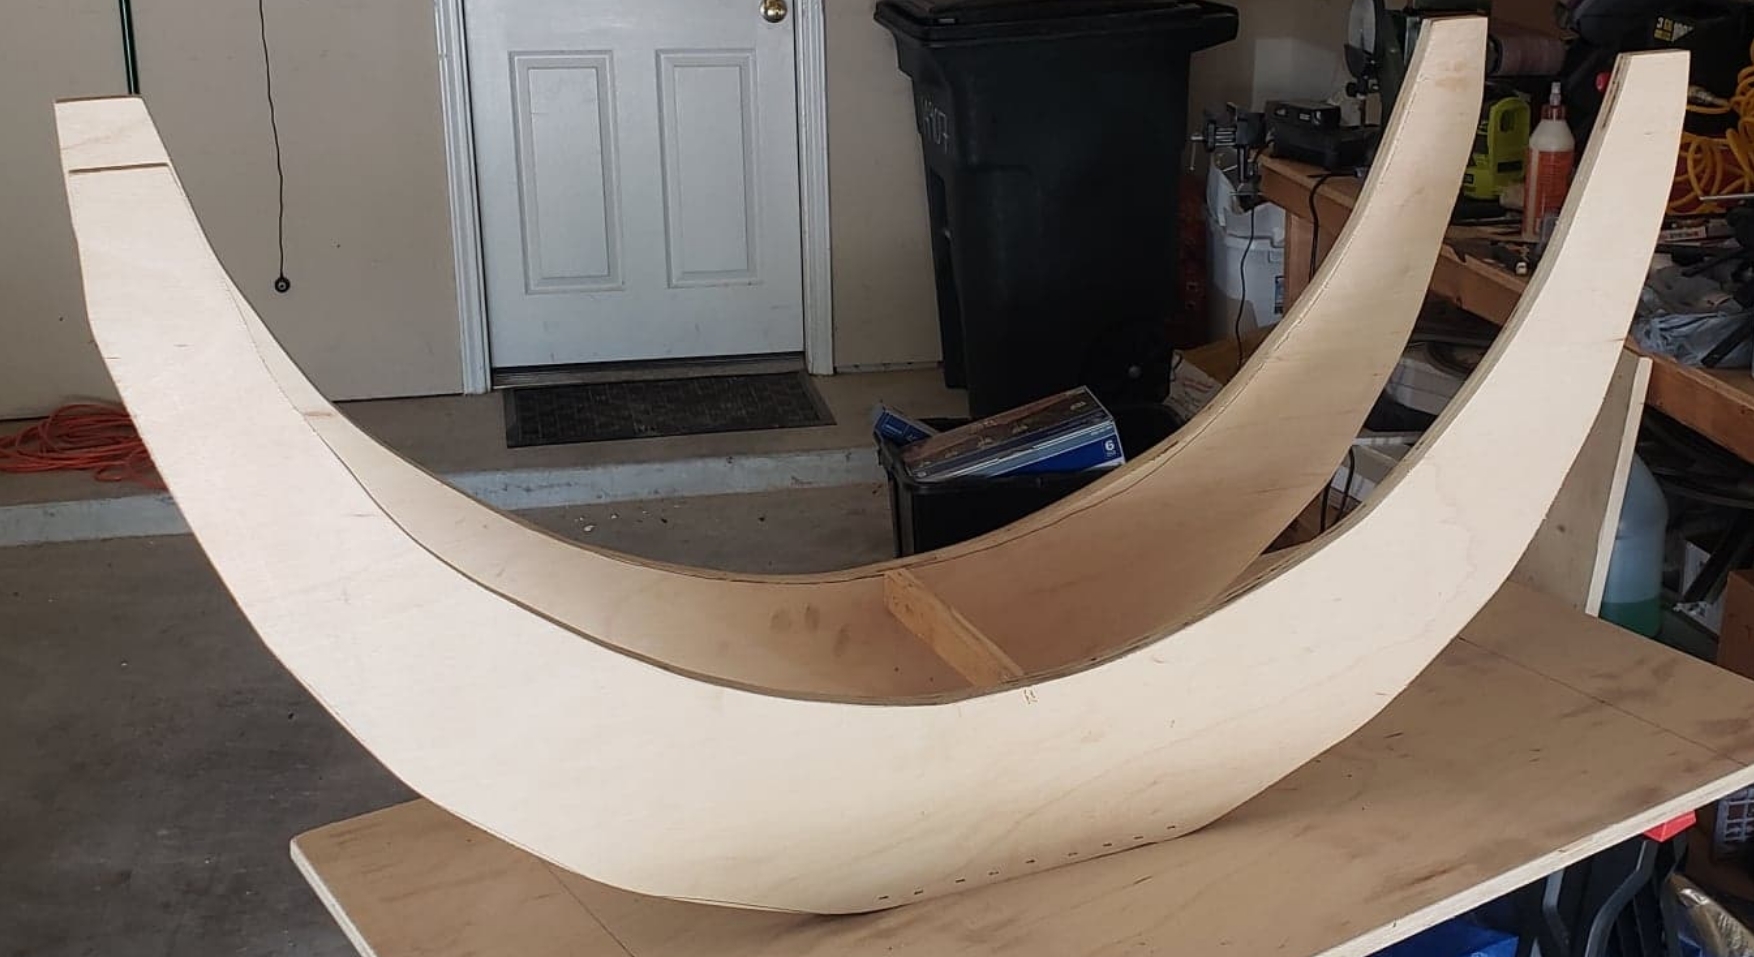
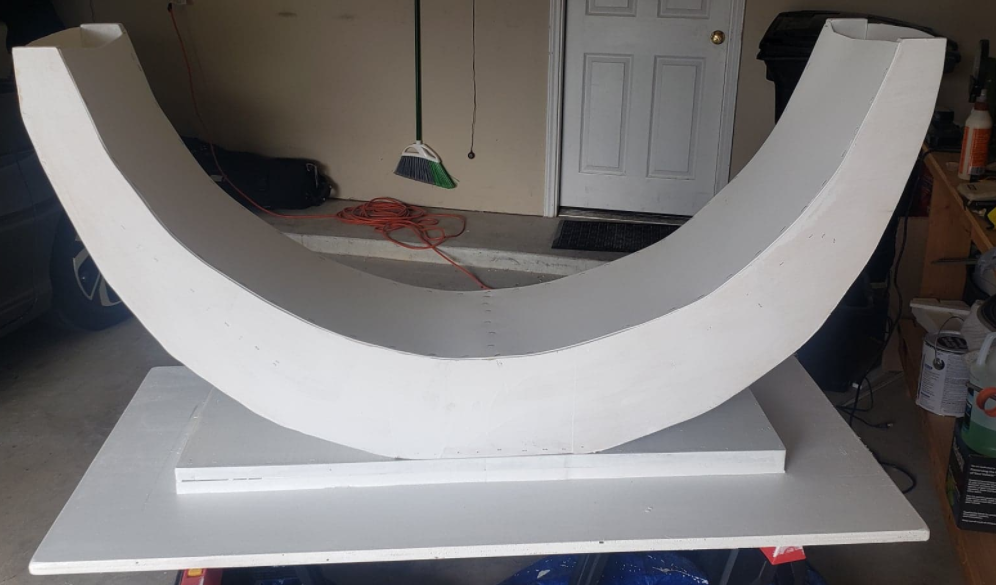
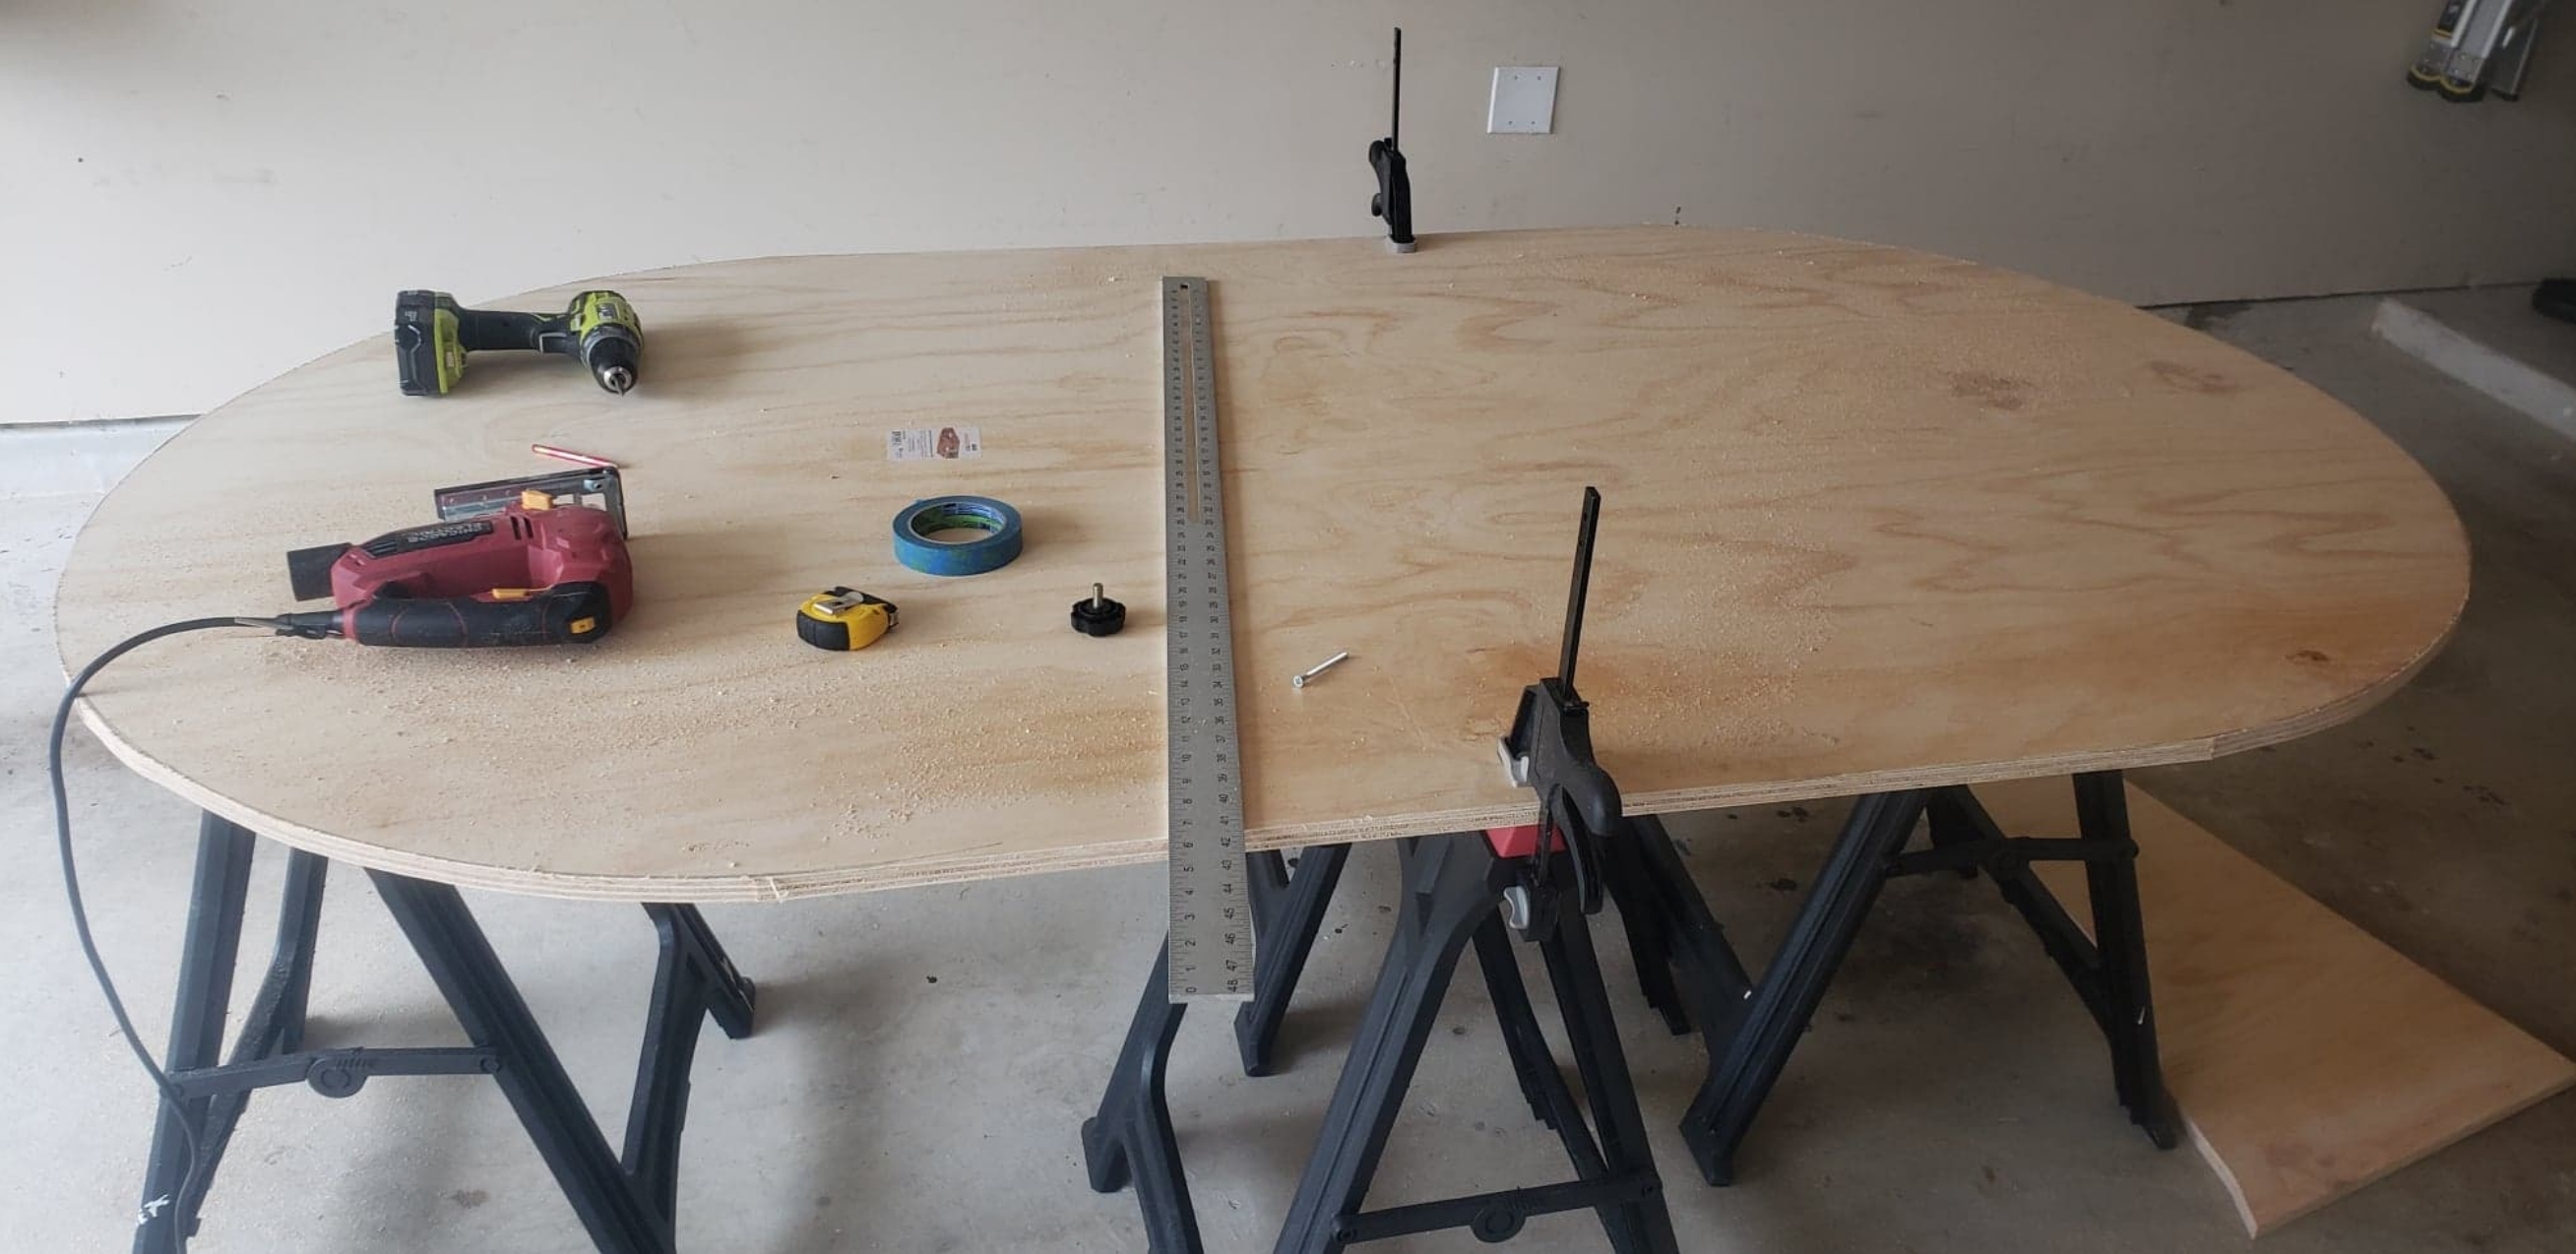
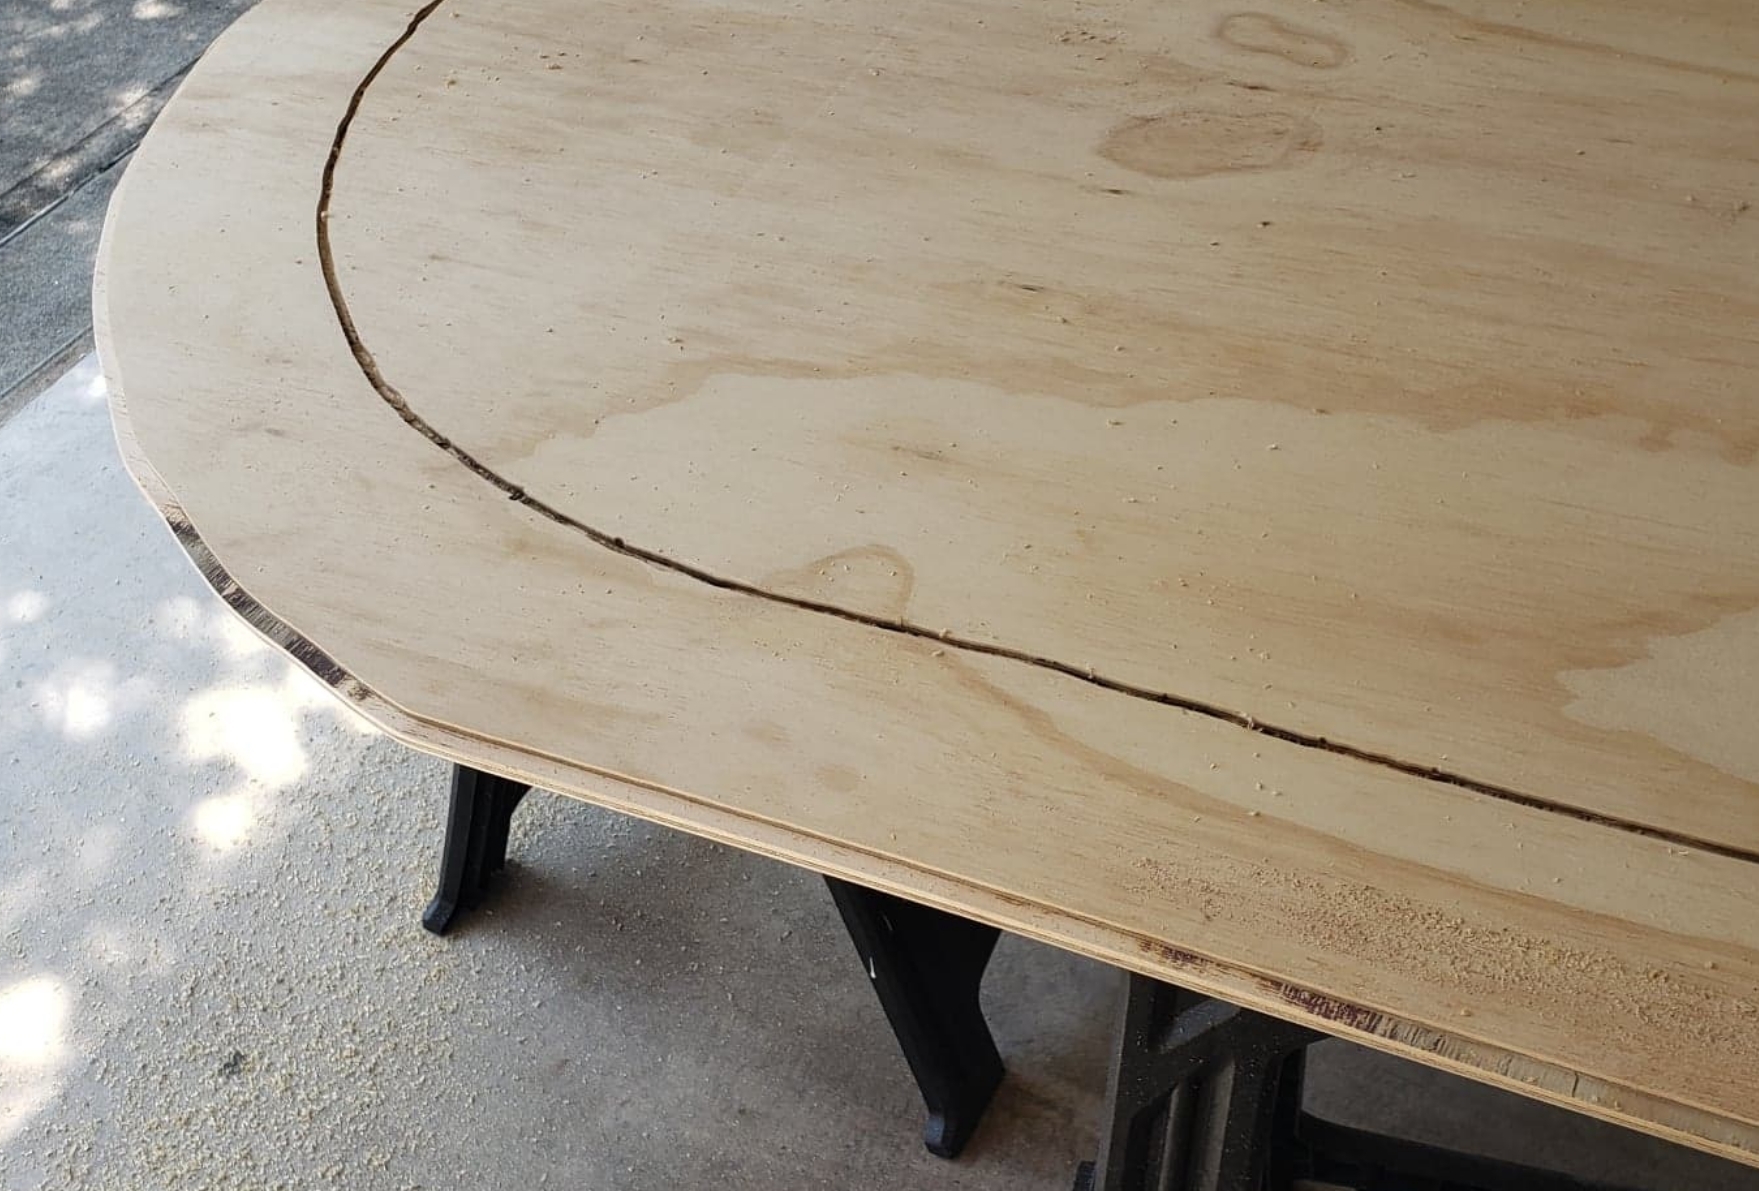
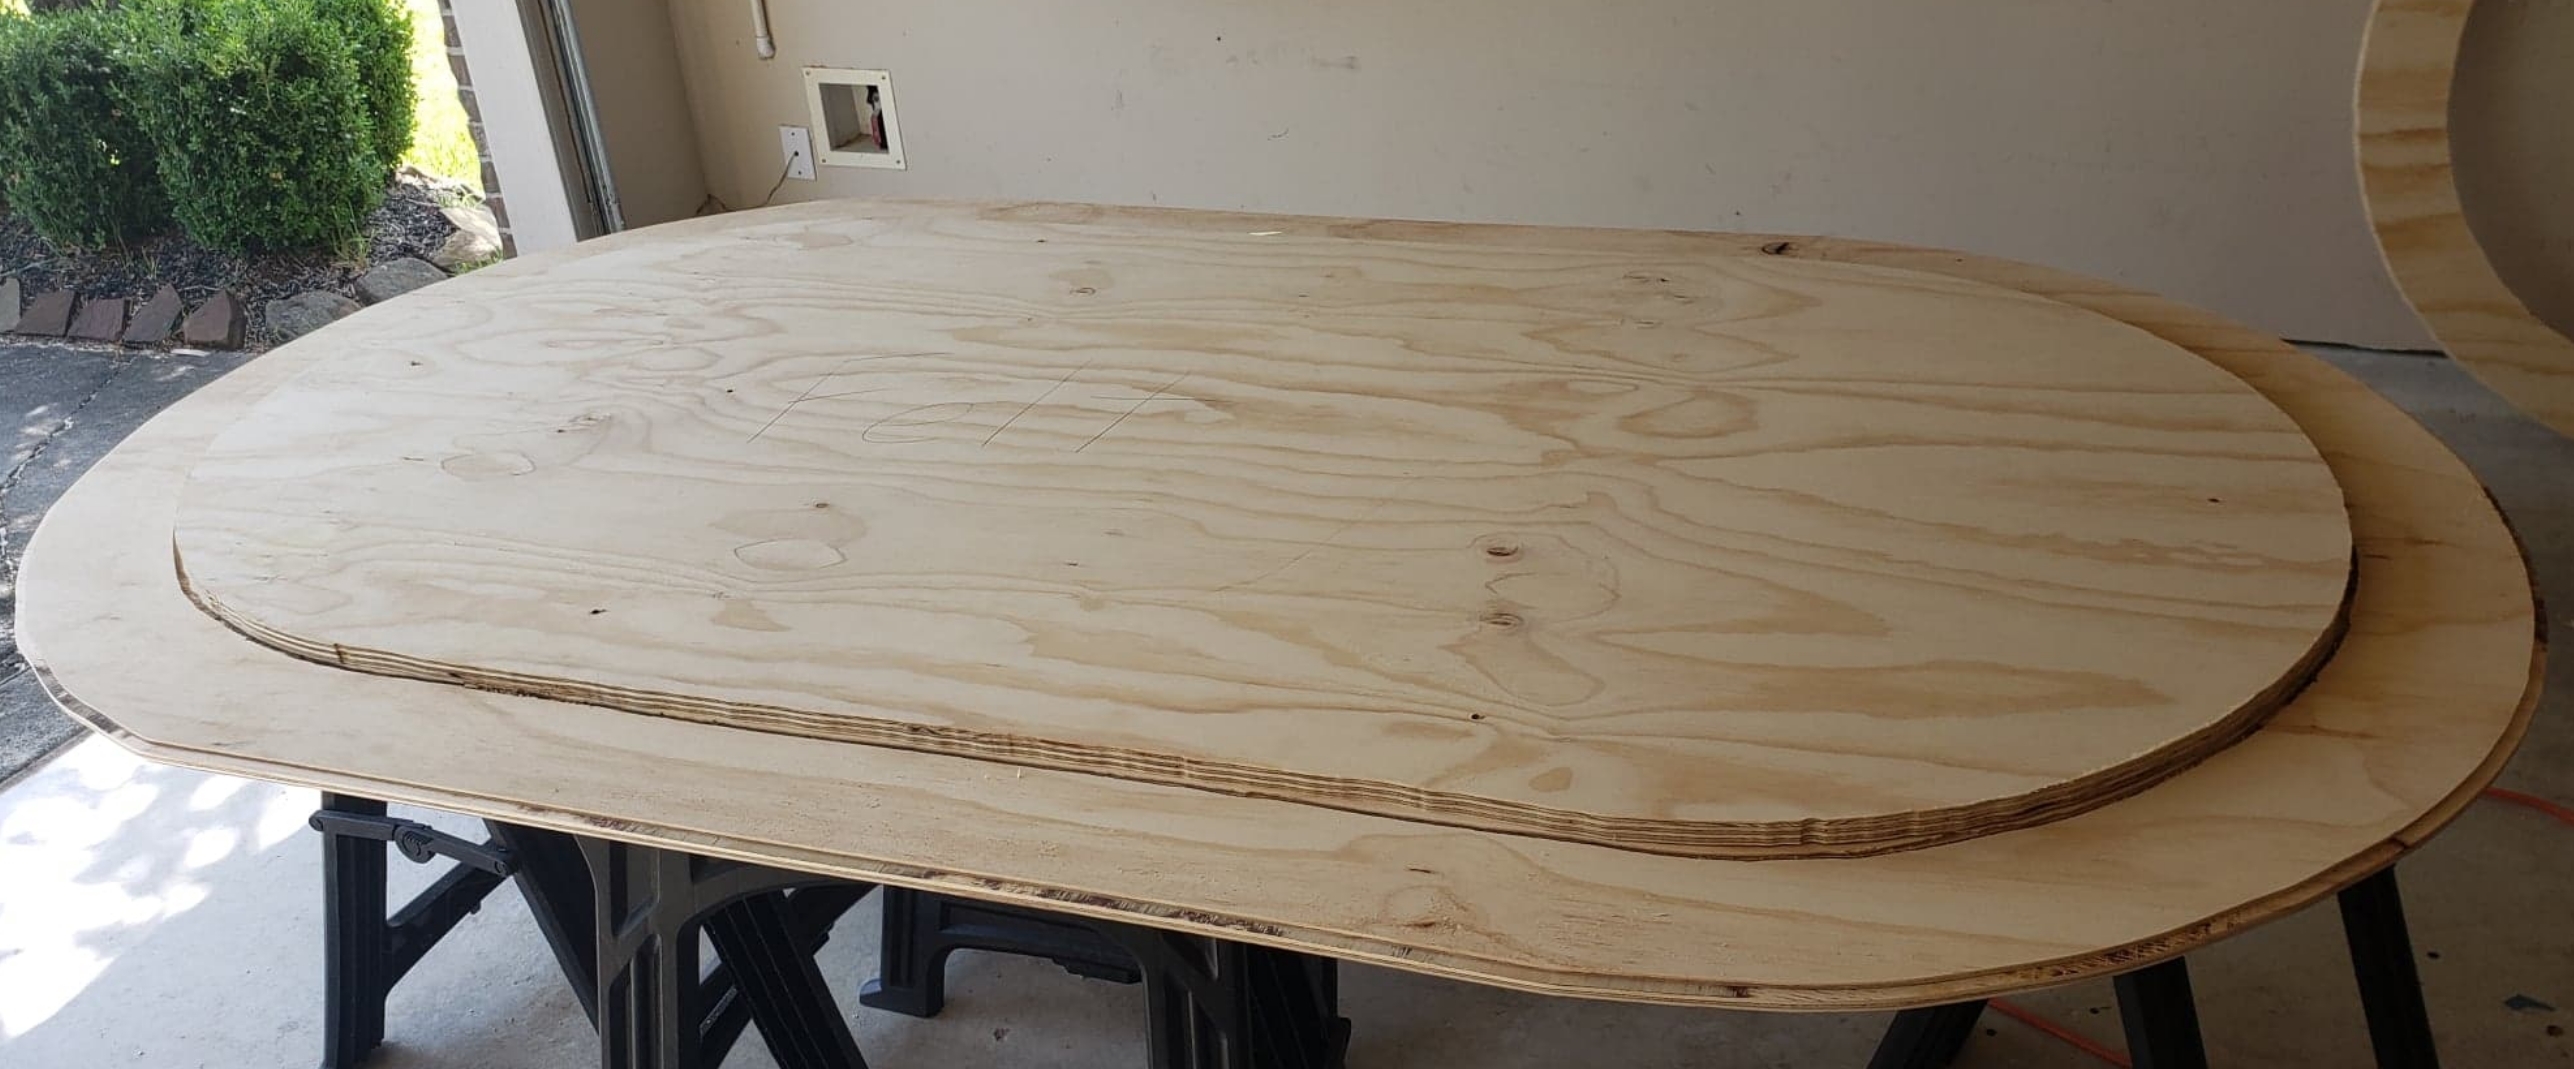
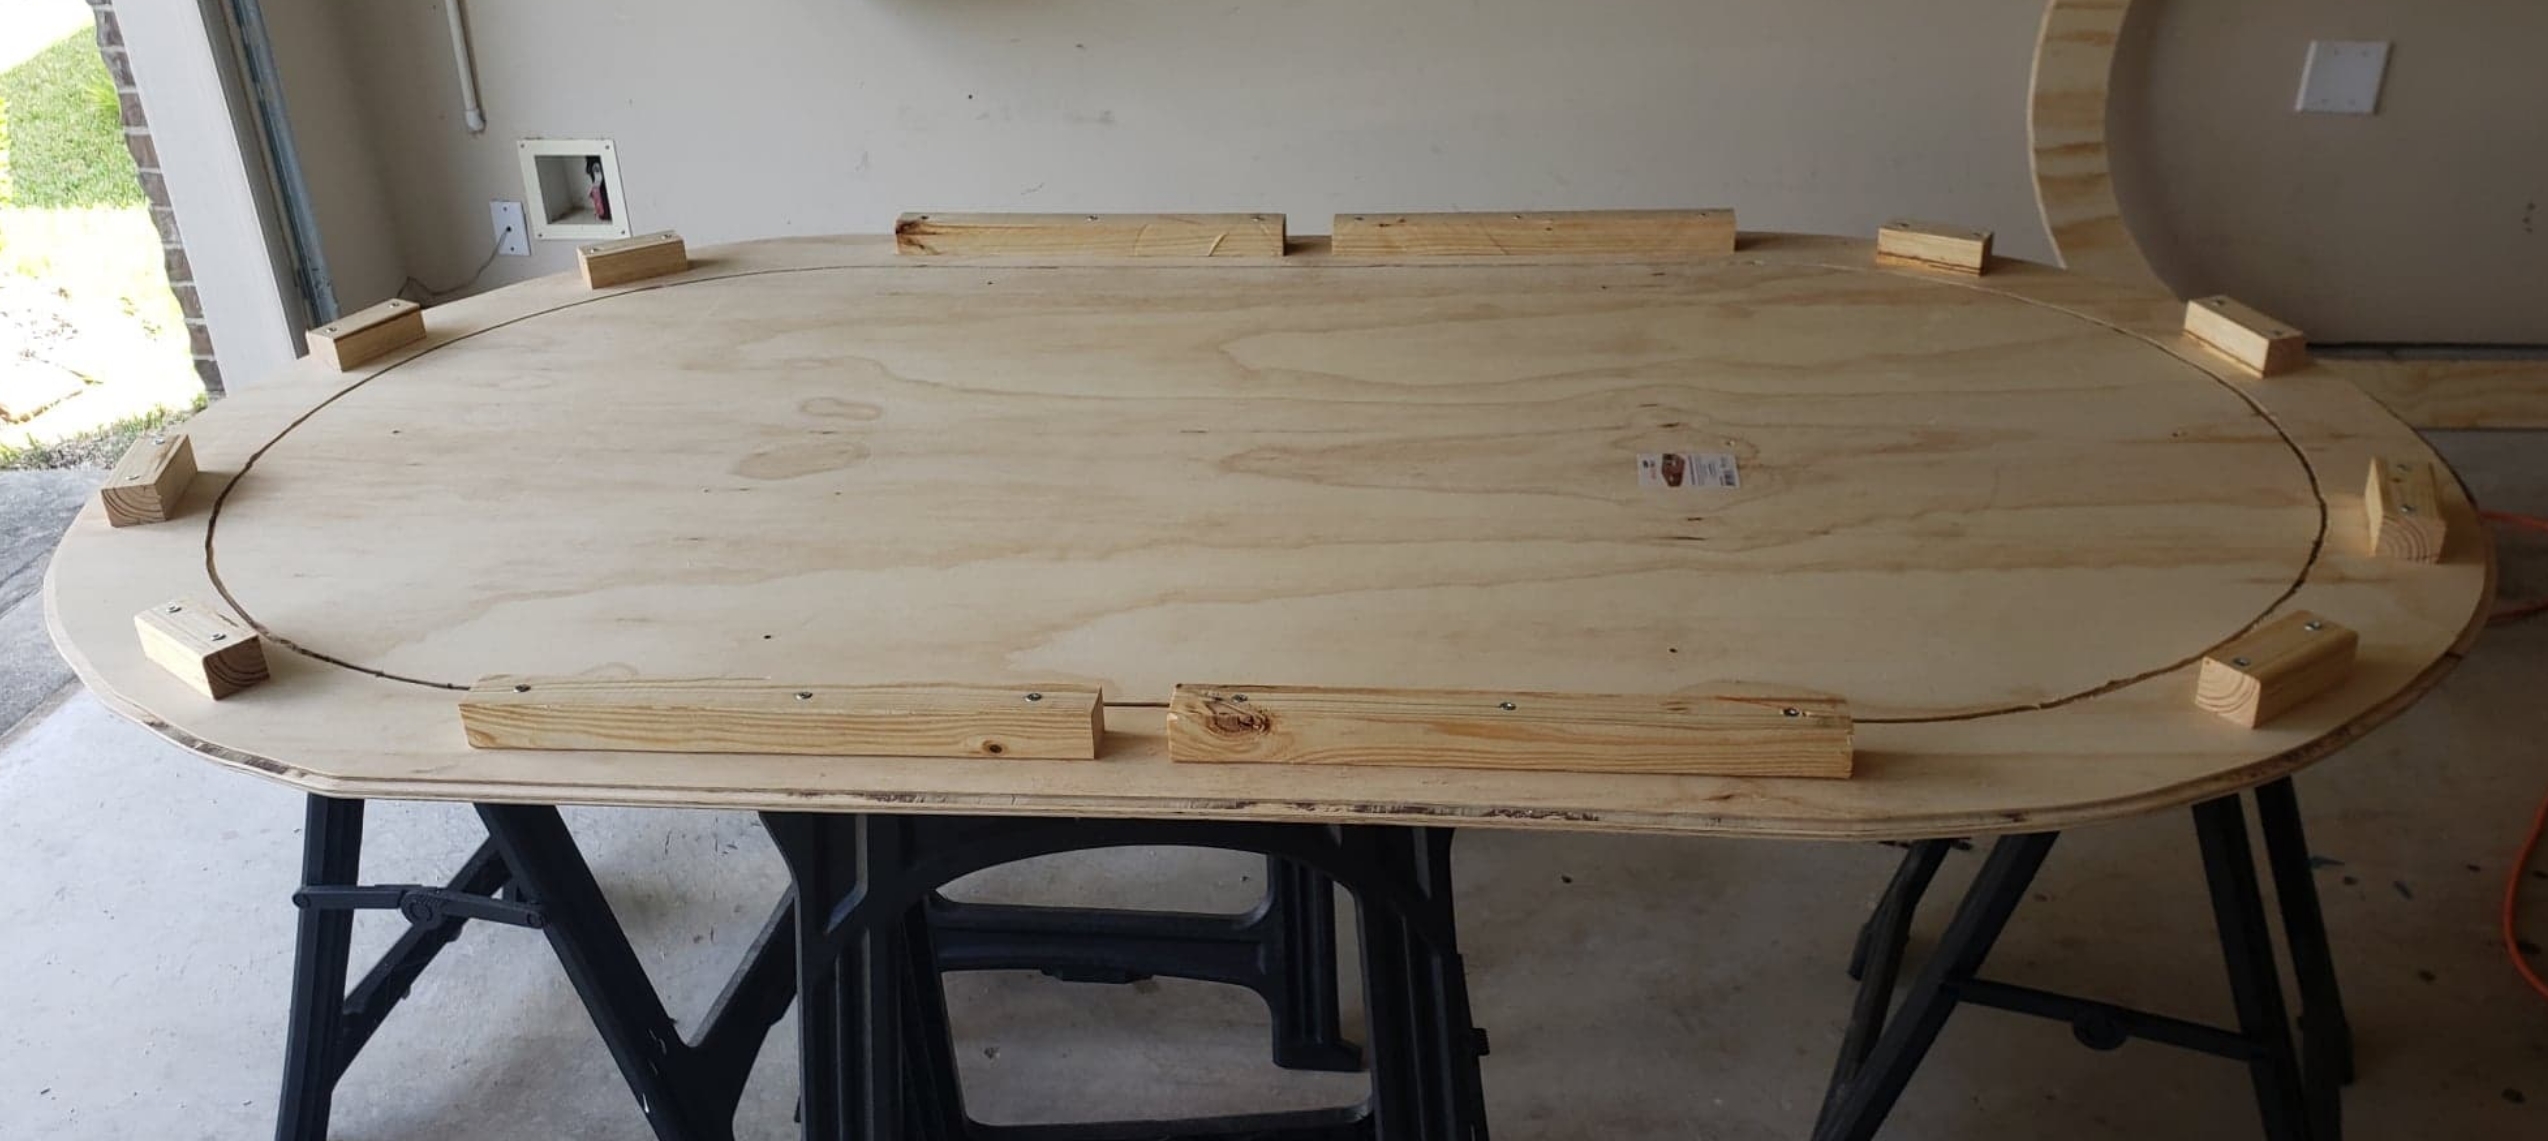
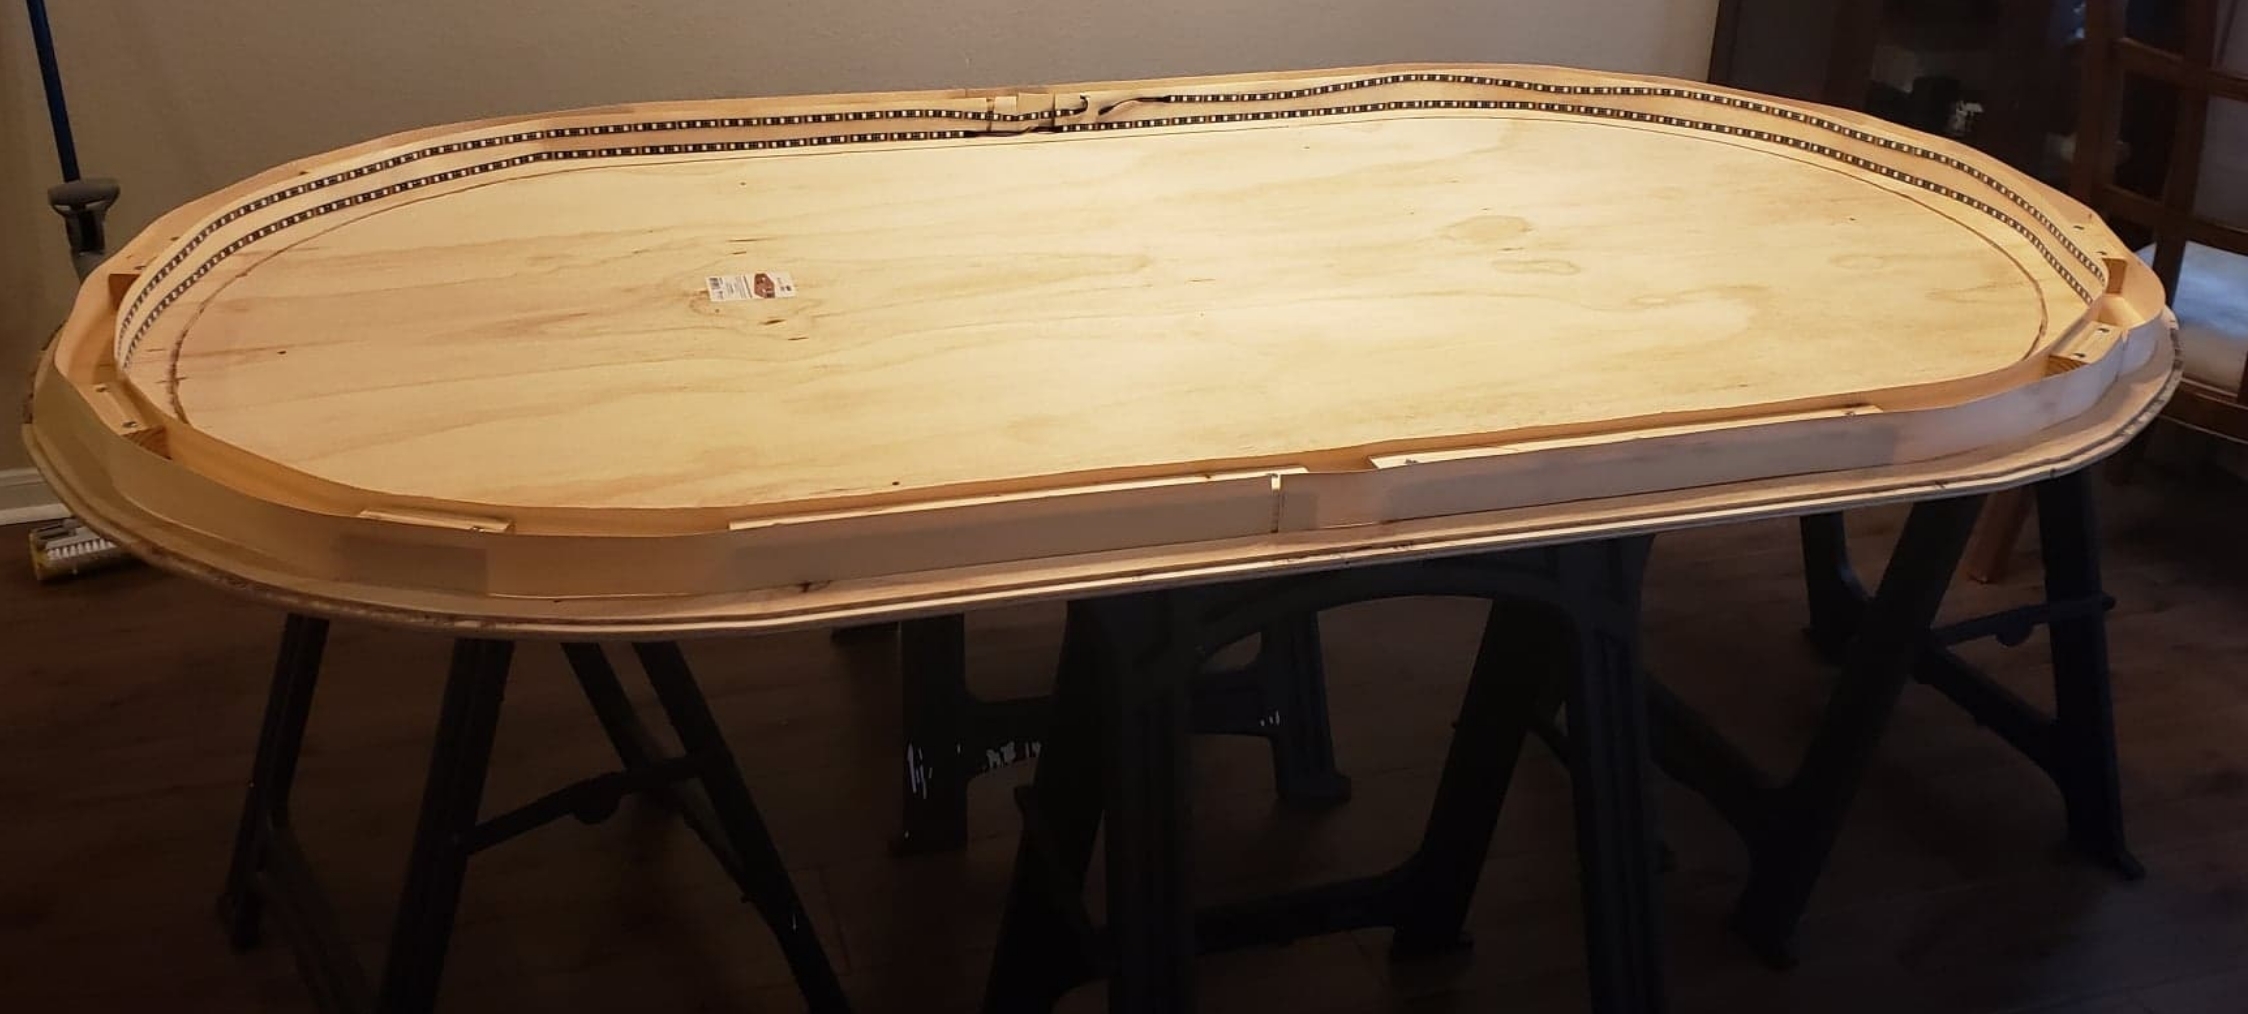
This table is going to be 7'x4' rounded oval, so we have some material to get rid of... this was helpful because I was able to pick an otherwise really nice sheet of plywood with a crack at one end because i'm taking a foot off one end anyways... I measured it and cut out the two pieces with my jigsaw, using the first cut piece as a template for the other to make sure both are the same dimensions...

a28c9a65ab51265b13de9c5b26a84127.jpg

2135c43b1d8c5321127dde6b6ee0959c.jpg


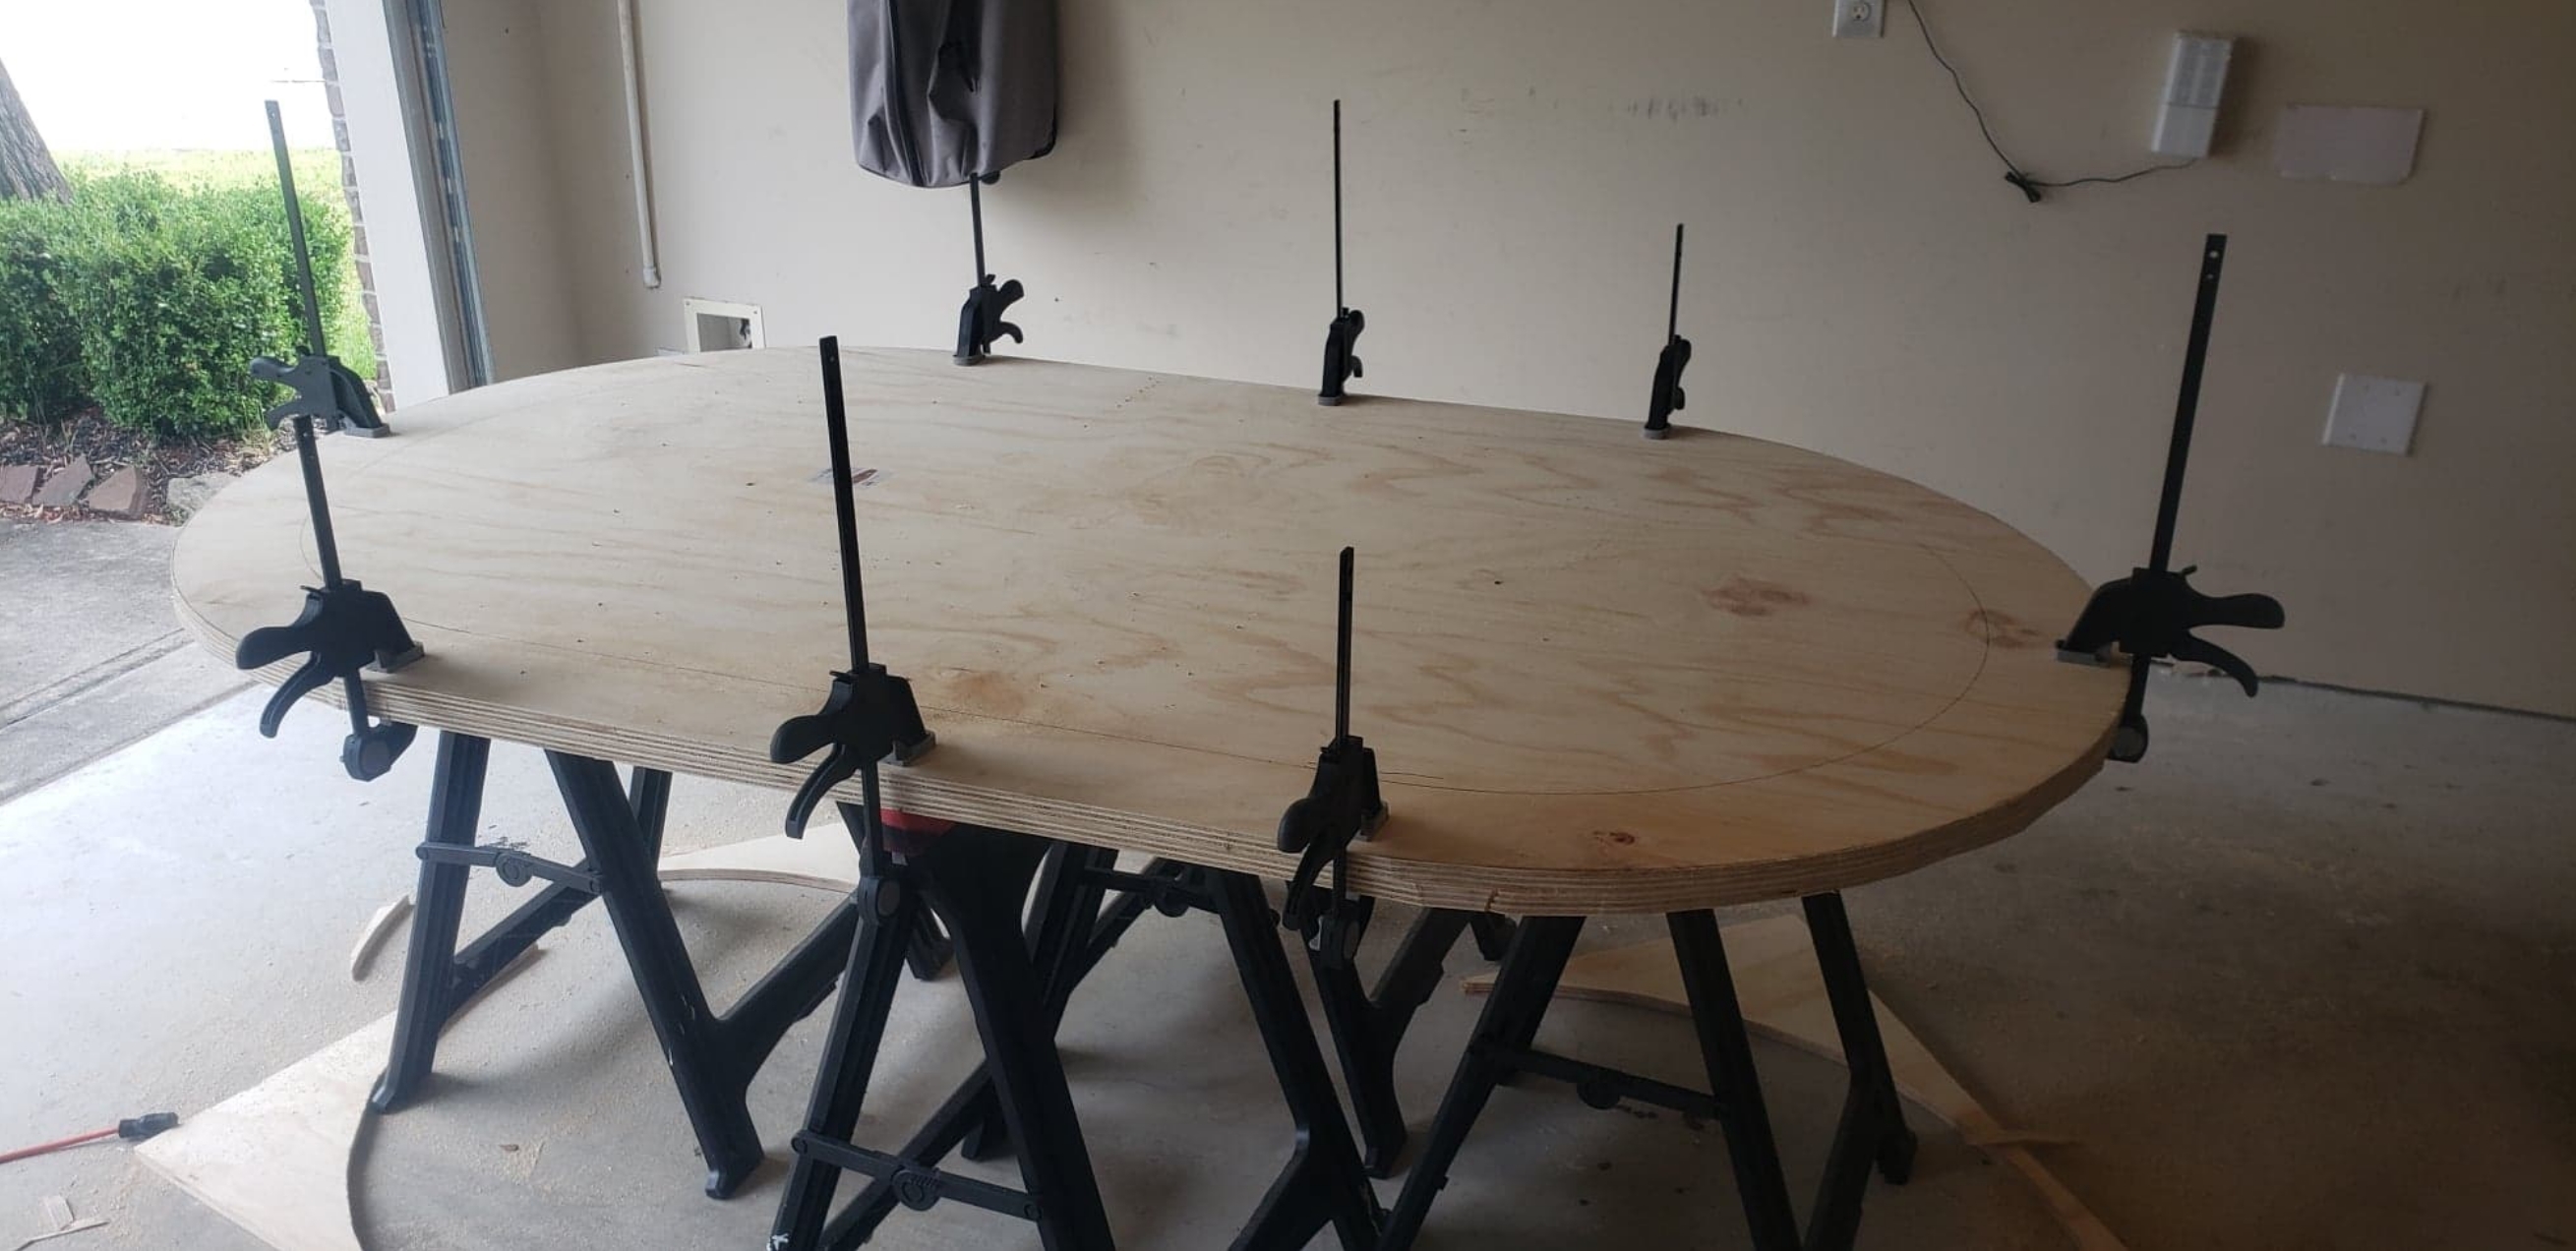
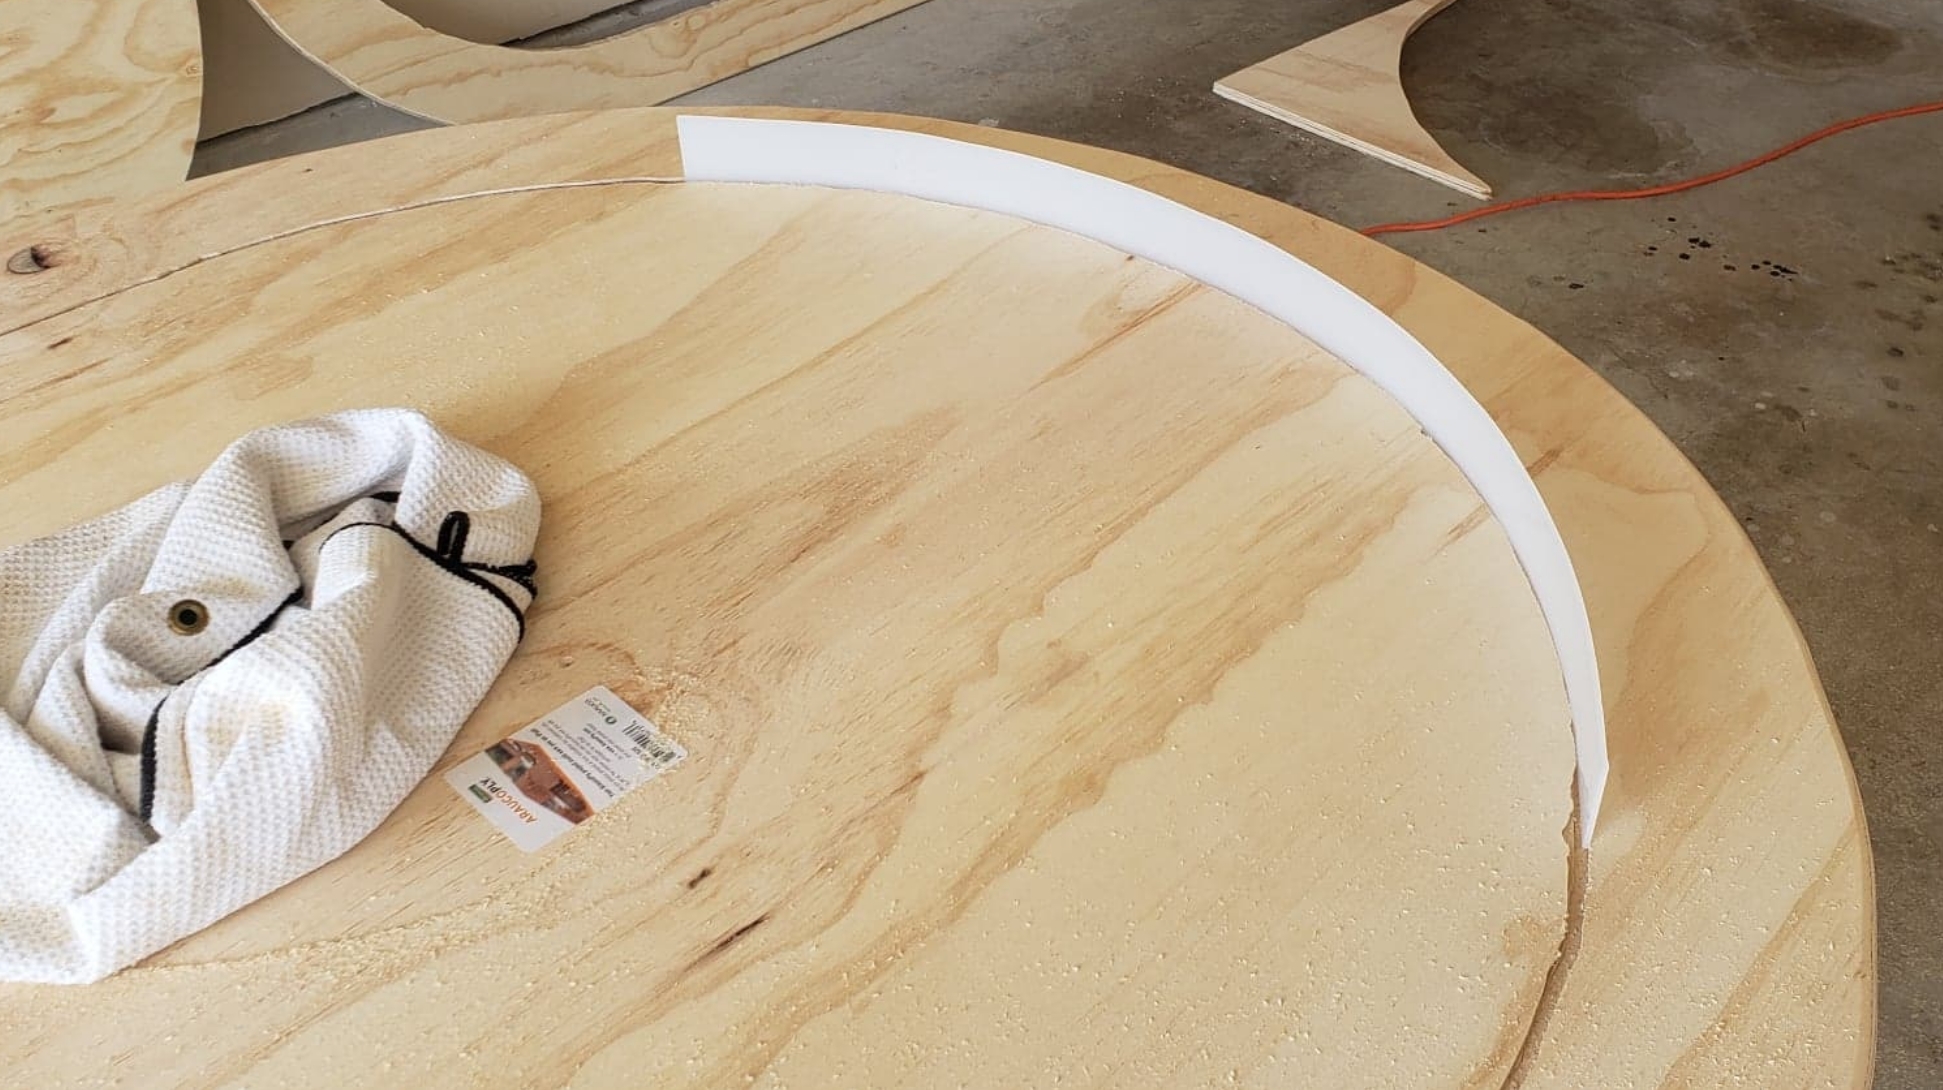
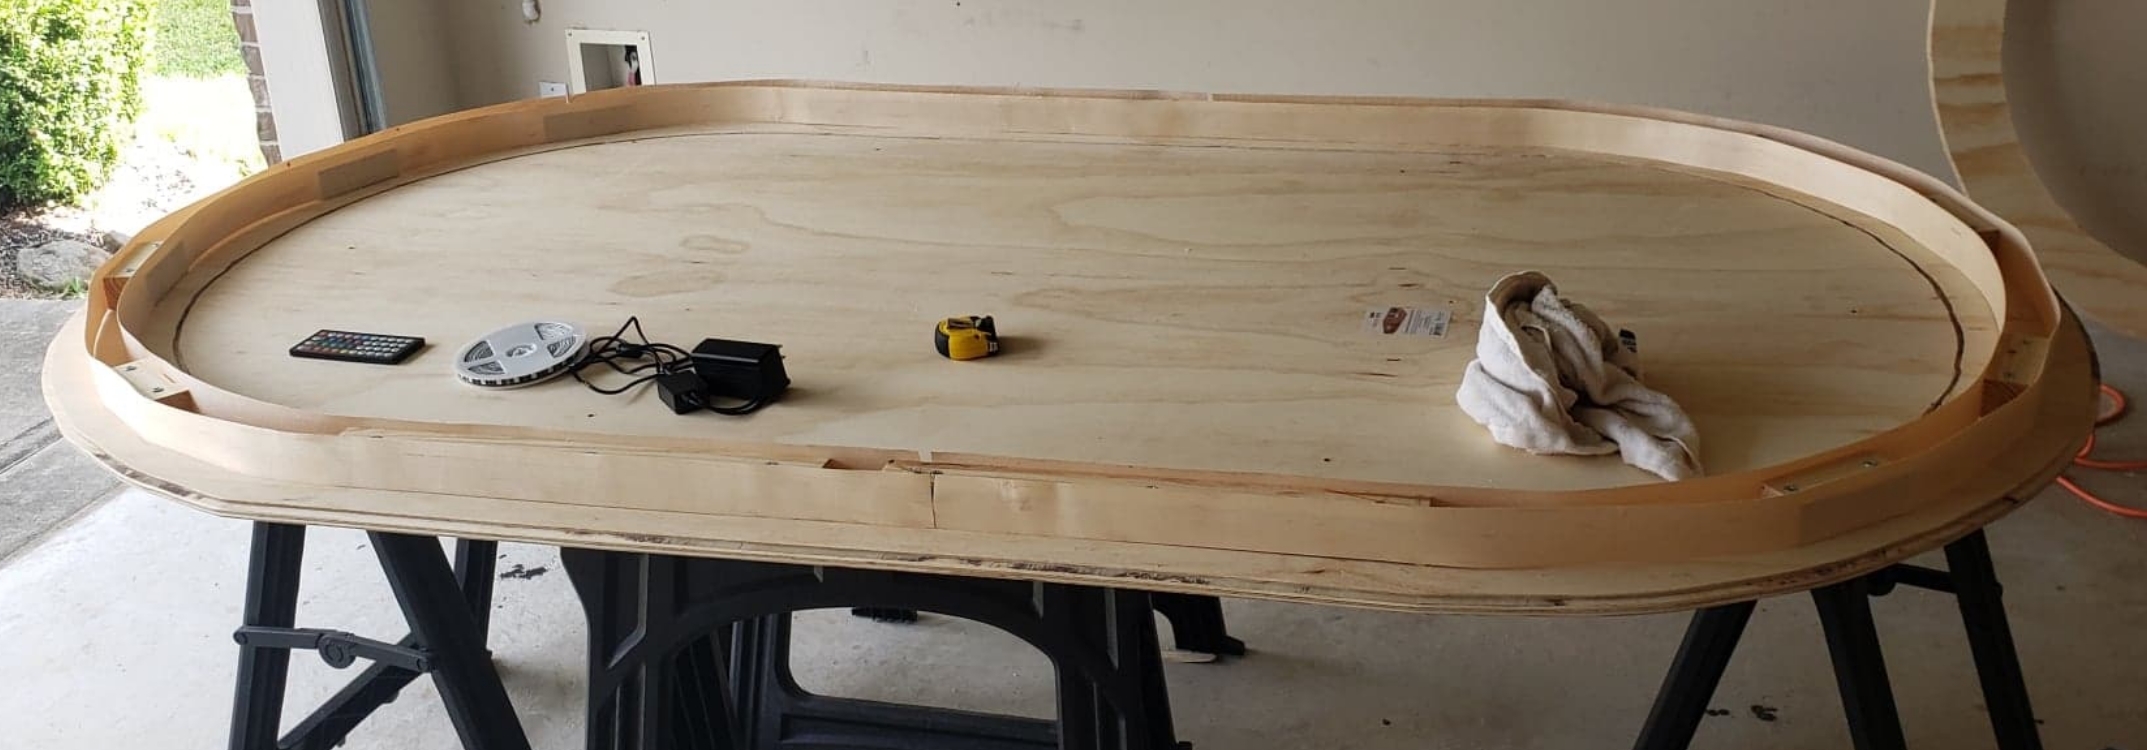
Once this thunderstorm passes, I'm going to use a cutout tool with a 1/8" spiral bit on both pieces of plywood at once.. the reason for this is rather nifty... the bit will cut all the way through the top layer of plywood to separate the rail sheet from the playing surface sheet.... the bit will also cut about 1/8" into the bottom layer of plywood (the table base) and create a groove for the acrylic sheets to sit in... lastly, the above tool will cut a second groove just inside the edge of the table base for the outer acrylic loop...

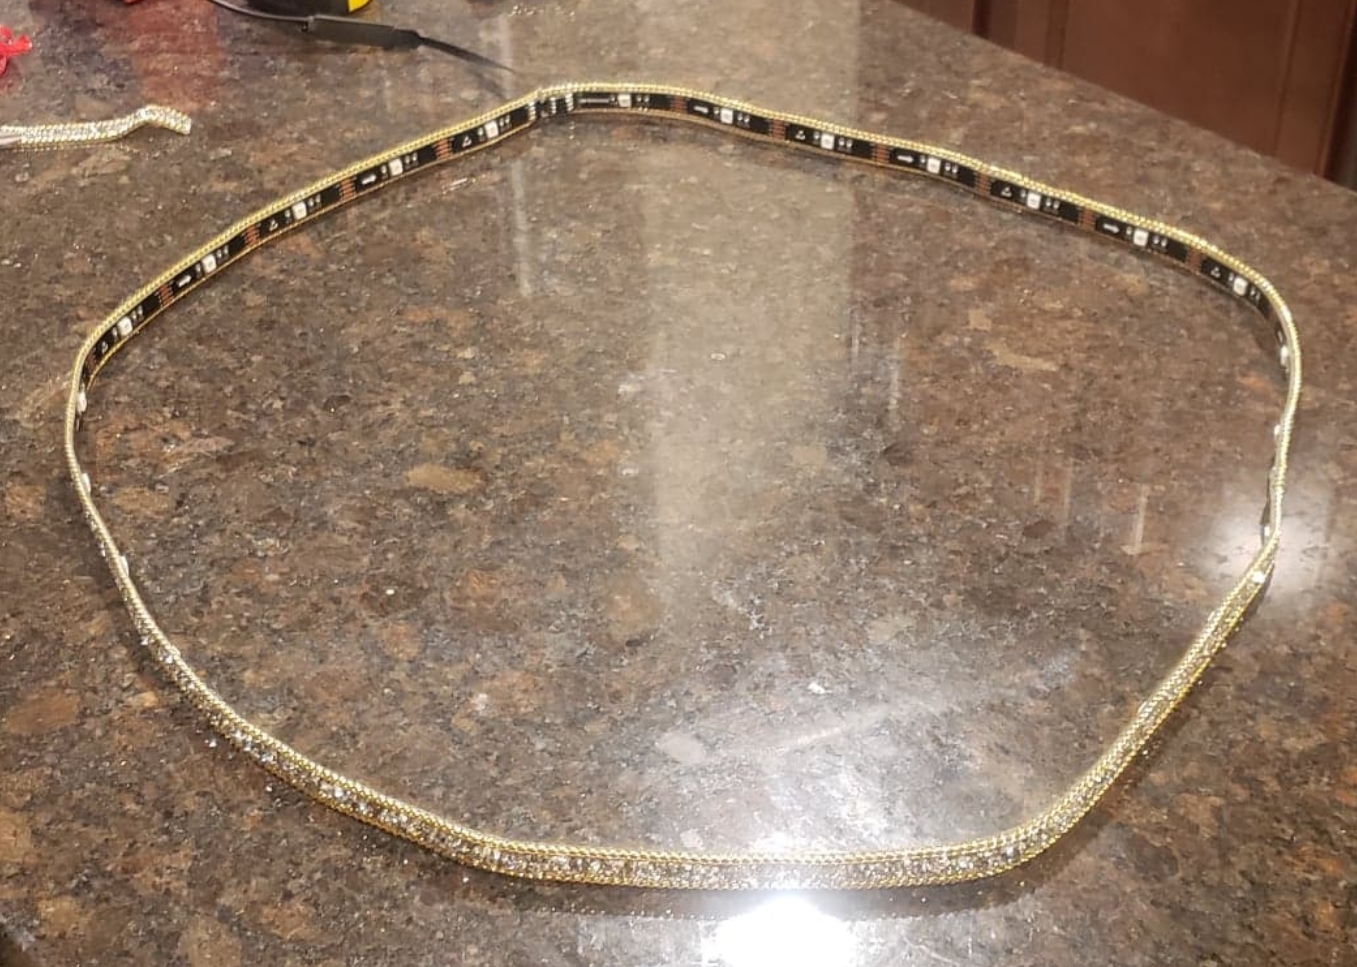
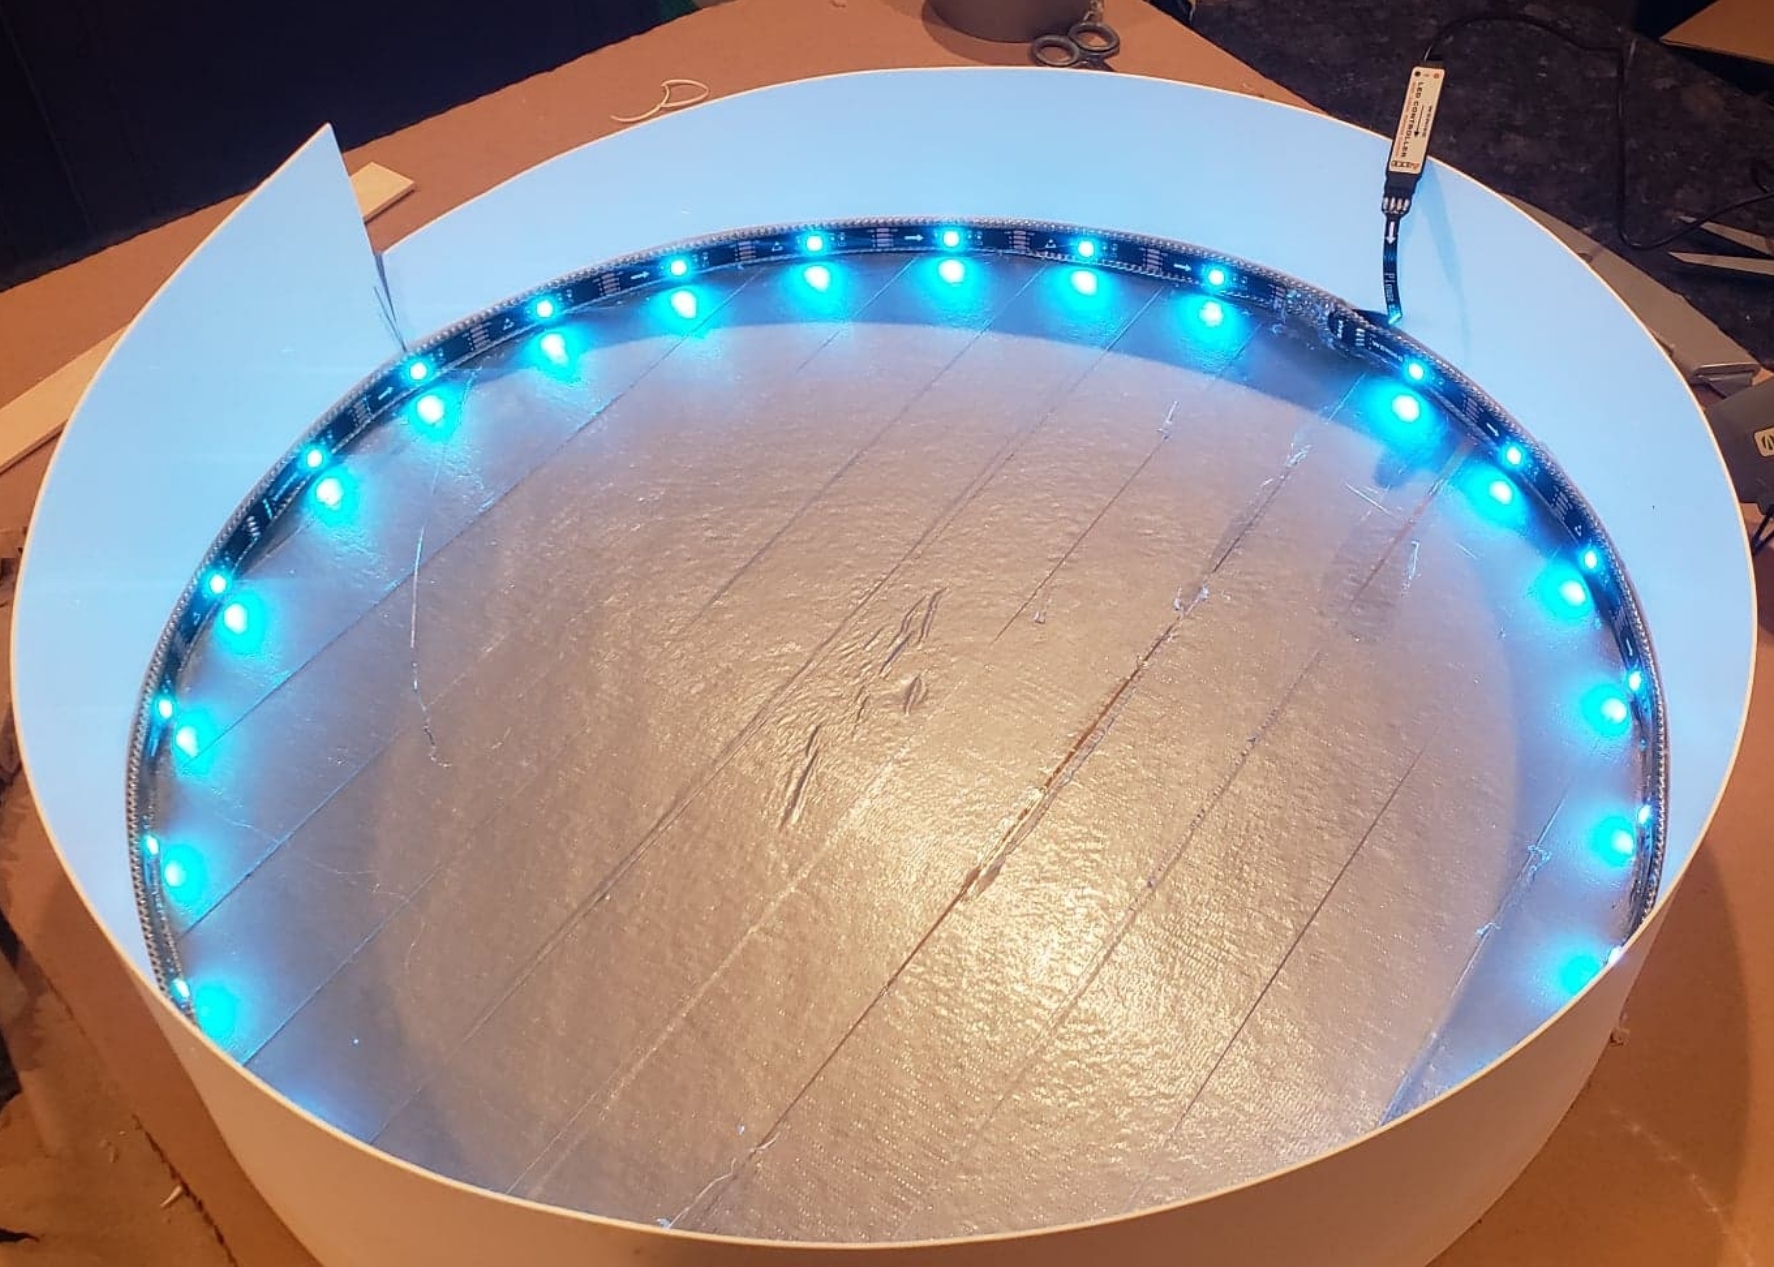
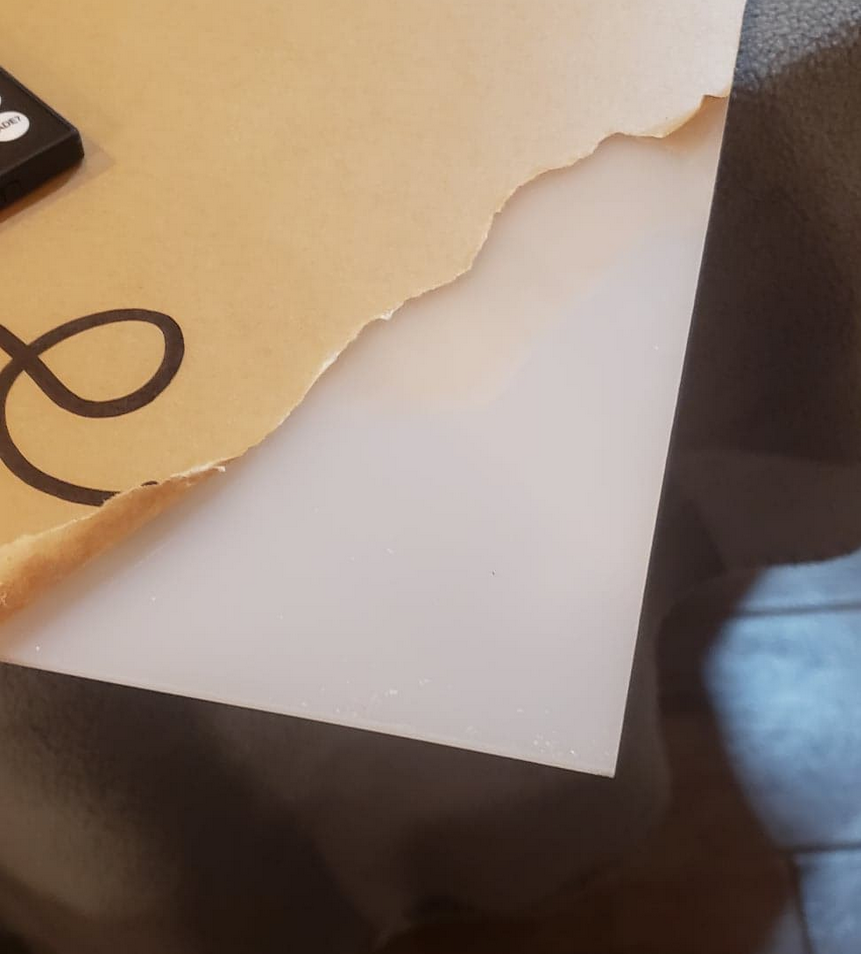
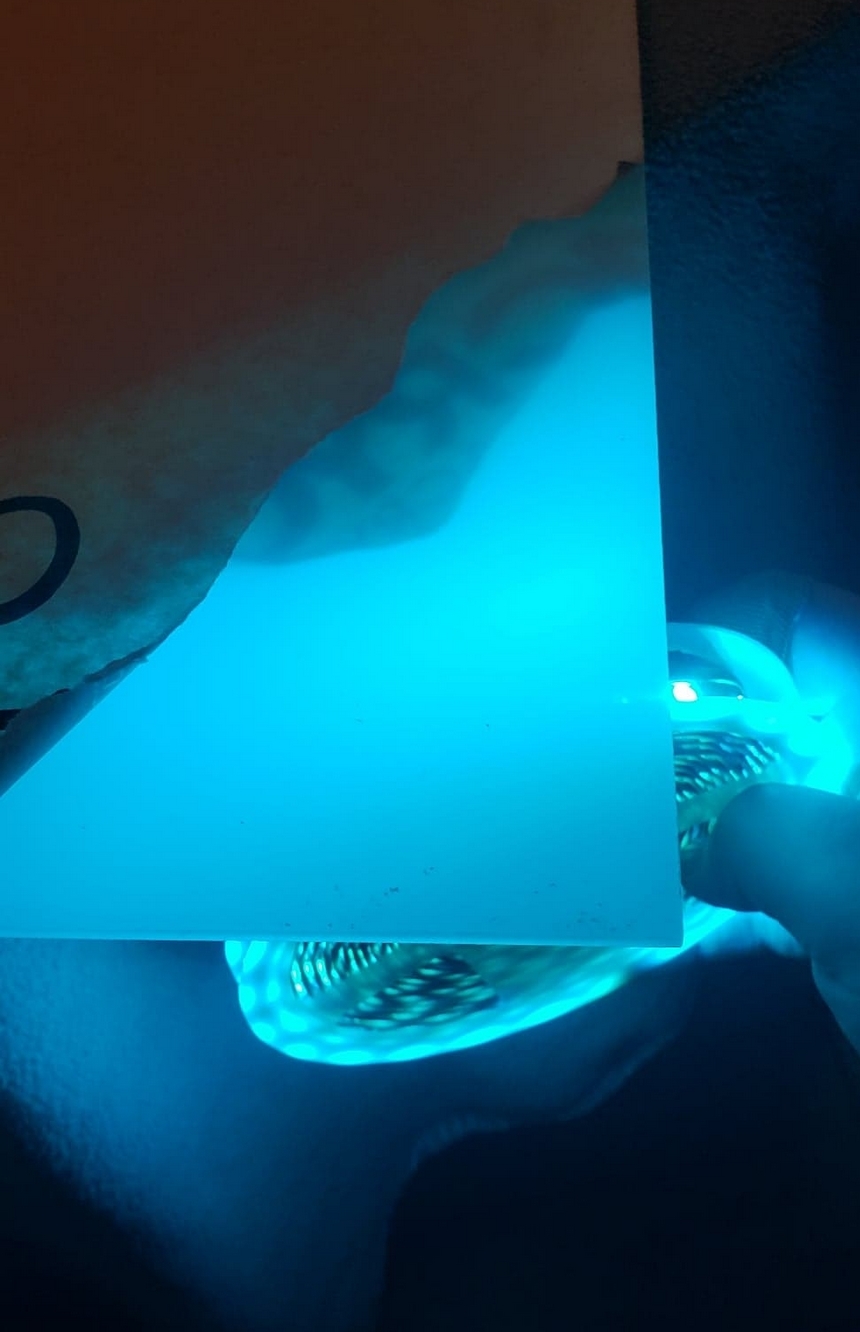
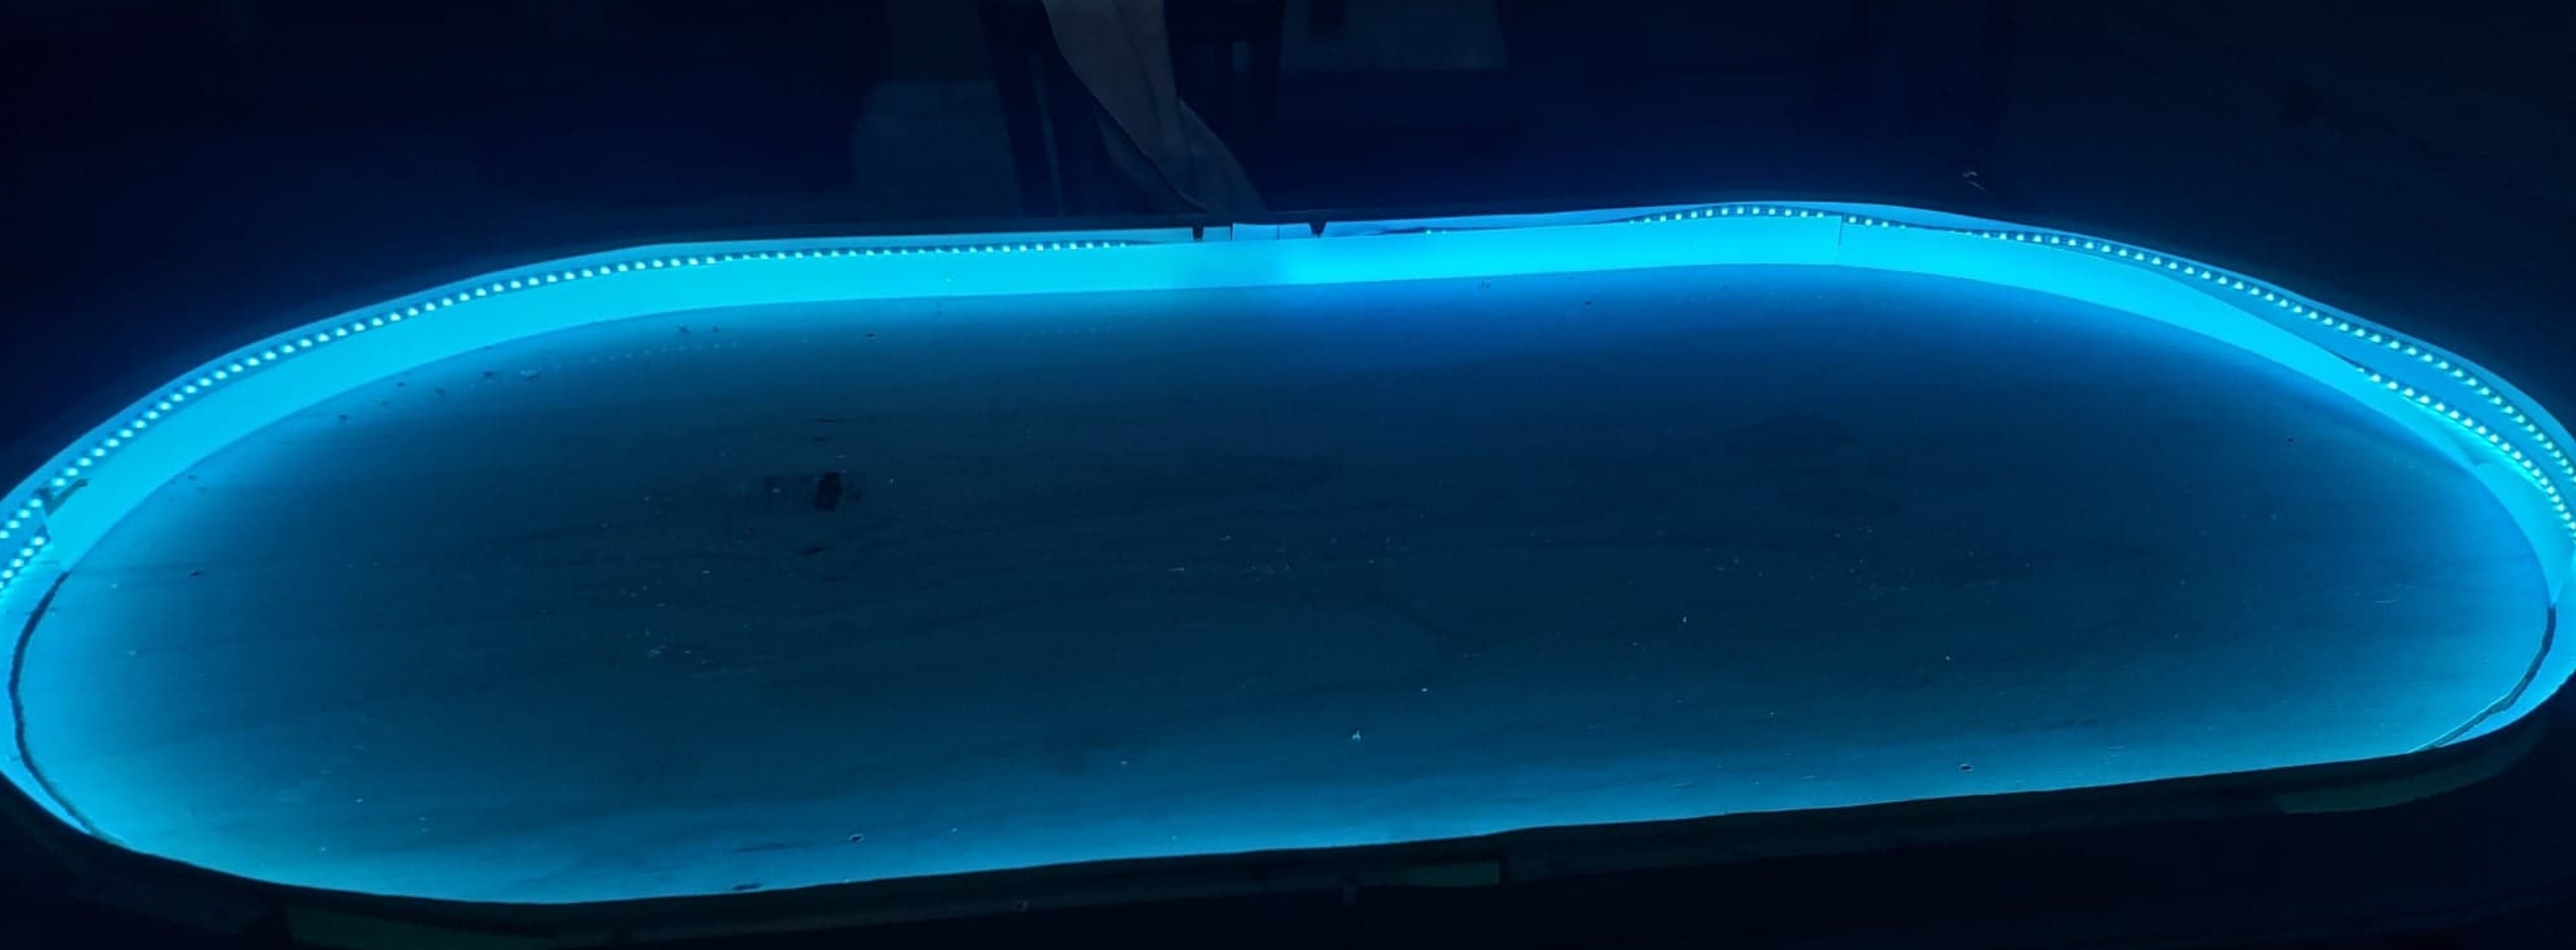
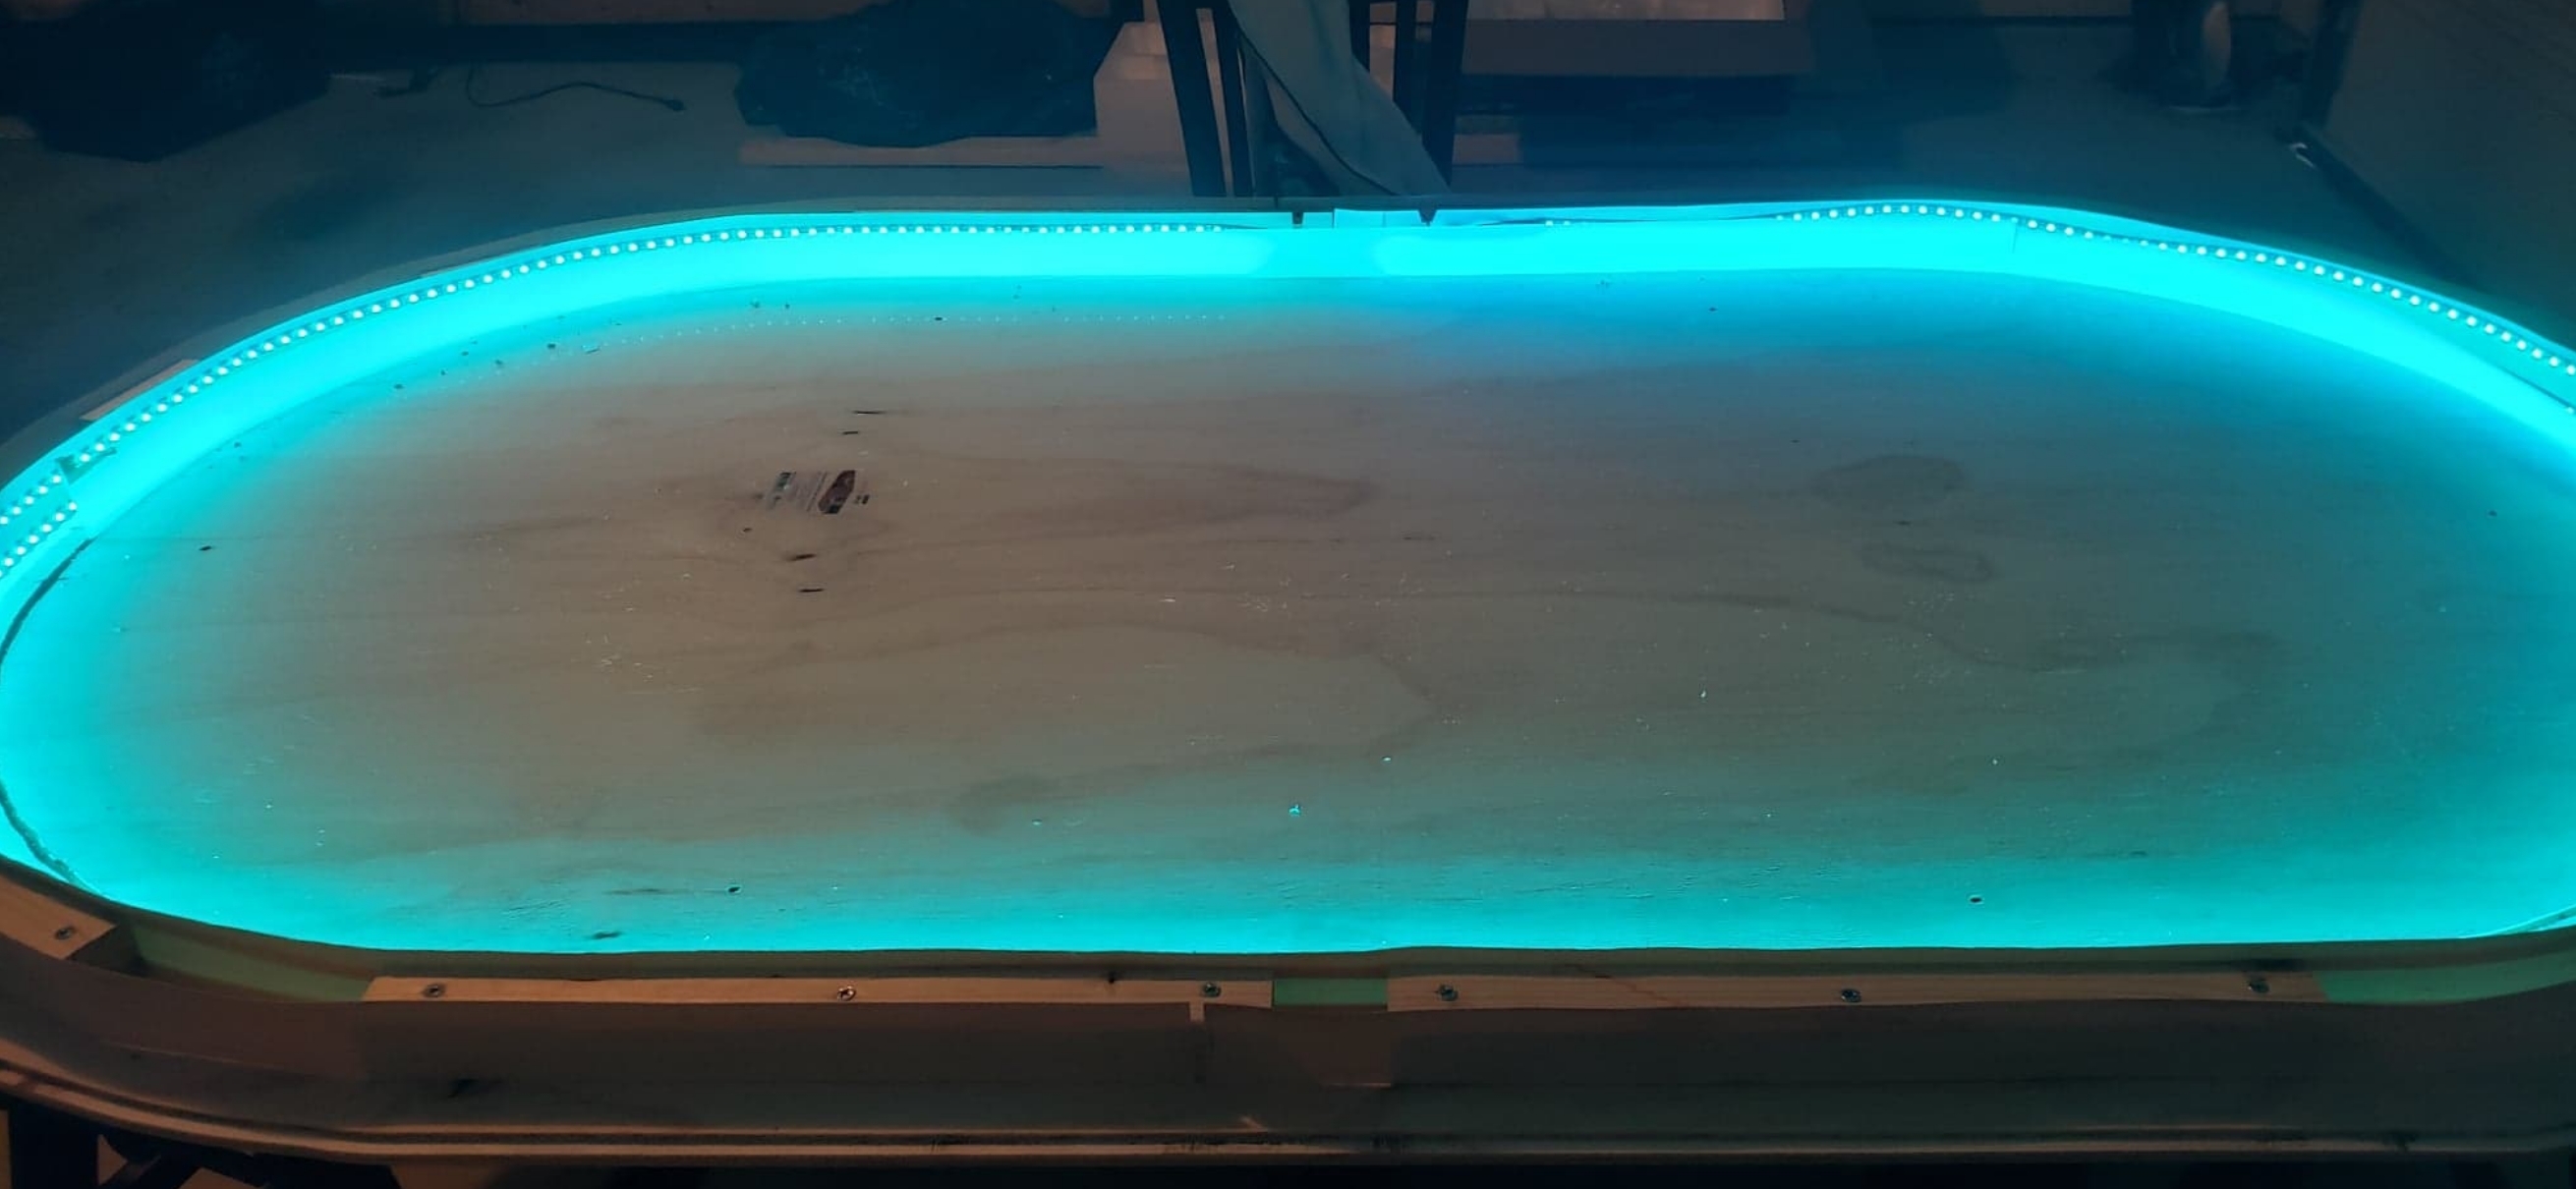
Speaking of acrylic, I ordered a 24" x 36" white 55% translucent acrylic sheet from Amazon which I calculated to give me enough 2" strips to do both inner and outer loops... I did a quick test if its light-diffusing capabilities with the LED light strips I'm going to be using and the results are fantastic...

87be7961fb3d4fb4b451ee66fda49445.png

9b421517b6be67c4b23fdeac57a479db.jpg


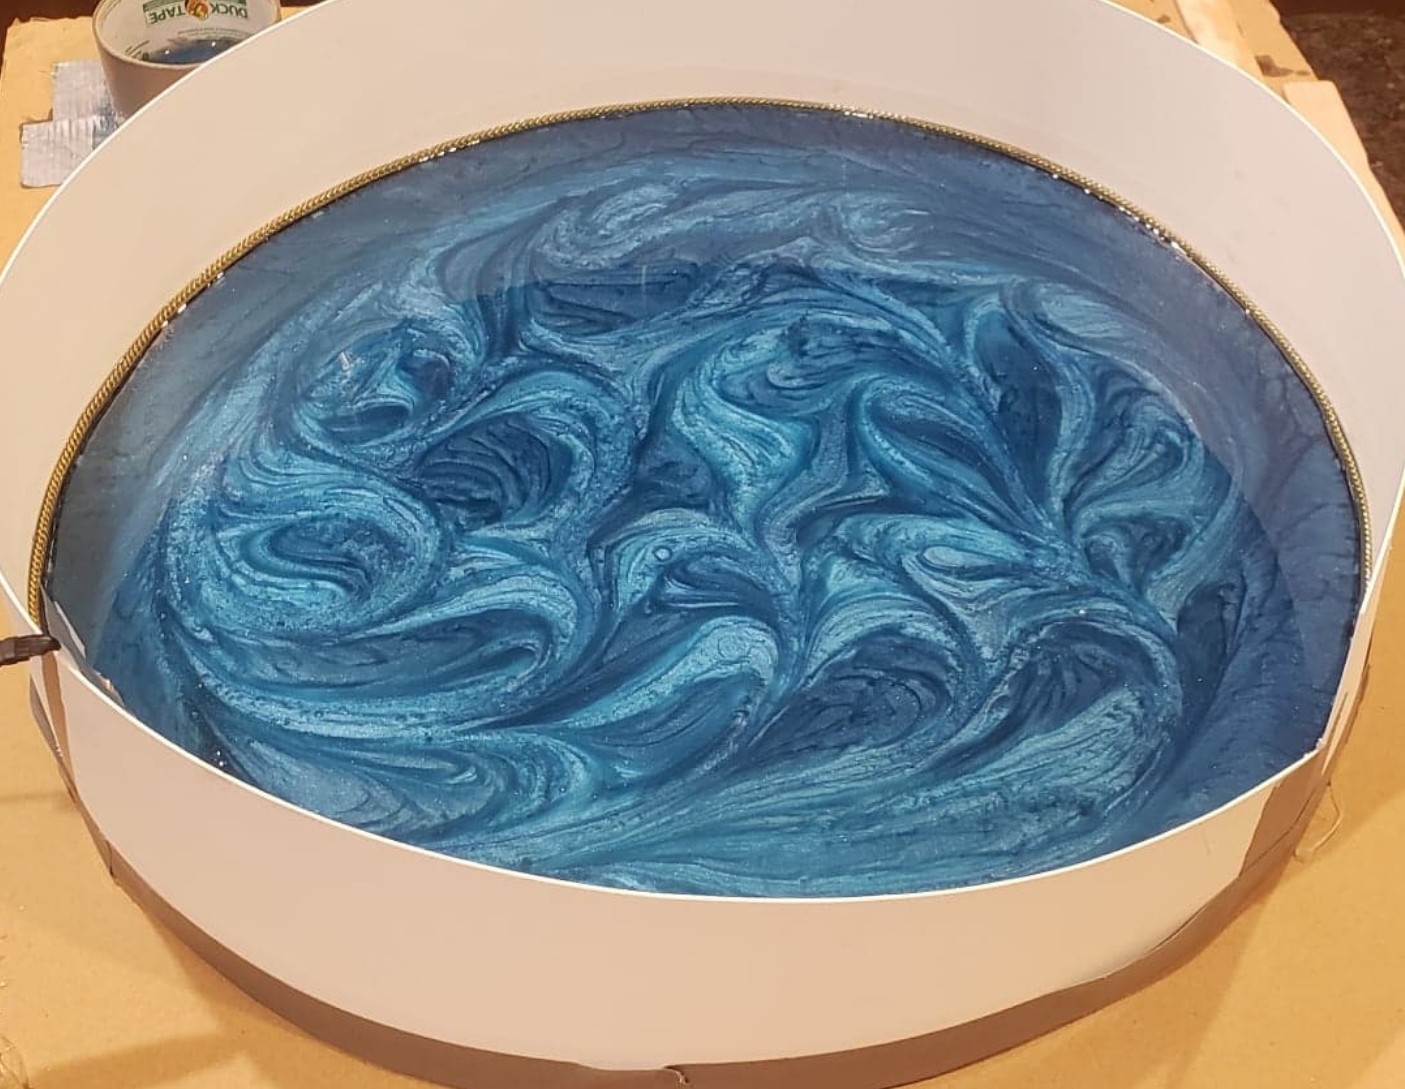
I also took a moment to check on the epoxy resin pour for the base's centerpiece and I love the color and pattern I was able to get out of it so far... 2 more days and we can crack the mold open and see how successful this has ended up being!

a5dff5a12c972636452b30b4d9a6ebbb.jpg


More updates to come as the build continues!
 
Bought a router today and it has helped immensely... much easier than the rotary tool... updates on the plan later tonight... but until then here's some pics...
20200911_181917.jpg
20200911_181912.jpg
 
Lot of sanding and polishing to go on the centerpiece... lost the exterior bling on the mold release but that's easily replaced... more opaque than I would've liked... but it's still cool looking...
20200912_005941.jpg
 
Another full day in 90-degree weather... here's what's new...

I routed a groove for the inner acrylic to slide into...
beb0865b63376d2e228ae9915c64293d.jpg


For the outer ring of acrylic I figured the easiest method would be to use a rabbet bit on my new router to carve an edge to attach the acrylic to... so that's how I went about that one...
81bef776173e23910de0272456563bca.jpg


In order to more easily line up the playing surface to the table base once the custom felt is attached, I came up with the idea of drilling holes in both and using wooden dowels to drop the playing surface into place when the time came... then it would be secured using wood screws...
f149c7b8cbb4ab5f77ab528989331ba2.jpg


Next up came the 2" x 2" wood screwed into the table base. These will be host to the edge banding that I will mount the LEDs to as well as serve as a surface I will attach the suede rail to...
9c47dca29ac9727a02018f29e24cb93f.jpg

812b730f8a9e73e4f1e389b5ea4a3504.jpg


After that, the fun begins... two LED lighting strips were added to the inner edge banding to light the acrylic for the inner raised rail... the other two strips for the outer raised rail will arrive on Monday...
88d26f3af63704ba8570b0e07d20968c.jpg

3b4cb9bf7ffb97643e956d763d5f7b51.jpg


This evening, I'm gonna finish sanding and polishing the centerpiece and possibly move the table base inside to the air conditioning as all the dirty sawing and sanding is done with... so I think I'm going to enjoy the rest of this project a little more without 120% humidity and 90+ degree heat...
 
Suede rail done...
103dccb46cd486e2fddedc53866c3684.jpg


Moved the table base inside for the rest of this build since the dirty parts are done and over with...
8ee40795edee54681f20cef08d172304.jpg
 

Create an account or login to comment

You must be a member in order to leave a comment

Create account

Create an account and join our community. It's easy!

Log in

Already have an account? Log in here.

Back
Top Bottom