Nymor
3 of a Kind
First mooted in mattross1313's Natatomi display/storage case thread I'm copying/editing/continuing from my post there so as to not hijack that thread ...
I was looking for ideas for a case for my chips and that thread inspired me.
I've considered the acrylic bird cages, classic aluminium thingies, hard cases but the cutlery box idea really grabbed me. I didn't need something designed to be portable - my chips aren't going anywhere - so it's something aimed at display instead.
Stage 1: The Box
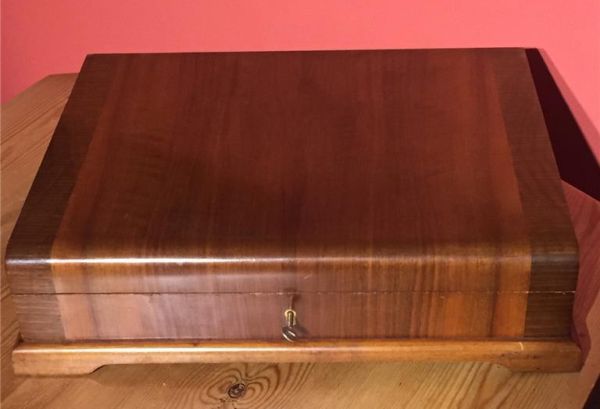
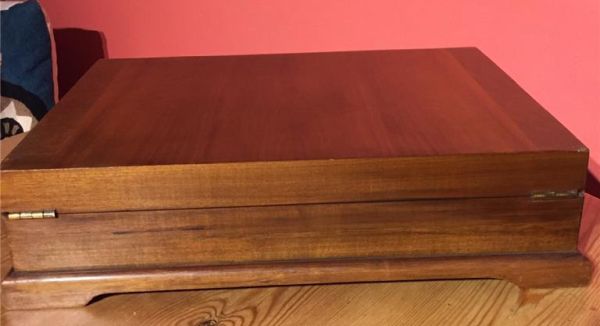
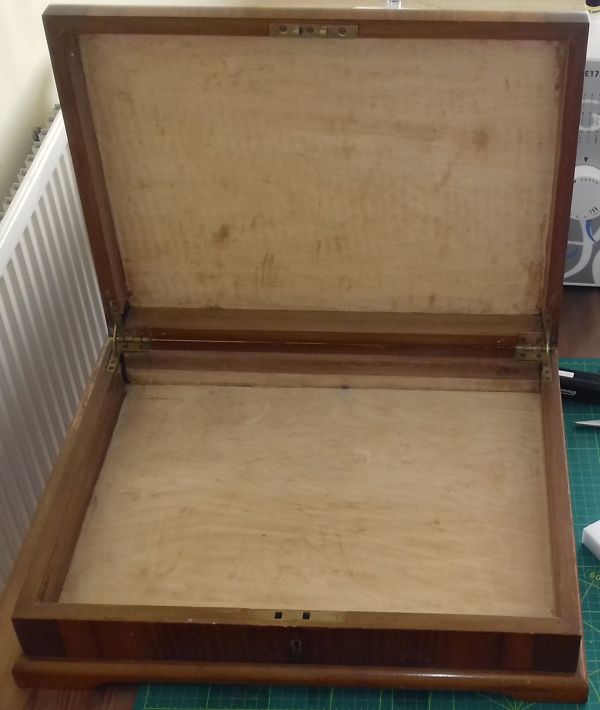
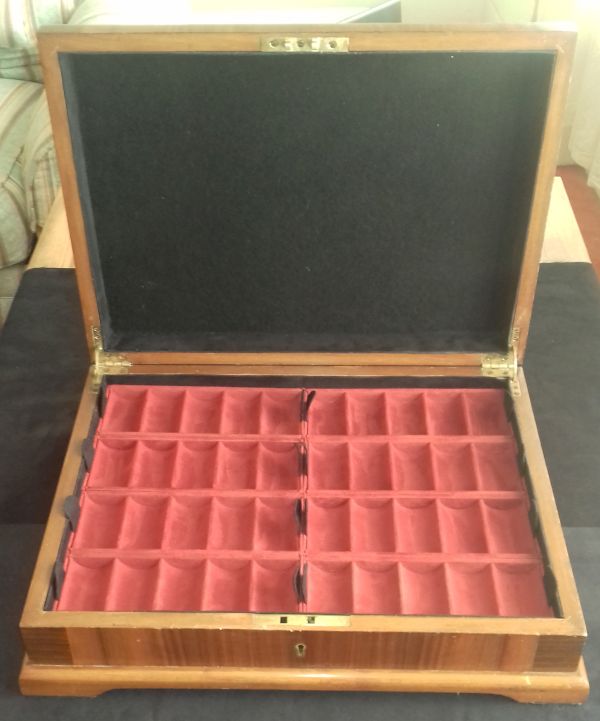
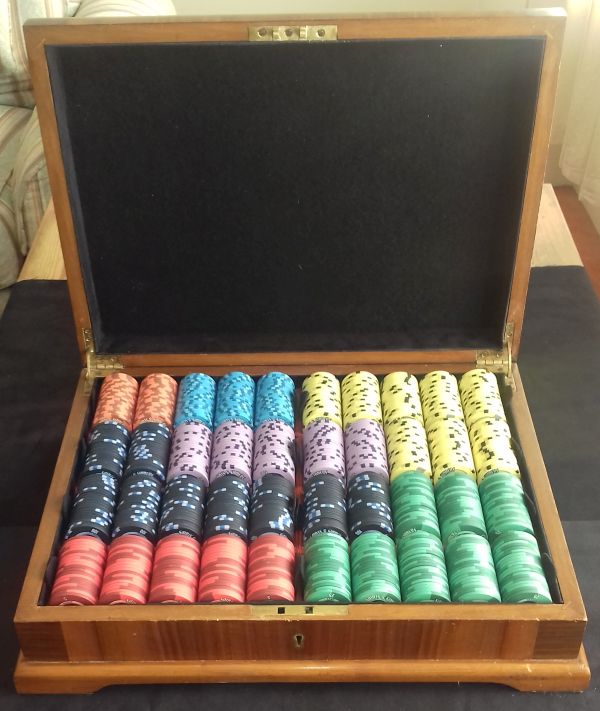
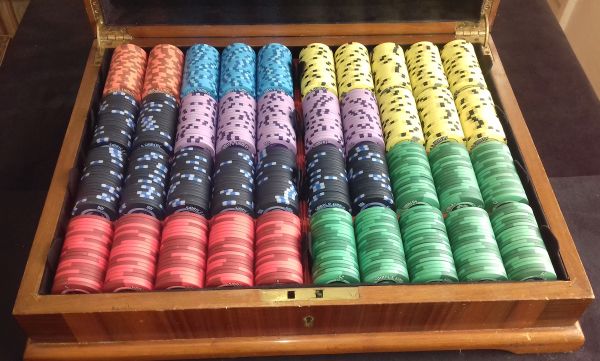
Watched eBay for a few weeks and bought a box to repurpose when the measurements worked. Had to asked the vendor for the exact internal dimensions as it was extremely close but this canteen could hold all my chips in one layer with just millimeters to spare ... in theory.
As well as the size my other main priority was to get one in generally good condition so I wouldn't have to repair anything. This one was good, with a key, and any wear was on the old insides that were being ripped out anyway. (original eBay pics).
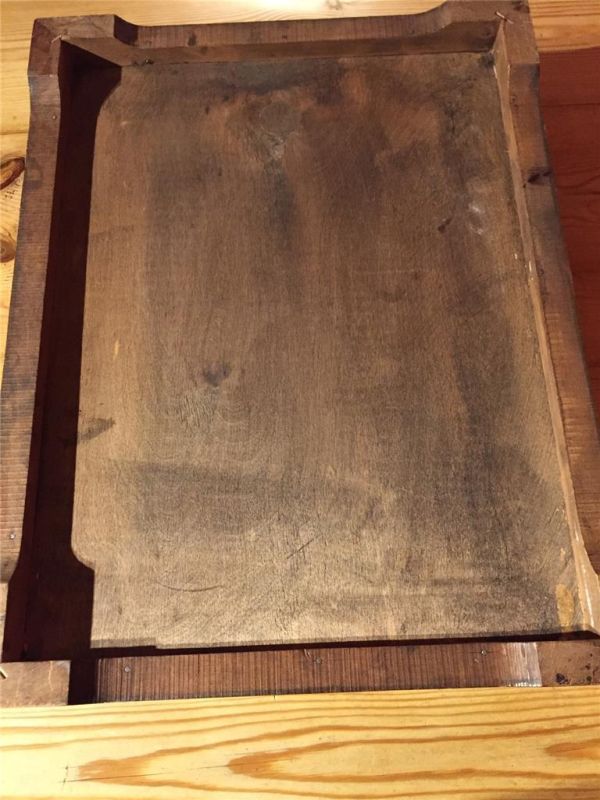
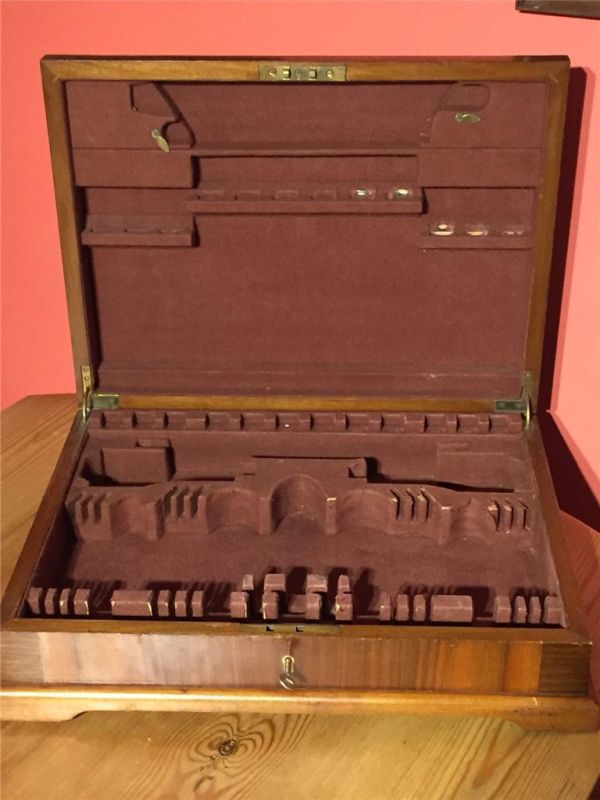
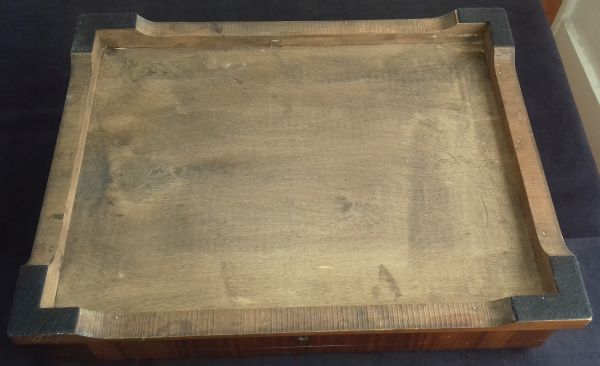
Couldn't wait to tear that out and clean up a bit.
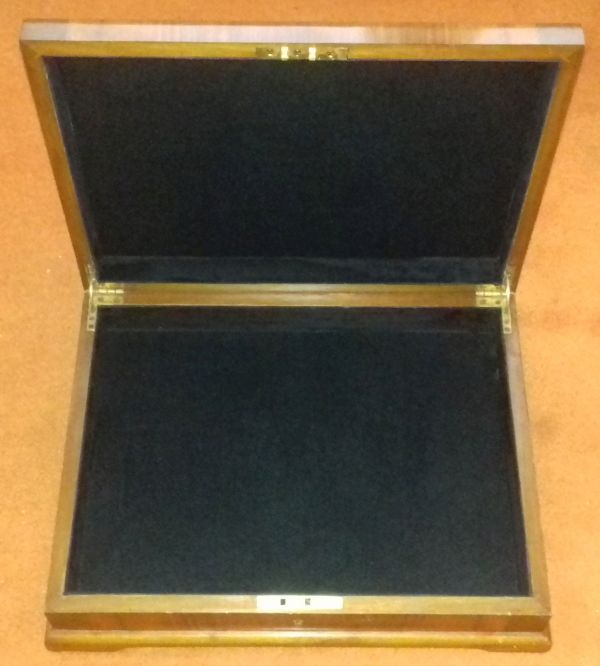
Then re-line the sides with suede covered card and the base with felt, top and bottom, and a little polish. Some other thicker felt pads on the feet also.
Stage 2: The Racks
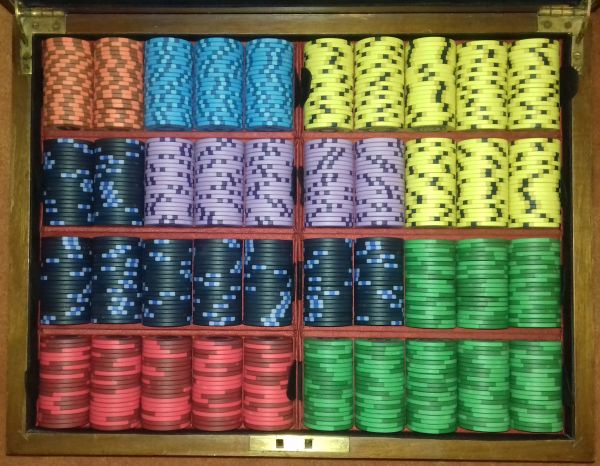
I hadn't initially planned to print individual racks was thinking more along the lines of a full, fixed, tray for the chips. However once I started looking at how I would take the chips out, finger space, and how I was going to cut it up for the printer it became apparent that separate racks would actually work quite well. I don't have to take the racks out but the option is there should I choose to. Best of both worlds.
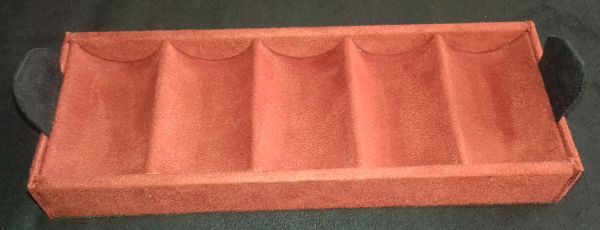
Moving forward with that and including the same suede as my tables rail I ended up with these parts for each rack. (Designed in FreeCad and exported as .stl files)
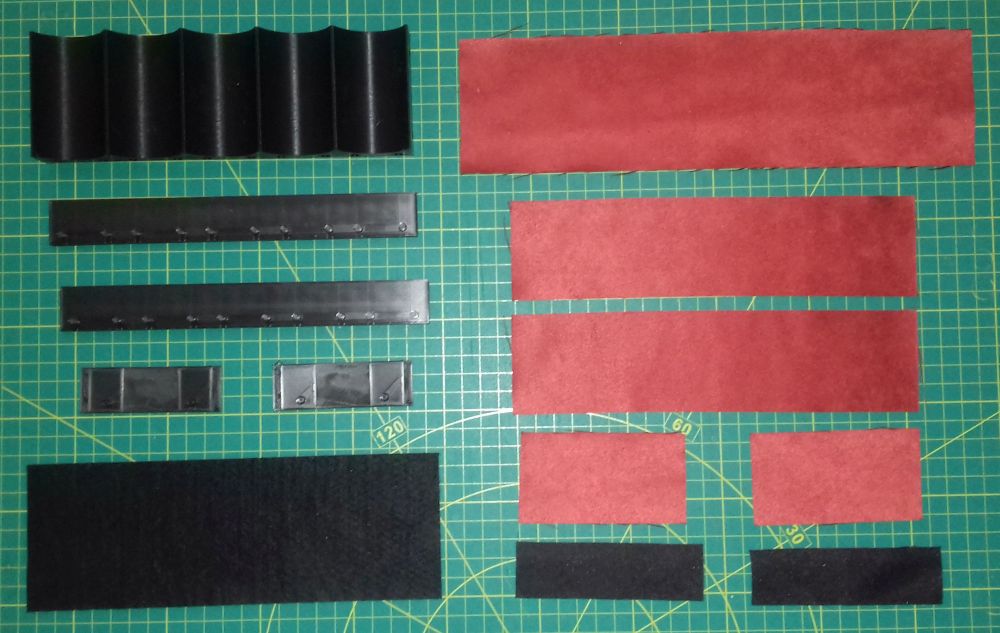
It looks more complicated than it was. As I'm covering the plastic with suede I had to break the rack down into a main section, 2 sides and 2 ends - with their fabric and then a final piece of black felt for the bottom. I also added holes and biscuity things to aid exact alignment as joining the main parts together was going to be with superglue and that is pretty unforgiving if you don't get things right first time. (The fabric is glued using 3M77)
It was ~12hours printing per rack.
Once I'd printed 2 I could dbl-check my widths which were fine - but once I'd done 4 I found I was 2mm oversized to fit then in ok vertically. I'd messed up somewhere there and didn't feel like shaving the 0.5mm from each rack and redoing so instead removed the cardboard from the box lining front and back. Easy peesy and you can't notice the difference.
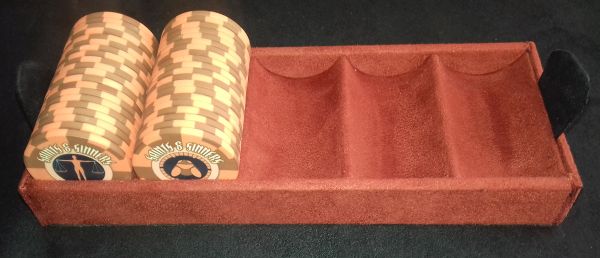
The racks now fit so snuggly that I don't have to use any force to put them in and I can turn the box upside down and they stay where they are. To the millimeter")
Pretty darn pleased with it so far
Stage 3: Cards/Buttons
Next stage is to add accomodation for cards and buttons etc. I have 25/28mm depth over the chips in the lid so will be using that space for that - again 3D printed with some padding to protect the chips. A pack of cards is ~18/20mm thick so I plenty of room to play with so just need to work a few things out.
Thank you for coming to my TED Talk
I was looking for ideas for a case for my chips and that thread inspired me.
I've considered the acrylic bird cages, classic aluminium thingies, hard cases but the cutlery box idea really grabbed me. I didn't need something designed to be portable - my chips aren't going anywhere - so it's something aimed at display instead.
Stage 1: The Box
Watched eBay for a few weeks and bought a box to repurpose when the measurements worked. Had to asked the vendor for the exact internal dimensions as it was extremely close but this canteen could hold all my chips in one layer with just millimeters to spare ... in theory.
As well as the size my other main priority was to get one in generally good condition so I wouldn't have to repair anything. This one was good, with a key, and any wear was on the old insides that were being ripped out anyway. (original eBay pics).
Couldn't wait to tear that out and clean up a bit.
Then re-line the sides with suede covered card and the base with felt, top and bottom, and a little polish. Some other thicker felt pads on the feet also.
Stage 2: The Racks
I hadn't initially planned to print individual racks was thinking more along the lines of a full, fixed, tray for the chips. However once I started looking at how I would take the chips out, finger space, and how I was going to cut it up for the printer it became apparent that separate racks would actually work quite well. I don't have to take the racks out but the option is there should I choose to. Best of both worlds.
Moving forward with that and including the same suede as my tables rail I ended up with these parts for each rack. (Designed in FreeCad and exported as .stl files)
It looks more complicated than it was. As I'm covering the plastic with suede I had to break the rack down into a main section, 2 sides and 2 ends - with their fabric and then a final piece of black felt for the bottom. I also added holes and biscuity things to aid exact alignment as joining the main parts together was going to be with superglue and that is pretty unforgiving if you don't get things right first time. (The fabric is glued using 3M77)
It was ~12hours printing per rack.
Once I'd printed 2 I could dbl-check my widths which were fine - but once I'd done 4 I found I was 2mm oversized to fit then in ok vertically. I'd messed up somewhere there and didn't feel like shaving the 0.5mm from each rack and redoing so instead removed the cardboard from the box lining front and back. Easy peesy and you can't notice the difference.
The racks now fit so snuggly that I don't have to use any force to put them in and I can turn the box upside down and they stay where they are. To the millimeter
Pretty darn pleased with it so far
Stage 3: Cards/Buttons
Next stage is to add accomodation for cards and buttons etc. I have 25/28mm depth over the chips in the lid so will be using that space for that - again 3D printed with some padding to protect the chips. A pack of cards is ~18/20mm thick so I plenty of room to play with so just need to work a few things out.
Thank you for coming to my TED Talk

