You are using an out of date browser. It may not display this or other websites correctly.
You should upgrade or use an alternative browser.
You should upgrade or use an alternative browser.
Workbench Build (1 Viewer)
- Thread starter timsta007
- Start date
The build is looking great! Which vice are you looking at?
Having a hard time deciding on this. I'm 100% going to install an inexpensive moxon vice using two pipe clamps since I have everything I need for that. I think I'd also like to have some sort of dog system and would need an end vice for that but I'd really love to have a leg vice! Since I'm trying to keep this build as economical as possible, I'll probably start with the two screw moxon vice and use the table for a bit before deciding what I really need. Here's what the moxon vice looks like if you aren't familiar with it.
https://i.ytimg.com/vi/JvAPW_YbOYg/hq720.jpg
Do you have a good slide table for the table saw? If not, well worth building one. Easy build, and it massively improves accuracy. You can even tack/clamp jigs to the slide table to run things through the table saw with repeat accuracy.
LOL! I've totally been there on various types of projects. The good news is that you're working in construction-grade fir; it wouldn't have been all that bad!
I don't have a slide table for the saw yet. Part of the problem is that I'm using a contractor table saw placed on a platform on saw horses. I'm pretty tall so this setup works fine for me but there's no way I'm going to build a table that tall just for table saw use, especially with my limited space. I think the ultimate solution is to build some sort of movable work station with locking casters that I can put the table saw on and use the workbench as the slide table. I'll have to think about this some more. I did take full advantage of the cross cut sled. I don't think I could have come anywhere near the accuracy I needed without that, especially since the miter slide I have is a POS.
It wasn't the cost of the wood that made me sweat, it was thinking about having to spend another 8-12 hours (plus glue time) planing and cutting the leg, as well as cutting the tenon and the half lap joints. Definitely a relief to figure out my mistake was a simple mix up instead of a catastrophe.
Mental Nomad
Full House
Part of the problem is that I'm using a contractor table saw placed on a platform on saw horses.
Ah. My first big purchase was a used Delta table saw in good condition, and my first build was an oversize slide table for it. One of my smartest moves, ever. I hauled out that slide table almost every time I used the saw - for pretty much everything except ripping 4x8 sheets - and was always happy to have it available.
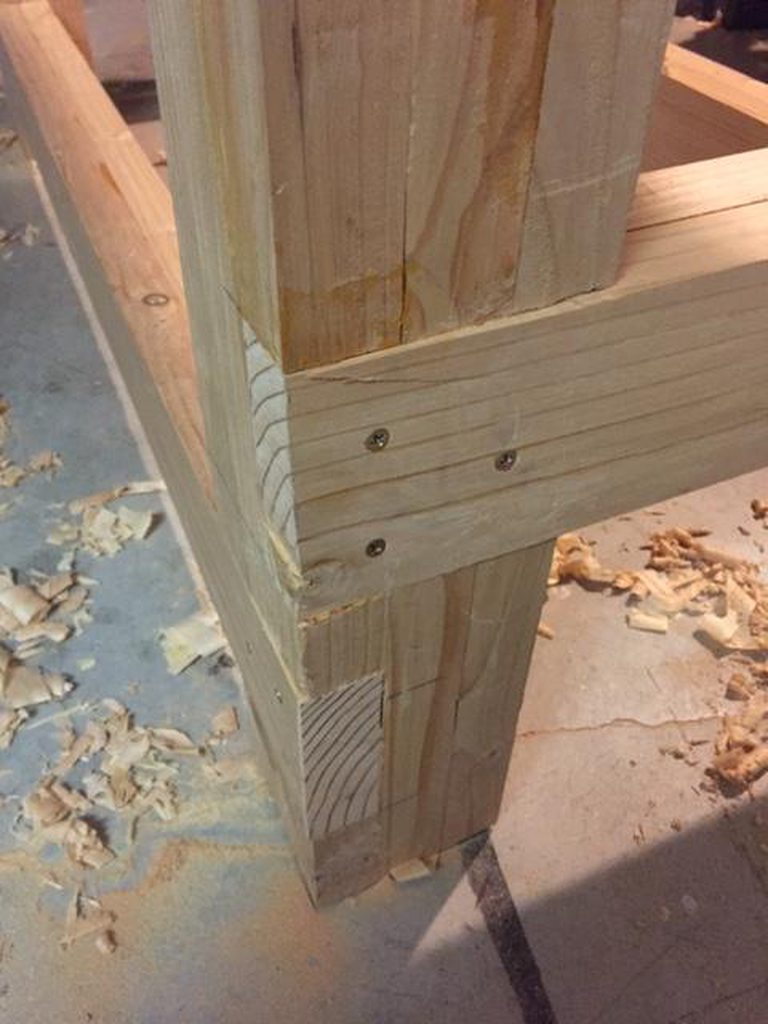
It's been way too hot here the last several days to do any real work on the bench but I did have time to make a little progress. I got all of the half lap joints completed - I used 3" screws and wood glue to attach them and then clamped for additional pressure. The screws are intended to help with the clamping pressure but the wood is soft so I didn't think that would be enough on its own. A friend came over and helped me get the table turned right side up.

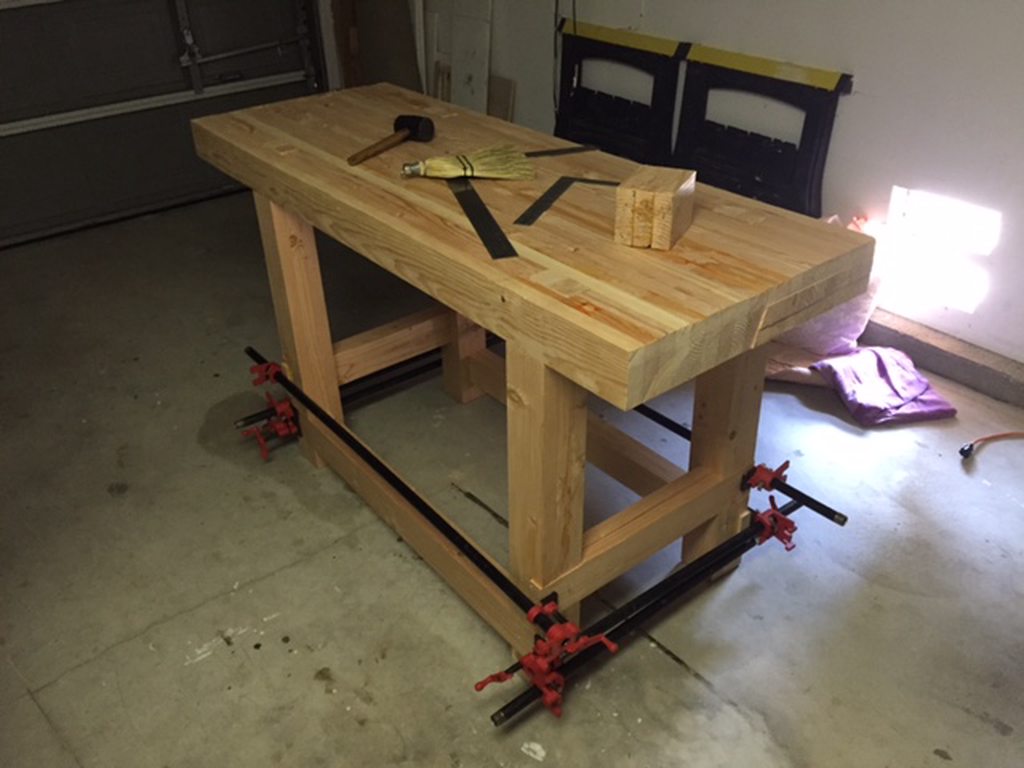

Here's a quick pic with the clamps removed.
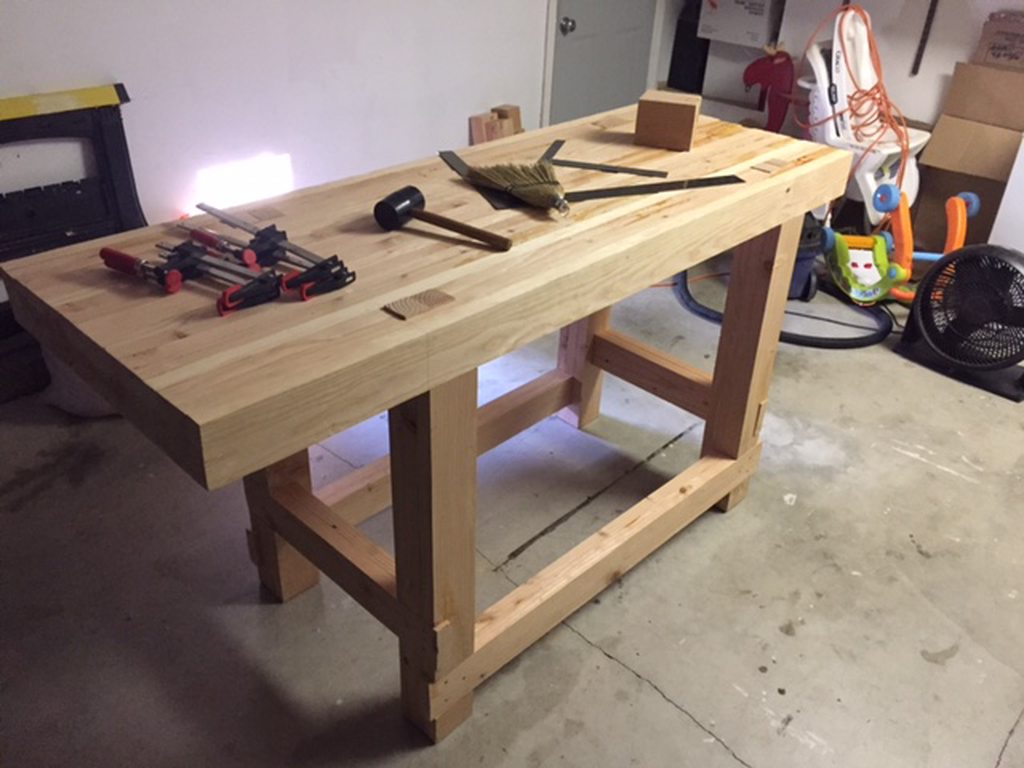
I'm a bit concerned that I may have made the legs too long. The workbench feels quite tall to me. With that being said, I'm 6'4" and wanted it taller than most normal height benches so its possible that I just need to get used to it. My plan is to wait to glue the base to the top until I've decided for certain. If I need to shorten it, I will just extend the leg tenons to bring the top down an inch or two.
Other than gluing the top to the base, the only other step to finish the basic base is to finish flattening the top. Need some slightly cooler weather before I undertake that last bit and I need to sharpen the plane iron again too.
Here's a quick pic with the clamps removed.
I'm a bit concerned that I may have made the legs too long. The workbench feels quite tall to me. With that being said, I'm 6'4" and wanted it taller than most normal height benches so its possible that I just need to get used to it. My plan is to wait to glue the base to the top until I've decided for certain. If I need to shorten it, I will just extend the leg tenons to bring the top down an inch or two.
Other than gluing the top to the base, the only other step to finish the basic base is to finish flattening the top. Need some slightly cooler weather before I undertake that last bit and I need to sharpen the plane iron again too.
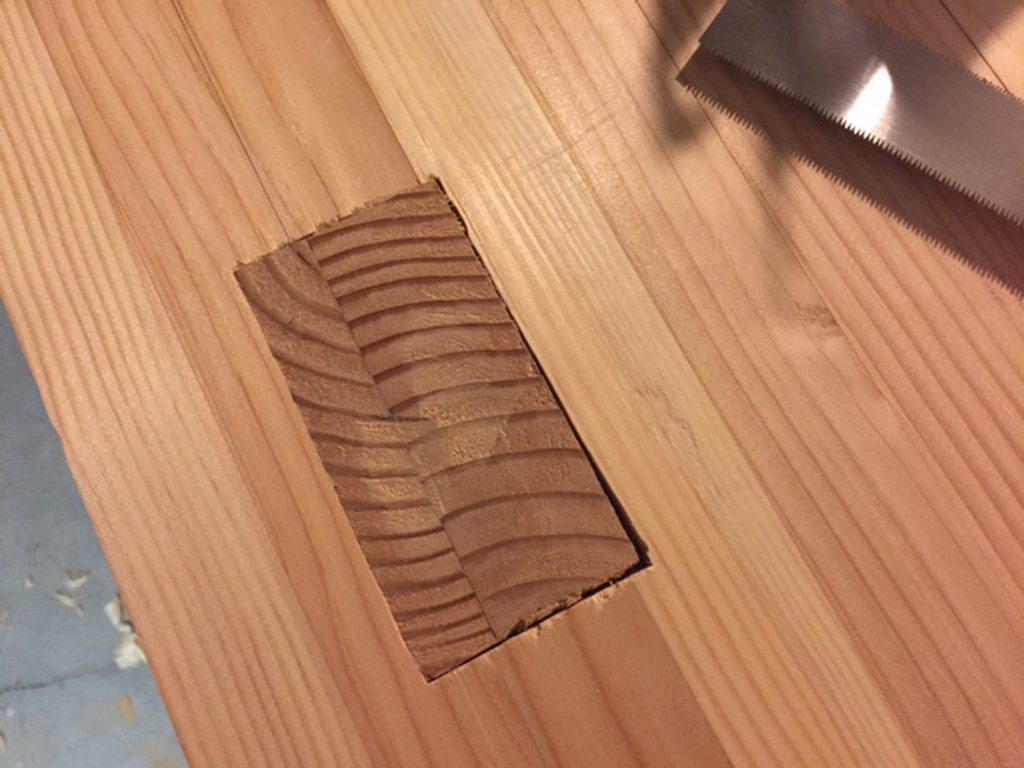
Small update but an incredibly satisfying one. Finished planing/flattening the top last night. Now that I'm back at work from paternity leave, I've haven't had nearly as much time to work on this project. As you can see from the prior pictures my shoddy glue up skills left me quite a bit of work on the top even with the head start I got from a few weeks ago. I ran into a bit of a problem with the leg tenons sticking up through the table. The steeper angle on my bench plane just could not handle cutting end grain wood no matter how sharp I got it so I had to take the bench top off the base again. These photos show after the vast majority of the work is complete but not the final leveling.
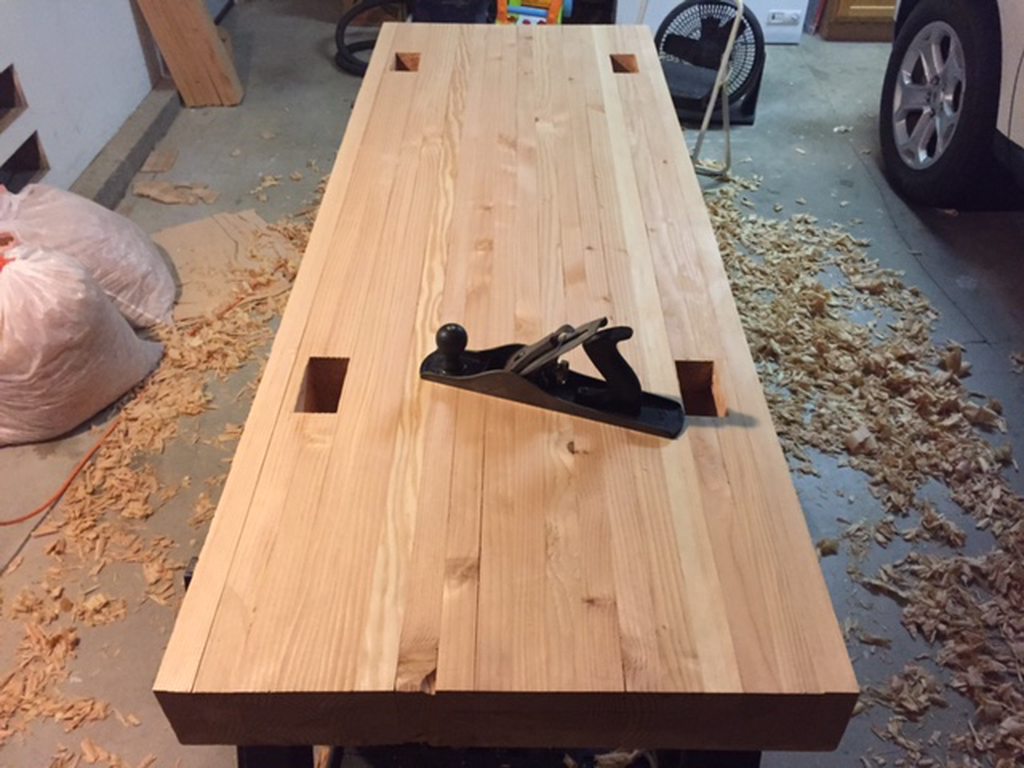


You can see in the following photo how although the top is quite flat, it still has a bit of cup in the middle from the rougher flattening process. The light peeking through underneath the side of the plane shows that the outside parts of the table are higher.

Another component to doing this properly is to check for twist in the top. Twist is when you have a high or low spot on a corner compared to the opposite corner but when checking across the bench it shows flat. You can check with with winding sticks. I made a set of winding sticks for this project out of some scrap wood I had laying around. To check for twist you sight down the front winding stick and line up against the back. If the two black marks line up perfectly then there is no twist. You can see from the following photos that the right back part of the bench from the view I'm shooting is a bit higher than the front left corner.


Once I'd removed the twist I went back and checked for high spots across the length of the table. Any high spots were marked with a pencil and then planed down. This was an iterative process that took about 4-5 rounds to get it flat enough to satisfy me. The next picture shows what I was happy with. Still a very slight bit of light peeking under the straight edge but this should be close enough that I can used the bench top as a flat reference for other wood that I'm working on milling.

Perhaps the most satisfying thing was how much more proficient and using the hand plane I've become. I was having some trouble with it a few days ago and fully took it apart, resharpened and made a few adjustments to the way the iron is set in the plane. It made all the difference and was critical to being able to successfully complete this flattening. For the first time in the entire project I started getting those beautiful fibonacci spirals in my wood shavings which indicates that the cuts are clean even, the iron is sharp, and the tool is being used properly.


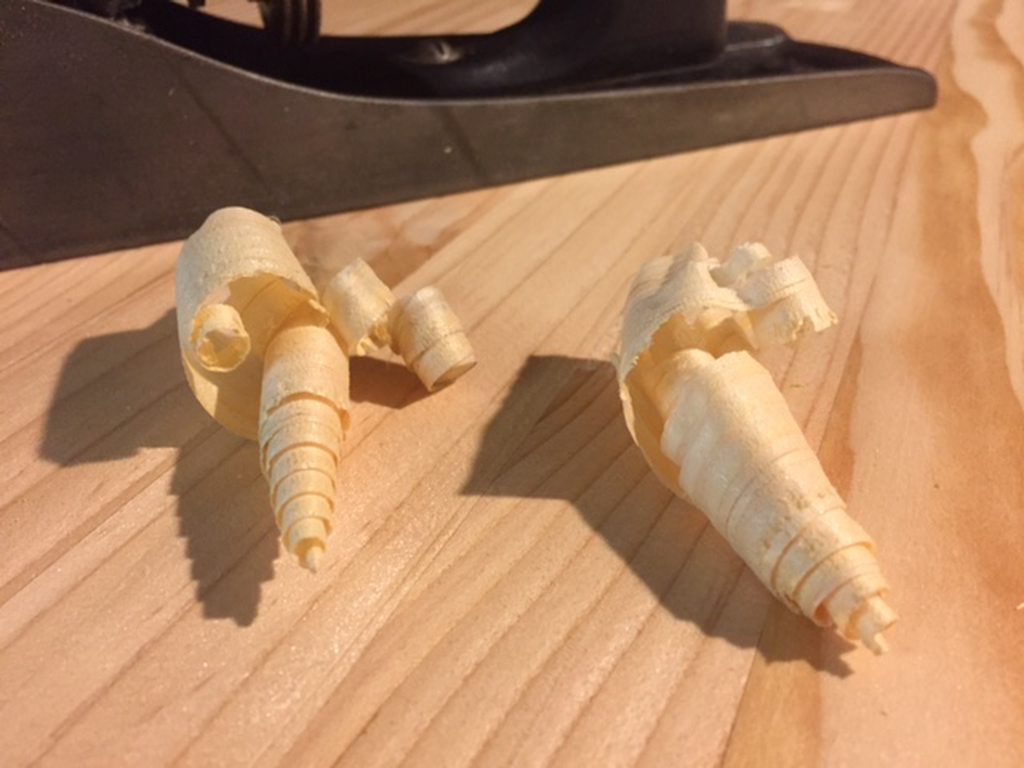
Last was a final finishing smoothing pass across the whole table which leaves the most incredibly smooth finish. I can't emphasize how incredibly satisfying it is to get a glare reflecting on the wood surface from the shop light without using a scrap of sand paper.

You can see in the following photo how although the top is quite flat, it still has a bit of cup in the middle from the rougher flattening process. The light peeking through underneath the side of the plane shows that the outside parts of the table are higher.
Another component to doing this properly is to check for twist in the top. Twist is when you have a high or low spot on a corner compared to the opposite corner but when checking across the bench it shows flat. You can check with with winding sticks. I made a set of winding sticks for this project out of some scrap wood I had laying around. To check for twist you sight down the front winding stick and line up against the back. If the two black marks line up perfectly then there is no twist. You can see from the following photos that the right back part of the bench from the view I'm shooting is a bit higher than the front left corner.
Once I'd removed the twist I went back and checked for high spots across the length of the table. Any high spots were marked with a pencil and then planed down. This was an iterative process that took about 4-5 rounds to get it flat enough to satisfy me. The next picture shows what I was happy with. Still a very slight bit of light peeking under the straight edge but this should be close enough that I can used the bench top as a flat reference for other wood that I'm working on milling.
Perhaps the most satisfying thing was how much more proficient and using the hand plane I've become. I was having some trouble with it a few days ago and fully took it apart, resharpened and made a few adjustments to the way the iron is set in the plane. It made all the difference and was critical to being able to successfully complete this flattening. For the first time in the entire project I started getting those beautiful fibonacci spirals in my wood shavings which indicates that the cuts are clean even, the iron is sharp, and the tool is being used properly.
Last was a final finishing smoothing pass across the whole table which leaves the most incredibly smooth finish. I can't emphasize how incredibly satisfying it is to get a glare reflecting on the wood surface from the shop light without using a scrap of sand paper.
How come you didn't just power sand the shit out of the top to flatten?
Obvious newby non-woodworking SOB question.
Obvious newby non-woodworking SOB question.
Hobbyphilic
Two Pair
Looks solid! You'll get many years of use out of that. Every bench has a character that makes it unique.
How come you didn't just power sand the shit out of the top to flatten?
Obvious newby non-woodworking SOB question.
I don't think it's a dumb question at all. I probably would have asked the same thing a few months ago. If I'd used a belt sander to flatten the top, I'd still have had to go through the lengthy process of checking and flattening high spots as I went. Since I had as much as 3/8 of an inch to remove in some spots I would have needed to use a VERY aggressive sand paper and it would have torn up the wood substantially in any areas that it came in contact. To get the same degree of smoothness I would have had to re-sand with progressively higher grit sand paper and eventually transition to an orbital sander for the really fine stuff (200+ grit). Overall I think it would have taken way longer to get the same results instead of just using the hand plane.
The other reason is that I don't own a belt sander LOL.
Great reason-no belt sander! Also, I guess it's way cooler to use the old-timey method, anyway! Feels more authentic!
A year or two ago when I started wanting to get into woodworking, I thought that I really couldn't do much without all the power tools. Just the idea of planing boards so they are flat and square to glue together seemed insurmountable without the right power tools. Since then I've come to appreciate how much you can do with the traditional woodworking tools and I'm enjoying the process of learning to use them. There's no question that in a lot of cases it takes way longer to do projects the power tools to mill boards but there are lots of things that the old hand tools just do better, just like using a plane instead of a belt sander. Looking forward to having this bench done so I can learn more on other projects.
I watched New Yankee Workshop for years and years and loved the meticulous way fine wood work comes together and the ingenuity of the craftsmanship. While I have done massive amounts of carpentry I have sadly never had the time, resources or space for fine wood working. I think starting with your own work bench was a great idea.
Very little time over the last week or so to work on this project but I did get a few additional things done. I flush cut and then planed the ends of the tenons that were poking up through the bench top as well as the ends of the half lap joints on the base.

Next up was mounting the new vise that came in the mail last week. I used some clamps to hold it onto the table while i drilled and installed lag screws.


This vise came with an adjustable dog so next up was to measure and drill dog holes to use with it.

I wanted to get some of them done to see how they would come out but I skipped the ones near the legs. I'll have to pull the top of the table off to do that and I didn't have time for that today.

I tried putting a chamfer on the holes to prevent chipping but I didn't do a great job of it on this hole. I'll clean it up with a small file. The hole in the 2nd pic came out a bit cleaner.


Next up was mounting the new vise that came in the mail last week. I used some clamps to hold it onto the table while i drilled and installed lag screws.
This vise came with an adjustable dog so next up was to measure and drill dog holes to use with it.
I wanted to get some of them done to see how they would come out but I skipped the ones near the legs. I'll have to pull the top of the table off to do that and I didn't have time for that today.
I tried putting a chamfer on the holes to prevent chipping but I didn't do a great job of it on this hole. I'll clean it up with a small file. The hole in the 2nd pic came out a bit cleaner.
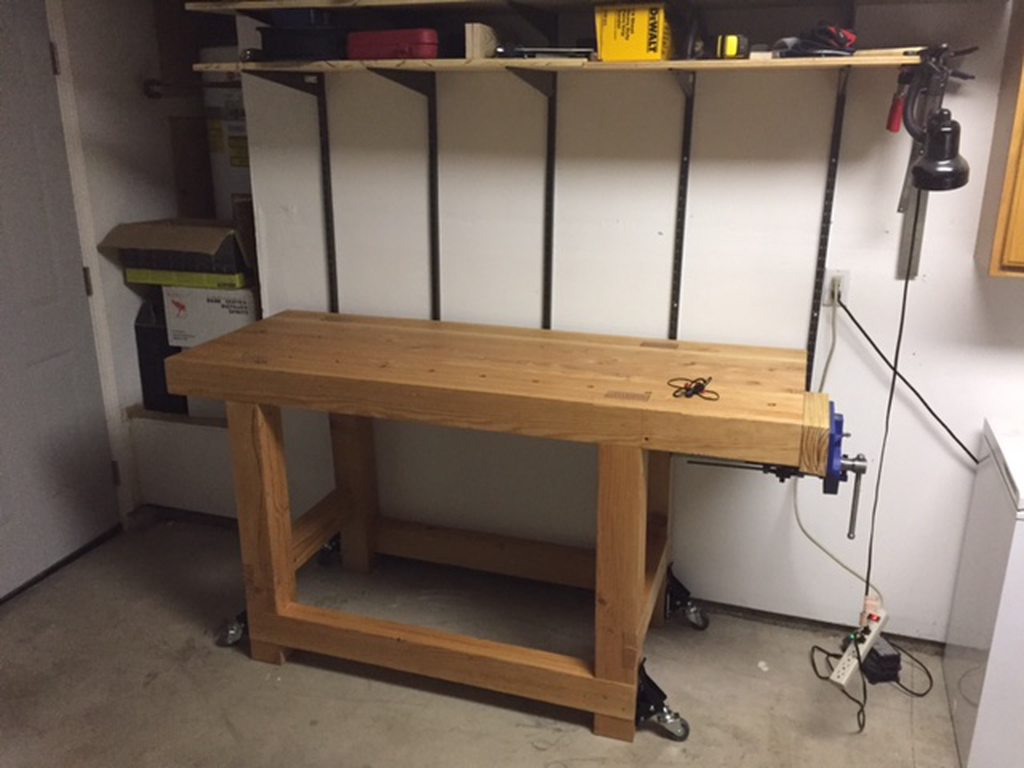
Been a few weeks since I updated this thread but i have a few minor improvements to share. I did finish off the dog holes at the legs which was quite a pain in the ass and got the table moved over to the wall where it will live most of the time.


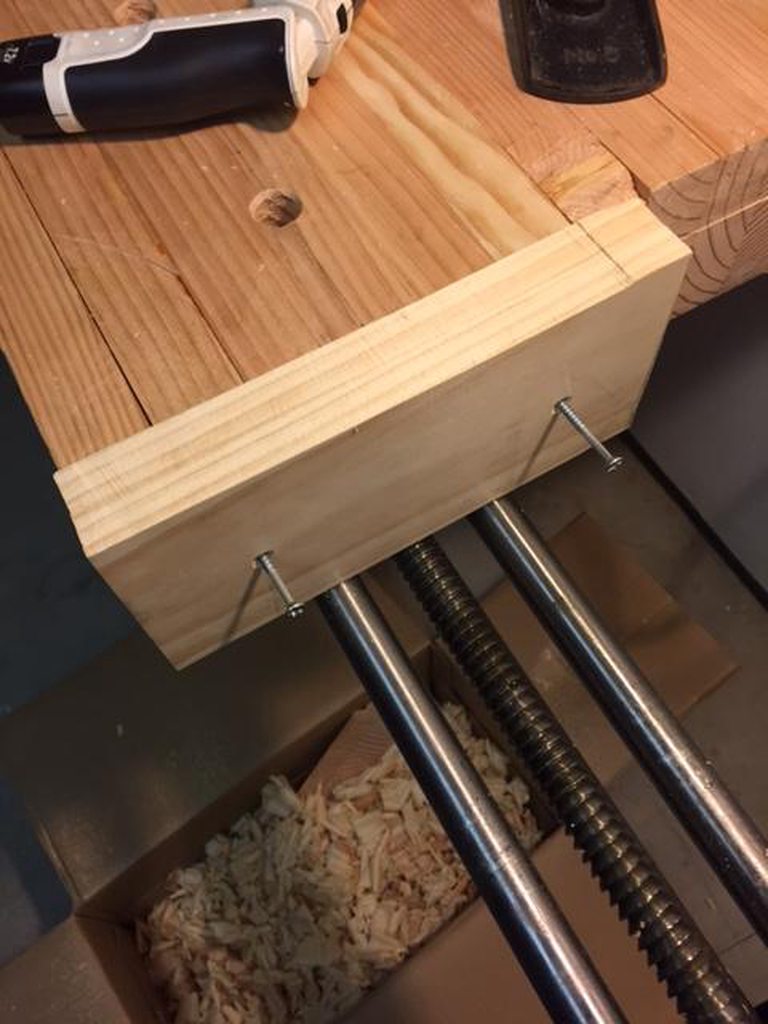
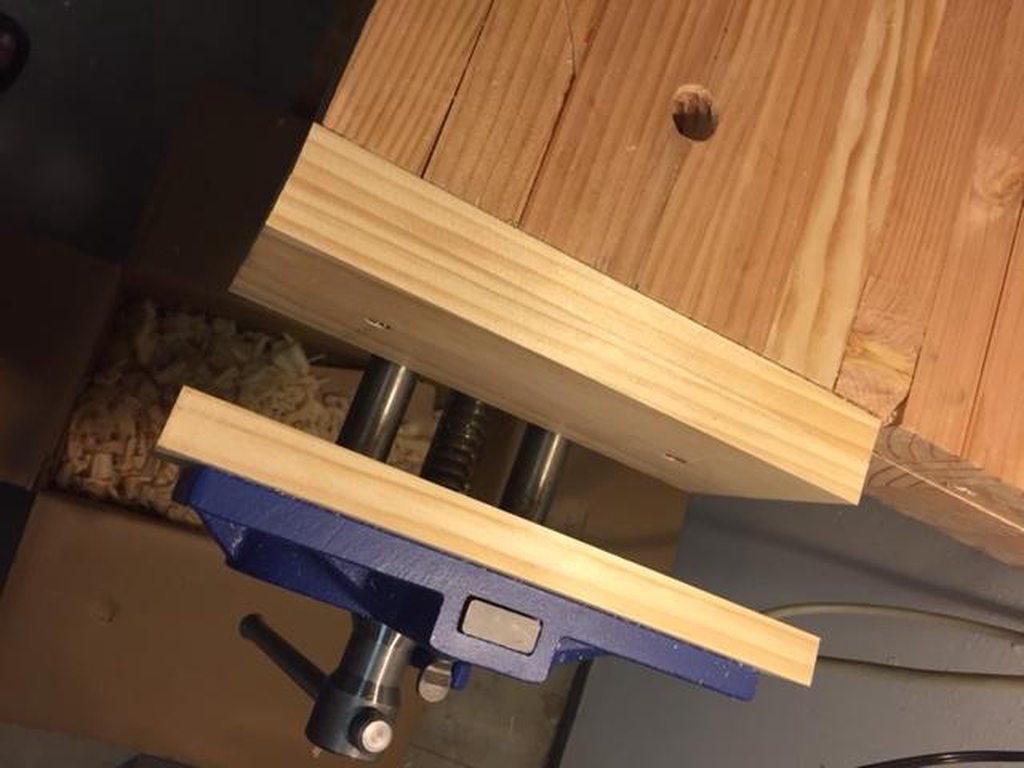
Next little project was to install some boards on the jaws of the vise to provide a bit more protection to pieces that would be clamped. Pretty cool to see how much easier this stuff is when I actually have a bench and a vise to use when working on the stuff. I decided to use three boards since I wanted the wood to be flush against the end of the workbench.


Next up was applying a coat of boiled linseed oil to the exterior surface. I put extra on the top and let it soak in a bit before wiping the excess, while I just rubbed the base with a cloth that was soaked in oil. I'm sure I will do another coat, but the fumes were pretty substantial so I'll probably wait a week or two to add more.


After working with it a bit, I've realized that for even moderate sized projects I'm going to want to move it out to the middle of the garage and be able to have more room to work. The solution for this was a cool set of retractable and removable casters from Rockler.

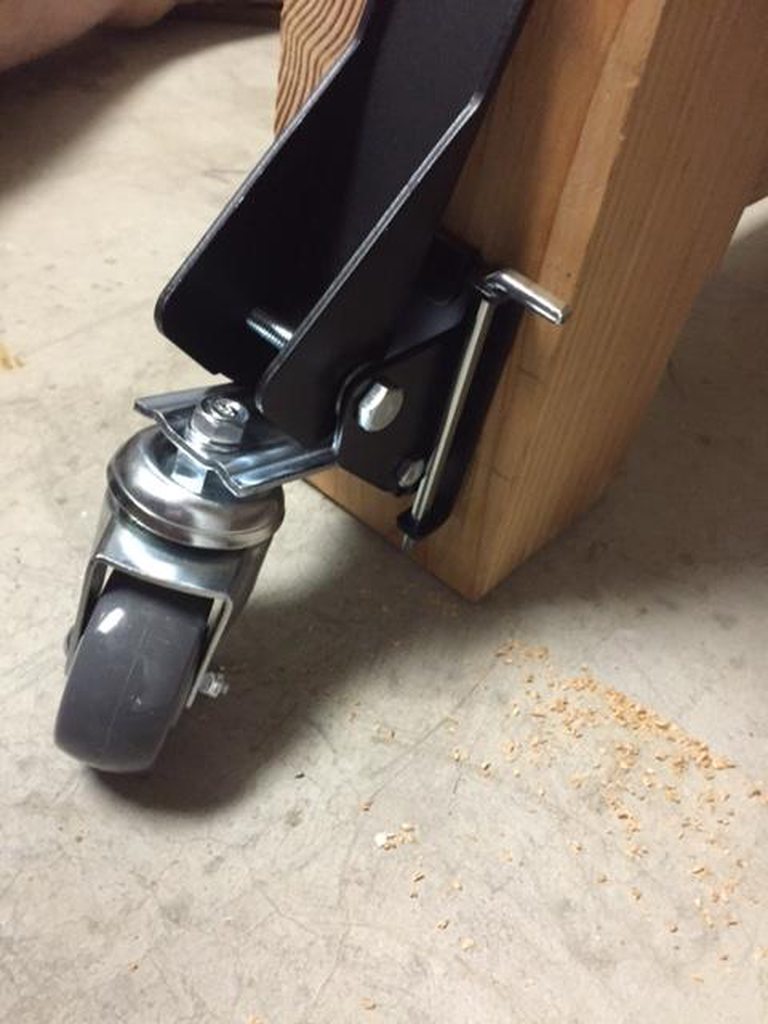


The only other addition I'm thinking I'd like to make at some point in the future is a leg vise but I think that will be a bit down the road and after I've done a few projects to see what I like and what I don't like about the set up. I'm still trying to find a good piece of firewood to make a carpenters mallet so the next project up may be installing french cleats on the wall behind the bench to give me lots more storage.
Next little project was to install some boards on the jaws of the vise to provide a bit more protection to pieces that would be clamped. Pretty cool to see how much easier this stuff is when I actually have a bench and a vise to use when working on the stuff. I decided to use three boards since I wanted the wood to be flush against the end of the workbench.
Next up was applying a coat of boiled linseed oil to the exterior surface. I put extra on the top and let it soak in a bit before wiping the excess, while I just rubbed the base with a cloth that was soaked in oil. I'm sure I will do another coat, but the fumes were pretty substantial so I'll probably wait a week or two to add more.
After working with it a bit, I've realized that for even moderate sized projects I'm going to want to move it out to the middle of the garage and be able to have more room to work. The solution for this was a cool set of retractable and removable casters from Rockler.
The only other addition I'm thinking I'd like to make at some point in the future is a leg vise but I think that will be a bit down the road and after I've done a few projects to see what I like and what I don't like about the set up. I'm still trying to find a good piece of firewood to make a carpenters mallet so the next project up may be installing french cleats on the wall behind the bench to give me lots more storage.
Señor Tony
3 of a Kind
A very respectable effort for a beginning wood worker. I am sure you increased your knowledge and saw improvements in your skills week by week.
I have one simple tip to improve the overall look and finish of the bench. Find a scrap length of dowel (bonus points for finding a piece that contrasts the pine). Get an appropriately size drill bit. Remove the screws in the half lap. Drill holes with said drill bit. Apply glue then knock in dowels. Flush trim. Instantly more professional and tidy look! The screws cheapen your build, give it the finishing touches it deserves!
Well done!
Similar threads
- Replies
- 19
- Views
- 639
- Replies
- 22
- Views
- 500