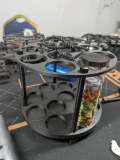
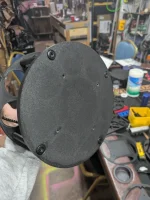
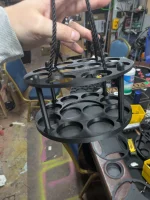
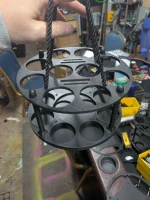
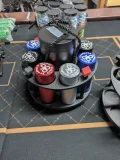
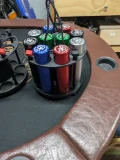
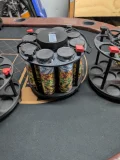
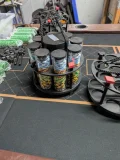
Alright some of you have been with me through this whole journey and now I am comfortable to off the products here on PCF. What you see below are some racks I have developed to hold the U-line tubes or the aluminum chip tubes I have developed. Some racks hold a 10 top or 8 and then a metal bank that has a little flip open to put money in without having to open the whole thing up. Bank empty holds 2 decks, spare (short) tube and any BB,SB and dealer chips. Prices;
Short 10 rack 9$ each
tall 10 rack 9$
short 8 rack & bank 12$
tall 8 rack & bank 12$
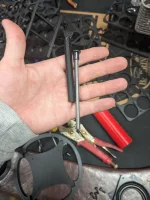
Tall aluminum tube (50 chips) 4$ each
Short aluminum tube (34 chips) 3$ each
Clear tube (43 chips) includes lid 1$ each
Shipping is not included but orders of 1 rack filled with any combo of tubes cost me about 10$ (continental united states).
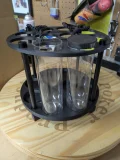
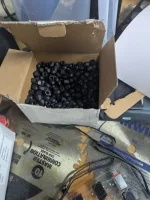
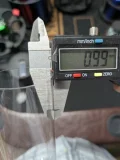
The clear tubes are very similar to the Uline 1.5x6 inch but these should fit 43mm chips in them, also the walls are 1mm thick which makes it more ridged than the Uline or Alibaba tubes. The aluminum tubes will fit 40mm and 39mm chips and have threaded caps, good for shipping chips if you add a little foam and screw the caps to make it compress a little. Please asks questions you can PM me or post on this thread.
Short 10 rack 9$ each
tall 10 rack 9$
short 8 rack & bank 12$
tall 8 rack & bank 12$
Tall aluminum tube (50 chips) 4$ each
Short aluminum tube (34 chips) 3$ each
Clear tube (43 chips) includes lid 1$ each
Shipping is not included but orders of 1 rack filled with any combo of tubes cost me about 10$ (continental united states).
The clear tubes are very similar to the Uline 1.5x6 inch but these should fit 43mm chips in them, also the walls are 1mm thick which makes it more ridged than the Uline or Alibaba tubes. The aluminum tubes will fit 40mm and 39mm chips and have threaded caps, good for shipping chips if you add a little foam and screw the caps to make it compress a little. Please asks questions you can PM me or post on this thread.
Attachments
-
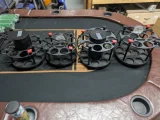 4 empty racks.webp154.6 KB · Views: 872
 -
 thick wall clear.webp60.3 KB · Views: 836
 -
 PXL_20250813_050104175.MP.webp40.5 KB · Views: 662
 -
 PXL_20250813_044732285.MP.webp40 KB · Views: 676
 -
 fit 43.webp178.9 KB · Views: 714
 -
 aluminum 8 bank short.webp123.9 KB · Views: 731
 -
 aluminum 10 tall.webp159.4 KB · Views: 766
 -
 8 clear bank tall.webp149.6 KB · Views: 778
 -
 8 clear bank short.webp173.2 KB · Views: 897
 ! This is my first product. Some think the nuts with suits on the top are a little "goofy". Here are some nuts and links you can order to make it look a little more sleek
 ).
). but I do appreciate the nuts pron from