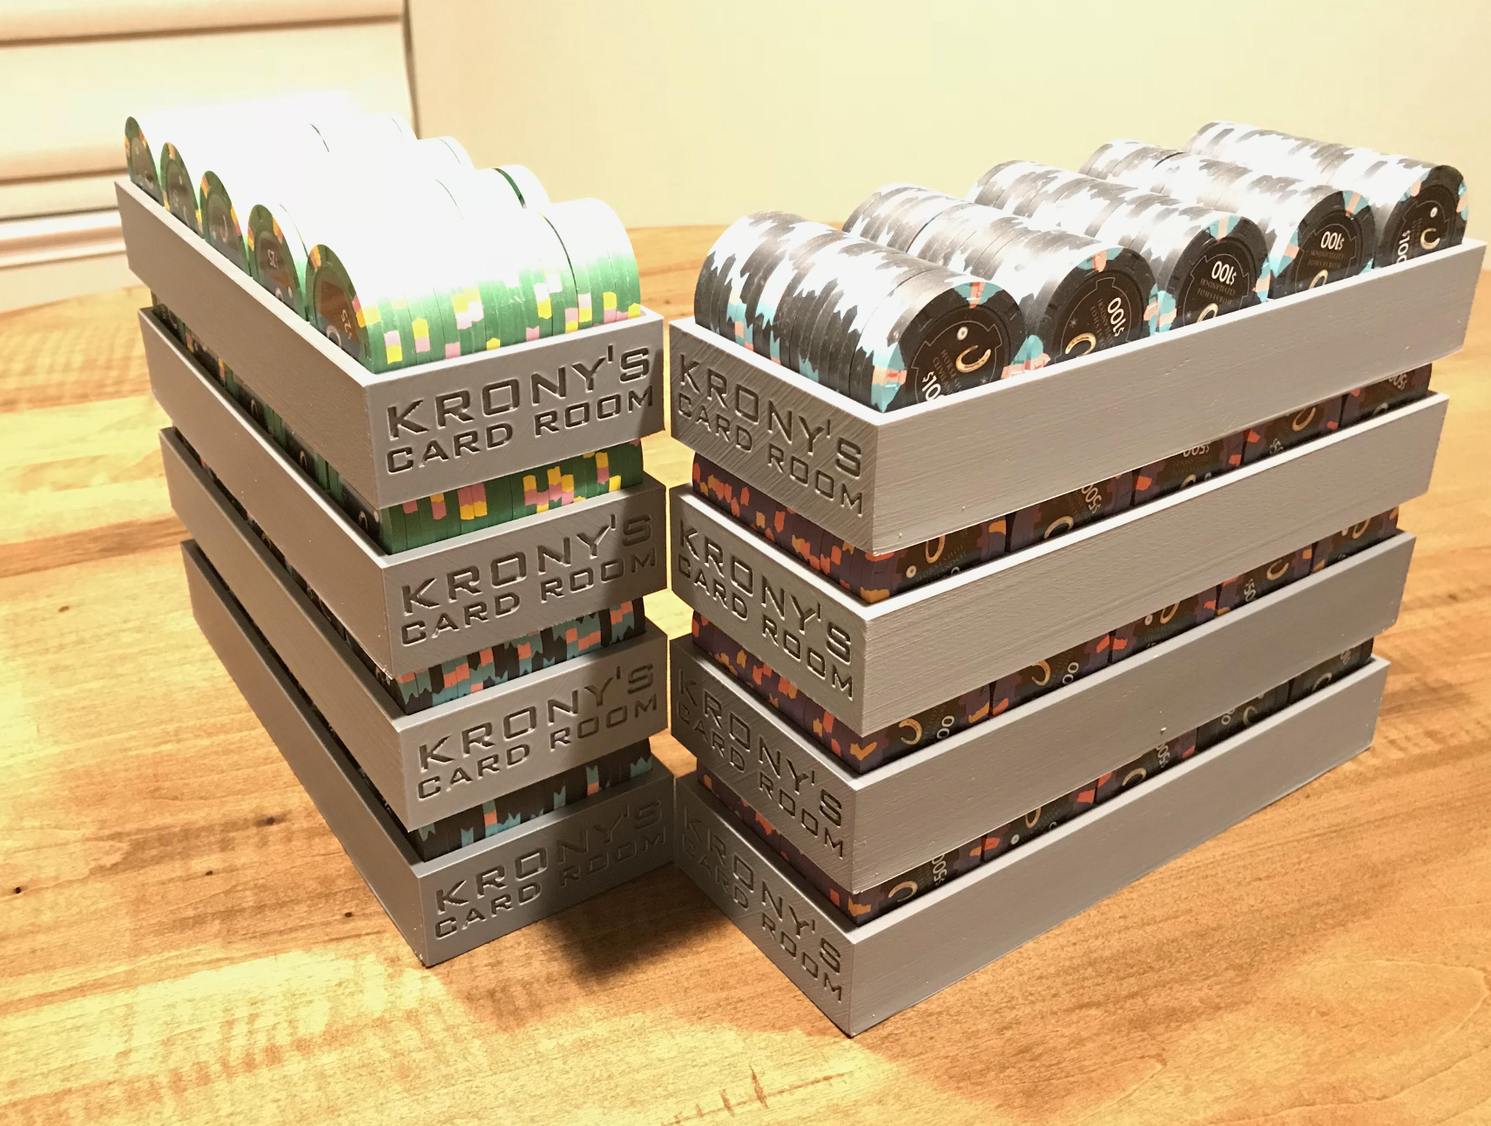
Krony
Two Pair
Hmm, what could this be?

I was wondering the same thing. My guess was it was the only way to achieve a bottom with a recess.Very cool!
Pardon my ignorance, buy why do the trays have to be printed at an angle like that? It seems wasteful of time and material. ???
Thanks.
Very cool!
Pardon my ignorance, buy why do the trays have to be printed at an angle like that? It seems wasteful of time and material. ???
Thanks.
Very cool!
Pardon my ignorance, buy why do the trays have to be printed at an angle like that? It seems wasteful of time and material. ???
Thanks.
You can print them in many orientations. All create a useable, functional tray.
(short answer)
The 45-degree tilt is a compromise that I think puts out the most aesthetically pleasing tray. Some material is wasted and in the case of 3d printing even wasted material takes time to produce. The wasted material is put into the recycling bin as it is recyclable plastic. Most manufacturing processes have waste material of some sort.
(warning: over-explanation coming)
I was wondering the same thing. My guess was it was the only way to achieve a bottom with a recess.
What is the material cost per unit?
Fascinating stuff, Ken! Thanks for the detailed explanation. (y) :thumbsup:(over-explanation below)
Here are the three orientation options I tried.
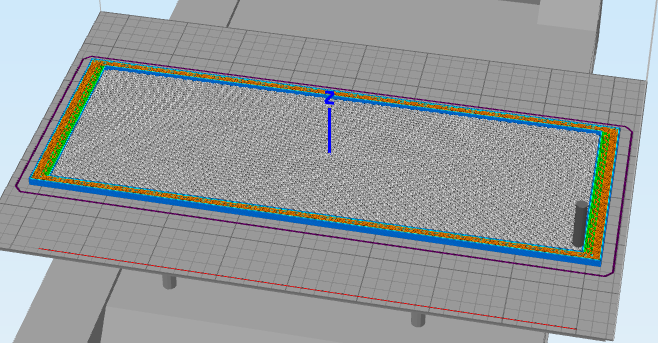
A. Horizontally flat, like they sit when holding chips
The problem with printing this way is there is a hole on the underside so they can stack. You will need to print support in there to keep that from collapsing. All of that support material would need to be removed which can leave marks.
horizontal printing cut-away bottom
The white material is support that would need to be printed to prevent the bottom from collapsing.
That isn't a huge problem, however.
3d printers print layer by layer (0.2mm per layer) from the bottom (or top in some cases) so that the bottom of that chip tunnel prints just one tiny line (0.4mm) at the bottom on one layer. On the next layer is skips where that tiny line is and prints a tiny line on each side of it. Continue this all the way to the top of the curve. This process creates a useable curve but it is a little rough. This is mostly because of the 0.4mm horizontal step vs the 0.2mm vertical step. Each layer is squished into the previous layer to make it bond together. The nozzle extrudes a round 0.4mm line of melted plastic.
The "solution" to this is B.
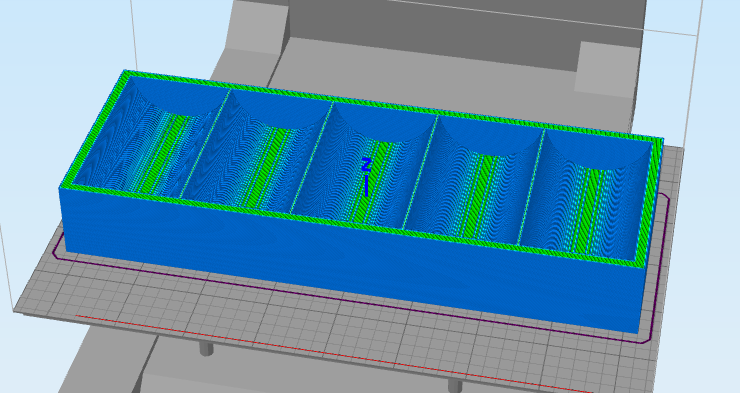
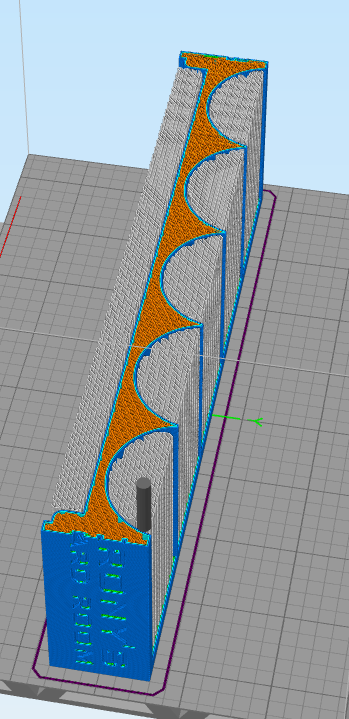
B. Vertical, tray on the side
If you imagine the tray on the side so that the chip stacks are straight up you get a really nice curve where the chips sit.
You also get an unsupported area on side that is now on top. So you need to print support material for the entire height of the tray, front (where the chips sit) and back (where it stacks on the tray below). This support material uses plastic and needs to be removed possibly leaving marks. Also, having support material that tall all by itself until the top has a larger risk of failing and often leaves the bottom part of that top wall (where it touches the chips) less smooth than would be desired. Support material often makes the underside of whatever it is supporting less smooth.
The side that is now flat against the printing bed is REALLY flat (and a bit shiny) as it was squished directly into the printing bed when the first layer was put down. The side that is up in the air is less flat and shiny so it doesn't match the bottom side.
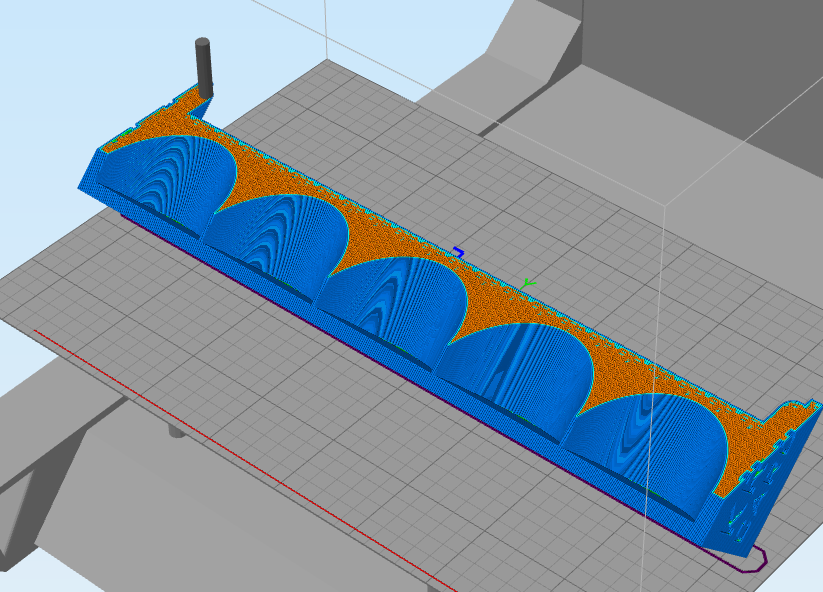
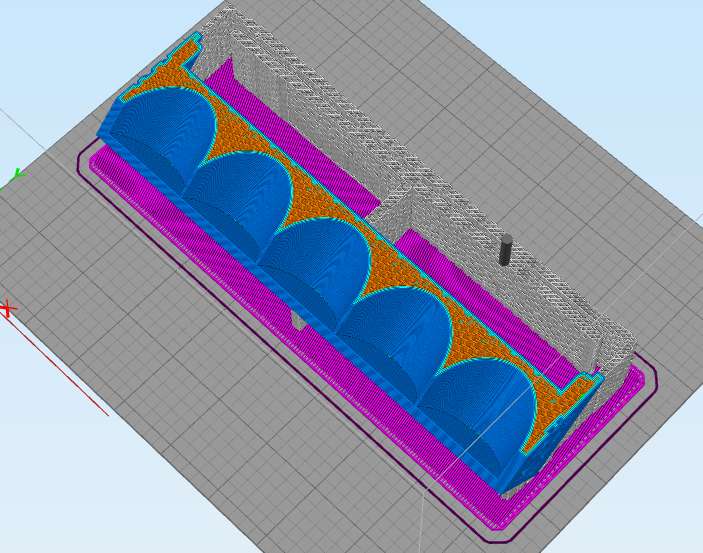
The compromise is C.
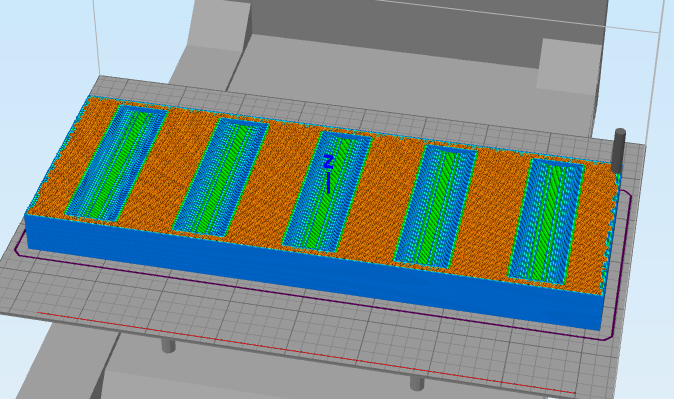
C. 45-degree angle
The 3d printer can print outwards up to maybe 50 degrees overhang without support.
If I print the tray at a 45 degree angle the chip tunnel (where the chips sit) gets a full curve line printed each layer. This is better in quality than horizontal (A) and almost as good as vertical (B).
45 degree printed cut-away
This is a cut-away diagram of a chip tray being printed at a 45-degree angle. Support has been...
The now top and bottom sides are being printed at 45 degree angles, are not touching the printing bed, so they match.
No support is needed where the chips sit or for the inside of that top wall.
It does need support but it re-inforces itself as it goes up by printing in a triangular shape against the tray as it goes up. This is very stable.
Also, the support only touches the tray on the bottom edges where the finish isn't very important AND minimizes how much support touches the part.
Overall, they all use some plastic that is just thrown away (in the recycling bin).
")