Removing the cancellation stamp on an inlay (GC Hinkley). (1 Viewer)

Rieguy

Full House
Supporter
Joined
Jun 19, 2020
Messages
4,344
Reaction score
20,485
Location
Texas
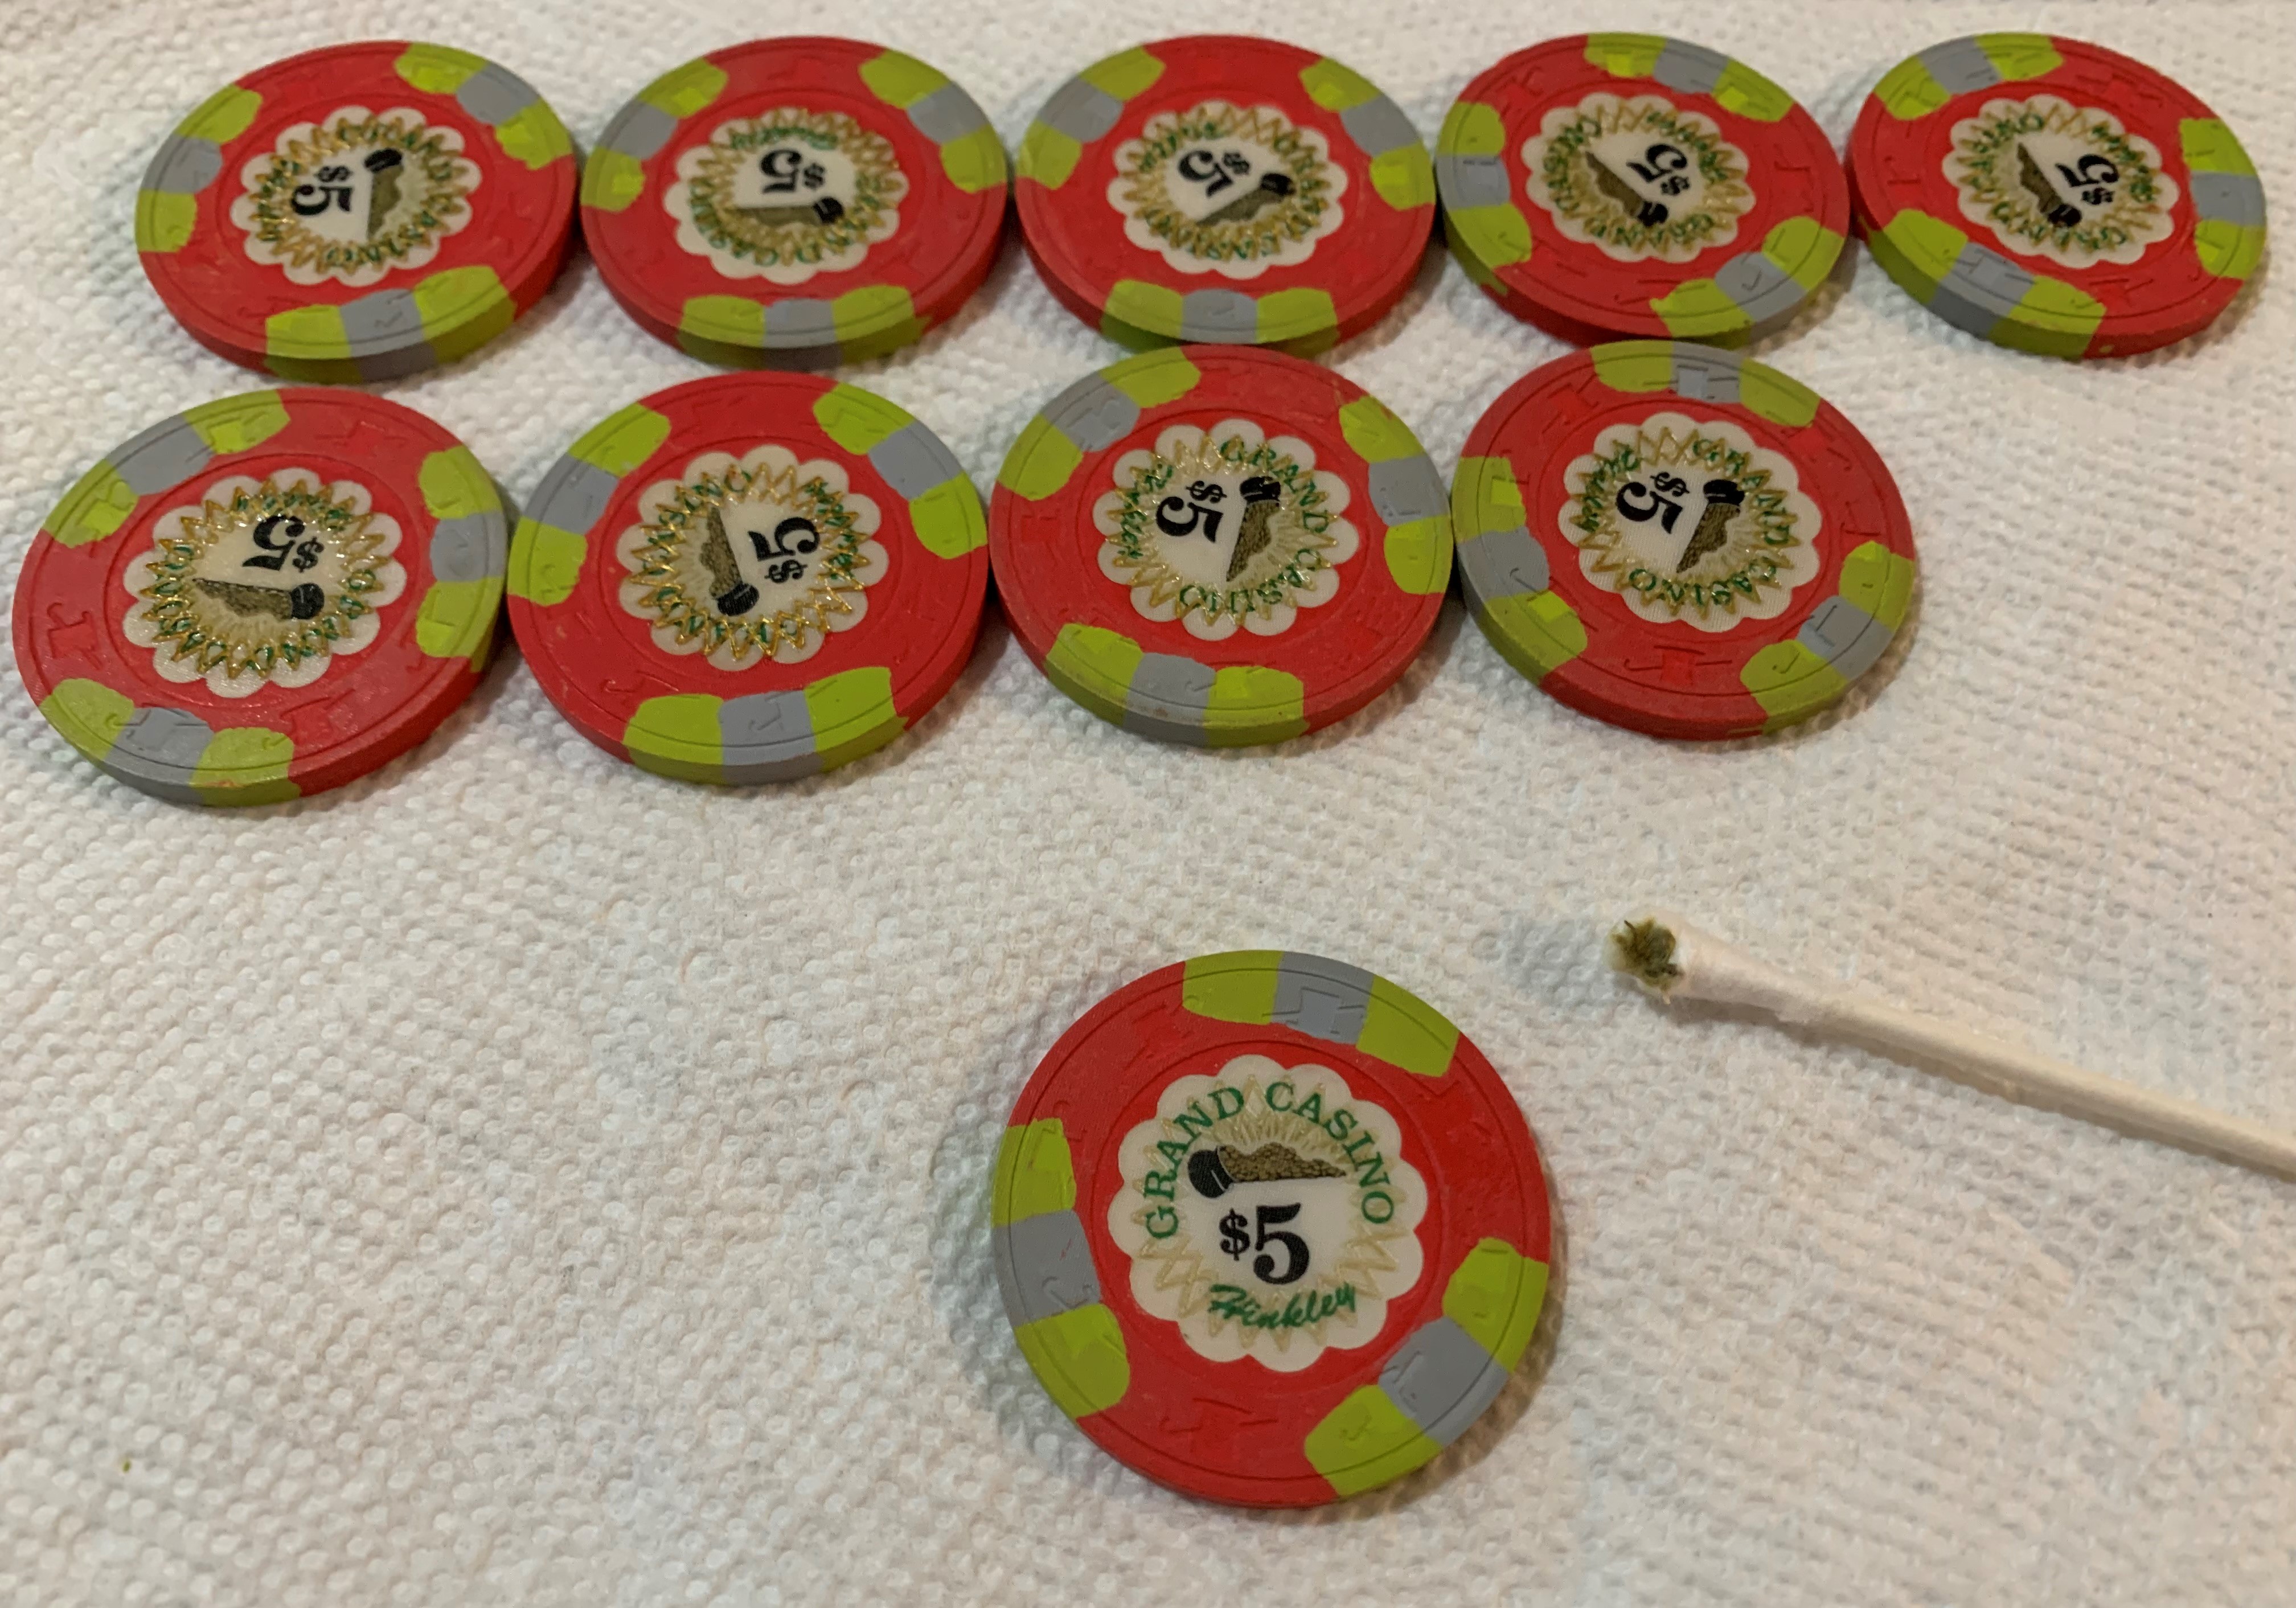
I hate posting a thread I know has likely been answered elsewhere, but after searching, all I could find for removing the cancellation stamp on inlays is that people use non-acetone nail polish remover. Assuming that is what I need (please correct me if I am wrong), what do you use that in conjunction with? Q-Tips? Regular cotton swabs? I am not looking to murder these; just remove the stamp and then clean them up as best as possible. I want the inlay and chip to come out unharmed as best as possible, although I realize the indention and other signs of the stamp will always be visible.

Thanks for any advice!

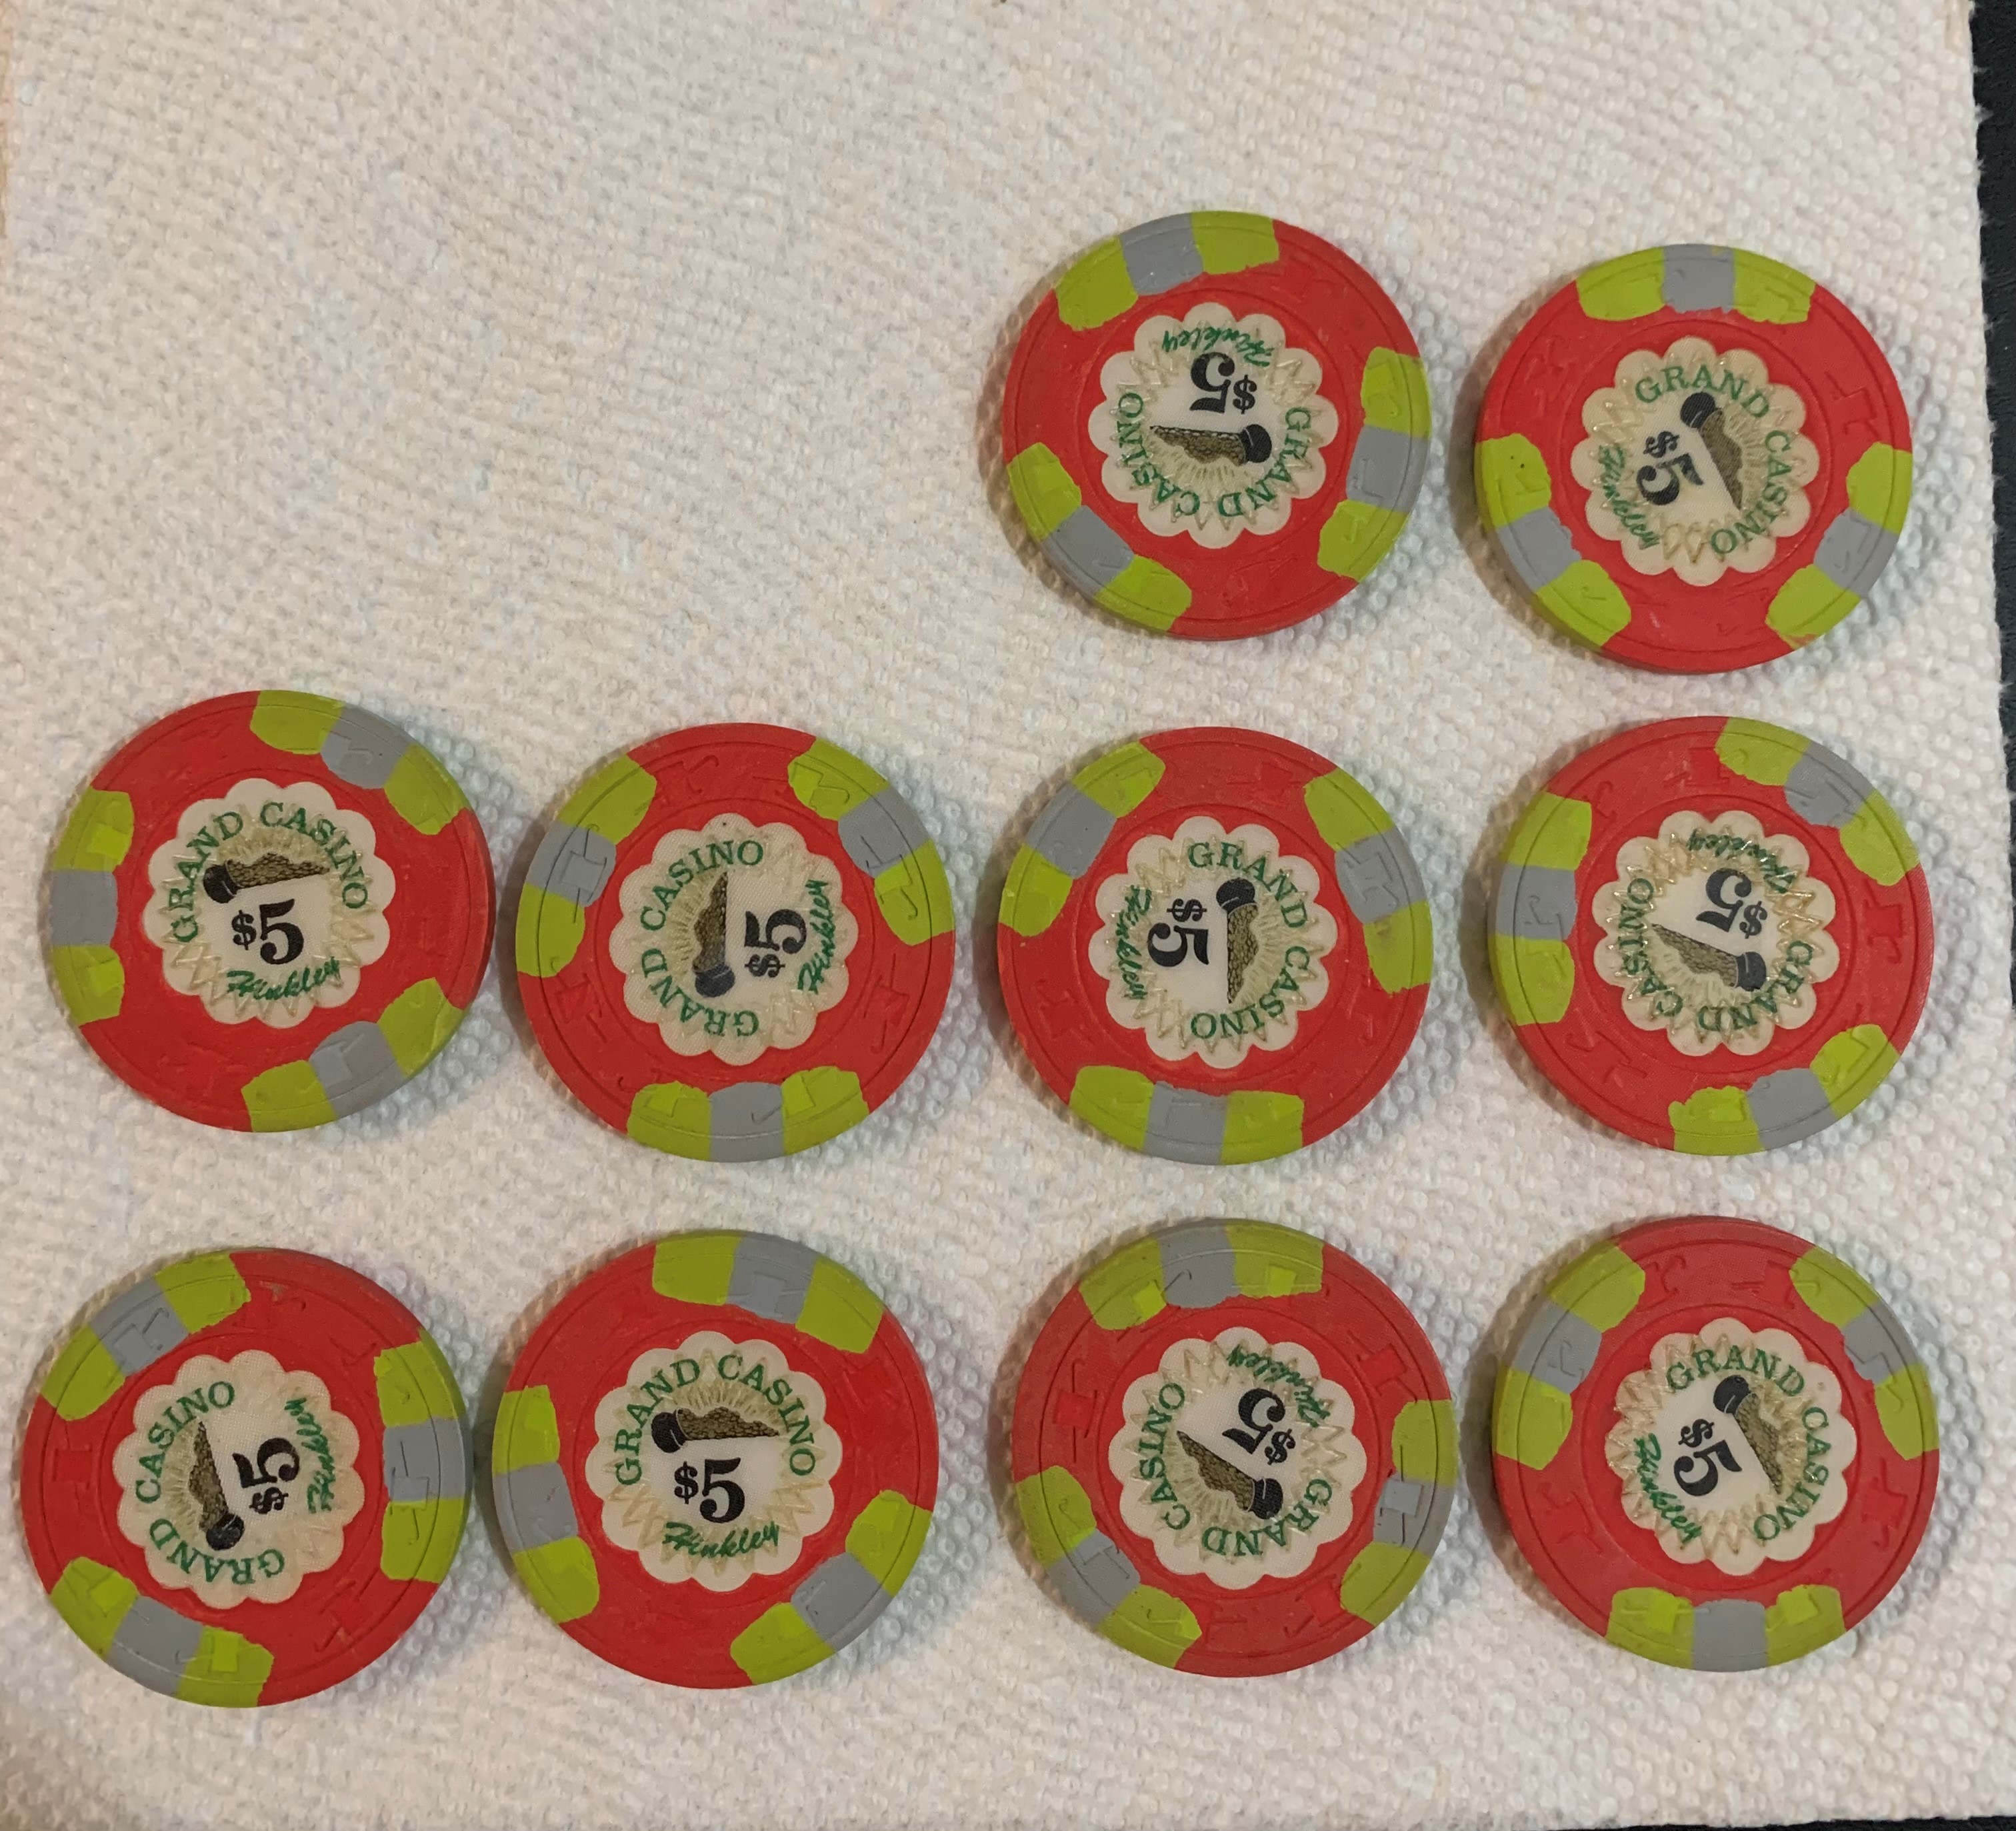
It is for these beauties:

IMG_5348.JPG


Also, if anyone has 80-100 of the Hinkley $25s and a barrel of $100s they are willing to part with (sell/trade/etc.), let me know!
 
Thank you; I appreciate it.

Figured I could knock out a rack today, but it takes a little more elbow grease than I realized with some chips cooperating more than others.

A quick comparison pic (w/ a more stubborn chip):

IMG_5381.jpg


Best one out of roughly a barrel so far:

IMG_5382.jpg
 
Thanks. I couldn't tell you, but I will look into it further because apart from a few chips the hot stamp did not come off easily. Most look more like that first picture than the second.
 
I thought the acetone-based NPR was better at removing the foil stamp? (This is from memory from what I've read, never done it myself)
Maybe. AFAIK, the acetone-based type will damage/dissolve the clay chip itself and smear the colors of the chip and edge spots. I've received some chips that had hotstamps cleaned that way and they were basically 'dissolved' on the chip face. Tread carefully.
 
Maybe. AFAIK, the acetone-based type will damage/dissolve the clay chip itself and smear the colors of the chip and edge spots. I've received some chips that had hotstamps cleaned that way and they were basically 'dissolved' on the chip face. Tread carefully.

Yikes, I'll definitely stay away from acetone, then.
 
Figured I owe it to anyone in the same situation that runs a search to give an update to share what my best method ended up being.

Dab a little NP remover onto the cancellation stamps via a Q-tip, let it sit there for 3-5 minutes, and then take another Q-tip and barely touch the tip of it in NP remover and use that to start rubbing off the stamp. Let that sit for a couple minutes and then take a dry Q-tip and rub off the rest as best as possible. The results came out much better this way for me after trying several different methods. Once I hand clean them with the usual methods, such as a magic eraser etc., I think they are going to look excellent. I will update when that finally happens, followed by the final oiled pics.

IMG_5502.jpg
 
Figured I owe it to anyone in the same situation that runs a search to give an update to share what my best method ended up being.

Dab a little NP remover onto the cancellation stamps via a Q-tip, let it sit there for 3-5 minutes, and then take another Q-tip and barely touch the tip of it in NP remover and use that to start rubbing off the stamp. Let that sit for a couple minutes and then take a dry Q-tip and rub off the rest as best as possible. The results came out much better this way for me after trying several different methods. Once I hand clean them with the usual methods, such as a magic eraser etc., I think they are going to look excellent. I will update when that finally happens, followed by the final oiled pics.

View attachment 591495
It's been a couple of years but curious if you e further refined this process. I'm about to try it with a rack of canceled $25s (not Hinkleys )
 
I haven’t found a really effective way to do it and I’m not sure I’ve seen any perfect results here on PCF. Honestly the nail polish remover really only gets you about halfway there. I’ve tried nail oil sh remover with magic eraser and that didn’t seem to do much better. But my guess is that’s the way you need to go - more of an abrasive, scraping solution as opposed to a chemical one.
Let’s get some brains on this!
 
u32yDoi.jpg
l8rJRwt.jpg
JMXEOyc.jpg

It's been a couple of years but curious if you e further refined this process.
Nope, still a time-consuming PITA but I've gotten better at it. None of the pics have any maintenance besides a first round of stamp removal; they clean up much better afterwards. I would say a brush or toothbrush are better than the magic eraser for just the inlays afterwards, since they really get into the crevices. I don't have an ultrasonic but would love to test them out in one (and probably will before the final stages, like oiling).

I'm about to try it with a rack of canceled $25s (not Hinkleys )
I assume NCLs? I don't have any in my possession, but by the looks of them the stamp doesn't seem nearly as deep, which could make it significantly easier.
 
u32yDoi.jpg
l8rJRwt.jpg
JMXEOyc.jpg


Nope, still a time-consuming PITA but I've gotten better at it. None of the pics have any maintenance besides a first round of stamp removal; they clean up much better afterwards. I would say a brush or toothbrush are better than the magic eraser for just the inlays afterwards, since they really get into the crevices. I don't have an ultrasonic but would love to test them out in one (and probably will before the final stages, like oiling).


I assume NCLs? I don't have any in my possession, but by the looks of them the stamp doesn't seem nearly as deep, which could make it significantly easier.
Foxwoods $25
 
Foxwoods $25
Whoa, just saw and those look intense with an entire starburst on the majority of the chip. Not sure there's a better way to approach them but I admittedly haven't tried much else. Definitely will need an electronic scrubber for the next stage with that much coverage and indentations.
 
Whoa, just saw and those look intense with an entire starburst on the majority of the chip. Not sure there's a better way to approach them but I admittedly haven't tried much else. Definitely will need an electronic scrubber for the next stage with that much coverage and indentations.
Right? I’m not sure what an electronic scrubber is, but I often wondered if the only solution would be to get in there with some kind of fine point dremel bit capable of scraping the hot stamp without damaging the inlay. But even if it existed, the labor . . .
 
Right? I’m not sure what an electronic scrubber is, but I often wondered if the only solution would be to get in there with some kind of fine point dremel bit capable of scraping the hot stamp without damaging the inlay. But even if it existed, the labor . . .
Something like this set-up (link). I remember some people sharing a cheaper one that was like green/yellow but I can't find it with a quick search. It hard different kinds of attachments that were appealing.

I'd be a little worried to start scraping them, but I would definitely try it once for science. The labor is the absolute worst either way.
 
Has anyone attempted this with the intention of relabelling? I’ve seen a method where the member used an eye dropper to place the NPR on the center of the chip. Then using a pin got under the inlay and was able to peak it off? I’m going to attempt a rebel on these but they don’t have the laminate on them so I’m curious my best plan of attack
 

Attachments

  • ED74C8FC-383C-4FEB-8770-05BC68689D30.png
    ED74C8FC-383C-4FEB-8770-05BC68689D30.png
    911.6 KB · Views: 64
Has anyone attempted this with the intention of relabelling? I’ve seen a method where the member used an eye dropper to place the NPR on the center of the chip. Then using a pin got under the inlay and was able to peak it off? I’m going to attempt a rebel on these but they don’t have the laminate on them so I’m curious my best plan of attack

@grantc54 any advice here?

I suggest @ChippinUp looks at the inlay removal thread.

Since your relabelling you dont need to remove the cancellation stamp, just the whole inlay. In my experience it can be a major PITA on the cancelled chips (could be they use paper inlays or because the pressure from the stamp makes it harder to remove).
 
This is what @RivieraDanny recommended. FYI, I have not tried this.

2 cups each. Into 1 gallon or so of almost hot water. Soak 20-30 minutes. They rub right off

View attachment 1080355
I admittedly haven't tried this method yet on these, as I'm a bit weary of the degreaser full-soak. I know it worked just fine on the Crystal Park chips that have the inlays that span the entire face of the chip, but there's a huge difference between those with the full smooth sticker and the OP chips here that are leaded with textured inlays and a much deeper stamp. That said, I eventually intend to try it out and will report back whenever that happens.
 
Thank you; I appreciate it.

Figured I could knock out a rack today, but it takes a little more elbow grease than I realized with some chips cooperating more than others.

A quick comparison pic (w/ a more stubborn chip):

View attachment 570258

Best one out of roughly a barrel so far:

View attachment 570257
i did not expect this to come out so well with out chip damage - nice work!
 
I admittedly haven't tried this method yet on these, as I'm a bit weary of the degreaser full-soak. I know it worked just fine on the Crystal Park chips that have the inlays that span the entire face of the chip, but there's a huge difference between those with the full smooth sticker and the OP chips here that are leaded with textured inlays and a much deeper stamp. That said, I eventually intend to try it out and will report back whenever that happens.
This is a good point, I think my conversation with @RivieraDanny was related to the full face inlay Crystal Park's stamp removal which may not work as well on standard RHC's inlays.
 
This is what @RivieraDanny recommended. FYI, I have not tried this.

2 cups each. Into 1 gallon or so of almost hot water. Soak 20-30 minutes. They rub right off

View attachment 1080355
I changed the formula a bit
And just soak them In 90% concentrate
It took the foil off a rack in about 10 mins it was 95% dissolved
Also added a little oxi detergent
Worked well for me but yah needs oil after

And wear gloves the concentrate form of it burns any small cuts
 
I changed the formula a bit
And just soak them In 90% concentrate
It took the foil off a rack in about 10 mins it was 95% dissolved
Also added a little oxi detergent
Worked well for me but yah needs oil after

And wear gloves the concentrate form of it burns any small cuts
Which chips? Pics are welcomed too if you feel like it.
 

Create an account or login to comment

You must be a member in order to leave a comment

Create account

Create an account and join our community. It's easy!

Log in

Already have an account? Log in here.

Back
Top Bottom