Poker Chip Cookie Cutters (2 Viewers)

Nex

Flush
Joined
Jan 25, 2017
Messages
2,174
Reaction score
3,337
Location
Club Hel, Downtown Megacity
I already recently mentioned this over in the CPC Tri-Moon punch thread, but now I have a first picture that warrants creating a thread. I will update it as I make progress. This will be fairly slow, so don't expect updates every day.

-----

Sometime mid to end of January, a Prusa i3 MK3 3D printer kit will be arriving here.

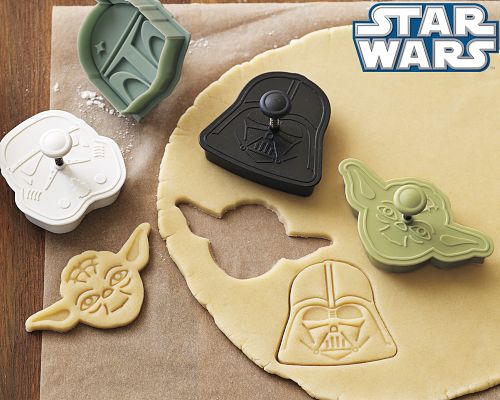
Of course the real fun in 3D printing is not just stupidly downloading and printing finished designs other people have made, but actually designing your own stuff. Aside from a few other things, this has been something I wanted to do since I read about David trying 3D printed clay punches to test new spot designs: Cookie cutters.

Using food coloring on some standard butter cookie recipe made with white flour, I presumed it should be fairly easy to get very decent-looking results, provided I have the necessary tools - and I'm going to design and print them. Using PETG for printing as it is food-safe and, as a nice side effect, also said to be sturdier than PLA.

I am starting with a Paulson-style 3Moon cutter as a proof of concept. If it works well, I'll probably make a couple more spot designs, possibly also more intricate ones.

To minimize the amount of waste/need to re-roll dough, I will make separate cookie cutters just for a set of edge spots that will be arranged close to each other.

There will also be a "mold" tool to imprint something on one side of the cookie after it has been assembled (and cut off any excess dough in the same step). Here I will start by cloning Paulson's THC mold as close as possible. Later on I can also make different mold designs, and I will have to if I want to either publish or sell these.

The cutters will mostly consist of four parts:
  1. The round punch to cut the chip circle from the dough, which also integrates the cutting parts for the spots on the inside.
  2. A pushout piece for the chip body without the spots. This one will have a pin in the center that goes upwards and protrudes a little over the top end of the round punch.
  3. A single pushout piece for all the spots. This one will have a hole in the centerpiece where the pin from the chip body pushout fits through. Both pushouts are supposed to be possible to operate independently.
  4. A clip for the top of the round punch, which will act as guiding support for the two pushouts.
I figured a pushout mechanism would make sense since butter cookie dough can be very sticky, and the edge spot cutting pieces are too intricate to be able to push out pieces of dough with just a finger. Plus, they should apply equal pressure over the whole surface of the dough piece, so dough warping should be minimal.

In the drawing below, you can already see the round punch and the bottom parts of all the pushouts. The blue lines at the top are my draft for the top clip. You can already see the circle for the hole where the pin from the chip body pushout is supposed to go through.

d01.png
 
Last edited:
I have seen other cookie cutter designs on Thingiverse (example here) that also had some surface molding integrated, and the photos of the finished butter cookies showed the molding was still very visible. It's probably only a matter of how deep you imprint the design. Will probably require a couple of iterations until I get that right, but it does appear to be possible.
 
I guess I meant the detail in the mold will bake out. And it will be tough to get the mold on the edge spots, unless you're going to do it after assembly.

Also, do the cutters need to be that tall? Cookies aren't going to be that thick.

Do you plan to oil the pushout surface and the cutters to avoid sticking?

Are the parts going to come apart for cleaning?

Not trying to poo poo this idea, just trying to give you some obstacles that you may encounter so you can think on them before finalizing the design.
 
They need to be that tall because the drawing above is still missing the biggest part of the pushout pieces - these will fill up the empty space.
Yes, it will be possible to take a cutter apart for cleaning. No parts will be glued or in any other way fused together.

Regarding oiling: I'll simply have to see what works best. But keep in mind the results depend heavily on the specific mixture of dough used. I might also add a slight cross hatch pattern to the bottom side of the pushout pieces to reduce stickiness.

Edit: Mold application is the last step before baking. So yes, it will be applied on a fully assembled cookie with all spots in place.
 
Last edited:
Got a forward notice this morning that my printer kit is going to ship soon. Should have it early next week.

Regarding the cookie cutters, I've now created a rough version of the top clip for the punch. Edges aren't filleted yet. I've done an initial design without any manufacturing tolerances vs. the punch itself, hoping for a very tight fit. Might have to work some tolerances in later when I have a test print. Will probably also have to slightly rework the top part of the punch to allow for easier assembly and disassembly.

This software is a pain in the ass to work with sometimes...

d02.png

d04.png

d03.png
 
I decided to change the punch/top clip fastening from the crude screwing mechanism to a snap fit mechanism. The PETG material should have the necessary give at these specific proportions. I also added a third connecting leg to keep the top clip in place better.

In order to make the screwing mechanism work, I would have had to cut pass-through openings into the sides of the broad top of the punch, which would have been very ugly and might even have destabilized the structure. Going with a snap fit design instead, with the punch being the socketed part, the punch looks and feels fine even without the top clip (and the pushout parts) attached, giving the user greater freedom in their preferred way of use.

Also had to remove most of the already applied fillets/chamfers as working with complex objects (one-way-)combined with the union command were extremely hard to modify, so I split them back into individual objects and grouped them instead. But using fillets/chamfers on grouped objects doesn't work like if it was one single piece combined with the union command.

I can also see things could get fairly laborous if I want to resize the whole thing, e.g. switching from 39mm inner diameter to 43mm. Earlier today I discovered this parametric construction tools section that would probably allow to make such a change in a matter of seconds, but I fear I'd need to reconstruct everything I already have from scratch in order to get this working :(

Printer kit was shipped early Friday afternoon and is scheduled to be delivered on Monday :)
Just sucks that UPS won't do Saturday delivery - which is the norm around here for all the other parcel services except FedEx - so I'll be distracted with work. But I believe the work laptop which I ordered before the holidays should be waiting for me in my office by now... so maybe I can simply "work" from home most of next week :p

d05.png

d06.png


Food coloring... seems to actually be an issue.

The kind of stuff I can buy at my local supermarket (acceptable ingredients) has annihilating reviews online, people claim it doesn't add much color at all.

And the stuff with good reviews you can buy online on the other hand is made with genetically modified corn and sugar and contains a couple specific food coloring agents that force the manufacturer to put a warning label on the box: "can adversely affect the activity and attention of children". Eww. Bon appetit.

Since I have seen so many industrially produced sweets in all sorts of (very strong) colors that did not have to bear either of those two labels, it appears like there is a third category of food coloring available, but not to consumers.

Meh. Baking poker chip cookies with lots of different colors certainly won't be a regular thing then, given those options.

For starters I've ordered a box of the good review stuff with terrible ingredients, but will only do a single test run with them first.

For long-term unobjectionable use, the only other alternatives I can think of would be three shades of brown: 1) dough with white flour, 2) dough with whole grain flour, 3) dough with any flour and cocoa. Boring.

Maybe I'll test the stuff that is available at the supermarket myself... in the best case, you'd just need a ton of the coloring in order to get acceptable results. This would make it considerably more expensive than the online order stuff, but at least it only contains halfway harmless ingredients.
 
Got completely fed up with the overcomplexity of modifications and improvements as the model became more detailed.

Dumped AutoCAD. Switched to Inventor. (I'm lucky to still be an enrolled university student... in name only)
Currently re-building everything I already had created from scratch, this time with all the bells and whistles available in Inventor: Assemblies from individual parts, parametrized construction.

At first, AutoCAD appeared to be made for 3D design just as well as 2D design, judging by the broad palette of solid modelling tools. But after working with it for a while, it became very apparent that even this seemingly broad palette of tools was merely a very rudimentary toolset compared to what you need to work properly and efficiently here.

d07.png
 
After toying around with my new printer over the whole past week, I worked a bit on the cookie cutter designs. Still way to go, but I think I have it all set up in an easily extensible/modifiable way now. Still fighting with some of Inventor's behavior and had to Google a lot of how-tos for very specific issues I ran into, but I'm slowly starting to pick up speed.

Was having some new printer calibration issues on the weekend, but after a lot of work I got it fixed. The Y axis belt got loose in its holder (a PET 3D printed part that has a little too much elasticity) and I ended up with horrible layer shifting. Now all fine :)

I'm still tweaking the clip mechanisms. The outer ones are rock solid already but very hard to fit. The inner ones (which will snap into guide rails on the shaft of the pushout part) are still too delicate for printing at 0.2mm layer height and don't have enough give either.

Edit: Did I mention how much removing support structures sucks? No way to do it cleanly with parts as delicate as this. I'm picking up that multi material printing upgrade asap so I can print supports in water-soluble material. But maybe I'll just remove the brim at the top of the punch or add a chamfered edge so I can print it cutting side bottom without supports.

DSC_0301-1.jpg
 
Last edited:
Got a good amount of work done. I now have the body pushout part for the punch and a mold stamp.

Body pushout is an assembly consisting of three components: shaft, plate, connector pin. Reasoning: I want to be able to print as much as I can without support structures and yet have a rough surface on the plate facing the cookie dough. This would be impossible if I printed it as single piece.

The only assembly component I am forced to print with support structures is the mold stamping plate. Everything else prints as-is. Don't even need a brim.

Optimized the models for 0.2mm layer height for relatively fast printing.

Only missing the spot pushout parts and a frame to aid with rolling out dough in the perfect thickness for a first alpha baking test.

Not pictured: black punch without spot punches inside (that's where the mold stamp goes into) and another transparent top clip.

_DSC0002r=2048w.jpg
 
Last edited:
Based on my experience with other cookie molds, I suggest you go for larger chips (50 or 60mm).

After reading this thread I was wondering what the ceramic equivalent would be. I guess we're talking about a pre-made sugar cookie where the design is "printed" on after the cookie is baked :)
 
We have these starwars cookie punches:

Star-Wars-Cookie-Cutters5510-165.jpg


Yoda is always a problem (the small ears get caught and often tear off) but the main issue is that it never releases the small circle cleanly. The larger ones work fine.
 
I get what you mean. And I have already planned the design in a way to avoid exactly these issues :)

Cookie dough is sticky and brittle. With those tiny spots I am going to be punching, I knew dough would be left sticking inside the punch after punching all the time, and getting those pieces out of the punch without tearing or deforming would be hard if I only had standard kitchen tools.

So I have added a moving insert for each punch that is just flat and perfectly fits the punched shape, and it has a handle at the top that can be used to push the insert down within the punch and shove all the punched dough pieces out by applying force distributed equally over the whole surface. This should reduce tearing to a minimum or even completely get rid of it.

(Actually it's two independent moving inserts - one for the body piece in the center, and one for all punched spots combined. You can see the insert for the center piece in my last photo, it's the thing front right.)

My only concern with tearing is when assembling the punched parts back to complete cookies before using the mold stamp to press the pieces together.
 
My cookie cutters are similar - they push out the cookie. However there is a slight gap between the punch and the sides which is there dough gets stuck and messes things up. It doesn't seem to happen too much (or maybe it's not so noticeable) with the larger cookies. If yours is made to very tight tolerances then maybe this won't be a problem but then maybe it'll get gummed up. No idea. I watch your progress with great interest!
 
Hmm yes that is still possible, indeed.

Already have been tweaking the tolerances a bit, I think I have a pretty good fit now. Maybe a third of a millimeter spacing around, still moves with ease.

Maybe some crumbs will still stick, but the biggest part of the shapes should go out without issues. Plus, in the mold embossing step, the whole dough gets pressed (again inside a round punch so there is no place where the dough can escape), hence any tiny holes in the dough resulting from incomplete punched parts should get filled automatically. Only consequence would be a slight variation in resulting cookie thickness.
 
Got the final parts designed. Printer is still hard at work churning out parts, but I'll have everything in hand in time to still do my test bake today.

The dough rolling frame interlocking parts still need some tweaking - had to cut off some material in order to fit them together. But it's usable. At just under 3 hours print time, I certainly won't run a reprint of this thing before I test.

d11.pngd12.pngd13.pngd14.pngd15.pngd16.pngd17.pngd18.png
d19.png


d20.pngd21.png
d22.png
 
What a shitload of work! But it paid off :)

I did get hold of some food coloring without crazy crap in it like genetically modified stuff which makes these cookies fit for sharing with my colleagues tomorrow at work!

The pushout pieces in my punch got dumped pretty much immediately because the dough simply clogged the gaps and locked them in place. But I believe my dough was extraordinarily sticky this time; usually it's not as bad as that. The dough rolling frame did a wonderful job. The mold stamping punch worked absolutely GREAT! Unfortunately I fucked up with the dosage of the food coloring, and I left them in the oven a little too long; I did not consider their thickness (our regular cookies are about 1.5 to 2 times as thick). But all in all I call this a mission accomplished!

_DSC0001r=2048w.jpg_DSC0002r=2048w.jpg_DSC0004r=2048w.jpg_DSC0005r=2048w.jpg_DSC0008r=2048w.jpg_DSC0011r=2048w.jpg_DSC0013r=2048w.jpg
_DSC0017r=2048w.jpg

_DSC0019r=2048w.jpg

_DSC0020r=2048w.jpg

_DSC0022r=2048w.jpg_DSC0023r=2048w.jpg_DSC0024r=2048w.jpg
_DSC0032r=2048w.jpg

_DSC0029r=2048w.jpg

_DSC0030r=2048w.jpg
 
Hahahahaha I’ve been following along, fairly confused since im the least technical person ever. But they came onto great, Paulson cookies lol. nice job.
 
Things to test in a different way next time...
- Roll dough thicker, maybe even all the way to 6mm. Probably reduces warping while baking and potentially makes it easier to handle the punched parts.
- Use lots more flour on the dough to make it less sticky. Should also increase the chances of the pushout parts actually working.
- Use much less red and blue food coloring for mixing if target color is purple and not black :banghead:
- Maybe make a test mold stamp that embosses deeper than the current 1mm. Should leave some more of it visible after baking and probably is generally the better choice if I go with 6mm thick cookies.

Initially I had planned to even calculate the exact amount of food coloring I would need, in addition to what I already did - calculating the amount of dough I'd need for each color, given a particular design. Even looked up some fitting color model / color mixing algorithms that would come close to real world pigment mixing, something like Kubelka-Munk. But I don't have a scale that can measure fractions of a gram, and for all the other colors but purple mixing was pretty straightforward, so I'll drop that idea.

Next time though I think I'll just evenly split the dough in as many parts as colors I want to use, and then just randomly pick colors for each chip's body and spots, rather than producing tons of cookies of the same design. Some more variety!

I'll make a couple more spot punches for the next run. Thinking of 6A14, 4D14, maybe 3TA14 or 3D38. I could even try 2V2W but I'd definitely need to create separate punches for the spots for that one. Now that I have all the base components designed already, creating additional variations is relatively easy and fast. As long as it doesn't change the punch diameter that is... would have to rework a ton of feature sketches to make changing the diameter work properly.
 
Last edited:
Was thinking about that already. Wafers might be perfectly suited for that, but I believe printers that can handle edible ink (and edible ink itself) of acceptable quality are pretty expensive.

But anyway I still have some R&D work to do on how to get the cookies themselves right. Also noticed some of the edge spots of my first attempt fell out; I will have to improve on dough adhesion, maybe with glair, at least for spots like 3Moon. Other spot types are perhaps more robust.
 
Have you tried to made a full fat roll including the spots, then slice each cookie before press, instead to made them one by one ?

I mean, to made this

242034


you start with this

242035


(i did not found a round example, but you'll get the idea)


by rolling the spots together with the main body they will stick way better,
 
Have you tried to made a full fat roll including the spots, then slice each cookie before press, instead to made them one by one ?
(i did not found a round example, but you'll get the idea)
by rolling the spots together with the main body they will stick way better,
I was briefly considering this way of manufacturing when I started out designing the punches, but I believe it won't work together with mold pressing because the roll would get substantially deformed while cutting it into slices. For the mold stamp to work as intended, the cookie dough needs to fit it very well, else it'll just produce a lot of waste material.

Any info when CSQ mold is installed and running. ;) Love this thread so far.
I do have plans to make a couple more mold stamp designs later on.
For starters, while I'm still doing more R&D on the other components, I'll keep working with the THC one though - I simply like its appearance best.
 
Last edited:
Sneak peek...

I've completed the necessary groundwork on the part designs to make them ready for arbitrary punch diameters, and added 43mm versions.

Currently working on implementing all the remaining Paulson spot types. I have Moon and HC already; still missing V, W, 12, 38/D38, 14/D14/TA14, TA316, 18/D18/DS18/T18/TS18*. But this really is nothing more than routine work at this point. It's really just typing shit into gigantic tables and wiring things that are already there correctly together for each spot configuration.

Adding or changing a punch diameter is literally changing one number in a table now. Adding new variants of an already existing spot type is the same.

I'm proud I finally worked out how this stuff works in Inventor. I am also happy to say that I believe I have finally figured out how to not get my feature sketches overconstrained automatically. That was the last big portion of Inventor I was really fighting with.

After all the spot types are implemented, I'll make a couple more mold designs, and then start designing dedicated spot punches that are more efficient on the small dough plates. Going to be a three-part design again (punch/clip/pushout).

* I'm just doing the W and 1/8" spot types for the laughs - not expecting these to work with the sticky butter cookie dough I have. Might work with other kinds of dough, who knows.

242687


242686
 

Create an account or login to comment

You must be a member in order to leave a comment

Create account

Create an account and join our community. It's easy!

Log in

Already have an account? Log in here.

Back
Top Bottom