Ok. Assuming you haven’t built the table already. Let’s move from Materials onto technique.
Tips
1- use a router for cuts. The bit width allows consistent spacing for wrapping upholstery and felt (and with the felt, stapling along the cut edge so it’s not showing underneath the table). Also a router is the easiest way to get a smooth professional looking arc cut.
2- use T-nuts to attach the rail. This will elevate this from a DIY hobbled mess to a well crafted and serviceable table. T-nuts are my standard “tell” on build quality. Kinda like when shopping for furniture you look to see how the drawers are joined...
3- upholstery. Take ur time. It’s frustrating at first. But you CAN get out those wrinkles if you follow a smart plan from the start and don’t rush. Lotsa staples.
Best of luck. Take lots of pics for us.
")
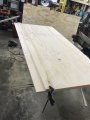
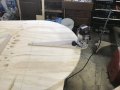
Router with jig
View attachment 266902
T-nut spacing in a rail
View attachment 266903
T-nut assembly
View attachment 266904View attachment 266905