beaver
Two Pair
I've started work on a table build for a good friend of mine. This is one of the first times I've remembered to take some pictures at every step of the way so I thought I would share the build progress here. You can never have too many build threads!
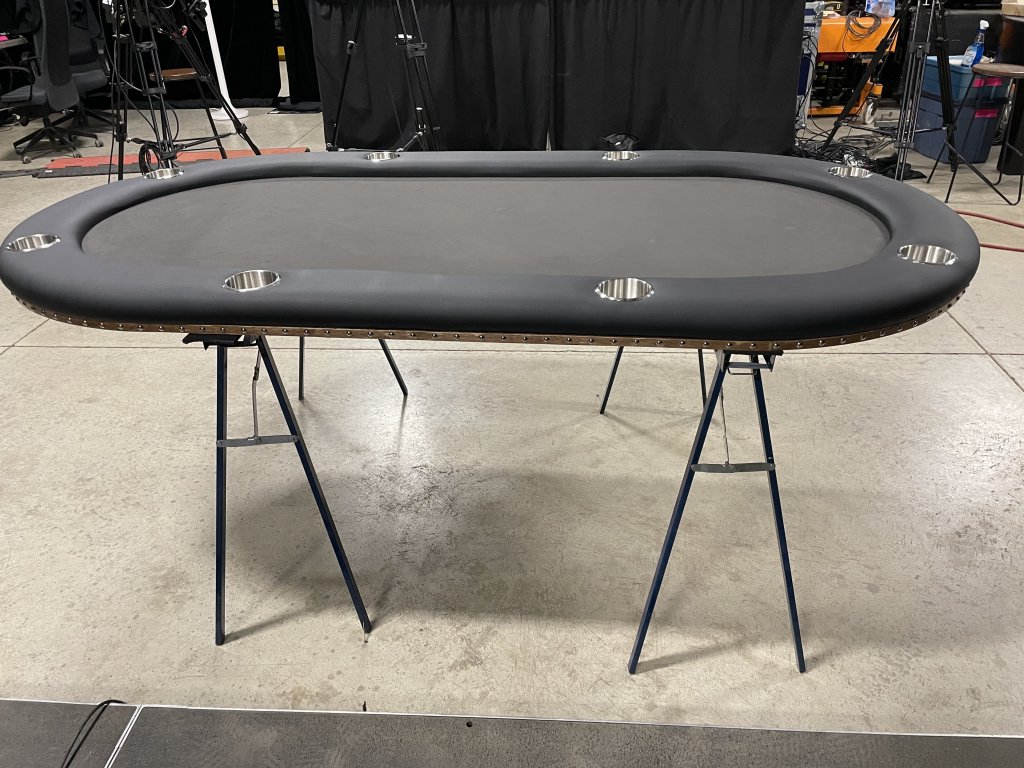
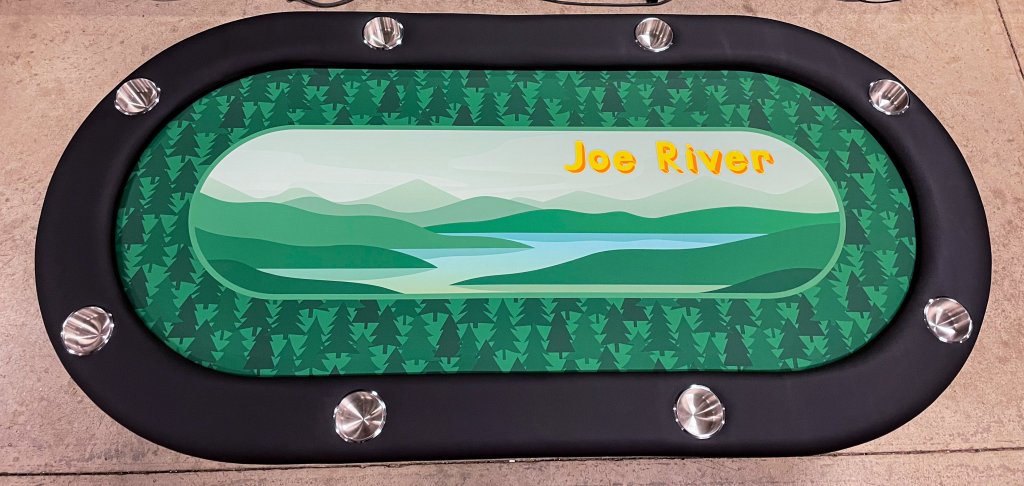
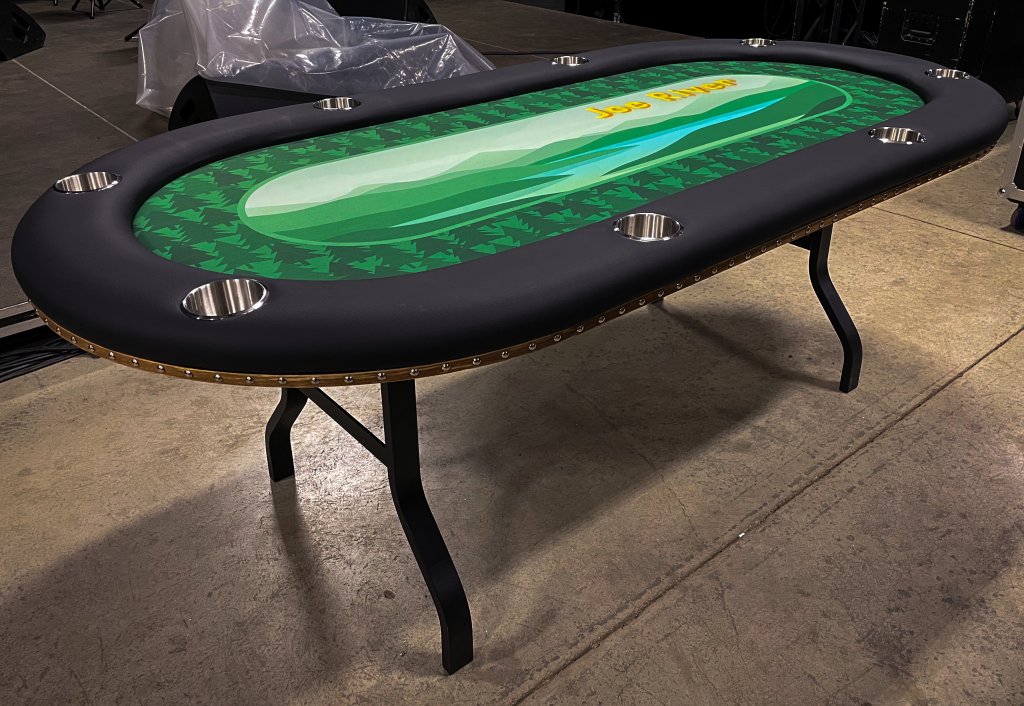
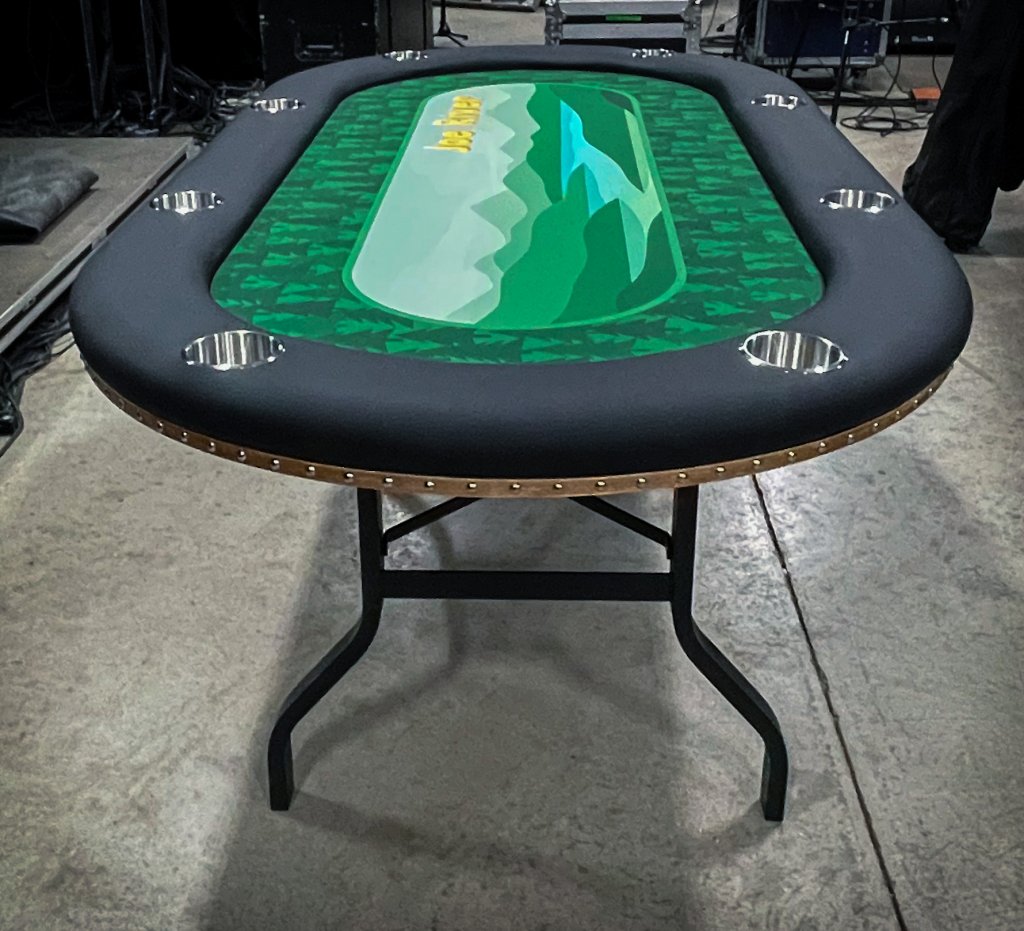
This table is going to be an 8-player 84x42". Custom felt, Gorilla legs, exposed base sheet with decorative nails, and jumbo cupholders in the rail (this is the way).
3 sheets of 3/4" ply will be used.
Sheet 1: Rail
Sheet 2: Rail lip and Playing Surface
Sheet 3: Exposed base sheet
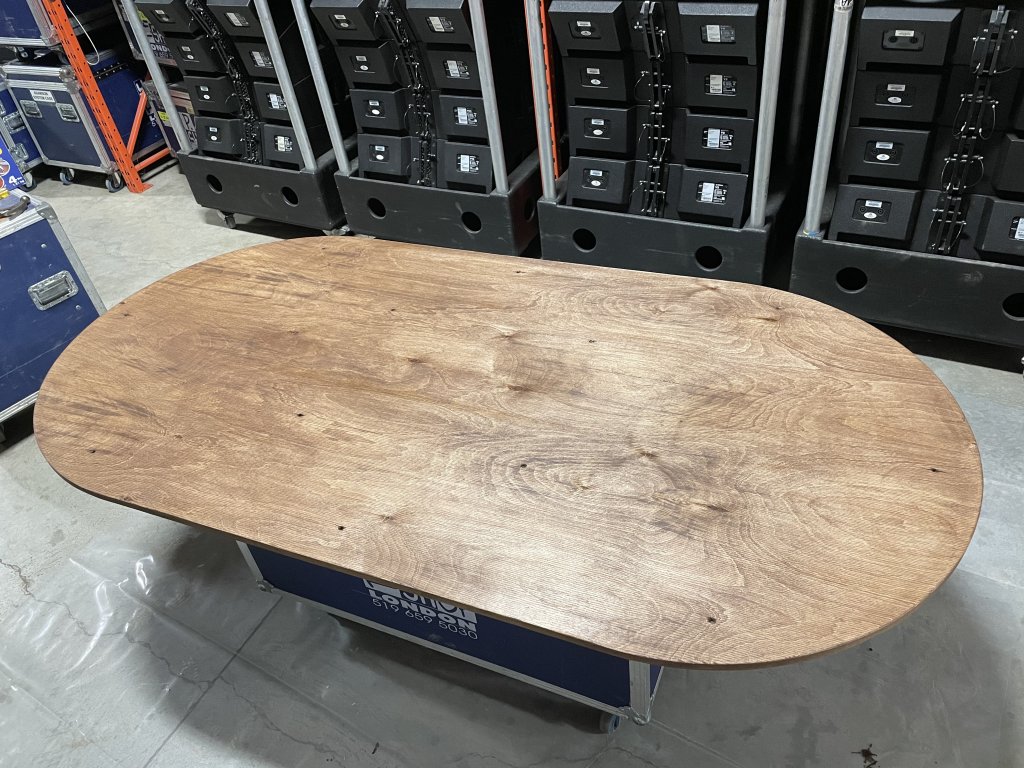
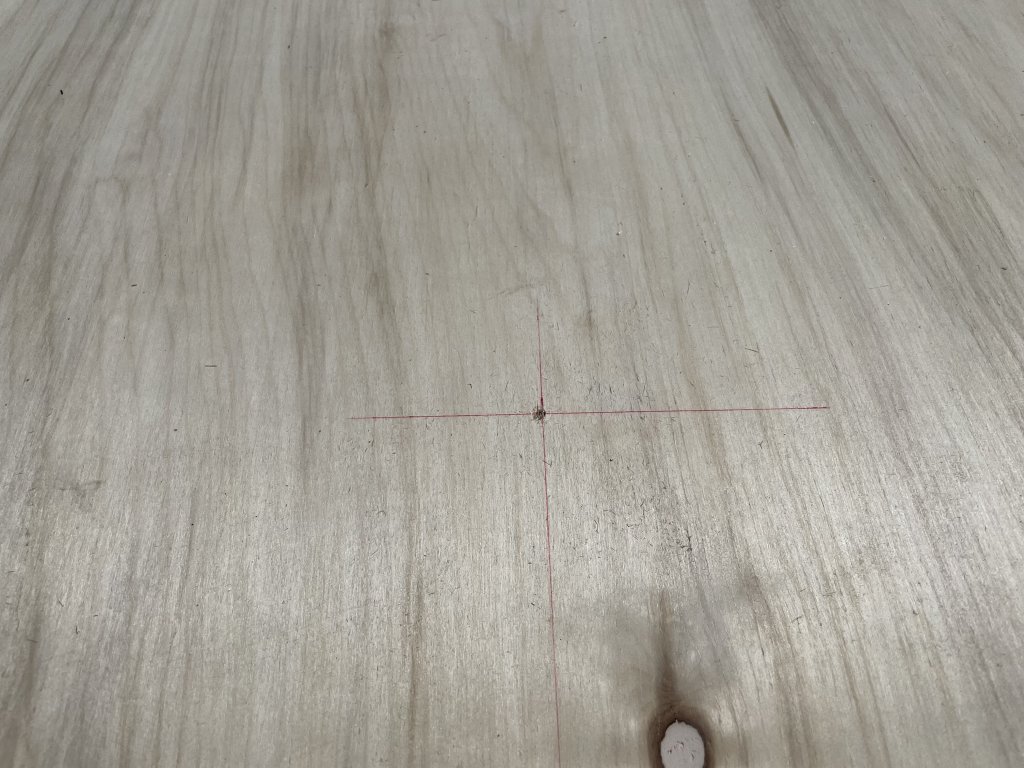
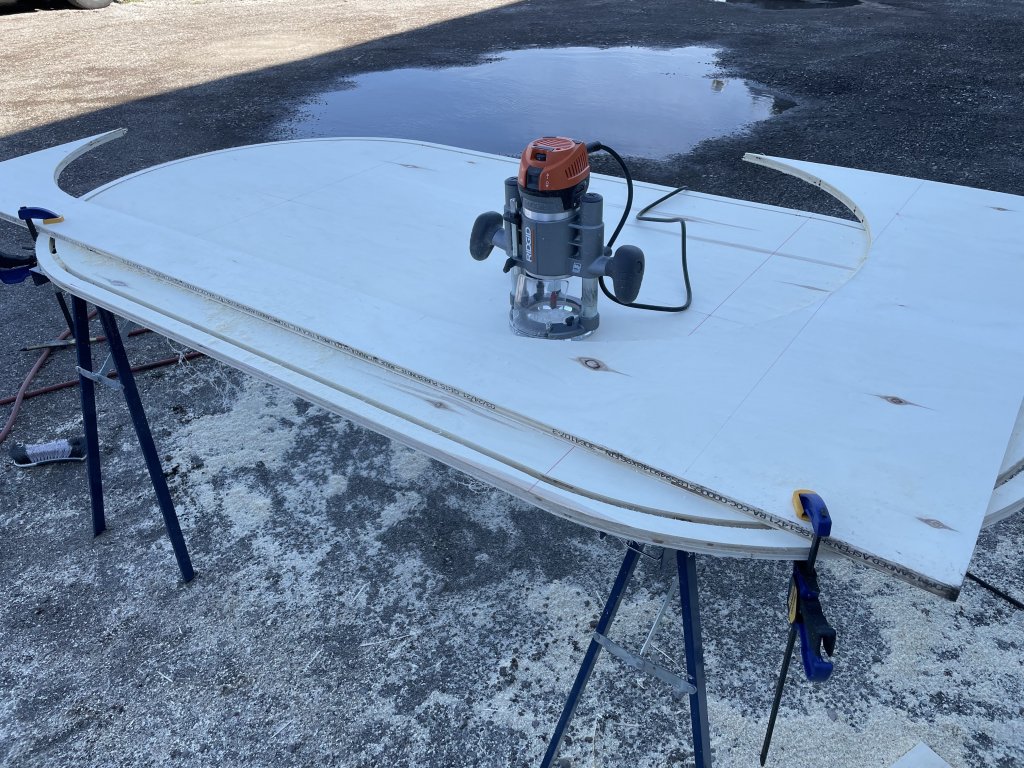
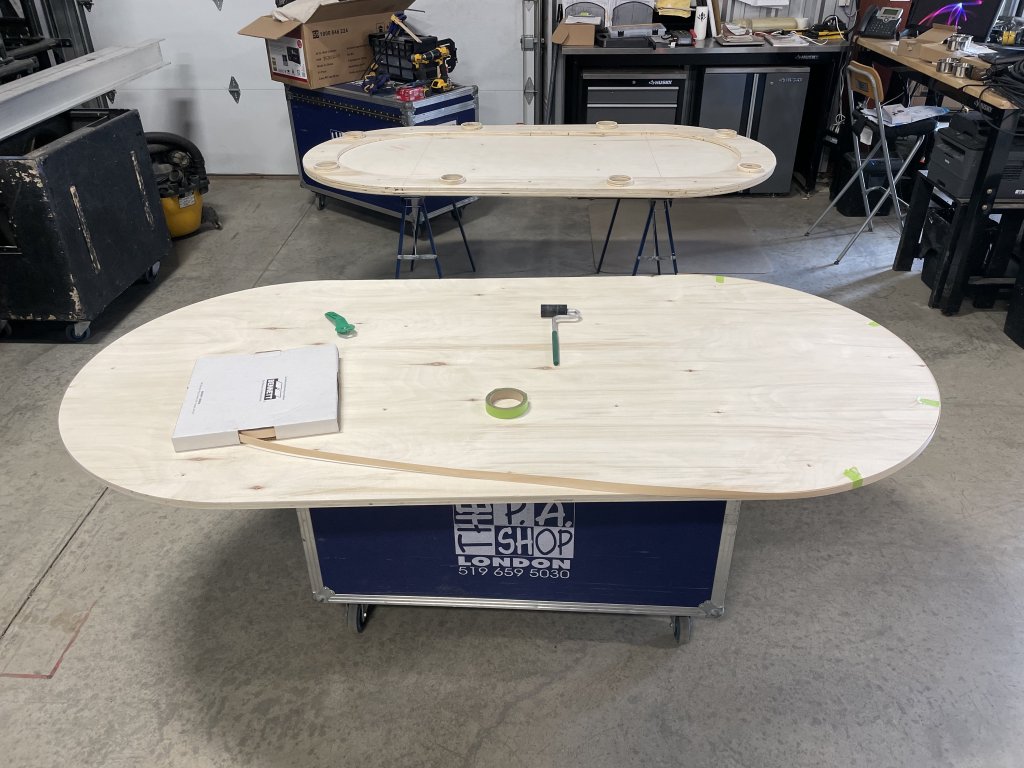
All three sheets will first be cut into 84x42" ovals. I start by marking out the centre points of each of the arcs.
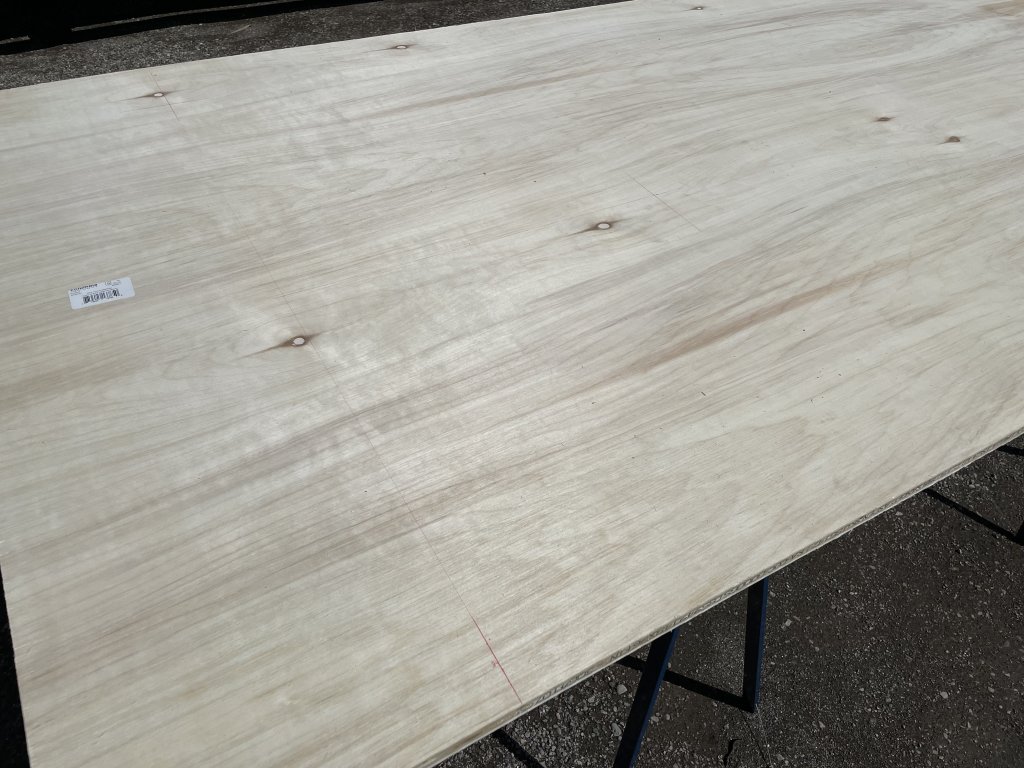
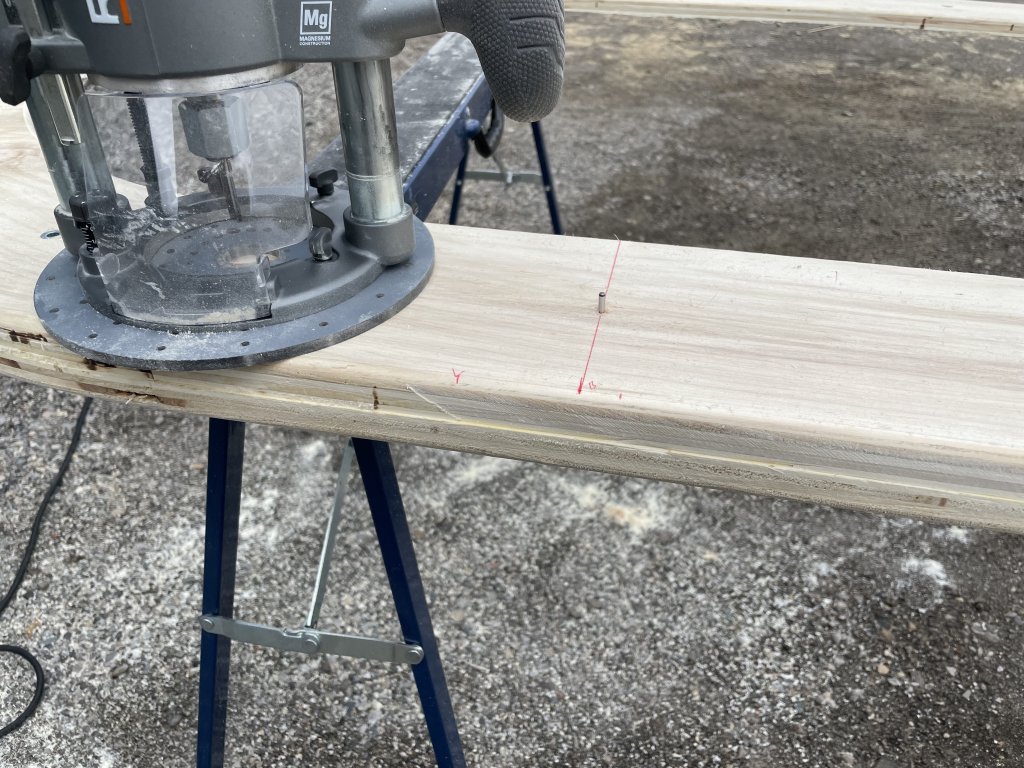
It's important to mark the point where the arcs will meet the straight edges. That way you know where to stop the router when cutting the arc.
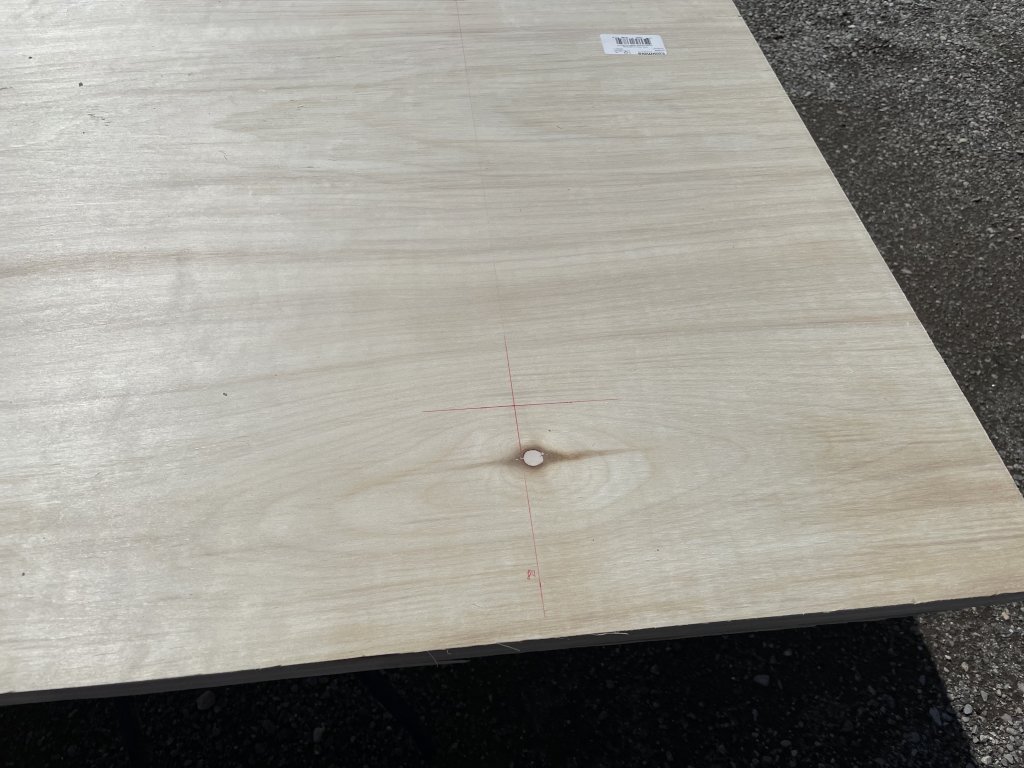
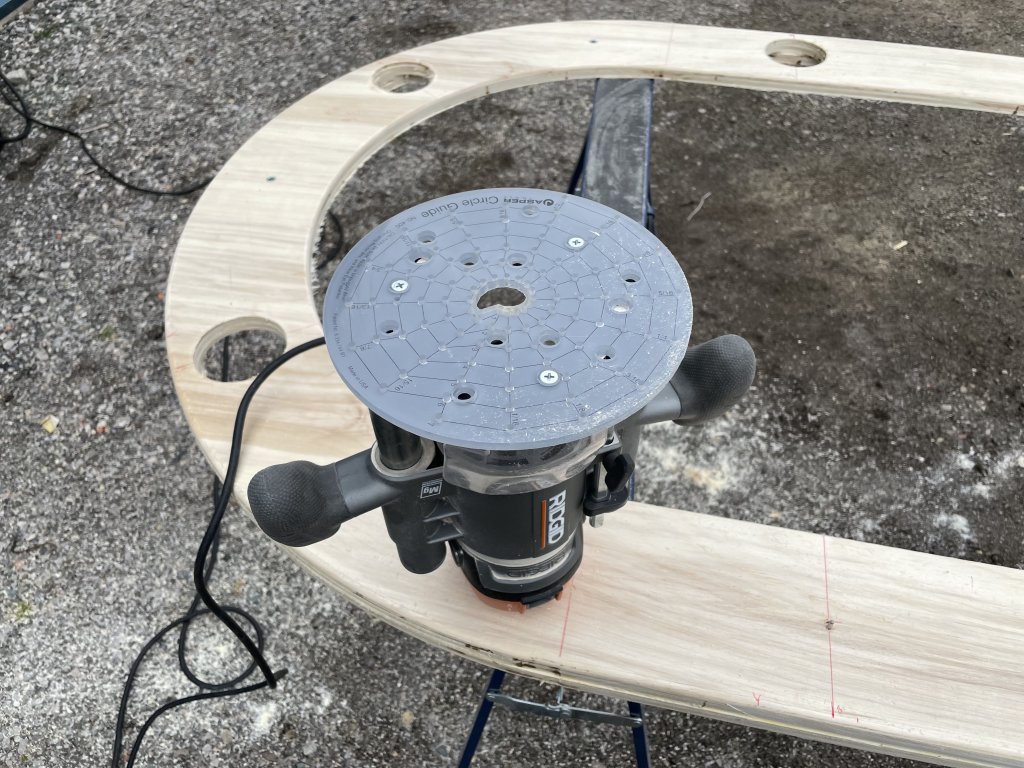
Each centre point gets a 1/8" hole drilled which will fit the pin for my Jasper circle jig.
I use the Jasper Model 300 circle jig and I can't recommend it enough. A circle jig is easy enough to DIY, but this thing isn't that expensive and makes things very repeatable and accurate.
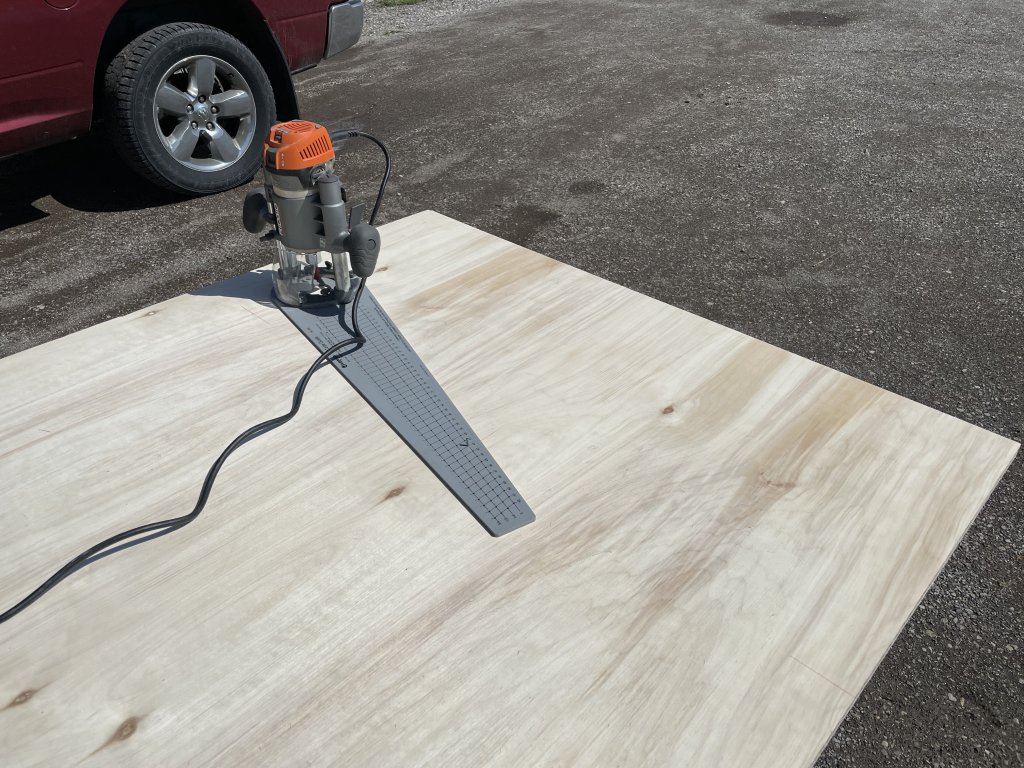
I do all my cuts in 3 passes, keeps it easier on the router and bit. Here's the first arc after the second pass.
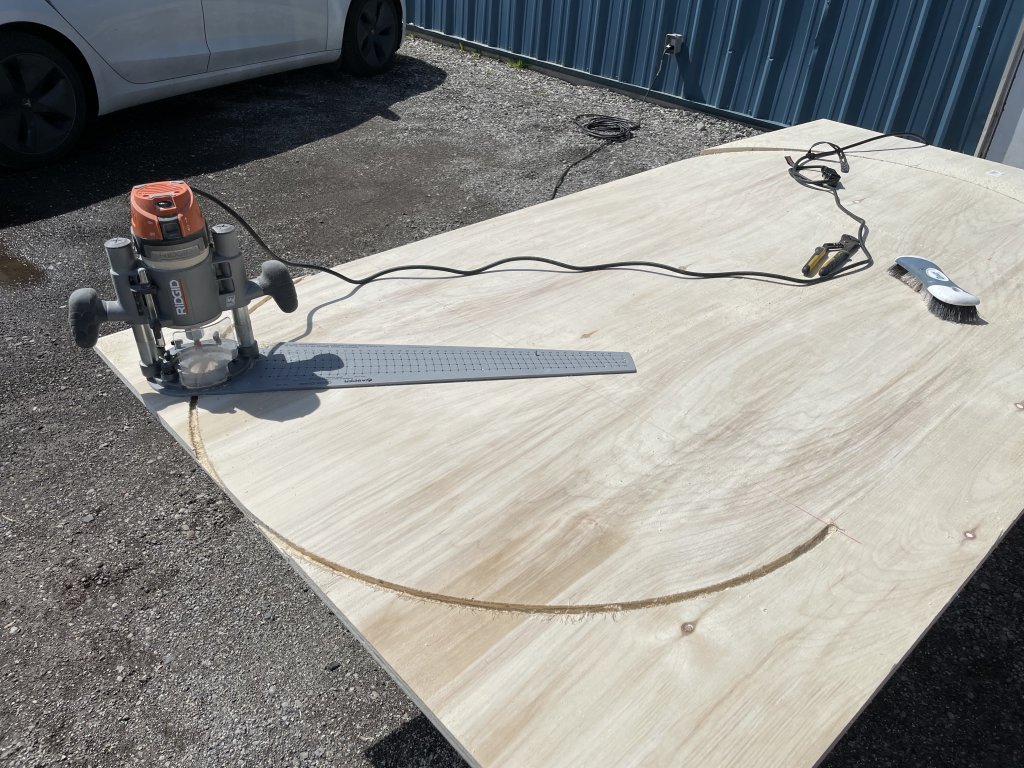
For the straight edges I used the factory edge of the plywood and run the router along it. In the future I would like to get a proper straight edge jig.
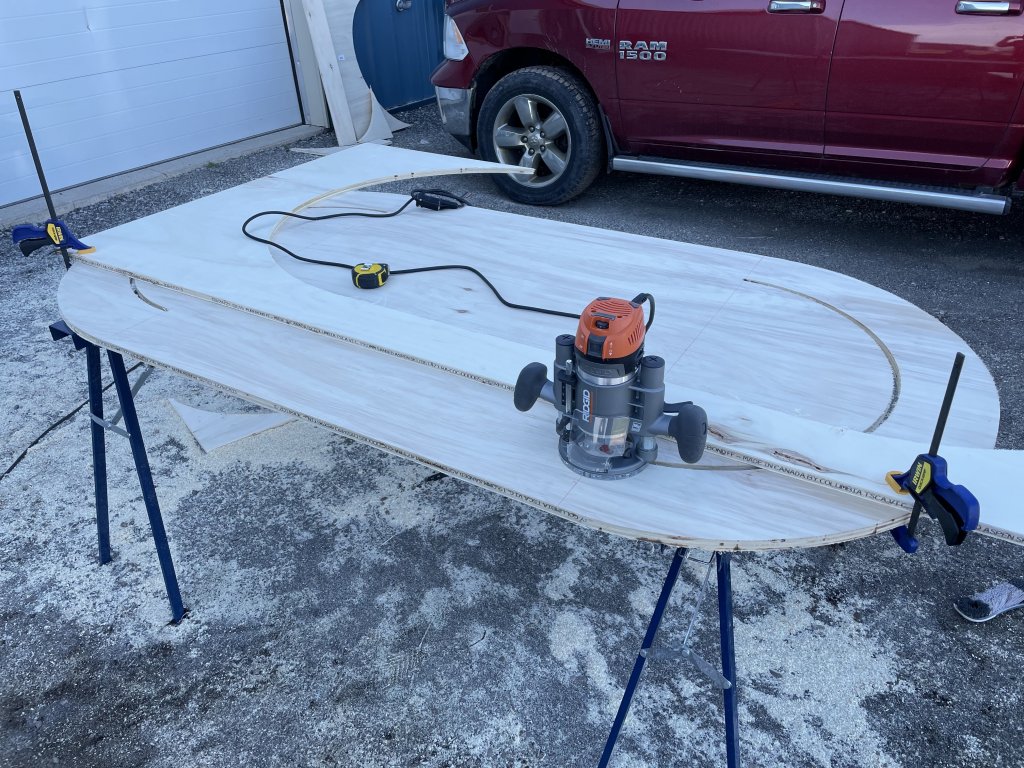
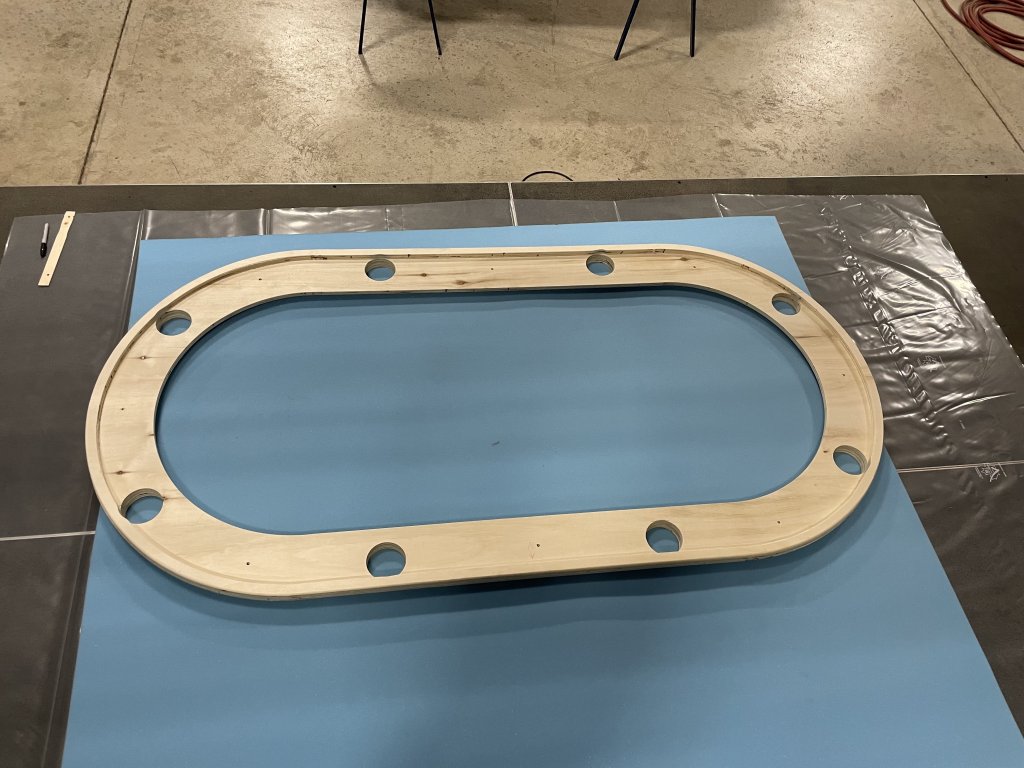
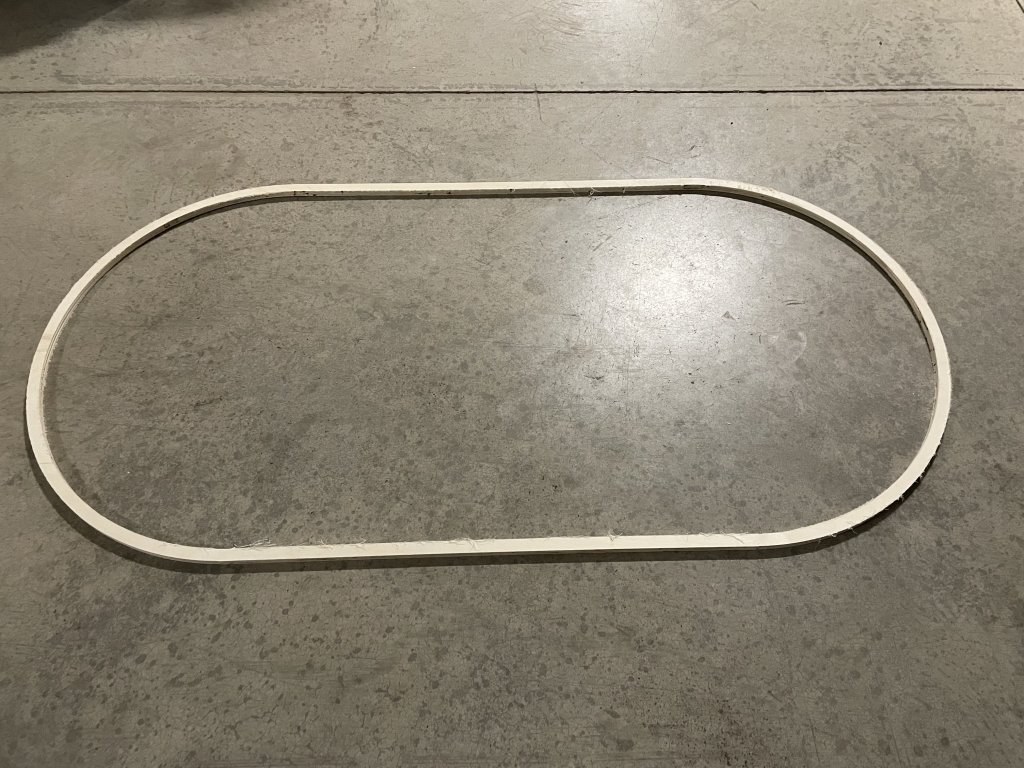
With all 3 sheets cut to the overall outer dimension, it's time to make the inner cut of the rail. This will be a 6" rail.

Here's both of the inner arcs cut. You can see that I stop the cut when the centre of the bit is at the centre line of the arc.
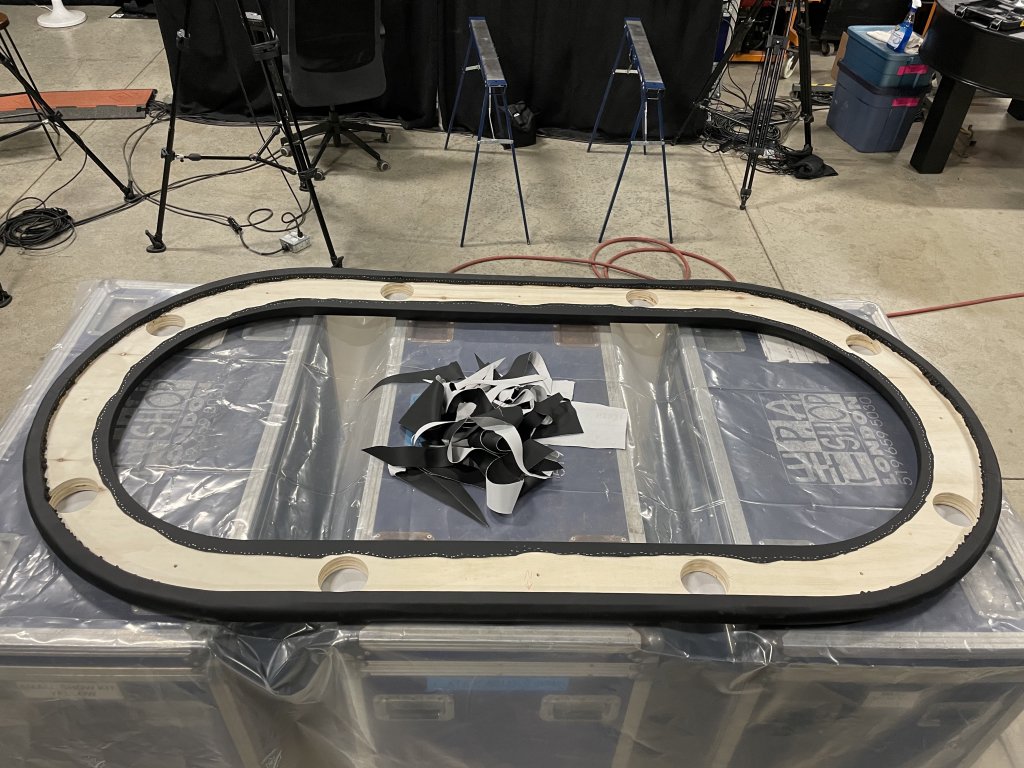
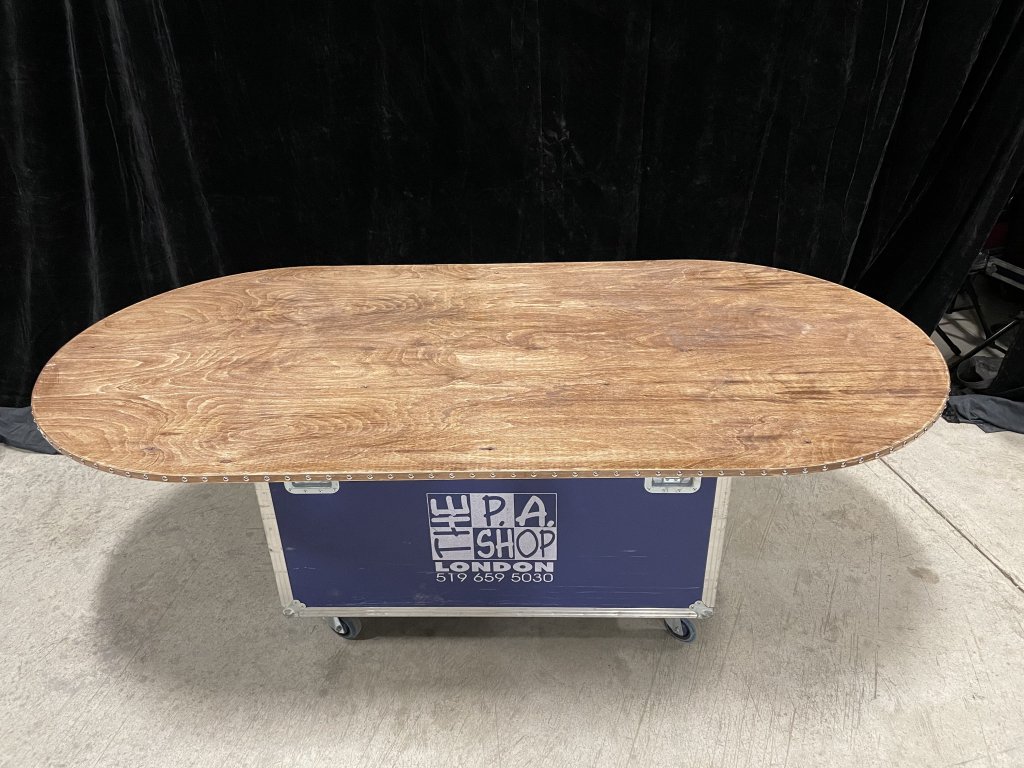
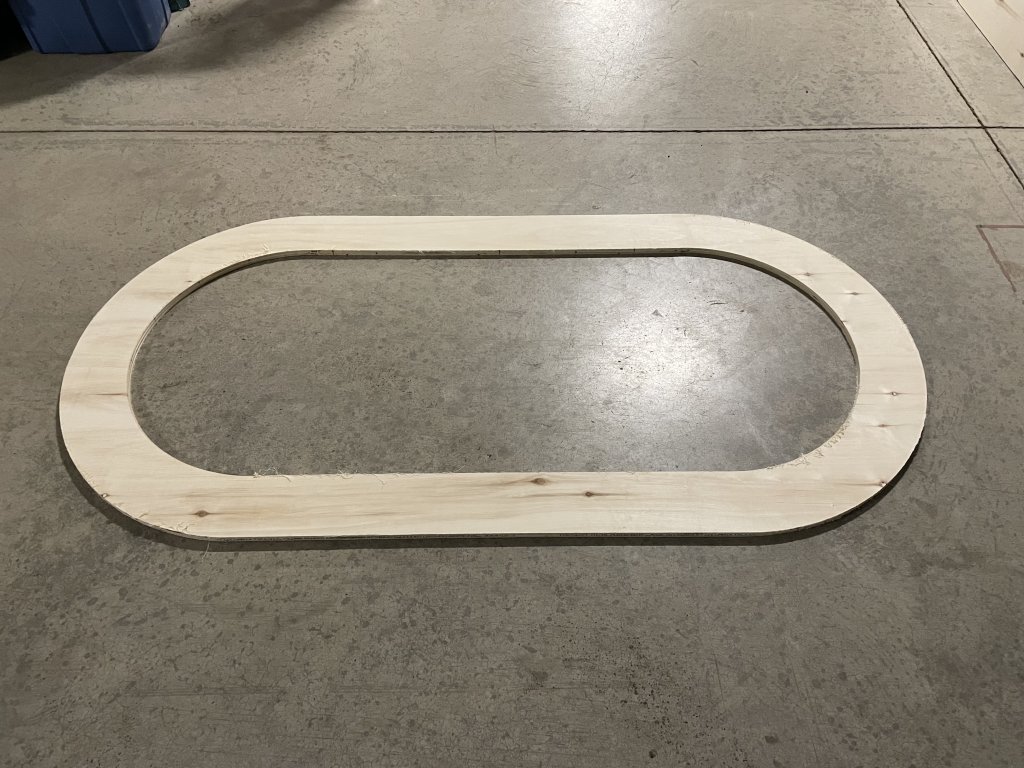
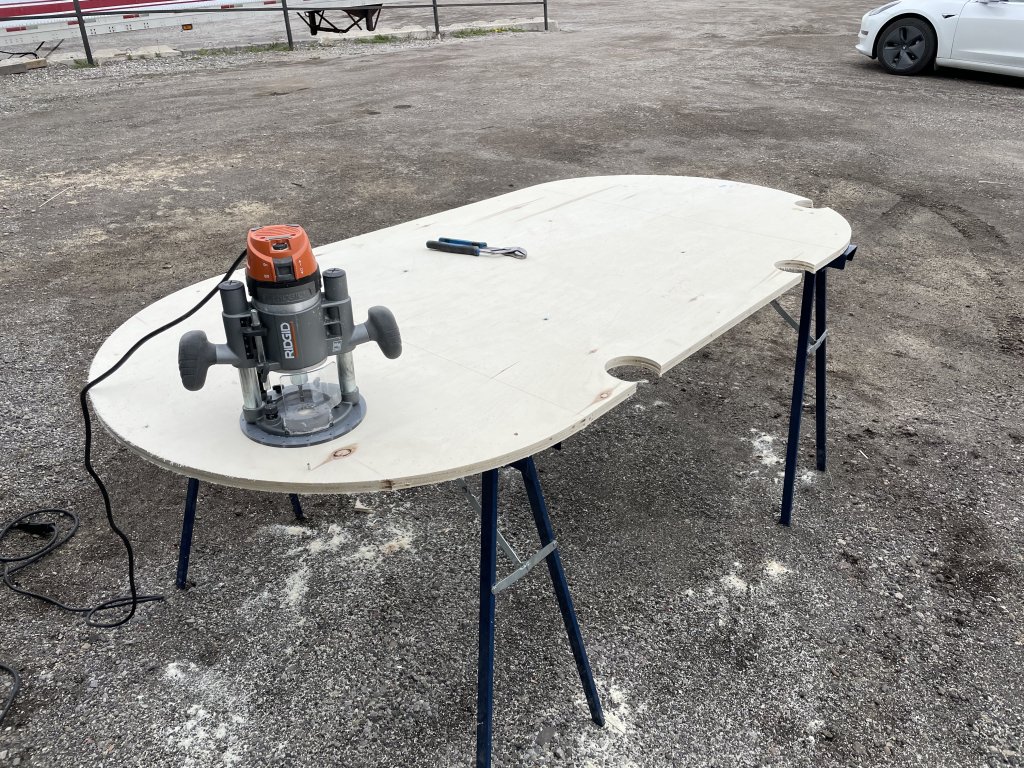
On a typical basic build, the centre piece of wood remaining after the rail is cut is added to the bottom of the table as extra support. Since this build is going to have a full sized exposed base sheet, it's not required. Here's the rail completely cut.
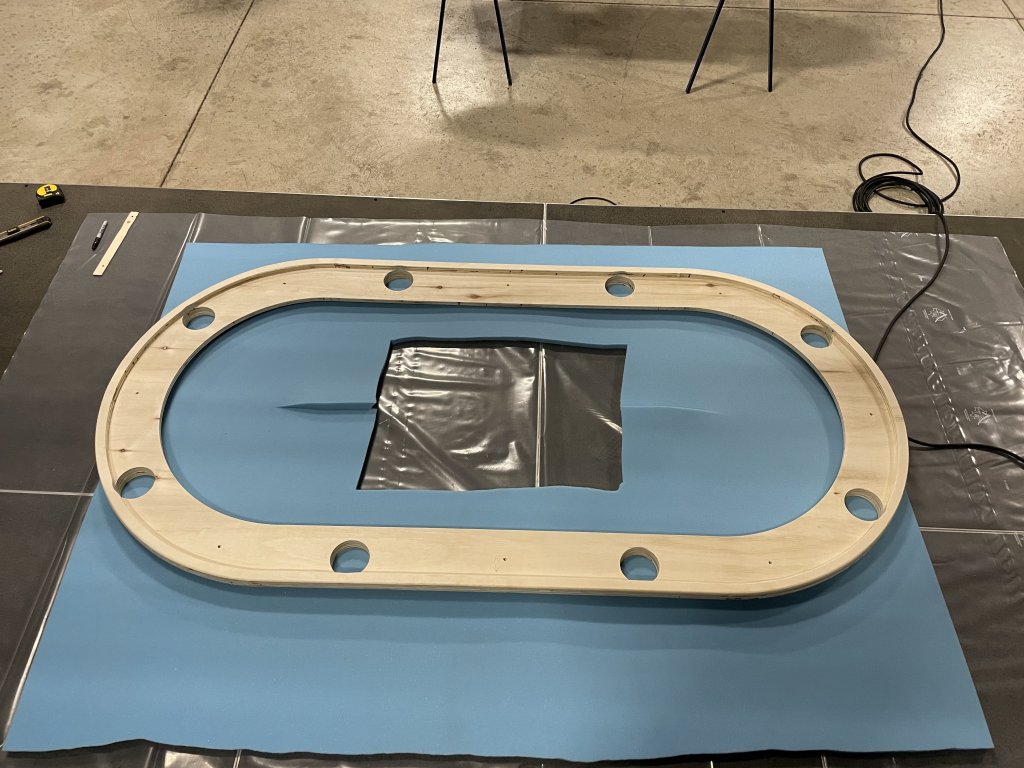
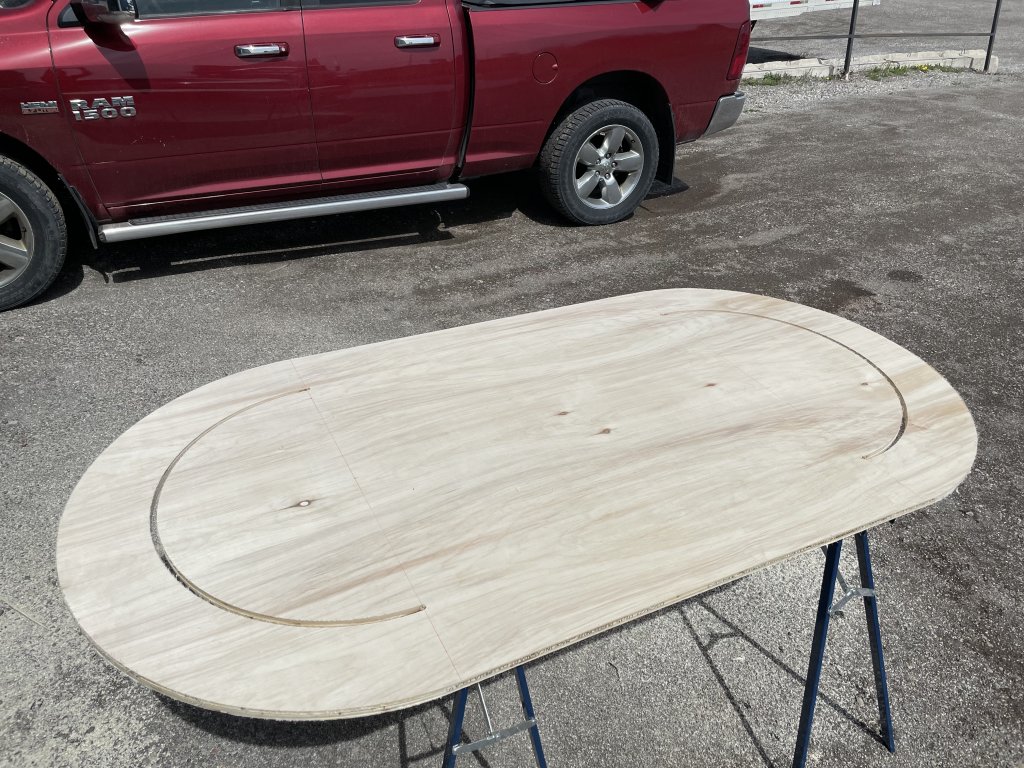
Sheet 2 is the same process, but instead of a 6" rail, its a 1" lip.
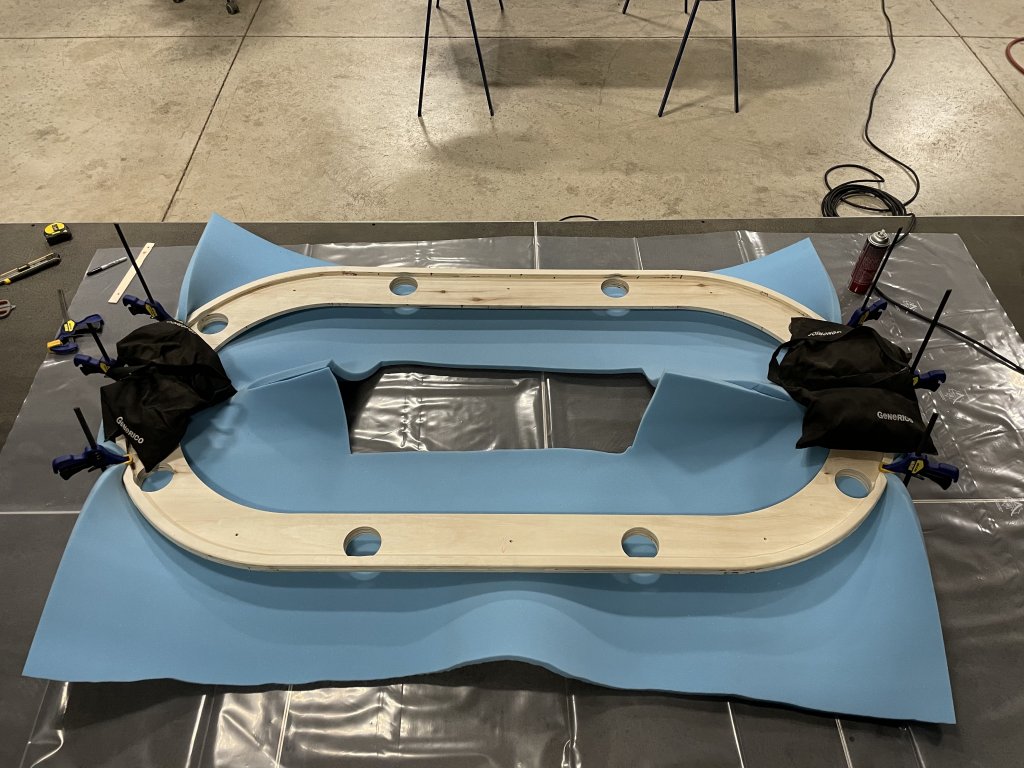
It then gets glued to the underside of the rail.

Whats left in the centre of sheet 2 after the rail lip is removed will be the playing surface.
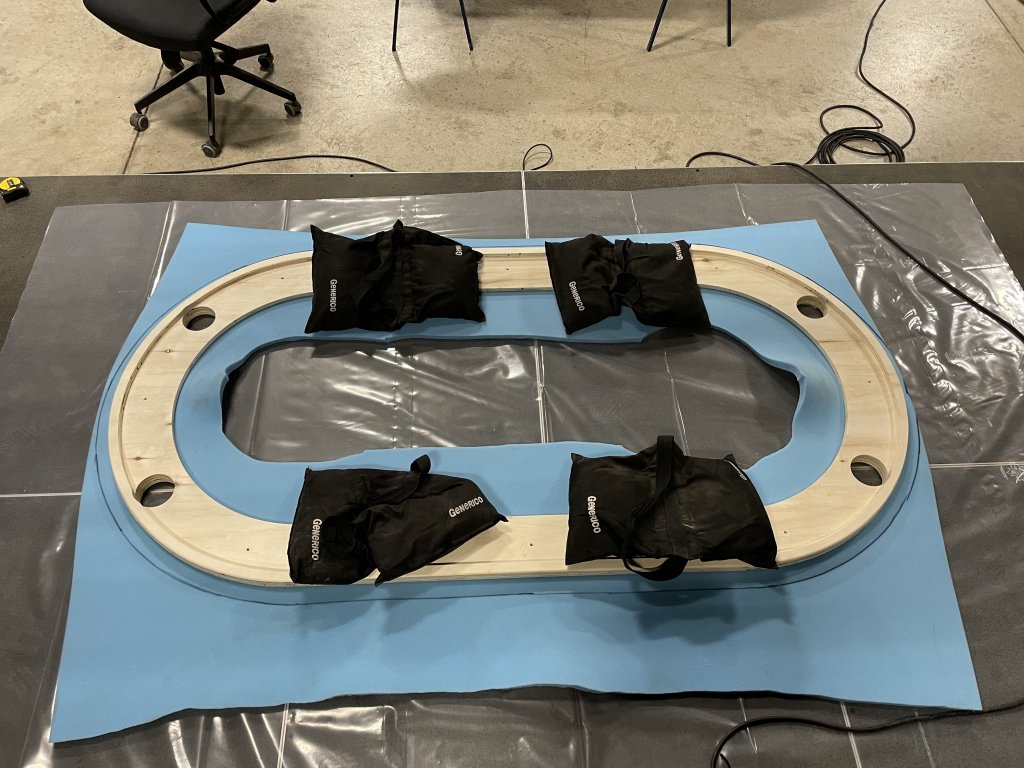
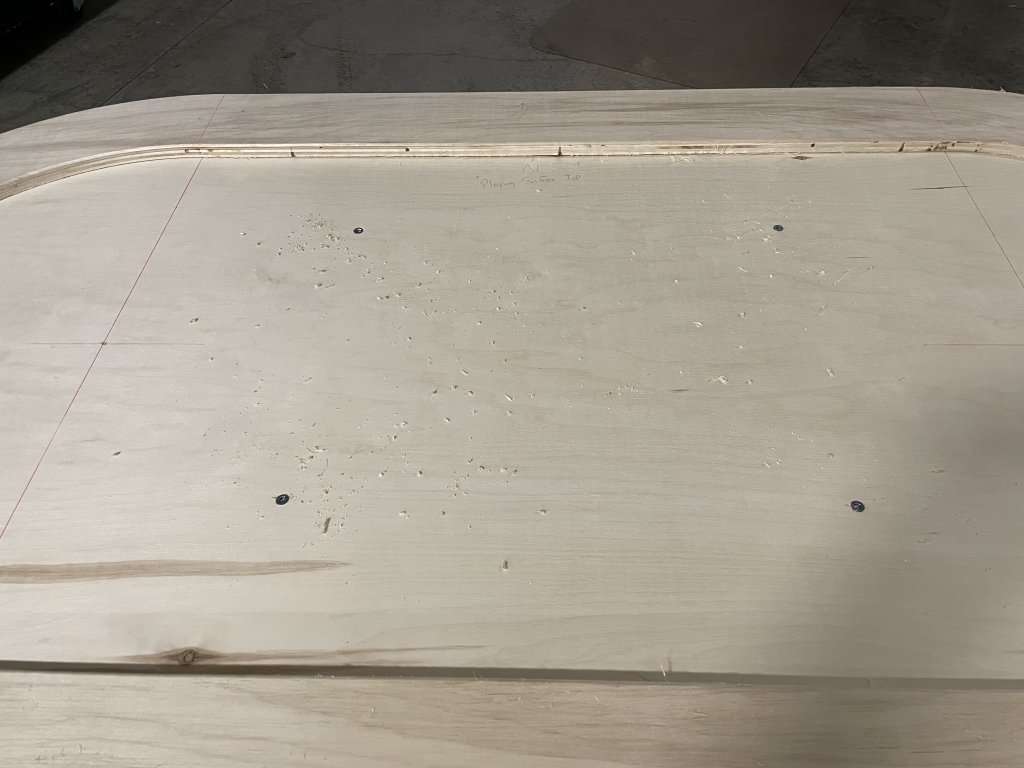
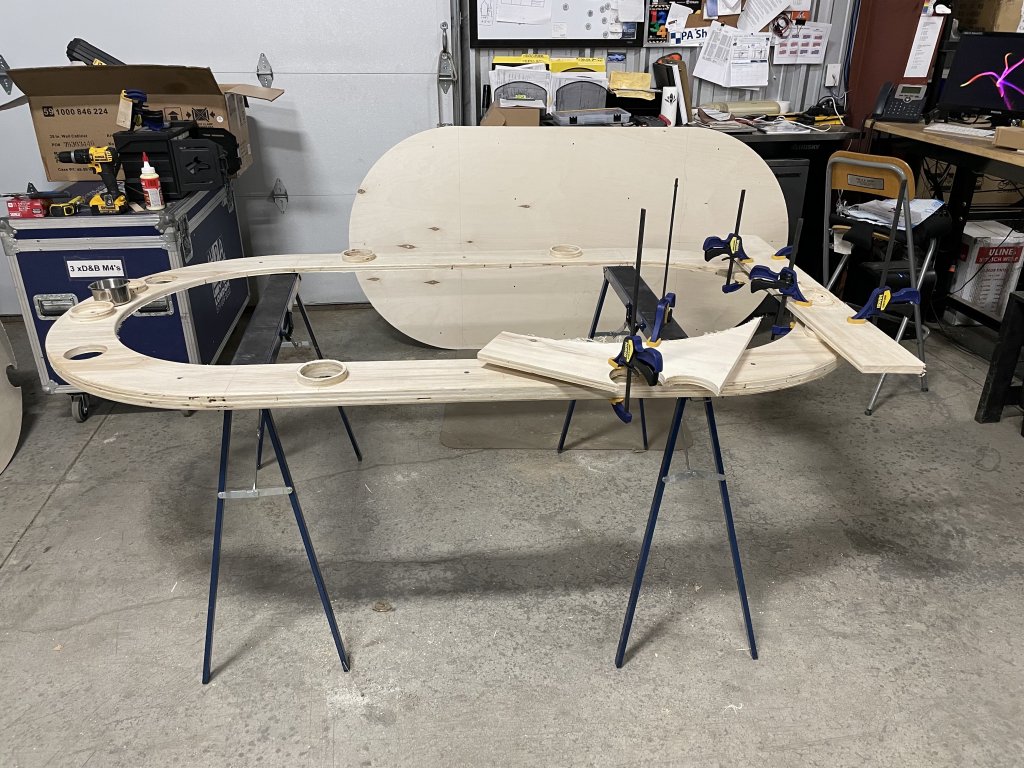
Now it's time to assemble the 3 sheets together. Make sure everything is lined up and square, then throw a few clamps on to hold it in place. I'm using 4 insert flanges in the playing area to hold it down to the base sheet. Drill the holes for them, screw in the insert flanges and install the bolts from under the base sheet to keep the playing surface in place.
It's time now to mark out the locations of the cupholders. I didn't get a picture of this, but I use a flexible tape measure wrapped around the outside of the rail, and some strips of tape to hold it in place. Divide this circumference measurement by 8 to get the distance between cupholders. I put a little mark at the outside of the rail at the desired measurement, then use a straight edge placed from that mark to the centre point of the arcs, then draw a line all the way across the rail. Once I've determined the location of all the cupholders, I drill a hole between each cupholder for more insert flanges. The bolts will come up through the base sheet, through the playing surface, and into the insert flanges in the top of the rail, holding the entire table together.
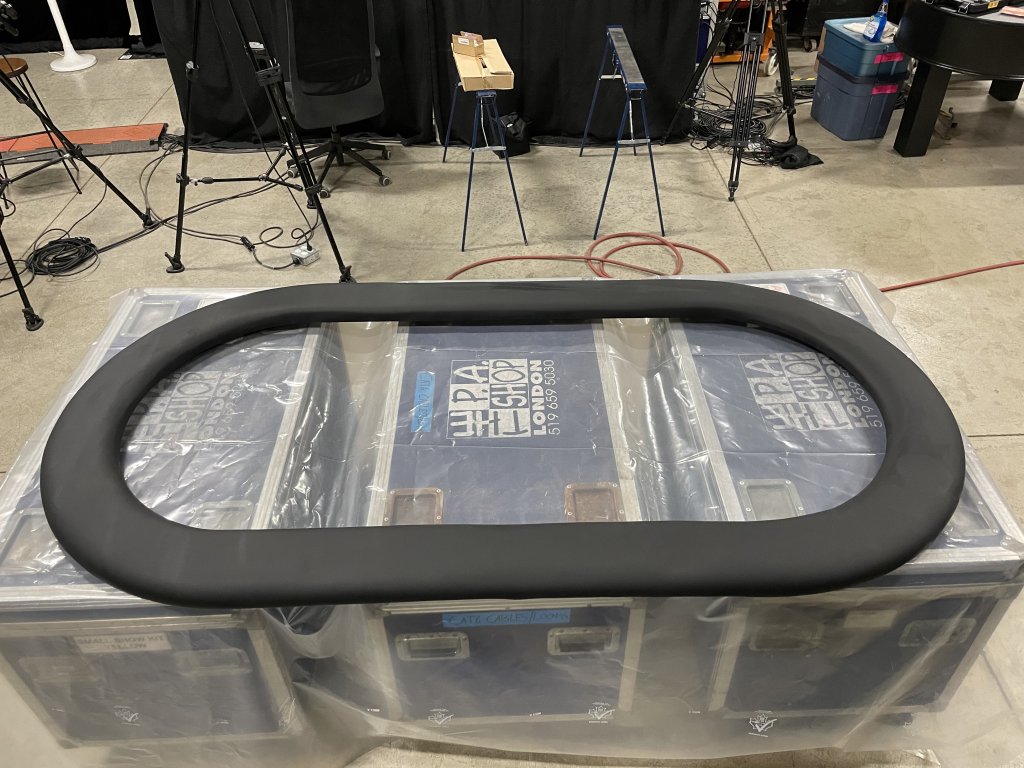
Back to the cupholders now. Measure in 3 inches from the outside of the rail to find the centre point, then drill a hole for the circle jig centre peg. Make sure the hole goes down through the playing surface sheet as well. You can see in this picture as well the rounded edges on the rail. I roundover the inside and outside of the top of the rail, and the outside of the bottom of the rail lip.

For these smaller holes I use the Jasper Model 400 circle jig.
Same process as the larger one. Insert the centre peg into the hole, and put the jig on at the right diameter marking.
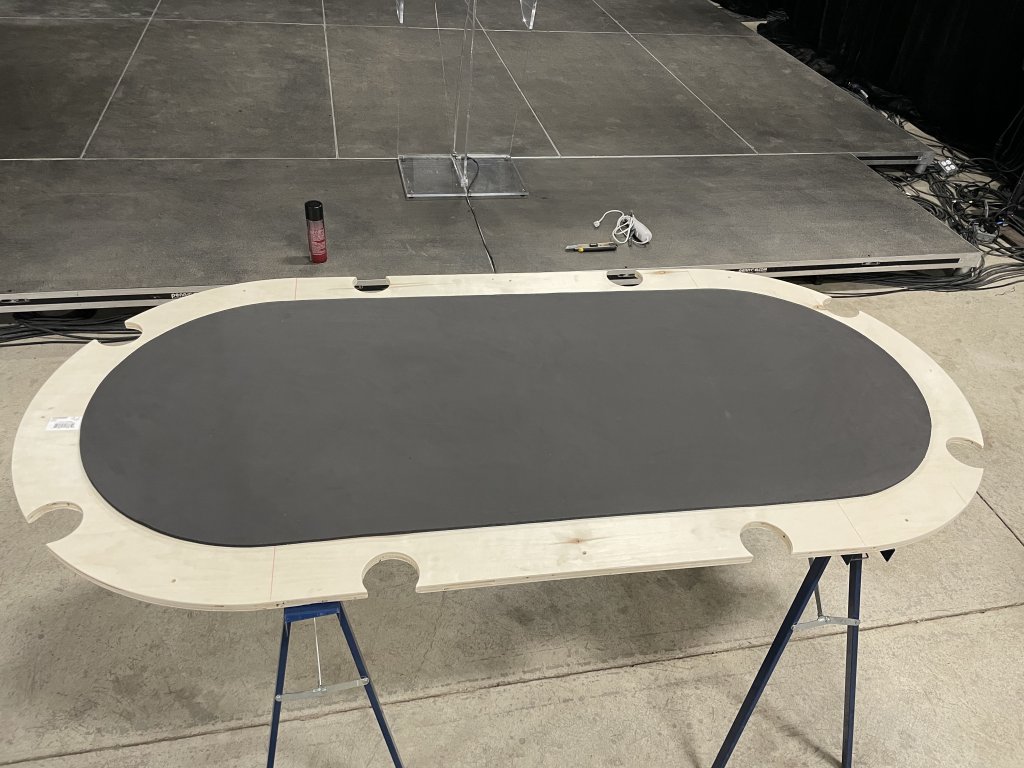
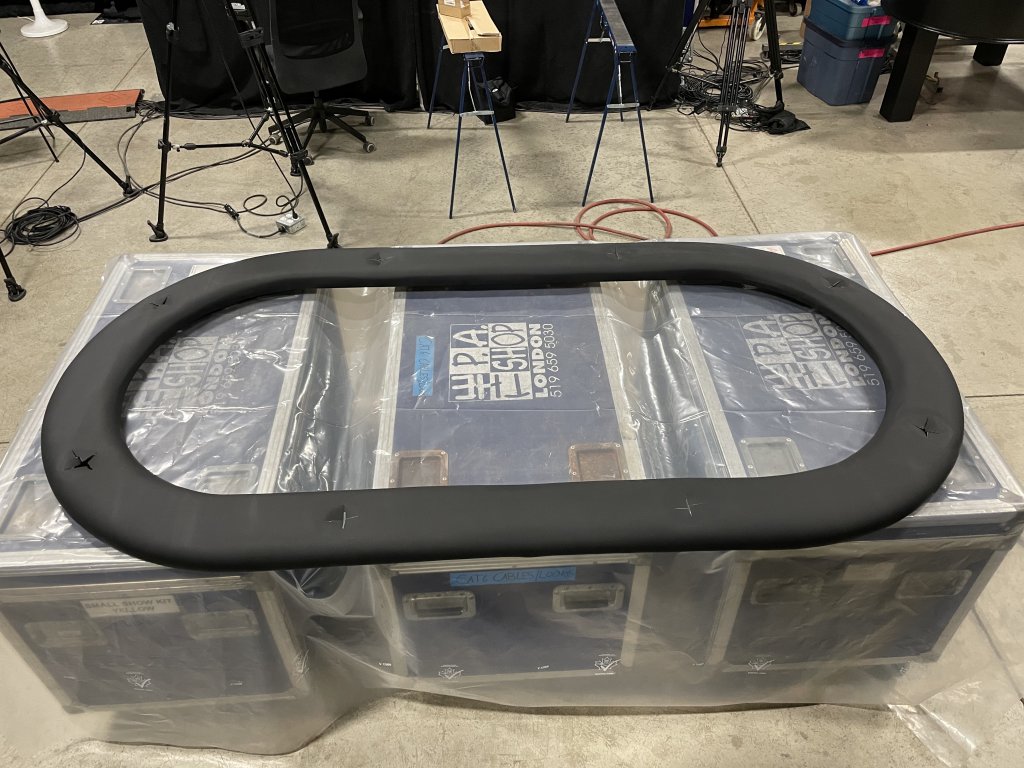
Once all 8 holes are cut in the rail, repeat the process in the playing surface.
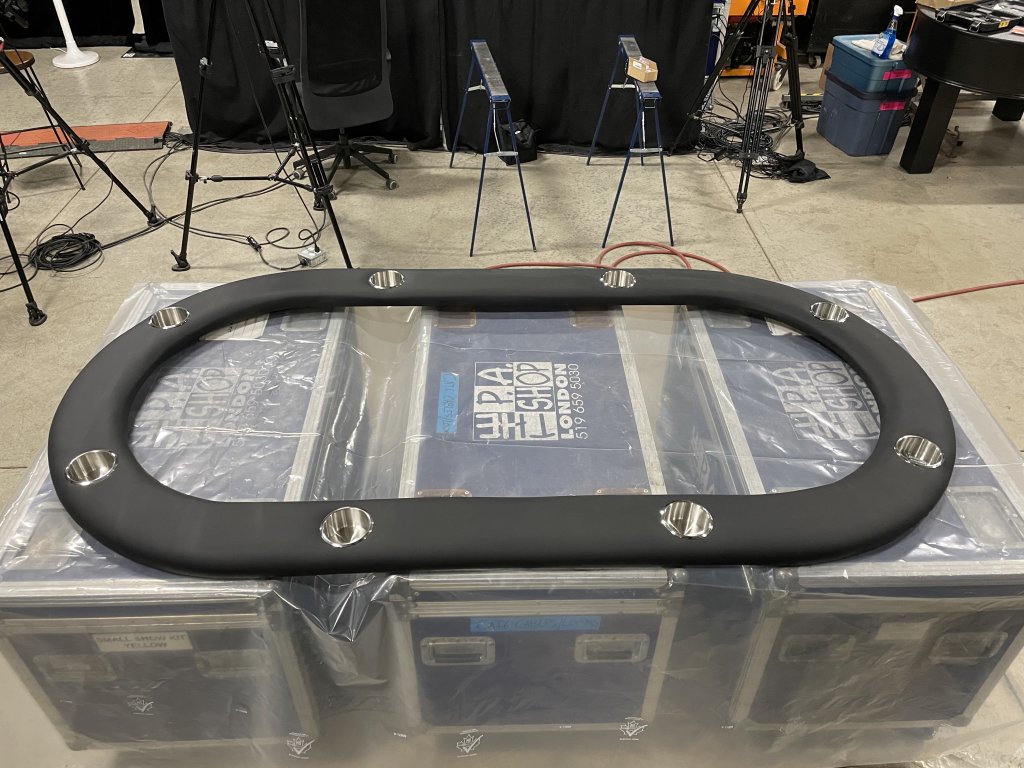
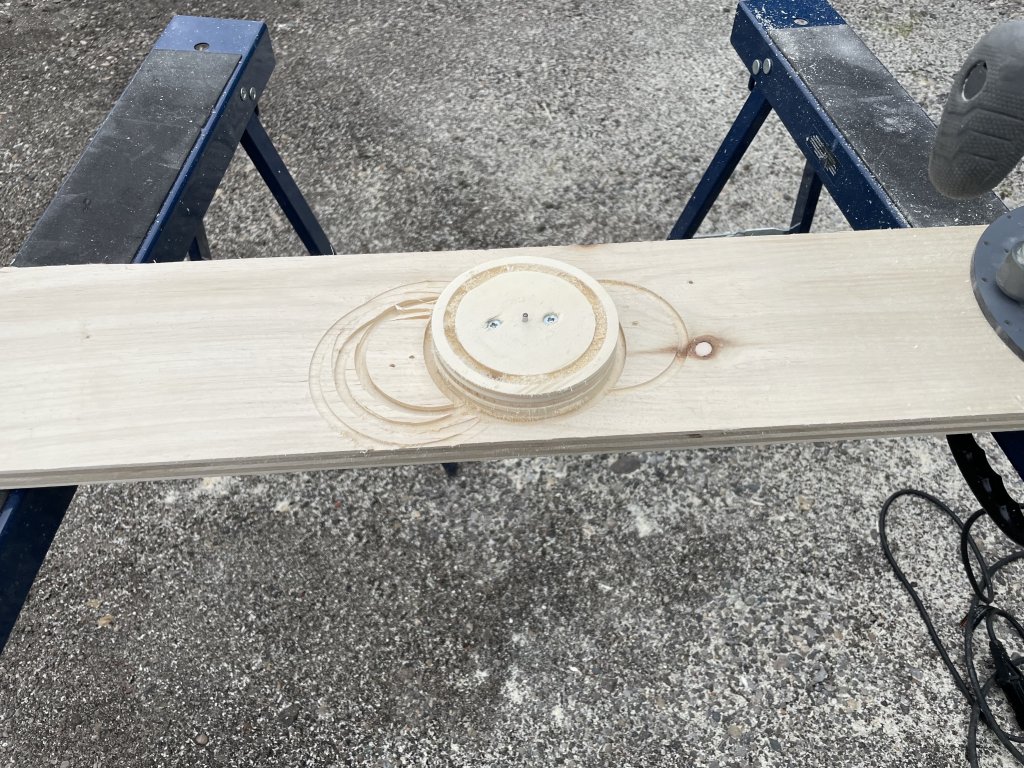
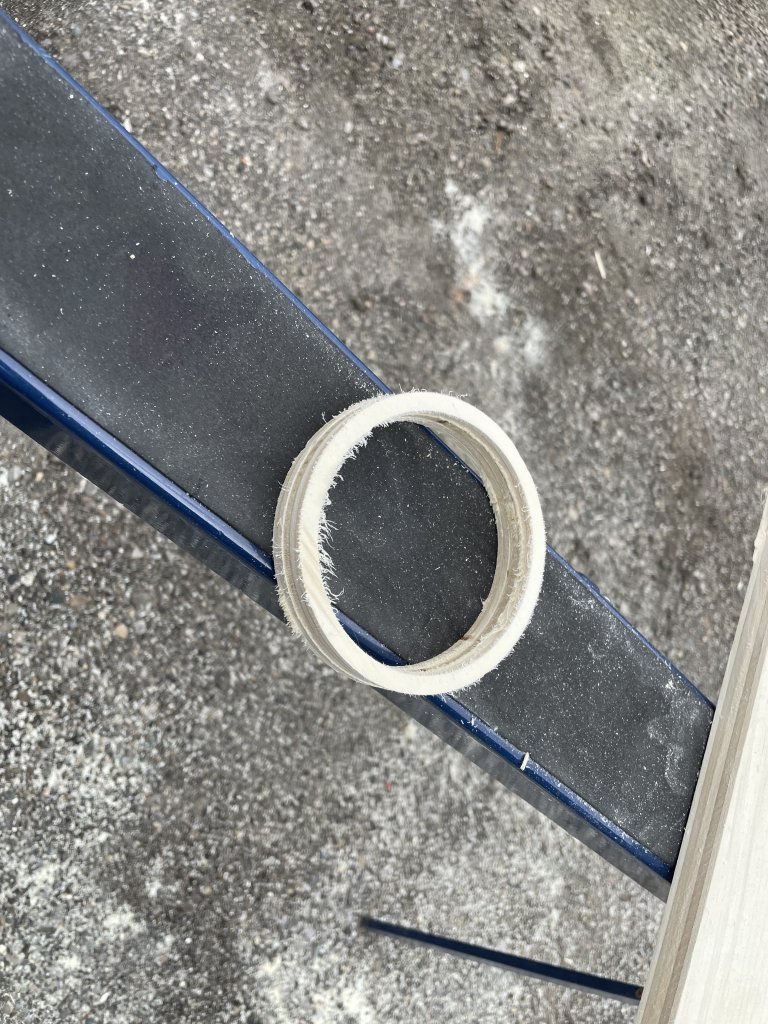
I'm a huge fan of cupholder rings. I think a table looks so much better when the cupholders sit flush with the top of the rail instead of sinking down into them. I screw down some of the off-cut scraps and use the same jig. Make sure you always cut the outer diameter first, or else you won't have a way to use your circle jig to cut the inside.
Finished ring.
Then glue and clamp the rings onto the rail. I do this with cupholders inserted to keep them centred.
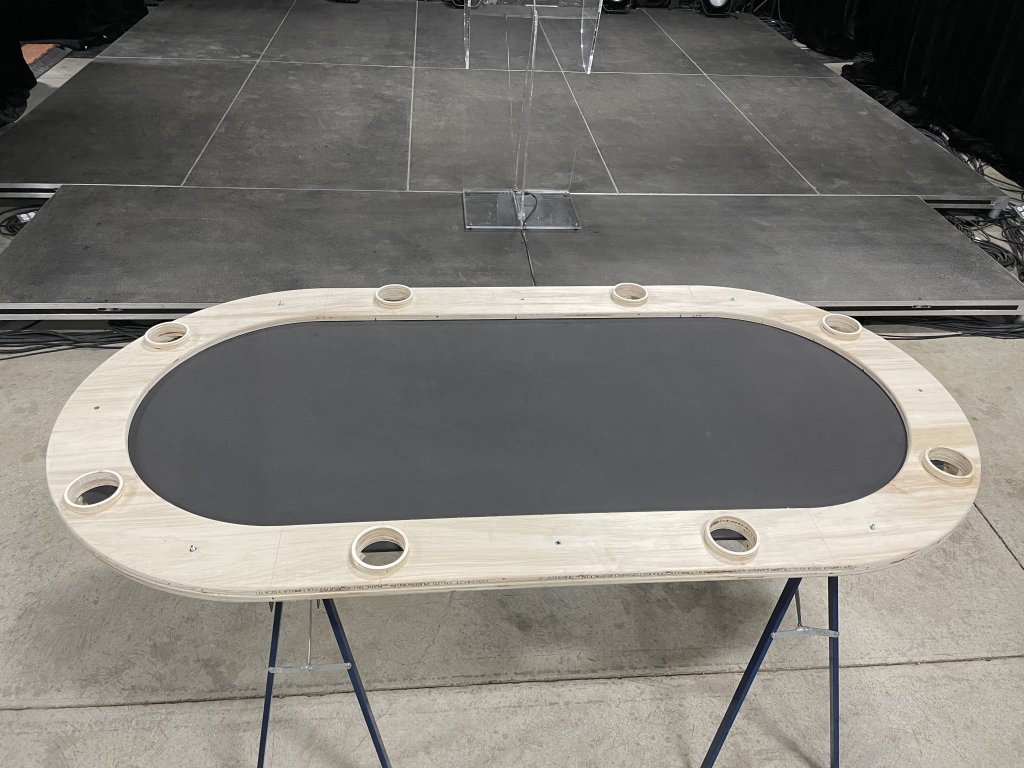
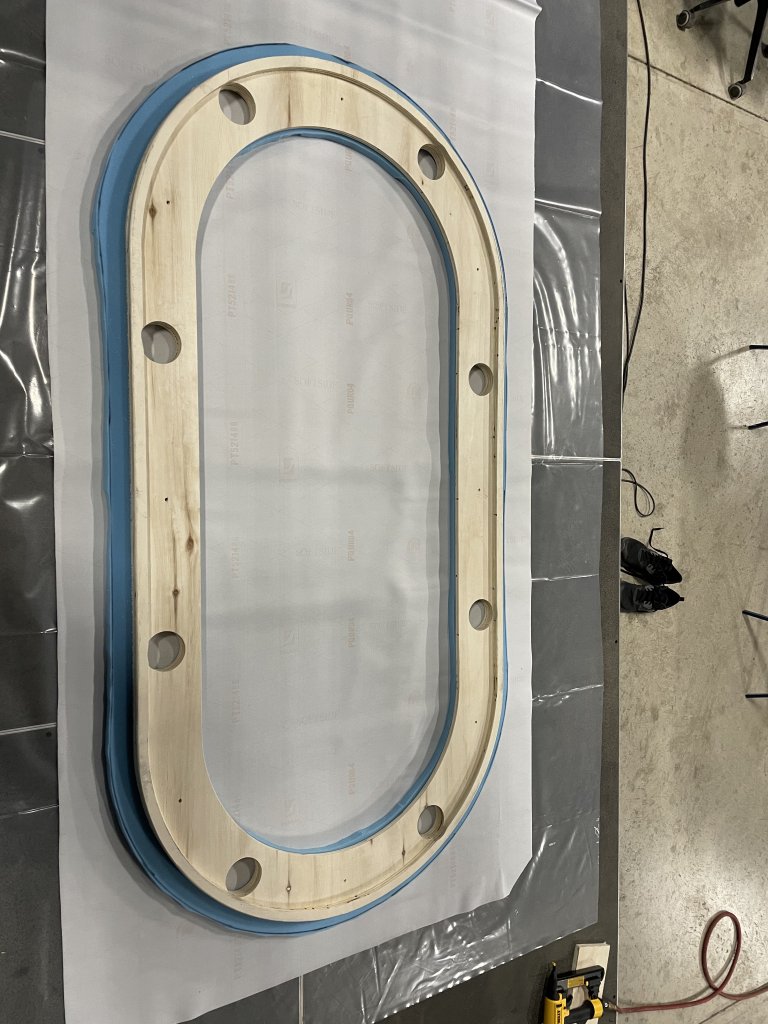
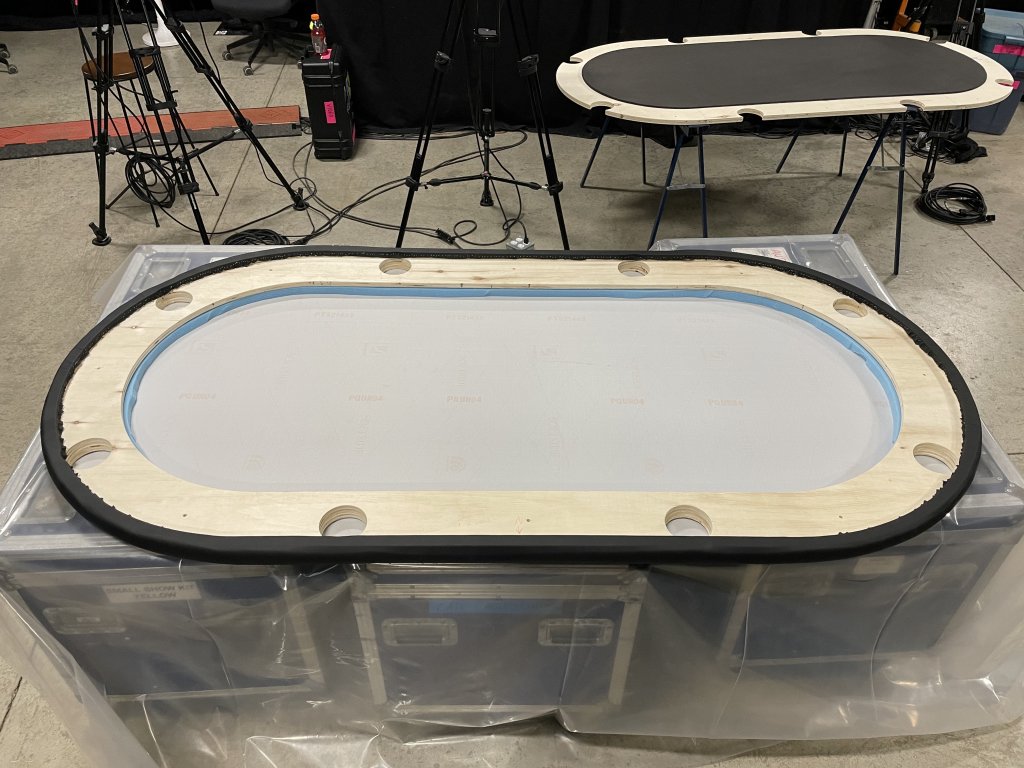
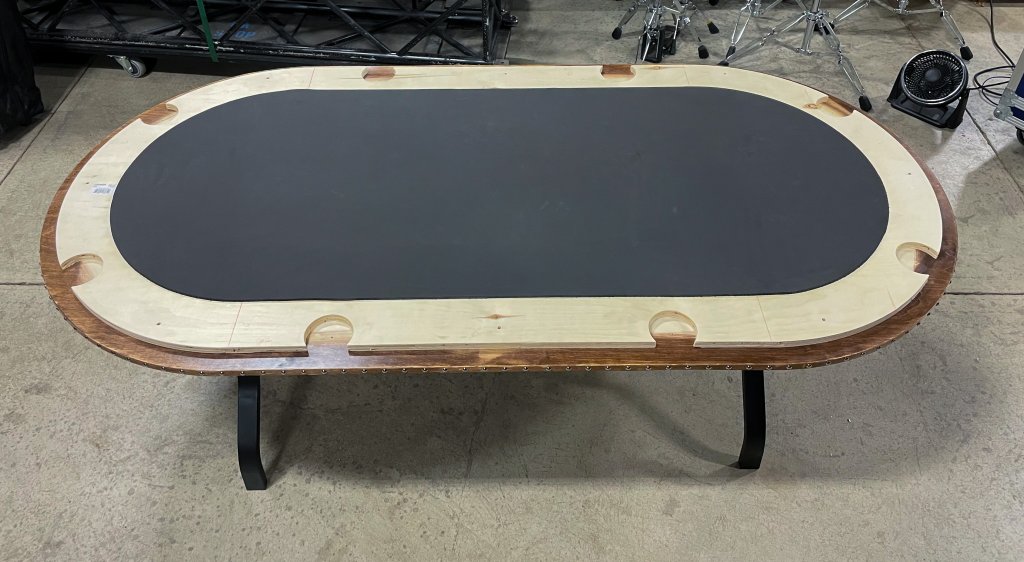
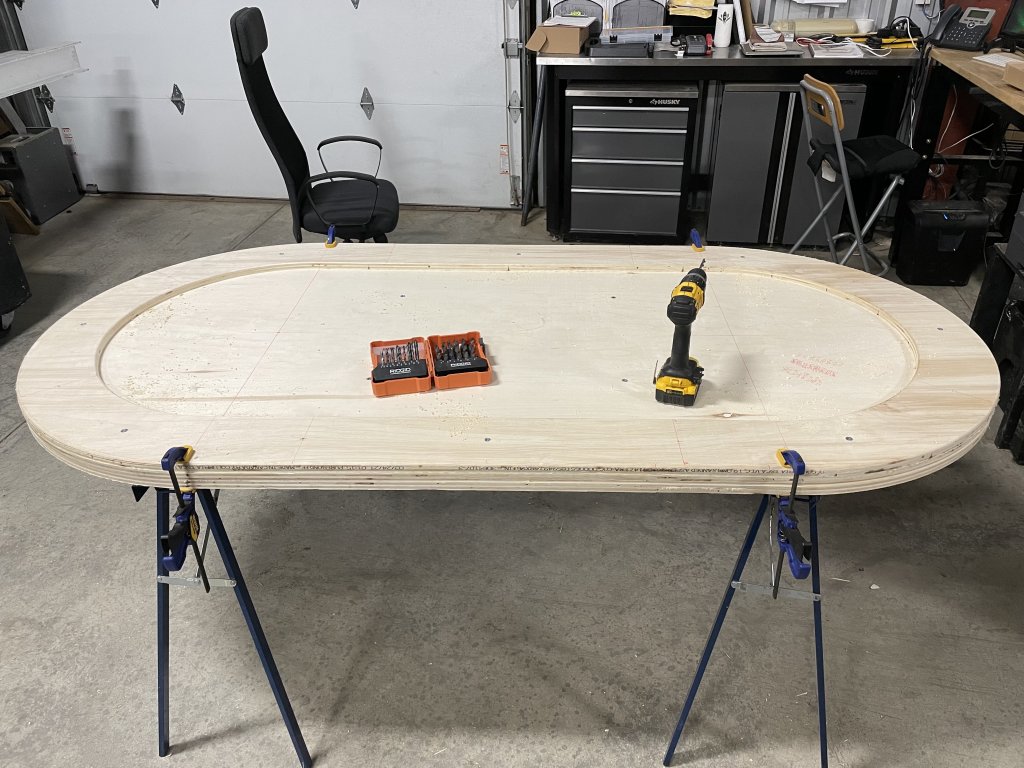
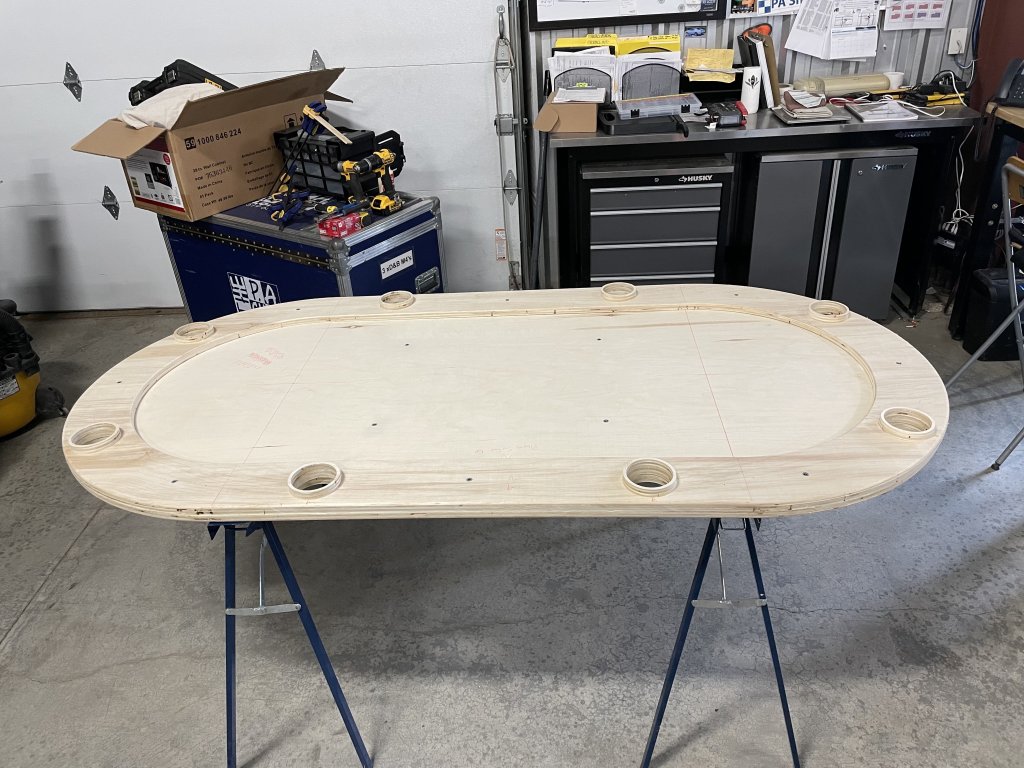
Once the glue is dry the rail is complete.
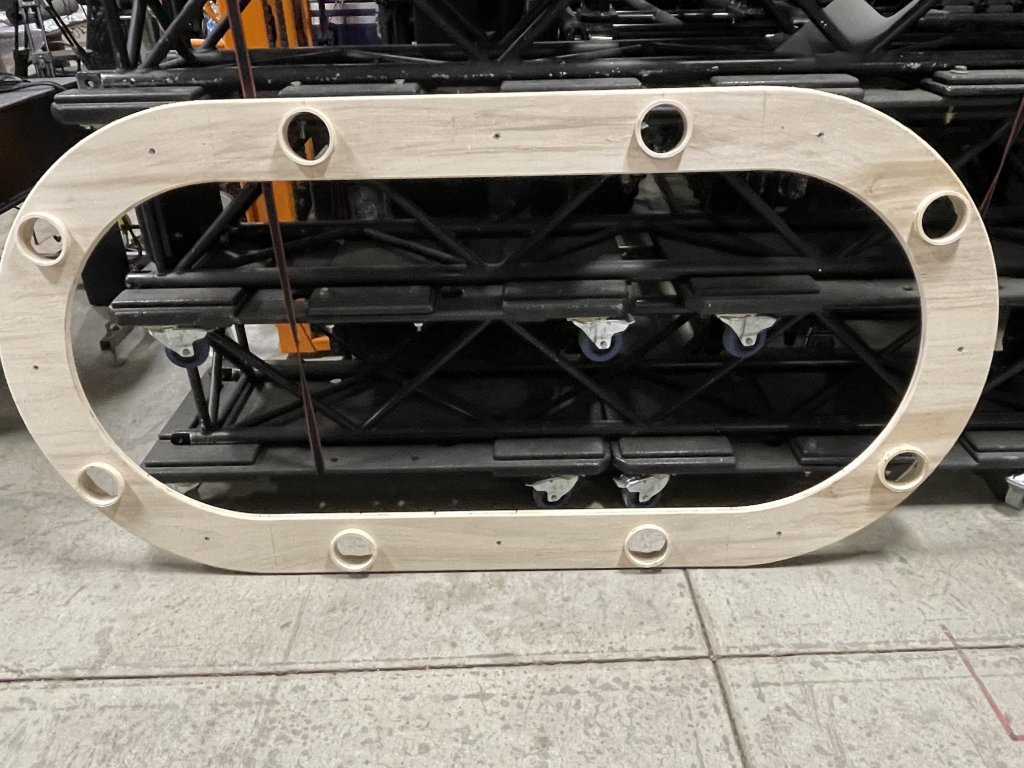
It's starting to look like a poker table!
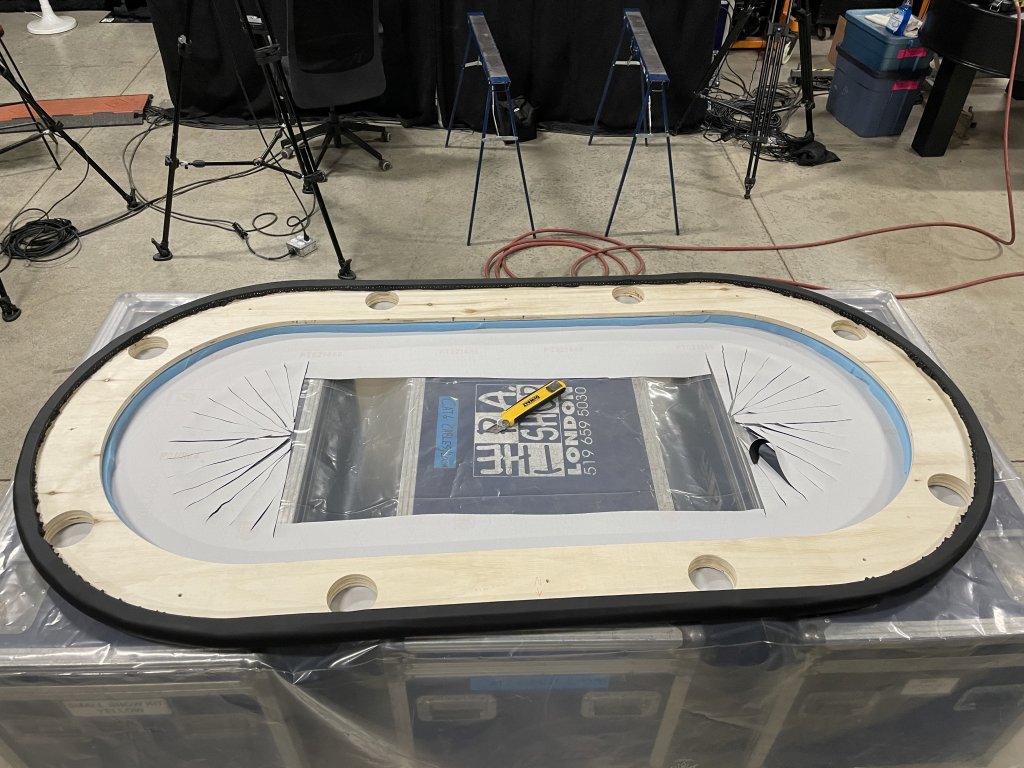
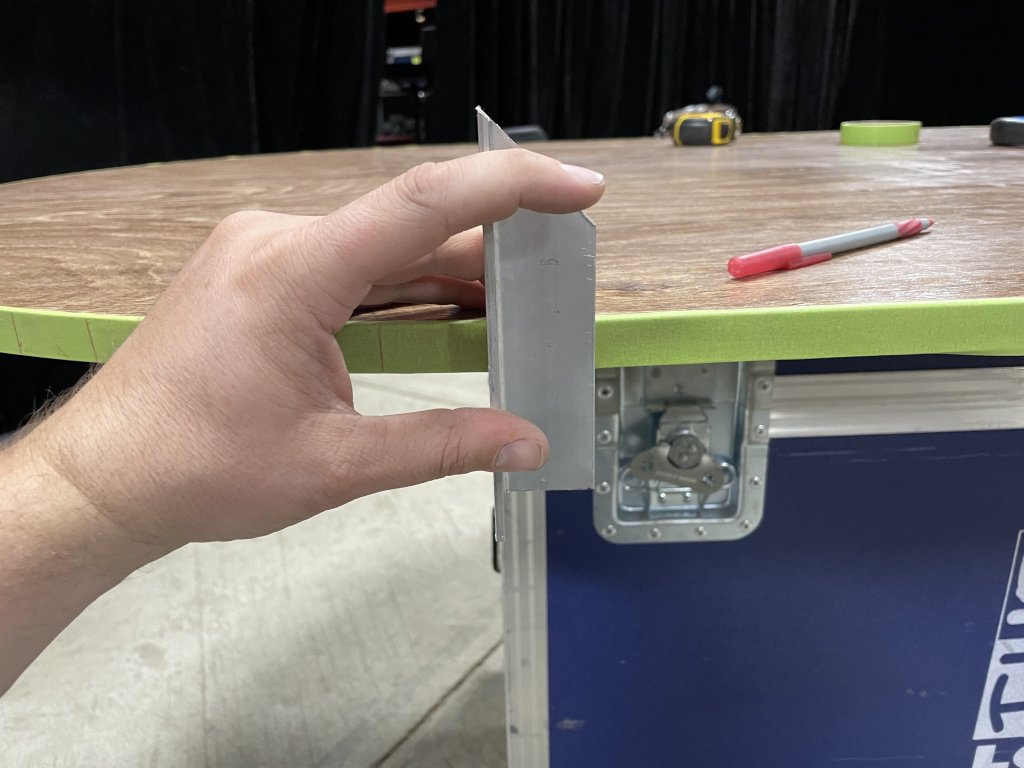
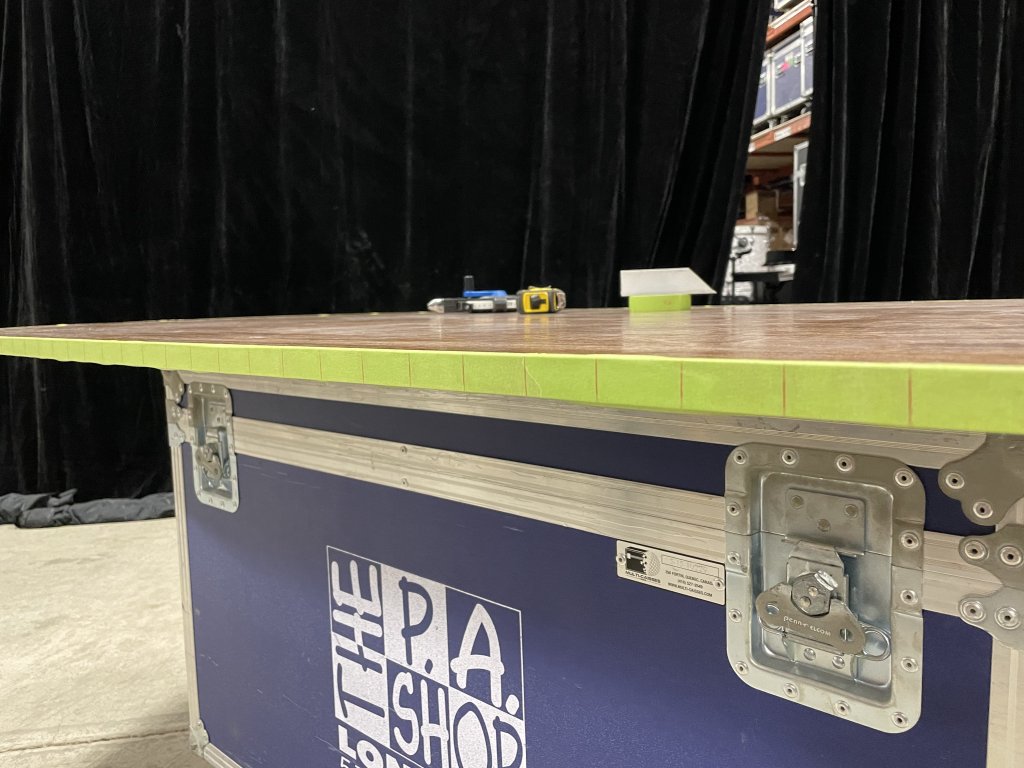
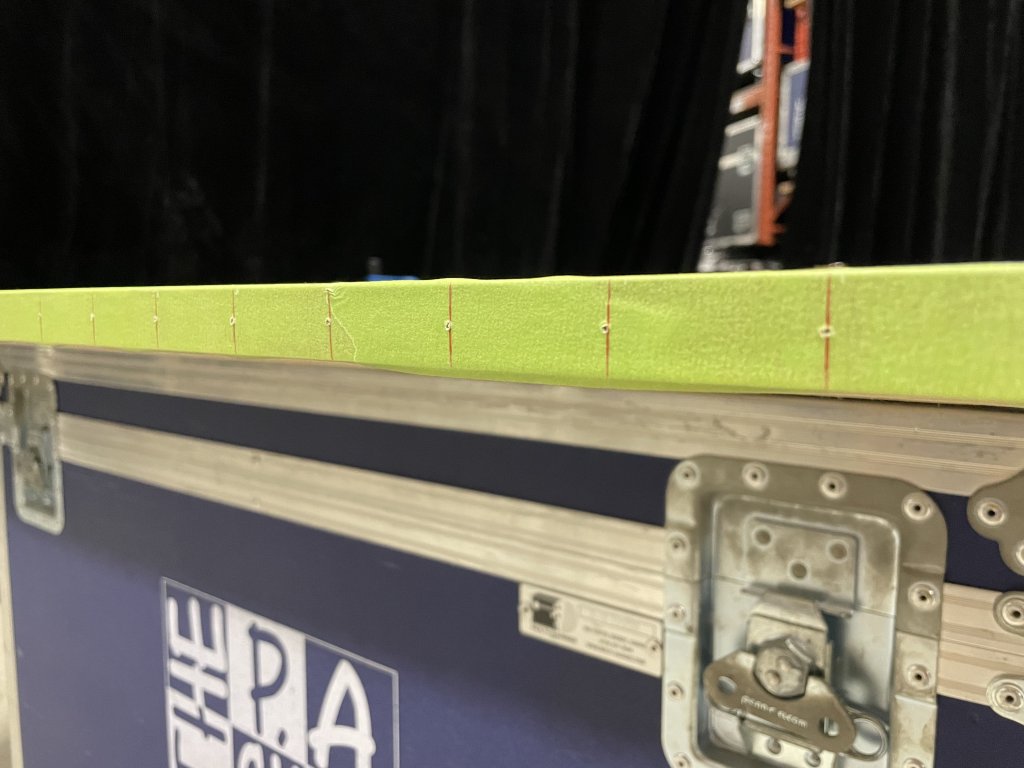
Now onto edge banding the base sheet. I like to have the edge banding roughly in place and tape it on there to keep it square.
Once I have that roughed into place all the way around, then I start with the heat gun and veneer roller.
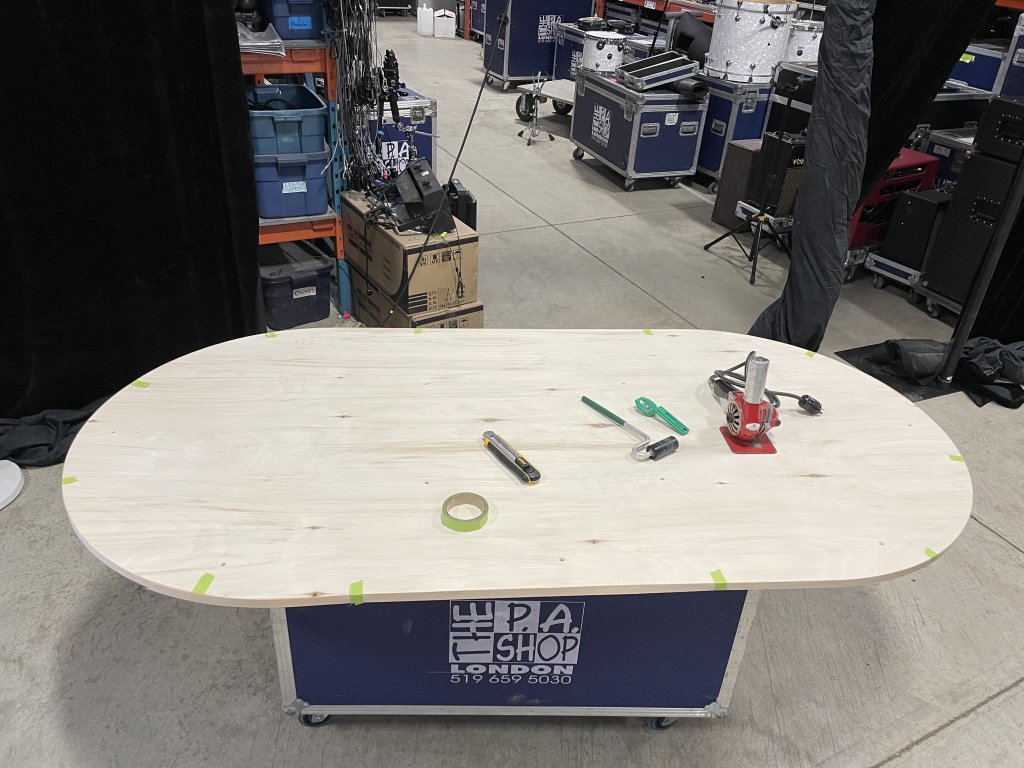
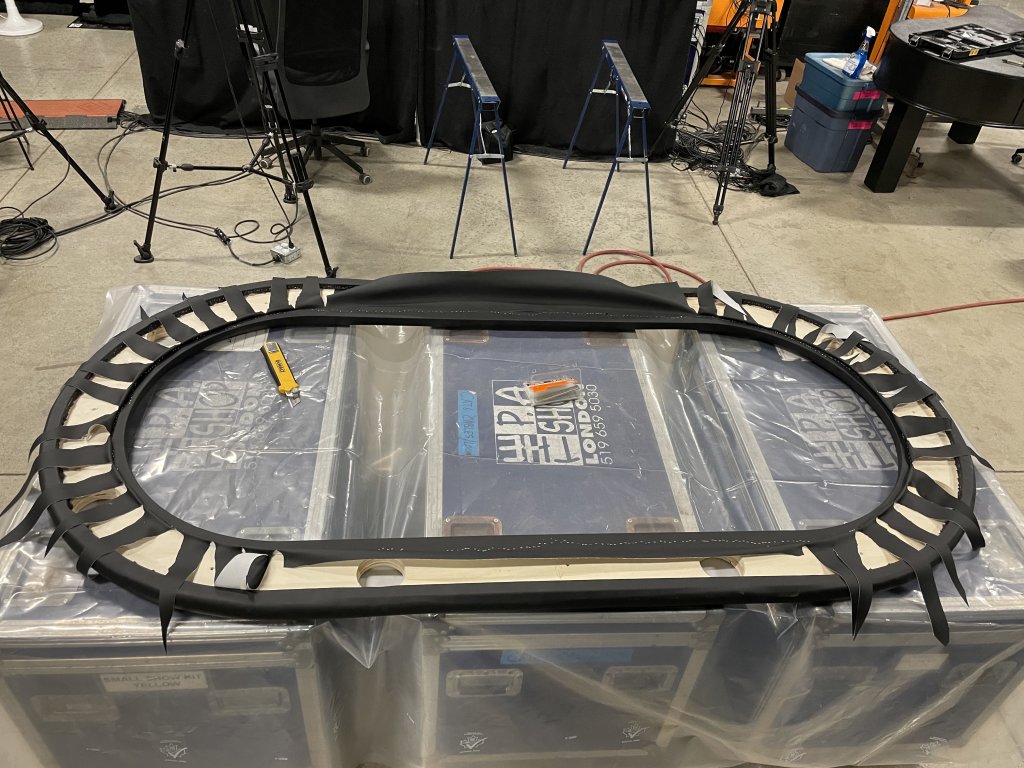
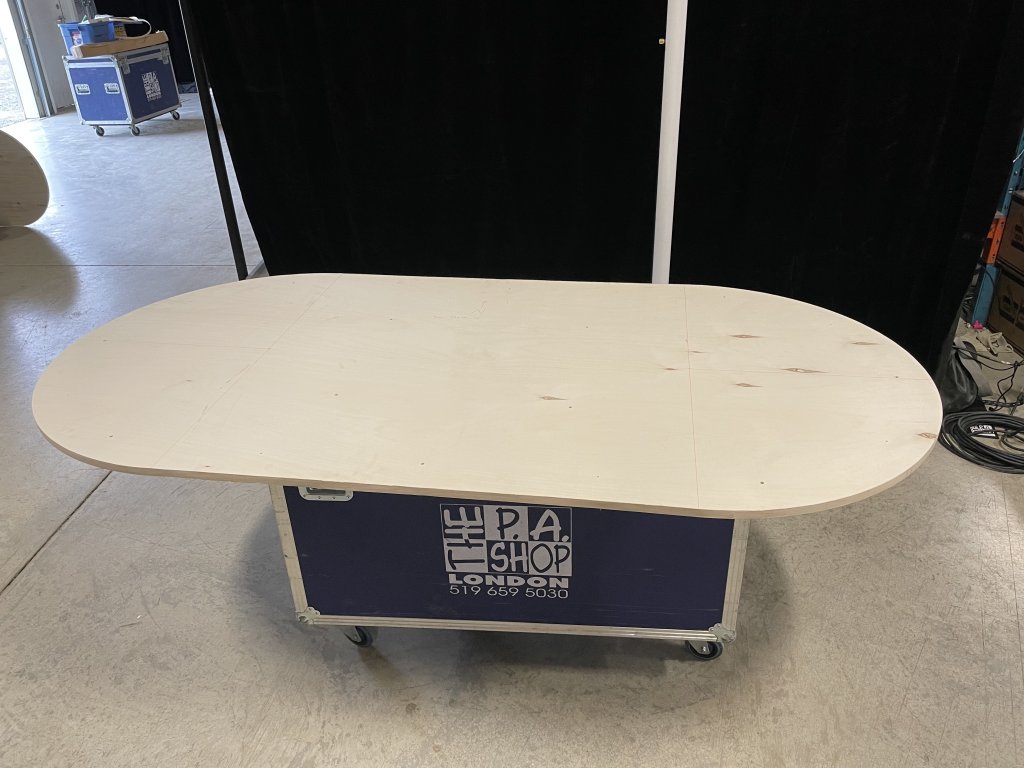
It's hard to get any pictures of this process when I'm by myself, but here's the completed edge banding.
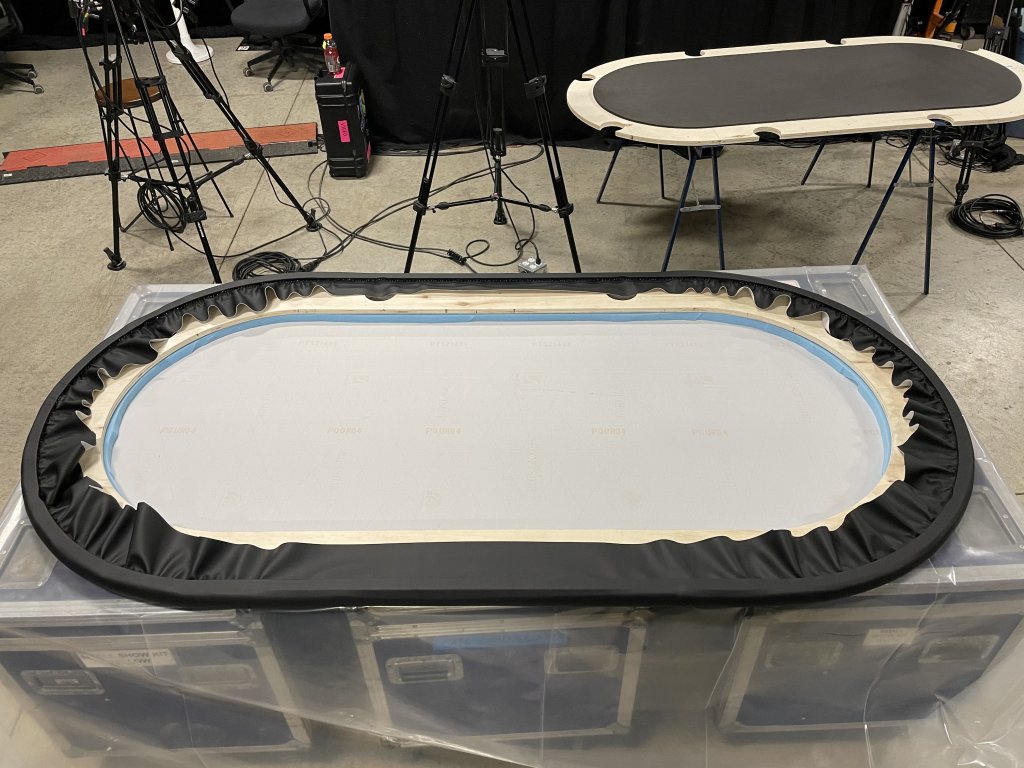
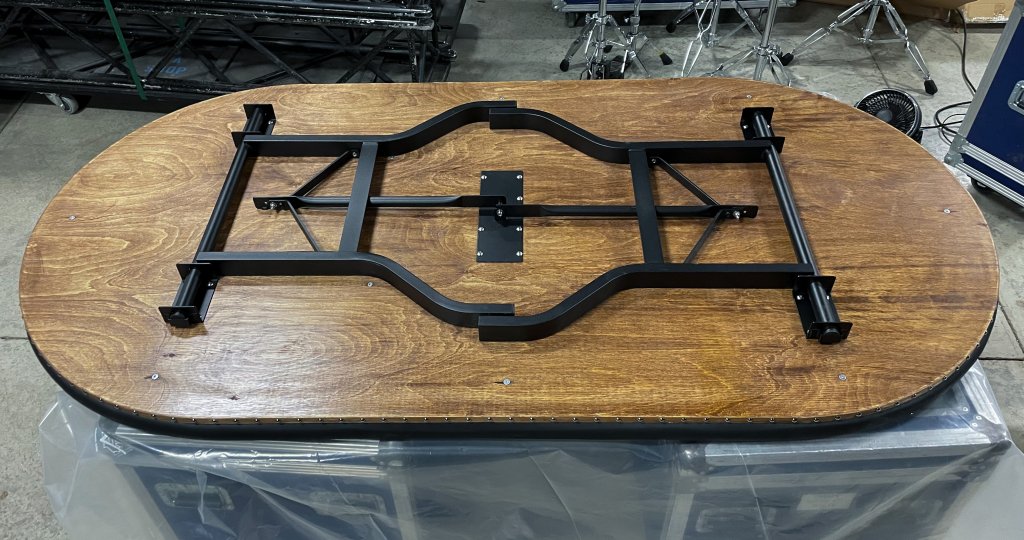
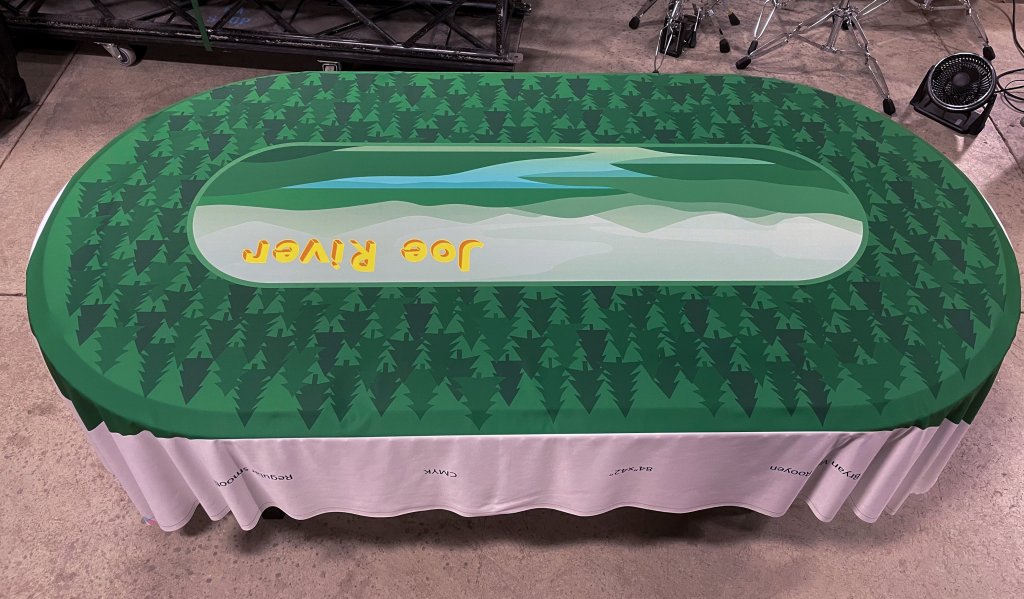
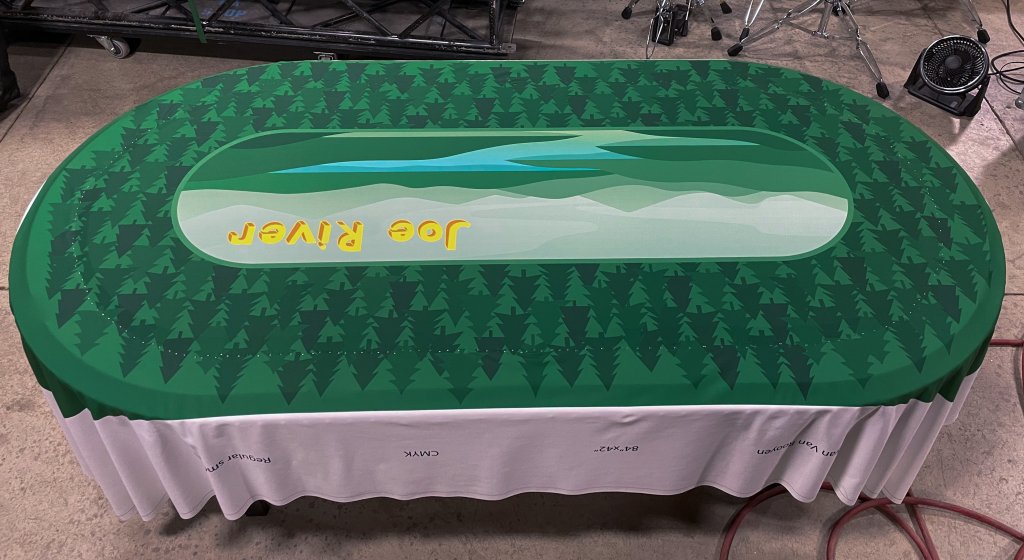
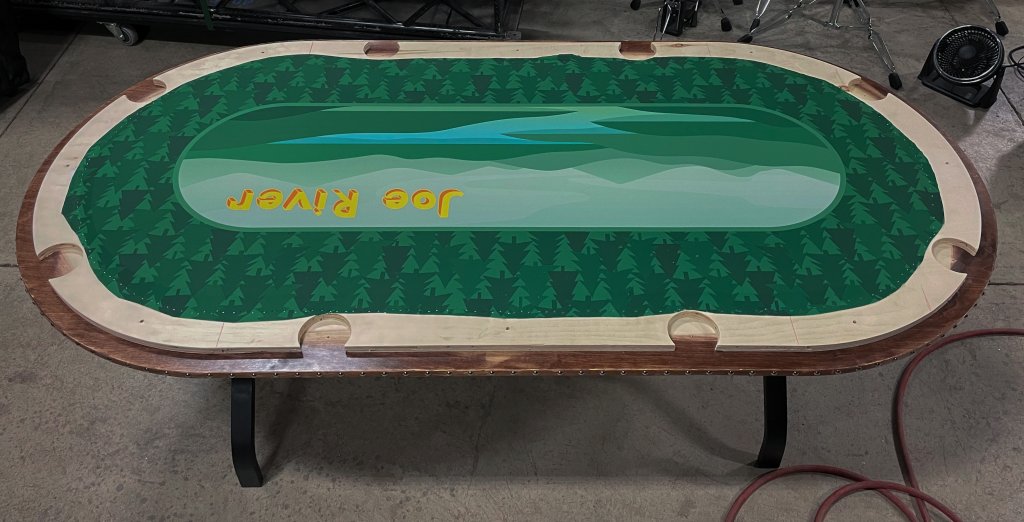
That's where I'm at so far. The rail foam should be arriving this week, then I can go ahead and wrap the rail. I'll also get started on staining and finishing the base sheet soon as well. I'm waiting on the artwork for the felt, which I'll be ordering from Chan along with the Gorilla Legs, so those will be the last 2 steps.
This table is going to be an 8-player 84x42". Custom felt, Gorilla legs, exposed base sheet with decorative nails, and jumbo cupholders in the rail (this is the way).
3 sheets of 3/4" ply will be used.
Sheet 1: Rail
Sheet 2: Rail lip and Playing Surface
Sheet 3: Exposed base sheet
All three sheets will first be cut into 84x42" ovals. I start by marking out the centre points of each of the arcs.
It's important to mark the point where the arcs will meet the straight edges. That way you know where to stop the router when cutting the arc.
Each centre point gets a 1/8" hole drilled which will fit the pin for my Jasper circle jig.
I use the Jasper Model 300 circle jig and I can't recommend it enough. A circle jig is easy enough to DIY, but this thing isn't that expensive and makes things very repeatable and accurate.
I do all my cuts in 3 passes, keeps it easier on the router and bit. Here's the first arc after the second pass.
For the straight edges I used the factory edge of the plywood and run the router along it. In the future I would like to get a proper straight edge jig.
With all 3 sheets cut to the overall outer dimension, it's time to make the inner cut of the rail. This will be a 6" rail.
Here's both of the inner arcs cut. You can see that I stop the cut when the centre of the bit is at the centre line of the arc.
On a typical basic build, the centre piece of wood remaining after the rail is cut is added to the bottom of the table as extra support. Since this build is going to have a full sized exposed base sheet, it's not required. Here's the rail completely cut.
Sheet 2 is the same process, but instead of a 6" rail, its a 1" lip.
It then gets glued to the underside of the rail.
Whats left in the centre of sheet 2 after the rail lip is removed will be the playing surface.
Now it's time to assemble the 3 sheets together. Make sure everything is lined up and square, then throw a few clamps on to hold it in place. I'm using 4 insert flanges in the playing area to hold it down to the base sheet. Drill the holes for them, screw in the insert flanges and install the bolts from under the base sheet to keep the playing surface in place.
It's time now to mark out the locations of the cupholders. I didn't get a picture of this, but I use a flexible tape measure wrapped around the outside of the rail, and some strips of tape to hold it in place. Divide this circumference measurement by 8 to get the distance between cupholders. I put a little mark at the outside of the rail at the desired measurement, then use a straight edge placed from that mark to the centre point of the arcs, then draw a line all the way across the rail. Once I've determined the location of all the cupholders, I drill a hole between each cupholder for more insert flanges. The bolts will come up through the base sheet, through the playing surface, and into the insert flanges in the top of the rail, holding the entire table together.
Back to the cupholders now. Measure in 3 inches from the outside of the rail to find the centre point, then drill a hole for the circle jig centre peg. Make sure the hole goes down through the playing surface sheet as well. You can see in this picture as well the rounded edges on the rail. I roundover the inside and outside of the top of the rail, and the outside of the bottom of the rail lip.
For these smaller holes I use the Jasper Model 400 circle jig.
Same process as the larger one. Insert the centre peg into the hole, and put the jig on at the right diameter marking.
Once all 8 holes are cut in the rail, repeat the process in the playing surface.
I'm a huge fan of cupholder rings. I think a table looks so much better when the cupholders sit flush with the top of the rail instead of sinking down into them. I screw down some of the off-cut scraps and use the same jig. Make sure you always cut the outer diameter first, or else you won't have a way to use your circle jig to cut the inside.
Finished ring.
Then glue and clamp the rings onto the rail. I do this with cupholders inserted to keep them centred.
Once the glue is dry the rail is complete.
It's starting to look like a poker table!
Now onto edge banding the base sheet. I like to have the edge banding roughly in place and tape it on there to keep it square.
Once I have that roughed into place all the way around, then I start with the heat gun and veneer roller.
It's hard to get any pictures of this process when I'm by myself, but here's the completed edge banding.
That's where I'm at so far. The rail foam should be arriving this week, then I can go ahead and wrap the rail. I'll also get started on staining and finishing the base sheet soon as well. I'm waiting on the artwork for the felt, which I'll be ordering from Chan along with the Gorilla Legs, so those will be the last 2 steps.
Last edited:
")