Chateau de Noix table build thread (1 Viewer)

bivey

Full House
Joined
Nov 2, 2014
Messages
2,767
Reaction score
3,841
Location
Washington
Ive decided to add a third table to the Chateau lineup. I use mostly round tables and have not made a table to date. I've decided to try my hand at a raised rail oval with folding legs. I'll use this thread to update progress and ask questions. Feel free to enjoy the trials of my first foray into the woodworking world.

Basic plan is for a 5" rail on a table of 88" x 44"
Raised rail with decorative nails
Folding legs.
Vinyl material
As yet undesigned felt.
NO racetrack
No cup holders (will likely add swing out holders later on.)

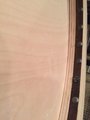
Currently planning on using 3/4 inch ply.
I'm looking into purchasing a router for the curved cuts.
 
Last edited:
Waiting anxiously.
Just posted in another thread about combo router kits, I'll repeat myself here. These kits give you the flexibility of having a fixed and plunge base for more possibilities of projects.
 
Yep...my wife got me the skil combo kit...skil is owned by Bosch and the quality has been very good.
 
It begins...

IMG_2174.JPG

I'm going a little smaller than most, but since this isn't a permanent fixture, portability wins out.
 
IMG_2184.JPG
IMG_2185.JPG


So far everything is coming along well. The router was my biggest concern with this project, but I really enjoy working with it.
 
Finished this evening with wood cutting.
I used a Mikata 0900 plunge router with a 1/4inch bit. For straight edges, I used a standard jig included w/ router. For the curves, I used a lewin jig. My dimensions are 88" x 44". Five inch rail. I used radius of 22". The rail uses an inner diameter of 17" and the supporting pieces are 19.5". I am using 3/4" birch plywood, 7 ply.

The build will have 3 layers, felt, rail, and one intermediate layer that allows for the exposed wood/raised rail.

I learned that the compass style jig is extremely easy to use. I actually had more trouble with the straight edges, but these too were not that bad.

My next bog steps are to 1. Apply edge banding to the exposed portions of the rail, stain the edging, and apply decorative nails. I will be sanding these edges down next.
2. Apply foam and vinyl for the rail.

The felt has not yet been designed and will be halt the project for some time, but it is essentially the last step before assembling the playing surface and the rail.

Playing surface

IMG_2186.JPG


Rail assembly
IMG_2187.JPG


Closer shot of rail assembly
IMG_2188.JPG


IMG_2190.JPG
 
First one? Not bad keep it up. If you have never edge banded before, i recommend taping it all the way around the table, to keep it straight, if not you can run into some areas where it wants to wrinkle. once its glued, its not very forgiving. GL
 
Looking good. I'm in the opposite camp, I've got the Chanman felt already but haven't started cutting the wood yet. I'm doing the same size though, 88x44. Keep up the good work and looking forward to more updates.
 
Sorry for such atrocious pics. Edge banding and stain applied. Next up, polyurethane seal and nails.

IMG_6972.JPG
IMG_6973.JPG

First one? Not bad keep it up. If you have never edge banded before, i recommend taping it all the way around the table, to keep it straight, if not you can run into some areas where it wants to wrinkle. once its glued, its not very forgiving. GL

Edge banding in small segments, on say a cabinet drawer, is no sweat. Applying one long 200 inch strip - different story. Big thanks to the Mrs on this one.
 
Adding the edge banding after using a router is considerably easier than after using a jigsaw. Looking good. Are you considering a custom printed felt?
 
I used to really hate edge banding. Especially around the inside of raised rails. Looks like you did a good job. Nice choice of stain color too.
 
Adding the edge banding after using a router is considerably easier than after using a jigsaw. Looking good. Are you considering a custom printed felt?

Thank you. Never under estimate the power of you tube. I bought the router for the simple reason that I didn't want to use a sander for three months straight.

Yes, and it will hold up the project, but that's just fine by me. I plan on a purple felt in line with these:

bi_round3a.jpg bi_oct4b.jpg
 
Looking good bud. Edge banding with the right tools makes it pretty pleasant. The first one I did using the wifes iron didn't go too well for either of us lol.
 
I've been looking at options for attaching my rail to the playing surface. My build is a fairly simple one and the rail is wider than the playing surface. I had originally planned on using wood screws to fasten the assembly, but the more I read, the more I see people using bolts and fairly complex assemblies.

What is the drawback to using wood screws? I am at a point in the build where I can accommodate some different ideas, but this week I start putting foam on the rail and playing surface.

Thoughts are appreciated.
 
I noticed some height variances in the deco nails application? My technique is to use a drill bit jig (I actually make one myself), then run the jig (simple piece of angle iron with a hole in it at the right spot) along the edge and pre-drill a very tiny hole in which the nails are later gently hammered into. The holes will be 100% exactly the same height spacing.

It wouldn't be too late to do this on your table. You could simply pre-drill your new holes exactly 1/8" to one side of the existing holes, and the nails would cover the old holes. IMHO having nails that are 100% in alignment looks very sharp, and your deco nails look sharp and are eye catching. Might be worth re-doing the nails? Especially since the nails are on a very visible place on your table.

Hon Chair.jpg
 
I've been looking at options for attaching my rail to the playing surface. My build is a fairly simple one and the rail is wider than the playing surface. I had originally planned on using wood screws to fasten the assembly, but the more I read, the more I see people using bolts and fairly complex assemblies.

What is the drawback to using wood screws? I am at a point in the build where I can accommodate some different ideas, but this week I start putting foam on the rail and playing surface.

Thoughts are appreciated.


I've only ever used bolts with insert flanges. T-Nuts will achieve the same result. IMO this approach makes removing and reattaching the the rail much easier, and also makes sure you have the rail aligned perfectly when reattaching it. You will find it nice to be able to remove the rail to clean underneath it, or maybe replace a felt somehwere down the road.

Don't get me wrong, zipping in a few wood screws will certainly do the job, but why not spend just a couple extra bucks and a few more minutes to do it right.

The table is looking great so far. Can't wait to see the finished product.
 
What is the drawback to using wood screws?

2 potential drawbacks - one is that there is the potential of the screw grabbing and pulling the speed cloth as you screw it into place. The other is eventually the screws will likely start to strip if you're using the same hole and taking the rail off multiple times, you'll likely find that you'll need to drill in new screws at different locations at some point down the road.
 
Out of alignment nails are very hard to remove without damaging veneer. I used a nail space and eventually figured out that it was easier to keep them in alignment without a hammer and just push them in with with thumb and then tap them tight with a hammer. I'm going to work on the few out of place nails this week.

So if I use some bolts, I suppose a need to pre drill the recess before applying the foam rail. Then the bolt just stays in place if I remove the rail?
 
depending on your design, you may need to drill a hole through the rail, playing surface, and bad sheet. Insert flanges or tee nuts will be inserted into the top of the rail, the bolts will come up through the bottom of the table. When you remove the rail, the bolts will be loose.
 
I love T nuts. I'm sure I go overboard but this is what I do. In the picture I use 6 to bolt the peds to the table. There are also 6 in the rail that hold the rail and racetrack down . If you look close there are also 4 holes drilled through at 3, 6, 9, and 12 o'clock . These are for 4 more tnuts in the playing surface not shown. Use your router plunged to 1/8" to make recess holes for the tnuts to sink into. Use duct tape over top of the tnuts before applying spray adhesive to keep the threads clean. I'd also dry fit bolt sizes to make sure they don't stick through the nut into the foam. I know this table is different but hopefully this gives you some kind of visual.
image.jpeg
 
I am also assuming that the depression for the bolts is not noticeable through rail foam?
 
Make them just large enough for the head of the tnut, this way it feels pretty much flush across the top. Not noticeable at all through 1" foam. Speaking of noticing things through the foam, put that fancy new router to good use and use a 3/8" round over bit along the inside and outside of your rail so you don't feel that pointy edge. :)
 
Here's what I use on all my t-nut applications (both rail and play play surface). A drill bit (works like a charm and super simple). Also use a bit of gorilla glue on top to hold it in place. :)

T-Nut Recess.JPG


T-Nut Glue.JPG
 

Create an account or login to comment

You must be a member in order to leave a comment

Create account

Create an account and join our community. It's easy!

Log in

Already have an account? Log in here.

Back
Top Bottom