My Man Cave Remodel (2 Viewers)

That looks awesome. What's the story on that bottle of beer?

Got it from a guy in Canada who collects beer bottles. He said he got at the casino. House beer I guess.
 
Awesome! The terribles collection is quite impressive.

Thanks. It seems to have caught the eye of the Terrible Herbst team too. :cool:

2015-11-17_22-55-24.png
 
Looks awesome. Mine is still sitting on the workbench. I didn't buy the marquee holder though and wish i did.

 
Looks awesome. Mine is still sitting on the workbench. I didn't buy the marquee holder though and wish i did.

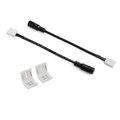
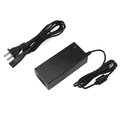
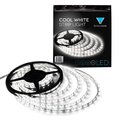
Thanks. I have another insert that I am going to light with LEDs and hang on the wall. I picked up a remote, power adapter, and strip LEDS from Amazon last week. I might use the leftover LEDs to light up my chip case and Terrible's display case.

20151207_222522.jpg


remote.jpg
http://www.amazon.com/gp/product/B00MHKCTLE

connectors.jpg
http://www.amazon.com/gp/product/B0085ZX8EM

power.jpg
http://www.amazon.com/gp/product/B00DKSI0S8

leds.jpg
http://www.amazon.com/gp/product/B005EHHLD8
 
  • Like
Reactions: 72o
Replacing all the fibreglass batting in the basement joists with foam board. I'm pulling out the stuff next to a support beam and it starts to feel and sound completely off, all crunchy and soiled. When I pull my hand out it's filled with almost nothing but honeycomb! Bees had colonized about half of the joist at one point, about 14.5 x 16 x 4" deep.
 
Replacing all the fibreglass batting in the basement joists with foam board. I'm pulling out the stuff next to a support beam and it starts to feel and sound completely off, all crunchy and soiled. When I pull my hand out it's filled with almost nothing but honeycomb! Bees had colonized about half of the joist at one point, about 14.5 x 16 x 4" deep.

When I did mine, I found a couple of small half dollar sized nests. Make sure you seal any gaps between the sill plate and foundation with spray foam. The Windows and Doors foam is what I used for everything. I bought a gun with various sized tips. If you lived in the US, I'd send it to you. All you would have to do is buy the pro cans that screw into it. (And the cleaner to flush it when you are done.)

http://www.amazon.com/GREAT-STUFF-PRO-Dispensing-Gun/dp/B0002YOMJE

http://www.amazon.com/GREAT-STUFF-Window-Insulating-Sealant/dp/B0002YWRH8

http://www.amazon.com/GREAT-STUFF-Dispensing-Cleaner-12oz/dp/B0002YWRG4

2016-02-03_19-33-10.png


I think I did this with the "one use" cans from the big box store. You have instant stop and start with the gun. It is more precise and less wasteful/messy.
 
Last edited:
When I did mine, I found a couple of small half dollar sized nests. Make sure you seal any gaps between the sill plate and foundation with spray foam. The Windows and Doors foam is what I used for everything. I bought a gun with various sized tips. If you lived in the US, I'd send it to you. All you would have to do is buy the pro cans that screw into it. (And the cleaner to flush it when you are done.)

http://www.amazon.com/GREAT-STUFF-PRO-Dispensing-Gun/dp/B0002YOMJE

http://www.amazon.com/GREAT-STUFF-Window-Insulating-Sealant/dp/B0002YWRH8

http://www.amazon.com/GREAT-STUFF-Dispensing-Cleaner-12oz/dp/B0002YWRG4

View attachment 29538

I think I did this with the "one use" cans from the big box store. You have instant stop and start with the gun. It is more precise and less wasteful/messy.

A chunk of one of the blocks in the foundation was gone. I think that's where they came in. I think I'll seal the hollow area with foam until I can get it fixed for good. I think there's some sort of foam gasket between the sill plate and the foundation already though.

A gun would have really come in handy for a couple of areas behind pipes and ducts, but I'm just about finished now.

Earlier you mentioned using shims on warped floor beams. Is that part of some method to straighten them out or just to get a closer fit with foam board? I just cut the boards with an offset to fit the joists where the beams were warping/bending.
 
The shims were for the walls we built on the ground then stood up. We measured the height from the slab to the bottom of the floor joists. Take the smallest number, subtracted the thickness of the top and bottom plates, and that is the length of your studs. I did a double bottom plate so 3x the thickness for me. (a 2 x 4 is 1.5 x 3.5) Shims filled in where the top plate did make contact with the floor joist or the 2 x 4 nailers we added if the wall didn't fall under a floor joist. The slab had the most variation but there were a few floor joist that were warped too.
 
Anyone have recommendations for insulating basement walls? There's so much conflicting information out there.

The original plan was to use 1.5" of XPS directly on the blocks covered by studs and batting, but using thicker Durofoam EPS with the same r-value would be cheaper. My concern is that the EPS will soak up any condensation through the edges even with the vapor barrier layer on the sides.

There's a few spots outside where the grading needs to be fixed, but it's been some time since there was any significant water invasion. Since winter is almost over anyways would it be worthwhile to wait until after fixing the grading before doing the basement walls?
 
Check out http://buildingscience.com/
I following their recommendation for my basement. Methods, materials, and material permeability are different depending on your location. EPS and XPS are recommend for different areas. Some areas can use either one.

They have helpful diagrams as well. These are just some random ones.

home-design.jpg
louisville_profile.jpg


I would rectify any outside issues before doing the interior walls.
If your cinder block walls are unpainted, I would put a coat of drylock on.
 
Just read this entire thread. Very impressive work, sir. I struggle to change a lightbulb and have paid for all the work to be done on my house. Basements almost non-existent here, we're more of a loft conversion nation. However, my partner has taken over the loft so I'm left with the choice of a garage conversion, or building/buying an eco-pod for the garden.

Great work, and you'll have to post some pictures when you have a game going :D
 
Great thread! I found it because I'm considering installing a Tyroc subfloor in my basement. Tommy, if you had it to do over again, would you use Tyroc? Have you noticed any lifting or other issues with it since you did the install? Can you comment on the temperature of the floor? Thank you!
 
Great thread! I found it because I'm considering installing a Tyroc subfloor in my basement. Tommy, if you had it to do over again, would you use Tyroc? Have you noticed any lifting or other issues with it since you did the install? Can you comment on the temperature of the floor? Thank you!

Yes, I would still use it. No issues with it. Just make sure you take care of any low spots with self leveling concrete and make sure the floor is clean and dry. I mopped the floor a few times and let it dry before installing it. Use the correct glue and you should be fine. It goes down fast. Make any cuts outside and wear a mask as it makes a lot of dust. Use a damp rag to wipe down the piece before gluing it.

Can you comment on the temperature of the floor?

Temp is the same as the room. I have carpet installed on 95% of the floor and some sheet vinyl in the bathroom and near the wet bar.
If installing carpet, you have to remove the nails from the tackless and glue it down. Carpet padding has to be glued down too. No staples.
 
Last edited:
A little project that I did today. I needed to add an outlet. I decided not to tap off the 15a circuit that was already in the closet. When I re-did the basement I separated the upstairs and basement wiring. All the basement wiring is brand new and I did it so I know what is on every circuit. That light inside the closet is the only thing that is using an upstairs circuit. Putting that light in was an after thought so I tapped power from that junction box that had to be added for access reasons anyway.

Instead I tap off a bank of receptacles that are on a 20a circuit.

All the basement receptacle look like this.. (Lutron outlets with screw-less plates)
Outlets are all installed ground pin up. There is no right or wrong way, its just preference.

IMG_20171121_224310.jpg


I added an extension box to this outlet and ran the #12 THHN wire in the molding.
There will be a piece of furniture here too so you won't even see this outlet.

IMG_20171121_161742.jpg


Through the closet and into a junction box (not pictured). From there I spliced over to romex and fished it down the wall to where the new outlet will be.

IMG_20171121_222934.jpg


IMG_20171121_222919.jpg


and done...

IMG_20171122_000354.jpg
 
Last edited:

Create an account or login to comment

You must be a member in order to leave a comment

Create account

Create an account and join our community. It's easy!

Log in

Already have an account? Log in here.

Back
Top Bottom